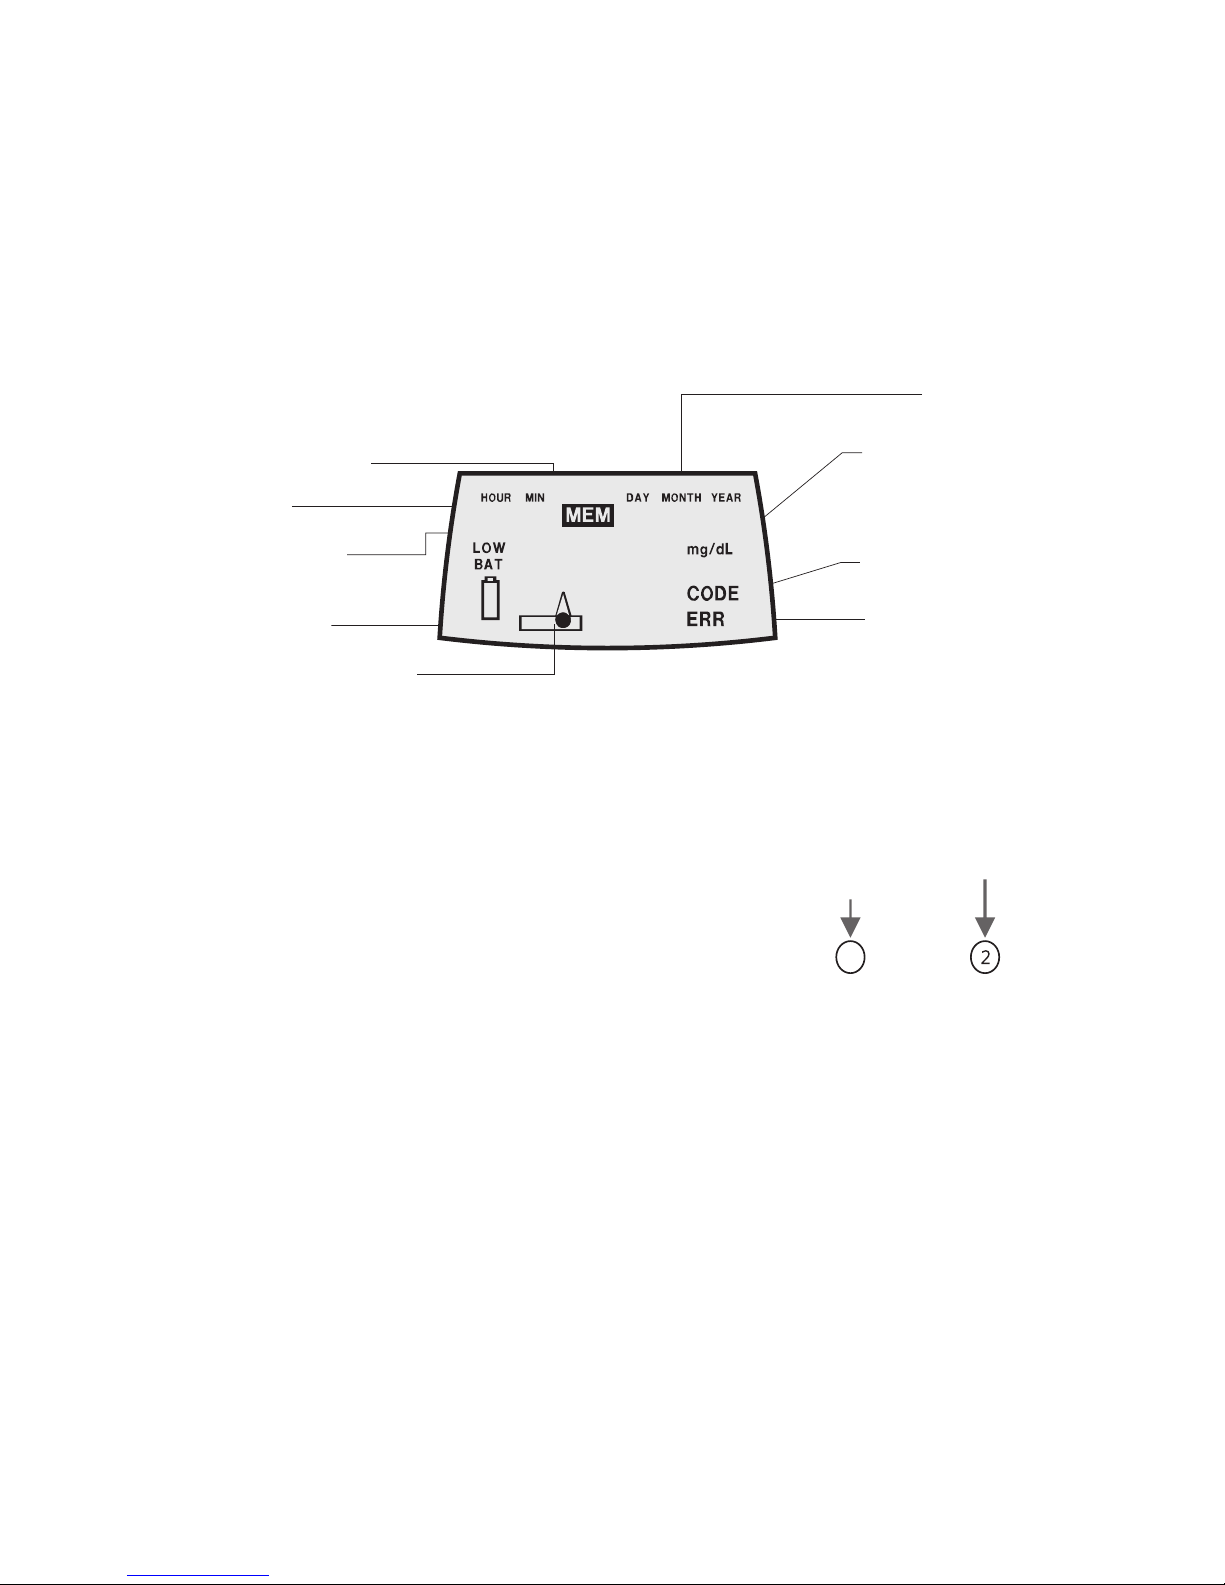
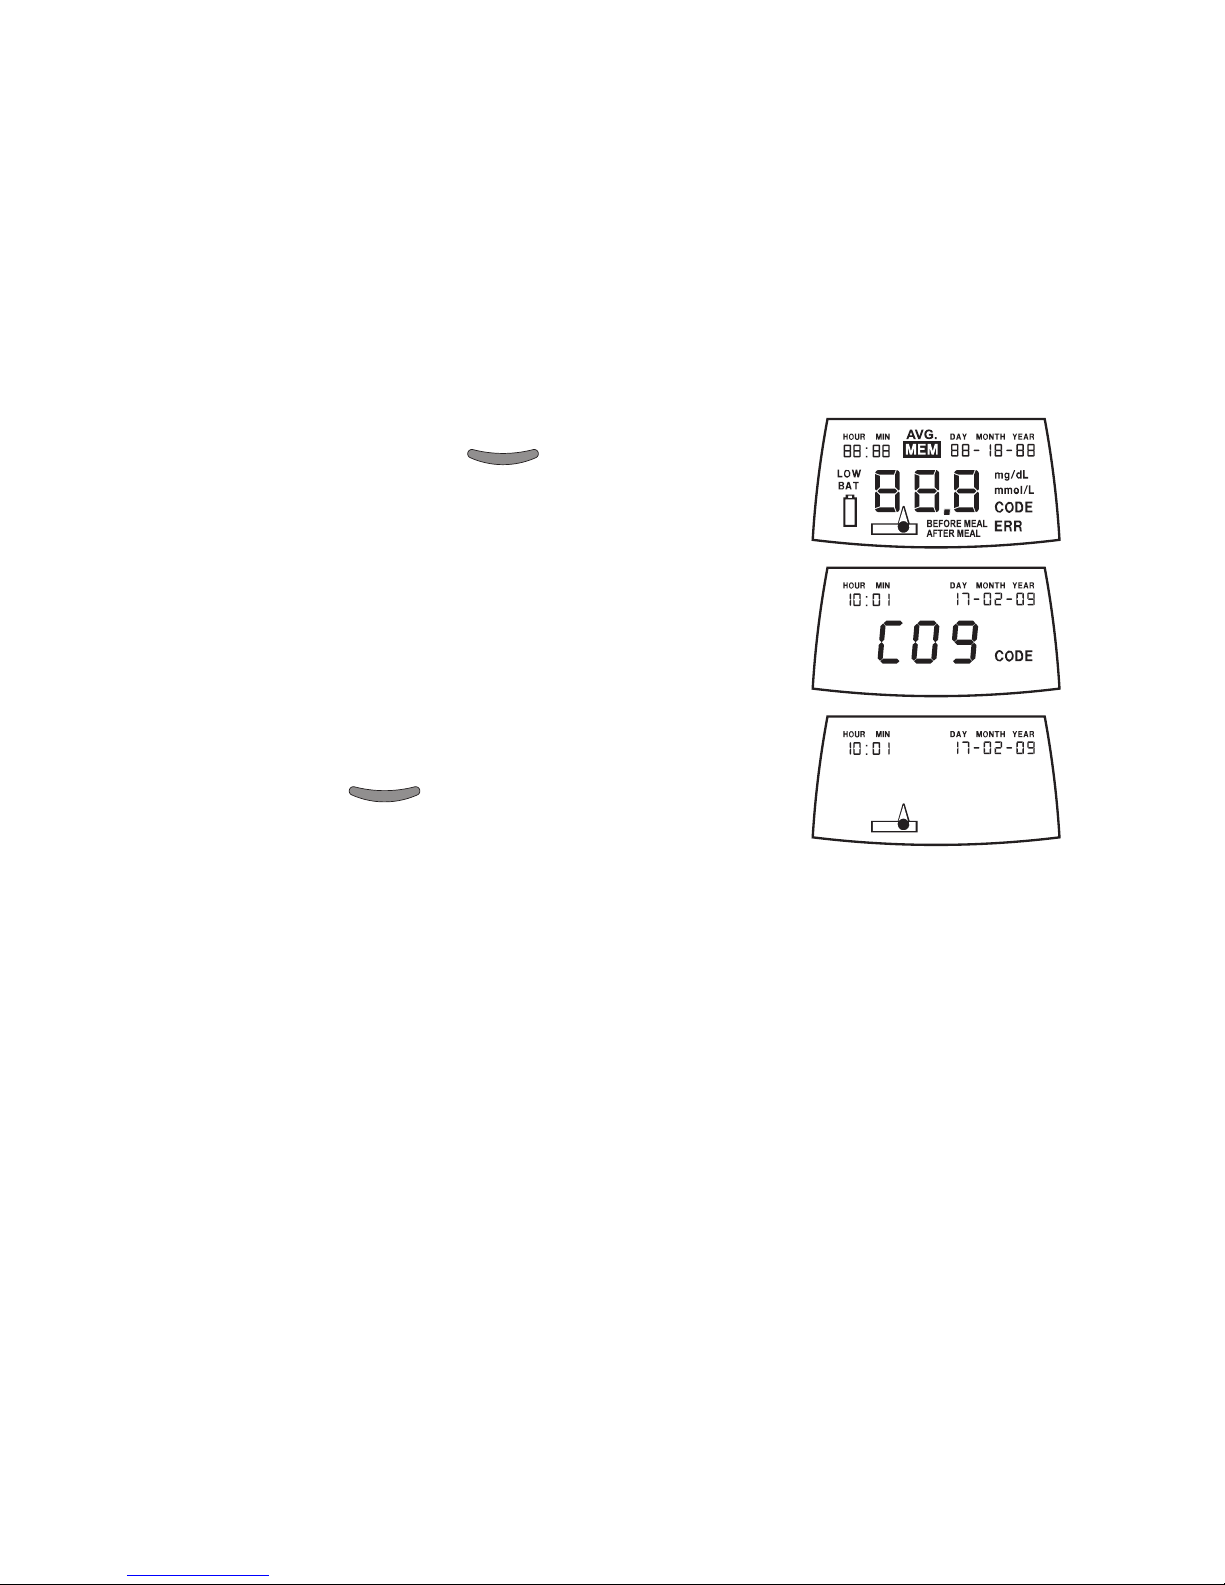
1) When you press the POWER Button, the monitor
switches ON and displays the initial screen in which all the
segment’s of the display are shown.
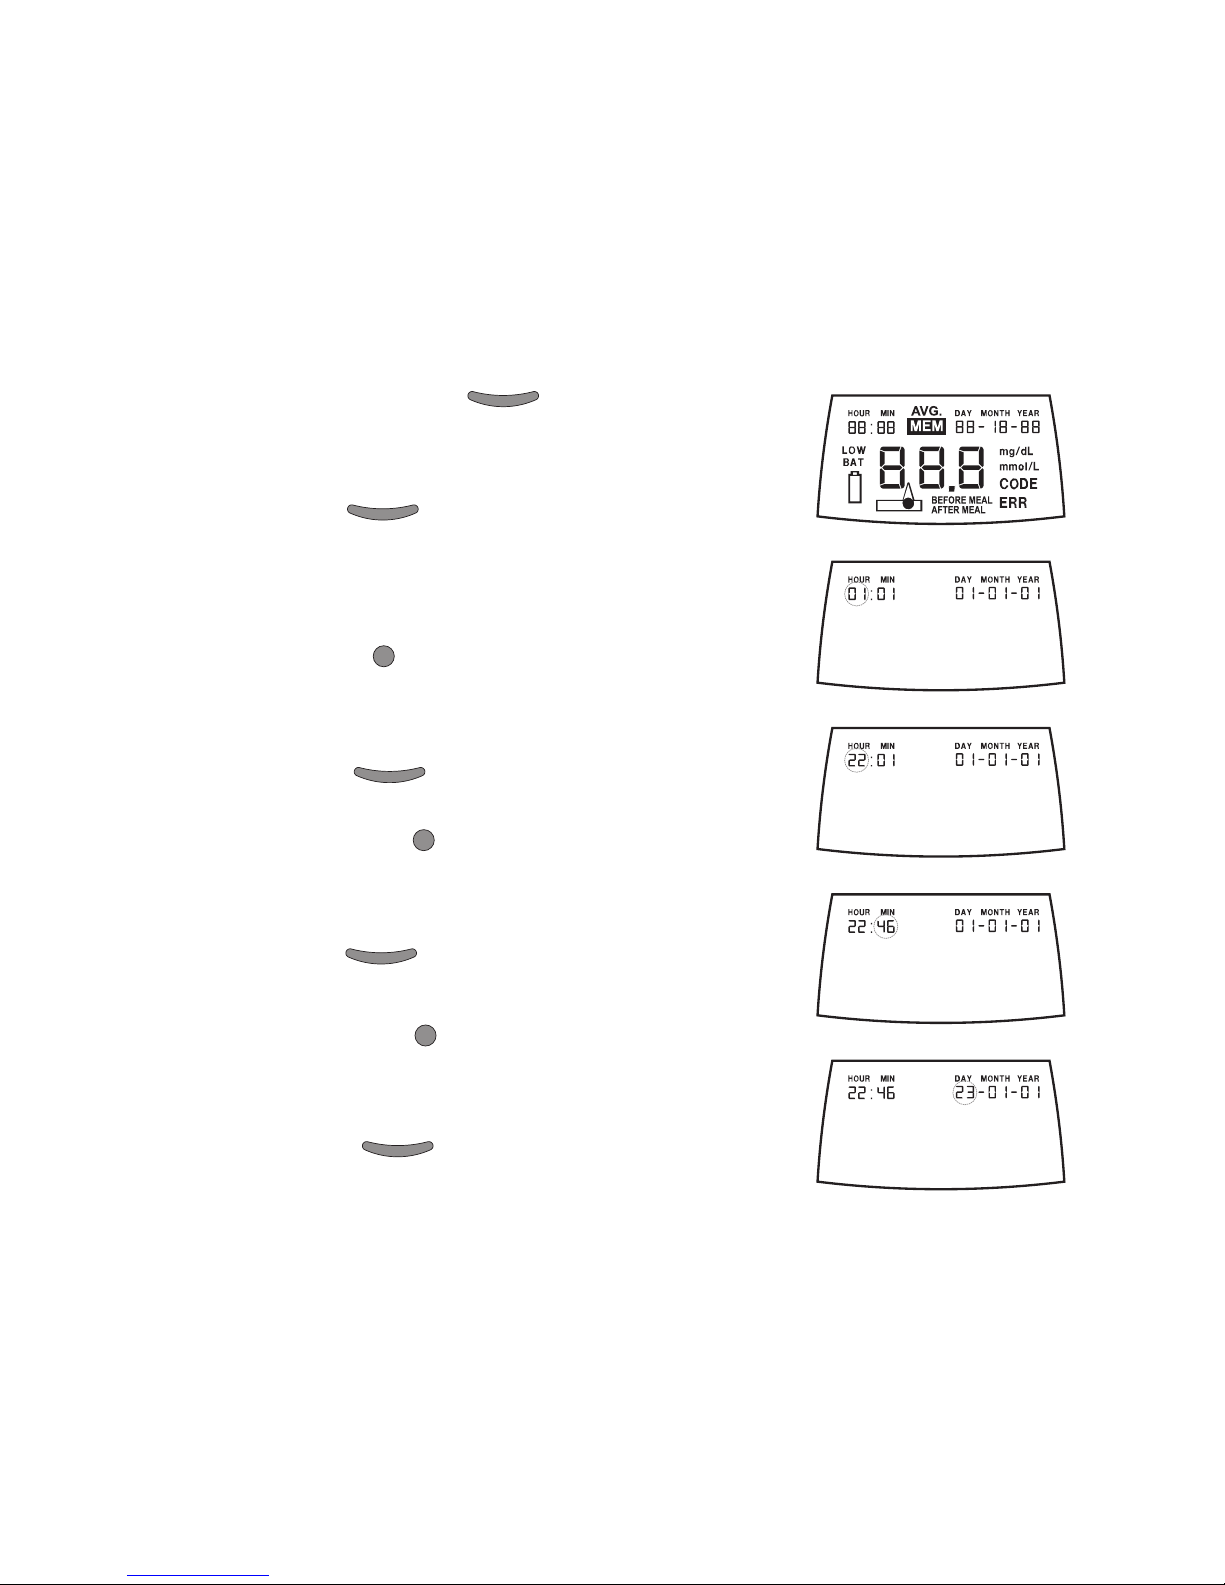
2) Press the POWER Button when the initial display is
shown to enter the time and date setting mode. Your
monitor now displays the current time and date set on your
monitor and the hour is blinking.
3) Press NEXT or PREV Button to increase or decrease the
hour setting till it displays the desired hour value. For
example, 22 to set a time of 22:46 (10:46 PM).
4) Press the POWER Button to go to the minutes set
mode. The minutes now start to blink.
5) Press the NEXT or PREV Button to increase or decrease
the minutes setting till it displays the desired minutes value.
For example, 46 to set a time of 22:46 (10:46 PM).
6) Press the POWER Button to go to the set day mode.
The day now starts to blink.
7) Press the NEXT or PREV Button to increase or decrease
the day setting till it displays the desired date value. For
example, 23 to set a date of 23 September 2008.
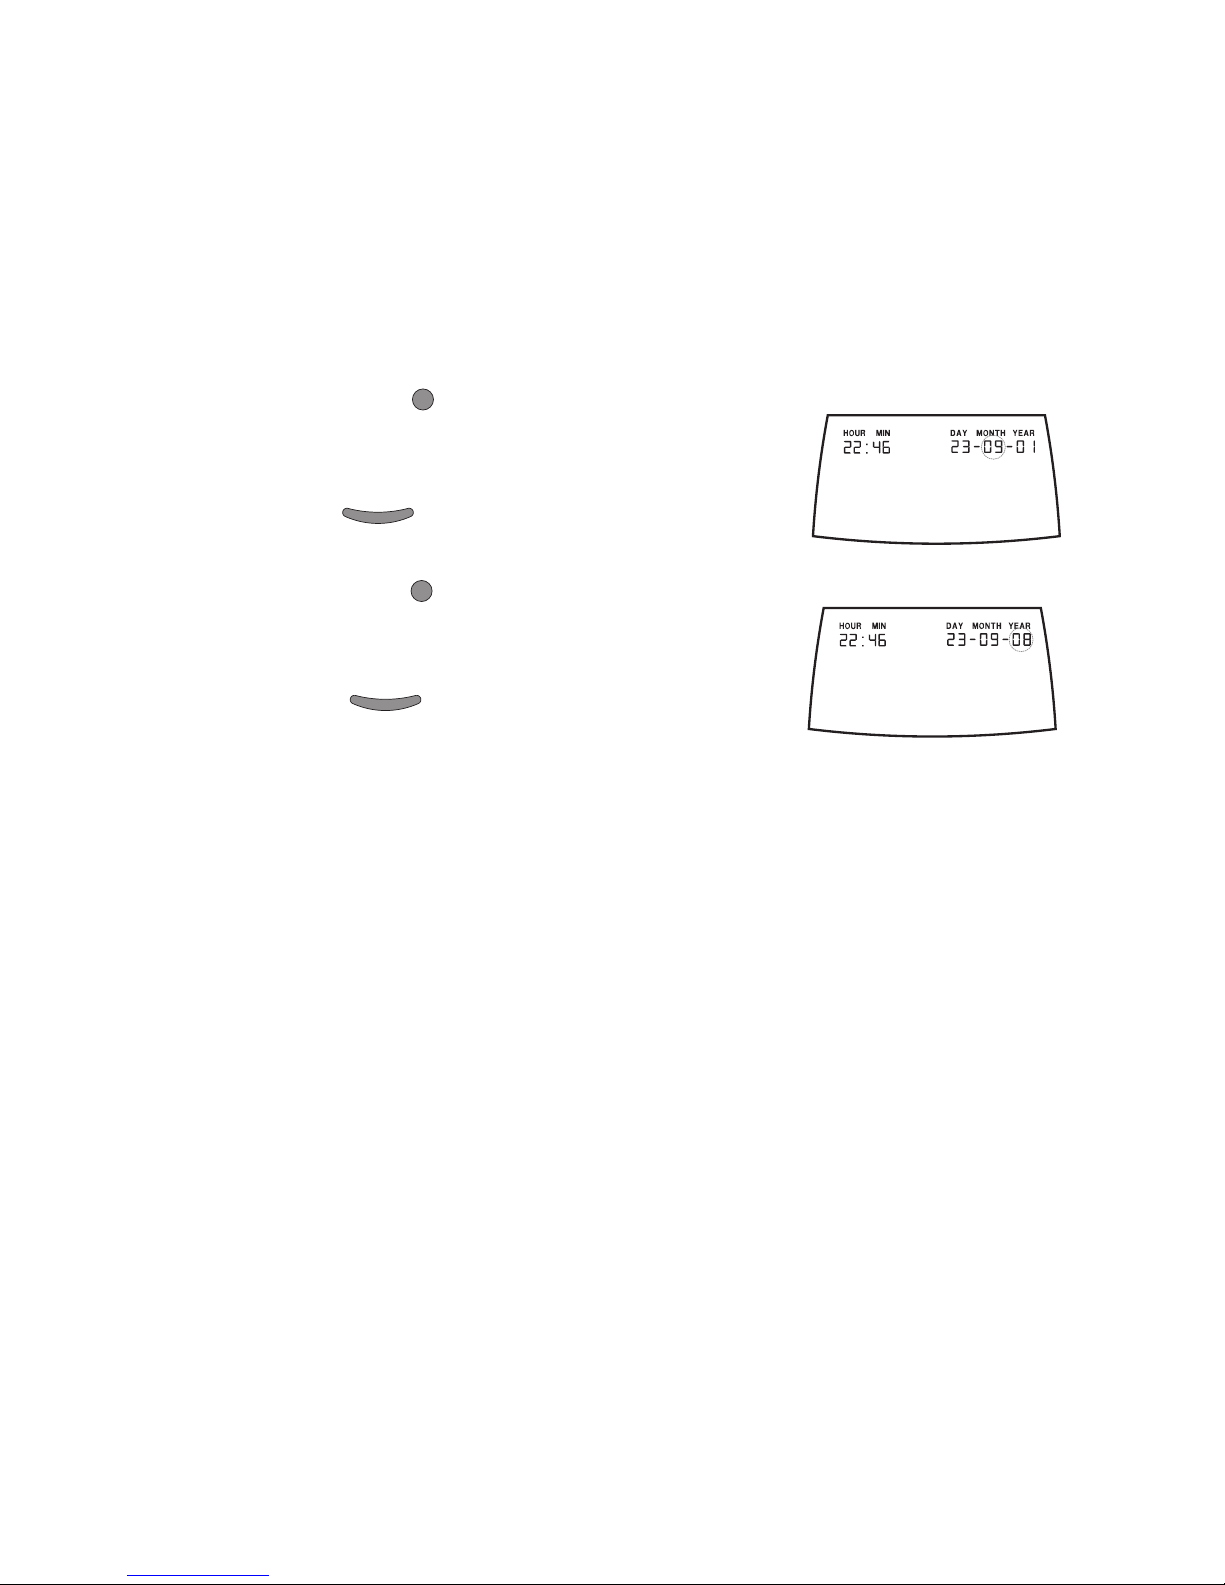
8) Press the POWER Button to go to the set month
mode. The month now starts to blink.
9) Press the NEXT or PREV Button to increase or decrease
the month setting till it displays the desired month value.
For example, 09, to set a date of 23 September 2008.
10) Press the POWER Button to go to the set year mode.
The year now starts to blink.
11) Press the NEXT or PREV Button to increase or decrease
the year setting till it displays the desired year value. For
example, 08 to set a date of 23 September 2008.
12) Press the POWER Button to save the date and time
that you have set and return to using your GM3+.
êIf no Button is pressed for 5 seconds, the displayed time and date is saved and your monitor
automatically exits from the time and date setting mode.
6. Coding your GM3+ for use
Before you use your GM3+ for the first time and thereafter every time you open a
new box of test strips, you need to set the monitor to match the GM3+ strip being
used. This is called Coding of the monitor.
êIncorrectly coded monitors will give false results. Coding needs to be done every time you use
a different or new pack of strips.