VIDEO INSTRUCTIONS: WWW.PLBFUN.COM/PRISMIC
Join our community online:
Follow us @PLBFUN WWW.PLBFUN.COM 2VIDEO INSTRUCTIONS: WWW.PLBFUN.COM/PRISMIC
Join our community online:
Follow us @PLBFUN WWW.PLBFUN.COM 3
With this kit, you will create a 23cm (9”) tall PRISMIC™
Hanging Heart. This project could take 30-45 minutes to
complete.
PRISMIC™ shapes are created by folding and interlocking
the included panels and inserting the USB-Powered LED
string light inside the shape to light it up.
Before you start assembling panels, take some time to
read these instructions and familiarize yourself with the
various parts of the panels and the kit. This will make your
PRISMIC™ building much easier and much more fun.
READ ME FIRST!
WHAT’S INCLUDED
INTRODUCTION
For a video tutorial on making this PRISMIC™ shape, please
visit www.plbfun.com/prismic
Each panel comes flat inside this package. Each panel has:
The panel images on these instructions are shown
outside side up.
More on what this means below:
Flat Edges
Tabs
Connecting Holes
Fold Marks
An Inside and an Outside
On the surface of each panel, you’ll see creased lines
creating shapes. These are the fold lines, along which you’ll
fold or bend the panel.
The black circles on the sample panel image are holes
where you insert the connecting pins to connect Flat Edges
to Tabs.
The included plastic locking pins are how folded panels are
connected to themselves and other panels, forming the
PRISMIC™ shape. Locking pins have a larger round end,
and a pointy one.
PRISMIC™ shapes are lit up from the inside with USB-
Powered LED Lights (USB Charger not included).
Locking pins are always inserted from the Outside of a
panel towards the Inside, going through the hole in the Flat
Edge first (A), then the corresponding hole in the matching
Tab (B). Use one hand to push the pin in, and the other
to provide support from the backside of the hole you’re
pushing the pin through.
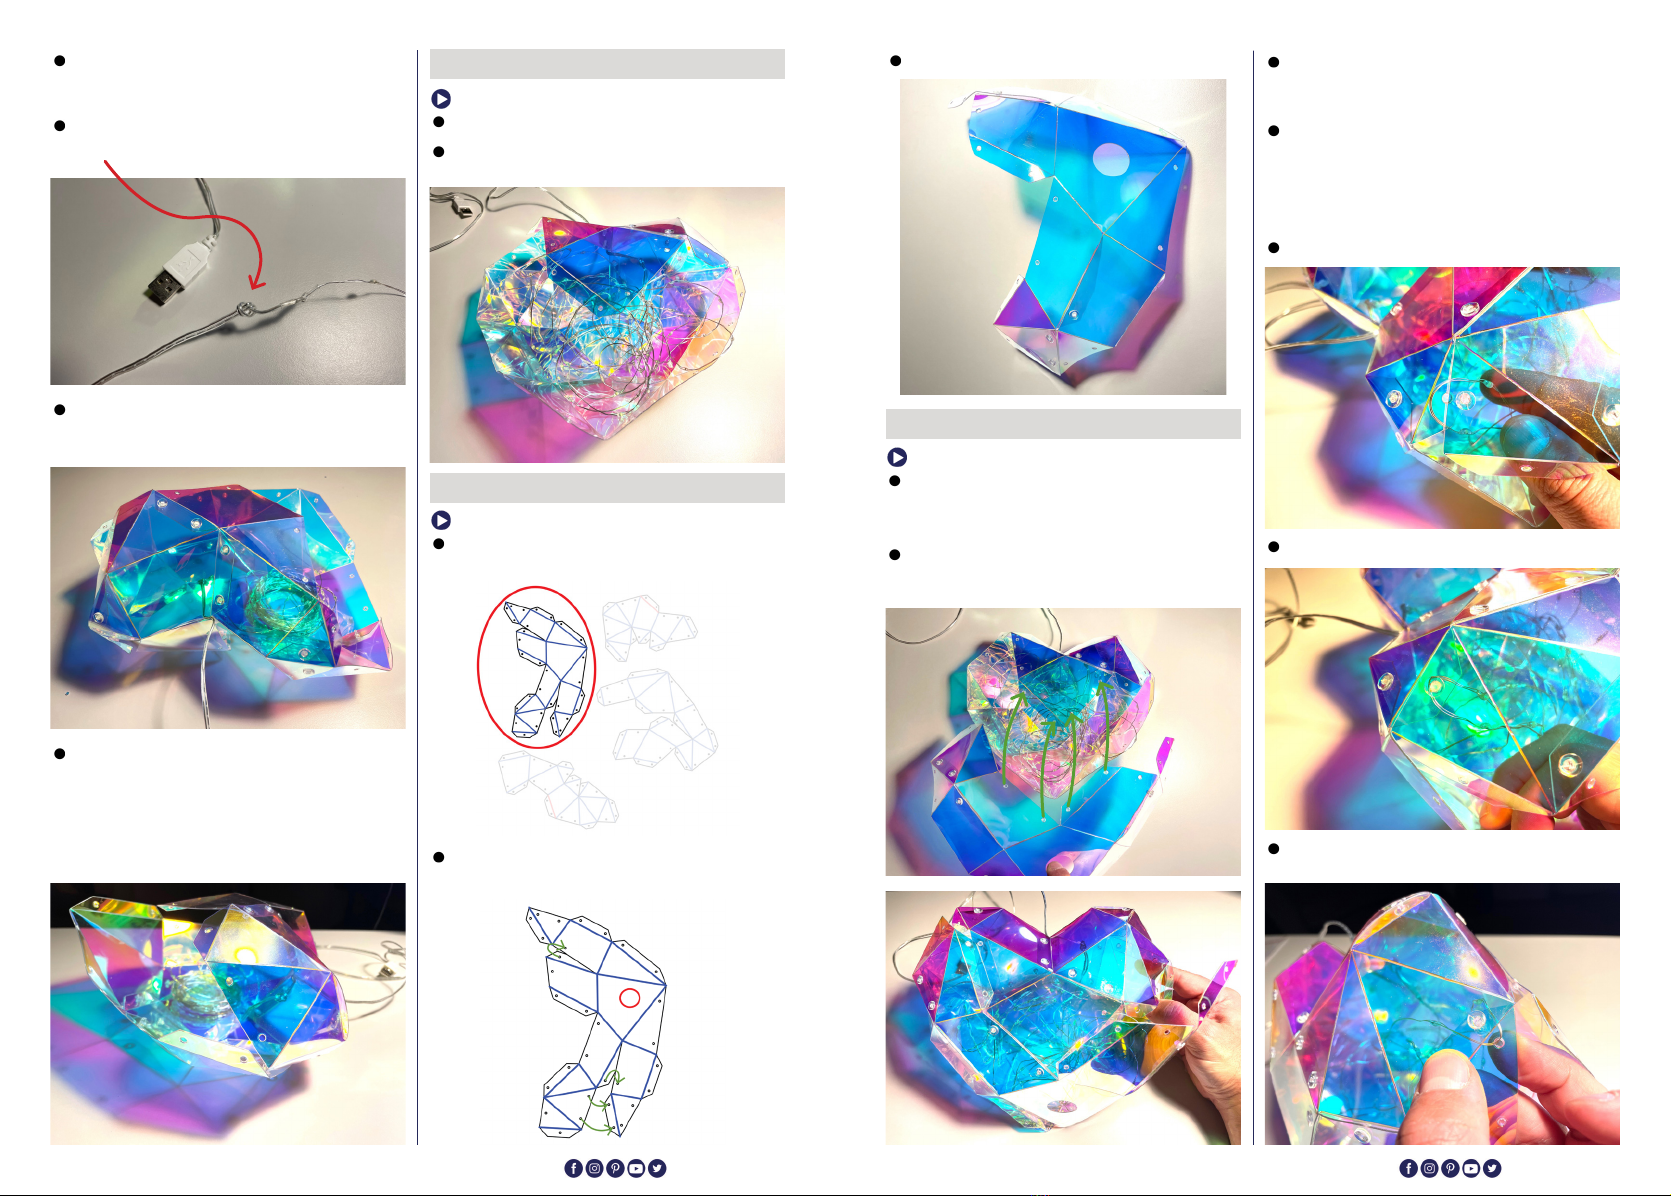
These strings are placed evenly inside the PRISMIC™
shape during the final steps of the assembly and are
locked in place when the final panel is attached.
They have a 1m (39”) lead with a standard USB plug at the
end. They can be plugged into an existing USB power port.
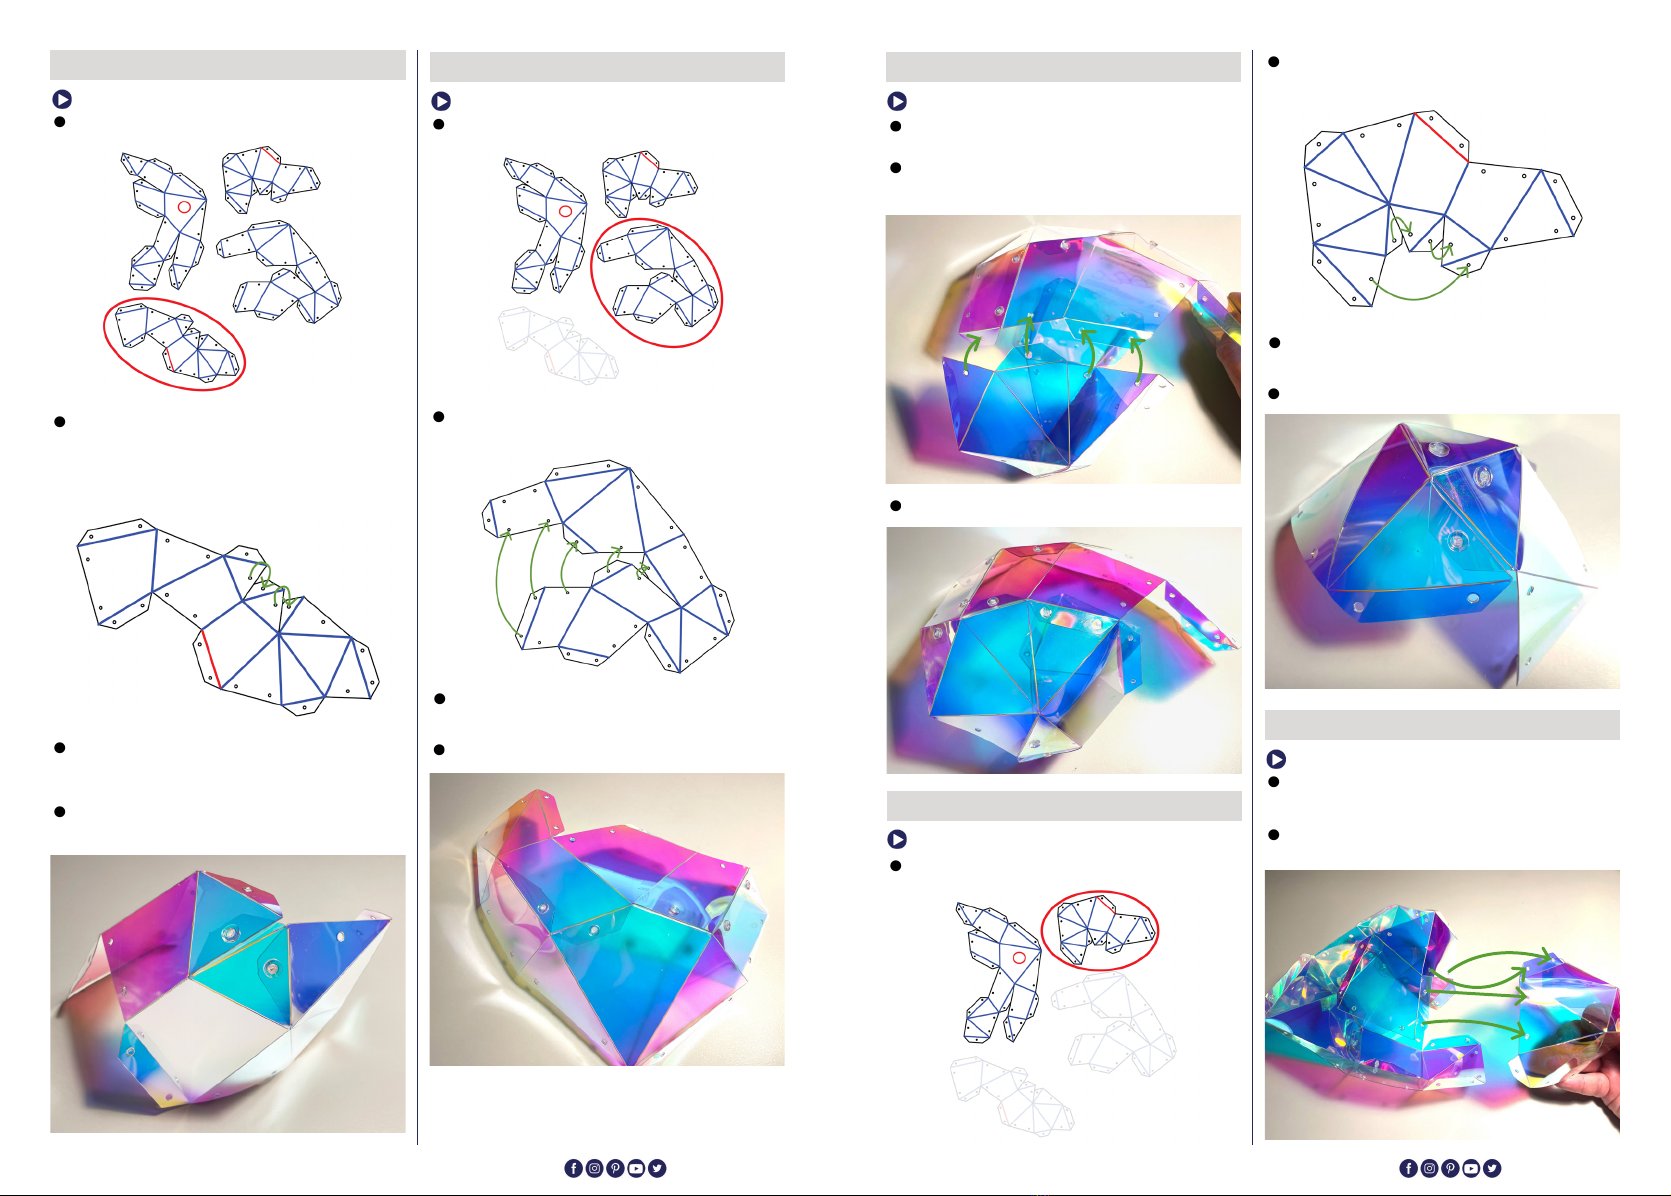
The instruction diagrams (whether it’s an overall diagram,
or a smaller section-specific diagram) will have lines
between holes on the Flat Edges and their corresponding
match on a Tab.
Not every hole pairing will be indicated in these instructions,
but once you start with the matched ones, the remainder
are easy to figure out.
The connecting holes will have little plugs in them. They
can be pushed out using the locking pins, or the tip of a
pencil to get them out of the way.
TIP: The holes are accurately placed. If a pairing looks like
it matches up, but it isn’t perfectly aligned, it’s not meant to
connect, as tempted as you may be. They probably connect
to another panel in a step further down the instructions.
The edges and tabs of a panel are how the panels lock onto
each other to create the shape.
They require a little pressure to push through the holes. It’s
easier to push through one layer at a time. Push through
the Flat Edge first, then the corresponding Tab. It is possible
to go through both at the same time, but it does require
more pushing force and doesn’t really save time.
As you join the panels together, if you can’t get one pin in,
don’t worry, it won’t affect the final result. The surrounding
ones will hold it in place. Just place the pin through the flat
edge, and don’t worry about getting it through the tabbed
edge underneath.
The red lines are meant to be folded towards you as you
look at the panel.
The Flat Edges are the edges of the panel that do not look
like a tab (identified in the sample image with an A).
Tabs don’t all look the same but are easy to distinguish
from Flat Edges. If they are hard to distinguish, there will be
a note on the instructions as to which is which.
TIP: A Tab will always look out of place on the outside of the
PRISMIC™ shape.
The blue lines are meant to be folded away from you as you
look at the panel.
The Tabs are the edges that protrude out of the main panel
and look like a little tab (Identified in the sample image with
a B). TABS ALWAYS GO ON THE INSIDE!
Each Flat Edge has a matching Tab to connect to
(sometimes on the same panel, but most often on
other panels).
As for how far you bend each piece, they vary; Most require
around a 15-45 degree fold.
Some panels may look very much alike, but they are
not. Be extremely careful to match up the panels to the
instructions. A misplaced panel or connection will disrupt
your entire PRISMIC™ build, and you’ll have to backtrack.
Panels
Fold Lines
Edges & Tabs
Connecting Holes
Locking Pins
LED String
PRISMIC™ Panels
Locking Pins
LED light strings
Hook
This PRISMIC™ kit contains:
INSTRUCTIONS:
PRISMICTM HANGING HEART
Tips on How to Fold /
Bend the Panels
The diagrams are looking down on the panel with the
Outside up and the Inside down.
As you fold the panels, regularly check against the panel
layout on the instructions to make sure you have the
Outside of the panel always facing you.
Following the diagram at each step, you can start folding or
bending along the marked crease lines.
Red lines are folded up towards the Outside.
Blue lines are folded away from you towards the Inside.
To fold each crease, secure one side of the crease between
one thumb and index finger and use your other hand to fold
the other side of the crease in the direction indicated.