PurSteam PROFESSIONAL PSSI-01 User manual

USER MANUAL
STEAM IRON
PROFESSIONAL GRADE
Model No: PSSI-01

1. Make sure that the voltage indicated on the rating
plate of the appliance corresponds to your outlet
voltage.
2. Use the iron only for its intended use.
3. To protect against the risk of electric shock, do not
immerse the iron in water or any other liquids.
4. The iron should always be turned to Minimum
(Min) before plugging or unplugging from the outlet.
Never yank the cord to disconnect from the outlet,
instead grasp the plug and pull to disconnect.
5. We do not recommend using an extension cord,
but if it is necessary, a proper gauge extension cord
rated for the appropriate power must be used.
6. Do not allow the cord to touch hot surfaces. Let
iron cool completely before putting away. Loop cord
loosely around the iron when storing.
7. Always disconnect iron from electrical outlet
when filling with water, emptying or when not in
use.
8. Do not operate the iron with a damaged cord or if
the iron has been dropped or damaged. To avoid the
risk of electric shock, do not disassemble the iron.
9. Close supervision is necessary for any appliance
being used by or near children. Do not leave the iron
unattended while plugged in or on an ironing board.
10. Burns can occur when coming in contact with
any hot metal parts, hot water, or steam. Use
caution when you turn a steam iron upside down
there may be hot water in the Water tank.
11. Do not touch the appliance with wet or damp
hands.
IMPORTANT SAFETY
INSTRUCTIONS
Read all instructions before using the iron.
When using your iron, basic safety precautions
should always be taken, including the following:
1
Your satisfaction is guaranteed. If you are not
completely satisfied with our Steam Iron and the results it
brings, we insist that you let us know. We’ll help you make
the Steam Iron work for you, or we’ll refund your money.

BEFORE USE
Spray
nozzle
Spray button
Burst of
steam button
Temperature
indicator light
PARTS
Water
inlet cover
Self-cleaning
button
Filling cup
Steam
control switch
Temperature
control dial
Swiveling
cord protector
Power cord
Water
tank
Precision Stainless
Steel Soleplate
◊Please read the instructions and the
Important safety instructions carefully.
◊Remove the transparent soleplate
protective foil.
◊It is normal for a small amount of
smoke to be produced the first time
the iron is used. This will quickly disappear.
◊To avoid damage to clothes from dust or dirt that
may collect in the iron, before the first use or after the
iron has been stored for some time, first iron an old
cloth, testing both the "Spray" and the "Burst of
steam" features.
2

3-WAY AUTO-OFF
◊Stainless Steel Soleplate
◊Anti-drip
◊Anti-calc
◊Auto shut off
◊Self-cleaning
◊PurSteam iron is 120V/60Hz and 1700W
◊Water tank is 420ml/14 fl.oz. capacity
◊Cord length is 8ft/2.46m
◊Temperature of the steam is 100°C/212F - use
with caution
◊Ergonomic material and design of the handle
IMPORTANT FEATURES
If the iron is not moved while it is plugged in, an
internal safety switch will turn it off. Your PurSteam
iron will beep 3 times and will automatically shut-off
if left for:
When this happens, the Temperature light indicator
will flash GREEN until you unplug the iron from the
power socket.
To avoid automatic switch off while the iron is heat-
ing up, always keep the iron on its heel.
30 seconds
tipped over
30 seconds
horizontally
8 minutes
vertically
3

STEAM IRONING
Filling with water
SELECTING THE TEMPERATURE
• Ensure the iron is unplugged.
• Slide the steam switch
entirely to the left.
• Open the Water inlet cover.
• Hold the appliance upright
so that the Water tank stands
horizontally. Fill with water
(containing no additives) to
the "Max" water level mark
using the provided Filling cup,
and close the cover.
NOTE:
• If you need to add water
during ironing, UNPLUG the
iron and repeat the above
steps.
• Ensure the iron is fully
reheated after filling (tem-
perature indicator light turns
GREEN) before ironing.
4
1. Place the iron upright on its heel, on an even and
stable surface.
2. Insert the power cord into an electric power
socket.
3. Set the Temperature control dial according to the
type of fabric you are ironing. Check the fabric's
label for appropriate setting. For delicate fabrics, we
recommend carrying out a test on a hidden part of
the garment (inner seam).
4. The desired temperature has been reached when
the Temperature indicator light turns GREEN. The
Temperature indicator light will turn from RED to
GREEN intermittently, indicating that the selected
temperature is being maintained.

THE STEAM CONTROL SWITCH
5
1. Ensure there is water in the
Water tank.
2. Wait for the Temperature
indicator light to turn GREEN.
3. Set or turn off the continu-
ous steam output using the
Steam control switch.
NOTE: This function can be used only when the
Temperature control dial is set in the range from • • •
to MAX.
NOTE: The iron continuously emits steam only if you
hold it in a horizontal position.
You can stop the release of steam by standing the
iron on its heel or sliding the Steam control switch
entirely to the left.
ATTENTION: Do not use the steam function for silk
and synthetics so as not to damage the surface of
the fabric.
If the Temperature control dial is set to a lower
setting, to prevent potential dripping, the iron is
equipped with the ANTI-DRIP SYSTEM.
The anti-drip system automatically reduces the
volume of steam when ironing at low temperatures
to prevent dripping.
During use, the anti-drip system may emit a clicking
sound, particularly during heat up or when the iron is
cooling down. This is normal and indicates that the
anti-drip system is functioning correctly.
synthetics
e.g. viscose,
polyester
silk,
wool
cotton,
linen
Do not iron
Laundry
label
Fabric Temperature
setting
Soleplate
temperature
70〜120°C
(158〜248 °F)
100〜160°C
(212〜320 °F)
140〜235°C
(248〜455 °F)
The amount of steam is being regulated by the
Steam control switch.
//

Use the Burst of steam func-
tion to remove stubborn wrin-
kles or to press in a sharp
crease.
1. Ensure there is water in the
Water tank.
2. Wait for the Temperature
indicator light to turn GREEN.
3. Press the Burst of steam button firmly to generate
a strong flow of steam.
4. Wait at least 4 seconds before pressing the Burst
of steam button again.
NOTE: This function can be used only when the
Temperature control dial is set in the range from
• • • to MAX.
ATTENTION: Do not use the Burst of steam function
on silk and synthetics.
SPRAY SETTING
BURST OF STEAM
VERTICAL STEAM
6
The iron can also be used verti-
cally. This is especially useful
for getting creases out of hang-
ing clothes, curtains, tapes-
tries, etc. To steam vertically,
press the Burst of steam button
while holding the iron in the
upright position.
WARNING: Never iron clothes while they are being worn.
The spray function can be used at
any temperature setting. Use this
function to make wrinkle removal
easier.
1. Ensure there is water in the
Water tank.
2. Aim the Spray nozzle towards
the garment.
3. Press the Spray button down
slowly for a jet or press quickly and firmly for a mist.
NOTE: Do not use the spray function on silk and
synthetics.

DRY IRONING
STORING YOUR IRON
WATER TO USE IN IRON
Tap water
7
PurSteam irons are designed to be used with REGU-
LAR TAP WATER (up to 12 grains of hardness). If your
water is harder than this, PurSteam recommends
mixing half tap water with half distilled water, which
reduces the hardness; or just use inexpensive bottled
1. Slide the Steam control
switch entirely to the left
and turn the Temperature
control dial to MIN.
2. Disconnect the power
cord from the power socket
and allow the soleplate to
cool down.
3. Empty the Water tank into
a sink by turning the iron
upside down and gently
shaking it.
4. Roll up the power cord around the iron.
5. Always store the iron in an upright position.
1. Slide the Steam control
switch entirely to the left.
2. Set the Temperature
control dial to the desired
setting according to the type
of fabric you are ironing.
3. The iron is ready for use
when the Temperature
indicator light turns GREEN.
NOTE: We recommend dry ironing with an empty
tank to be sure there are no drips, however, dry
ironing can also be performed with water already in
the tank.

SELF CLEANING FEATURE
8
The self-cleaning feature cleans inside the sole-
plate, removing scale and impurities.
We recommend using it every 10-15 days.
Instructions on how to perform the
self-cleaning:
◊ Fill the Water tank up to the maximum level and
set the Steam control switch to “0FF”.
◊Set the Temperature control dial to the maximum
and wait for the light to turn GREEN.
◊ Pull the plug out of the socket and hold the iron
horizontally over the sink.
◊ Hold the Self-cleaning button until all the boiling
water, steam, impurities and scale come out.
Always remember:
Water containing additives (such as starch, perfume
or fabric conditioner) may not be used. Such addi-
tives can affect the properties of the steam and, at
high temperatures, can form deposits in the steam
chamber, which will mark the laundry when they are
emitted through the steam vents. For this reason,
descaling liquids should not be used.
spring water. Never use 100% pure distilled water
since this can cause the iron to spit and leak.

CLEANING AND MAINTENANCE
ADVICES FOR GOOD IRONING
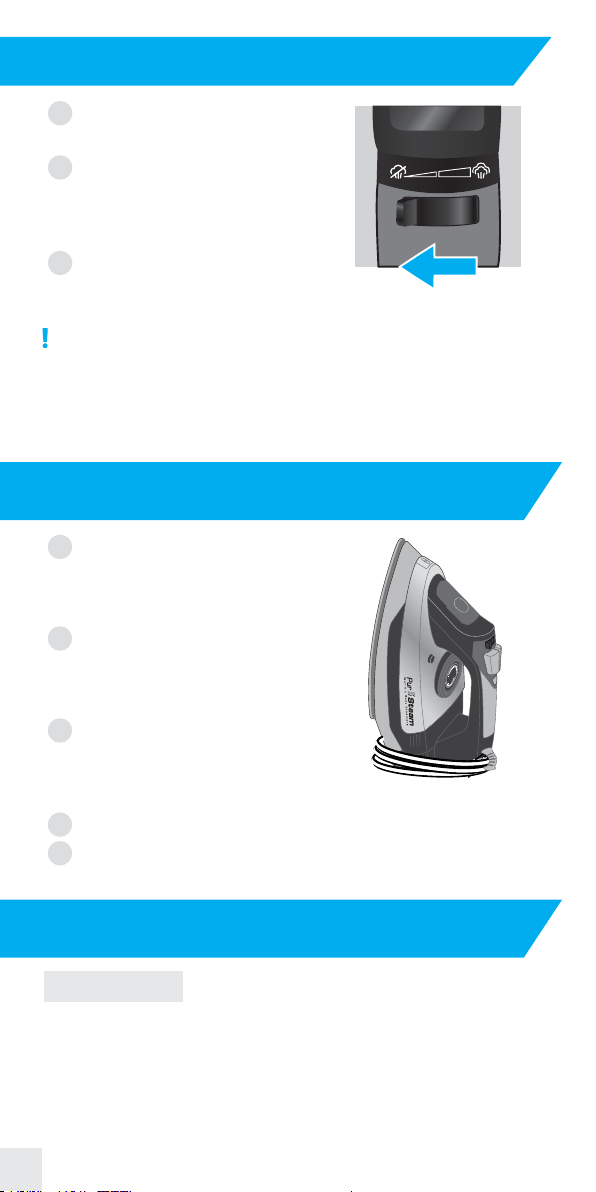
Cleaning the soleplate
9
◊ We recommend using the lowest temperatures with
fabrics that have unusual finishes (sequins, embroidery,
flush, etc.).
◊ If the fabric is a blend (e.g., 40% cotton 60% synthetics),
set a lower ironing temperature.
◊ If you don't know the composition of the fabric, deter-
mine the suitable temperature by testing on a hidden
corner of the garment. Start with a low temperature and
increase it gradually until it reaches the ideal temperature.
◊ Never iron areas with traces of perspiration or other
marks: the heat of the plate fixes the stains on the fabric,
making them irremovable.
◊ To avoid marking silk, wool, or synthetic garments, iron
them inside out.
◊ When cold and unplugged, the iron can be cleaned with
a damp cloth and wiped dry. Never use household cleaners
or solvents.
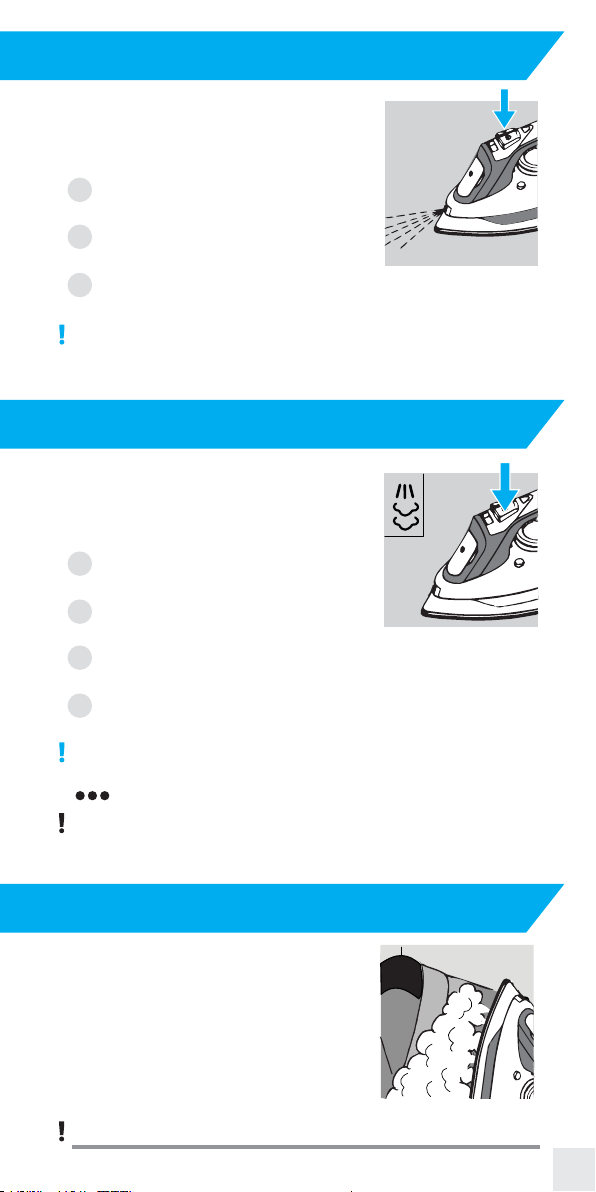
◊ If the iron has not been used for a long time (e.g., several
weeks) the steam channels should be cleaned, and any
deposits removed from the iron. To do this, hold the iron
horizontally before you start to use it and allow it to
produce steam for about 1 minute. Also, activate the Burst
of steam button several times.
NOTE: Before cleaning the iron, make sure that it is
unplugged from the wall outlet and cooled down.
PurSteam stainless steel soleplates have excellent
non-stick properties and can be simply wiped clean when
cold.
◊ During normal use, a sticky coating may build up on the
soleplate (starch, detergent buildup, burnt synthetic
fibers). This can be easily removed by using quality hot iron
soleplate cleaner available at most stores.
◊ Do not use abrasive household cleaners or abrasive
cleaning pads.
◊ The soleplate of your iron makes ironing easier. To
prevent scratching of the soleplate, do not iron over sharp
objects (zippers, etc.). Do not place the iron on rough
surfaces, e.g., metal iron support, which may scratch the
soleplate.

IRON TROUBLESHOOTING
Problem Possible cause Solution
Iron is
leaking
SOFTENED WATER
Auto-off activated?
Overuse of burst
of steam
Is iron plugged in?
Temperature dial
set too low?
Auto-off activated?
This is normal
Temperature
indicator light
turns GREEN
and RED
intermittently
Iron does not
steam
Steam valve is
clogged
10
DO NOT use 100% pure distilled
water, use tap water. In very
hard water areas mix half tap
water with half distilled to
reduce hardness; or use
inexpensive bottled spring
water.
Most softened water is alright,
but if you experience leaks or
spitting, change to untreated
tap water or inexpensive bottled
spring water. DO NOT use 100%
distilled water.
Move iron or gently shake.
Allow more time between each
burst.
The Temperature indicator light
will turn from RED to GREEN
intermittently, indicating that
the selected temperature is
being maintained.
If the iron is not hot enough, the
anti-drip system will activate
and stop the iron's steam
production. Set thermostat to
the position. Always allow
sufficient time for the iron to
heat up (indicator light turns
GREEN) before activating the
Steam control switch.
Move the Steam control switch
from min to max several times
to clear blockage.
Iron is not hot
enough
Turn Temperature dial higher.
Make sure the plug is in the
socket.
Move iron or gently shake.
Iron won’t
heat
DISTILLED WATER
◊ To avoid marking velvet garments, iron in one direction
(following the fiber) and do not press down on the iron.
◊ Many fabrics are easier to iron if they are not completely
dry. For example, silk should always be ironed damp.

Specications subject to change without notice
2
YEAR This product is warranted to be free from defects in
material and workmanship under normal use and
service for two years from the date of the original
purchase with the receipt. The manufacturer's
obligation shall be limited to repairing or replacing any
part of the product that is defective. Such warranty shall
not apply to damages resulting from accidents, abuse,
or misuse.
If you are not happy with the product for any reason,
(855) 530-6800 with your feedback or questions,
and we will do our best to make things right for you!
Your purchase comes with a 100%
satisfaction guarantee from PurSteam
2-Year Limited Warranty
Cheyenne, Wyoming 82001 USA
Telephone: (855) 530-6800
Web: www.pursteam.us
Table of contents