PURSUIT T-34C TURBO MENTOR User manual

2
TABLE OF CONTENTS
Introduction.........................................2
Assembling the Fuselage...................8
Installing the Stabilizers...................14
Assembling the Elevator..................22
Skinning the Elevator .......................29
Attaching the CBT skin.....................35
Skinning the Stab..............................37
Preparing the Fin/Rudder.................43
Skinning the Fin................................48
Fuselage TE.......................................52
Tail Cone Assembly..........................58
Mounting the Fin...............................62
Skinning the Rudder.........................62
Stabilizer Balsa Filler........................66
Rudder Trim and Install....................67
Fitting the Cowl to the Fuse.............72
Mounting the Cowl............................75
Applying Fuselage Skins..................82
Cowl Details.....................................103
Canopy.............................................108
Rx Switch/Pneumatic Gear.............114
Assembling the Wing .....................115
Spar Sleeves....................................115
Wing Ribs ........................................116
Wing TE............................................118
Installing the Spar Sleeves.............119
Wing to Fuse Joint..........................122
Installing Wing Mount Stanchions 124
Wing Control Surfaces ...................127
Flap Mounting .................................128
Aileron Mounting ............................133
Mounting the Main Gear Retracts..136
Main Gear Doors .............................138
Skinning the Bottom Wing.............145
Skinning the Top Wing...................147
Wing LE Skin...................................150
Wing Tip...........................................151
Flap and Aileron Skins ...................152
Navigation Light Lens and Shield .158
Wing Wiring and Plumbing ............159
Belly Pan..........................................162
Firewall/Engine Installation............165
Nose Gear Doors.............................172
Engine Ducting................................179
Fuel Tank and Fuel Lines...............182
Adding Details.................................182
Painting............................................184
Balancing.........................................185
Control Throws ...............................185
Preflight Check List ........................186
Flying ...............................................186
Repairing Damage ..........................186
Replacement Skins.........................189
Feedback .........................................189
Stabilizer/Elevator Template..........190
Fin/Rudder Template ......................192
Center of Gravity Diagram………...194
Laser Cut Parts Diagram................196
Inventory of Laser Cut Plywood....197
Inventory of Polycarbonate Skins .198
Inventory of EPP Components ......198
Inventory of Loose Wood...............199
Inventory of Hardware....................199
Introduction
Scale Pursuit Models would like to thank
you for purchasing our T-34C Turbo
Mentor kit and congratulates you for
selecting one of the most durable and
best looking scale models in the
industry. We know you will be proud of
your model when you finish and it will
likely be the best looking scale model at
your field. We are committed to
ensuring that your building and flying
experience with our products are
satisfying and rewarding for you.
You will find a CD in this kit that
contains a .pdf file of this manual in
case your hardcopy is not available.
Also on the CD are hundreds of photos
of the full-size T-34C, the Navy’s T-34C
flight guidelines, the scale drawings that
were used to create your T-34C model
and other documents.
Your T-34C kit is assembled like no
other model you’ve ever built. Because
of that fact, we created this manual to
provide you with step-by-step, visual
perspectives along with clear, written
directions. Please read through the
entire manual before you begin. As you
can see, most of the page space is
taken up by pictures. Even though the
techniques used to assemble the model
may be new to you they are relatively
straight forward for a scale project. If at
any point you are unsure of how to
perform a task, please contact our

3
customer support at (303) 953-2925 or
If, after reading this manual, you are not
comfortable proceeding or are not
satisfied with the quality of the kit please
contact us for return instructions and a
refund.
Liability
Scale Pursuit Models has no control
over the final assembly of this model
therefore no liability shall be assumed
nor accepted for any damage resulting
from the use by the user of the final
user-assembled product. By assembling
and operating the model, you accept full
responsibility and liability of any
resultant acts/damages and agree to
indemnify Scale Pursuit Models, Inc.
from any and all claims resulting from
the operation of the model. The
operation of giant scale RC models can
be dangerous to you and others,
therefore you should only proceed with
the assembly and operation of this
model if you possess the skills to
successfully and safely use this product.
This is not a model suitable for a
beginner RC pilot. Once assembly
begins, the kit cannot be returned for
refund.
Tools
In addition to those tools customary for
a scale model build, the following are
needed (marked with *) or helpful:
*Caulk gun for 10 oz. adhesive tubes
Sure Form sanding tool (Stanley No. 21-
399 or 21-115)
Curved tip scissors (like Hobbico’s
Stock No. HCAR0667)
* Putty knife (or something to spread
adhesive)
Small router base for dremel tool (like
Dremel No. 565)
Small and big cutter bits for dremel tool
Nos.111, 114, 115, and 561
Long X-acto blades (X-acto No. 26)
*6-32 tap
* Light weight wall spackle (available at
home improvement stores)
Contour gauge
Forstner Bits
*Scotch Brite® pads
*Waxed Paper
Sharpened brass tube for drilling tunnels
in the foam airframe (1/2” dia.)
Large “C” clamps for securing the wing
spar sleeves
Engine Selection
Several engines will be compatible in
your T-34C. You will need about 5 HP
to fly the T-34C realistically. You can
choose gas or glow engines as neither
gasoline or glo fuel will adversely affect
the foam or the painted skins.
We document the installation of the
Revolution 50 engine in this manual but
other engines can be made to fit by
adjusting their stand-off distance from
the firewall.
The DA-50 is a good engine choice.
The use of a ¾” to 1” prop extension is
helpful to move the cylinder head back
with this particular engine. Due to
engine overheating issues, at this time,
we are not recommending the
Revolution 50 engine.
Since there are turbo prop engines on
the market some modelers may want to
use this power source for this kit. Scale
Pursuit Models has not tested the
airframe for use with a turbo prop
engine, nor have we tested the
compatibility of the foam or plastic skins
with this type of engine. The high
temperatures produced by these
engines require testing before Scale
Pursuit Models can endorse the use of
turbo prop engines as a viable power
source for this kit.
Radio Gear
Your T-34C is typical of a giant-scale
model so you will want to protect your

4
investment with quality radio gear. We
recommend the use of two receiver
batteries and heavy duty switches for
redundant protection. In terms of servos
for your control surfaces, you should
use high torque, metal geared servos
with at least 130 oz. of torque. The
elevator should use a servo with at least
170 oz. of torque.
Landing Gear
Scale Pursuit Models has designed T-
34C retracts to ensure that our
customers have a scale retract solution.
Robart® will manufacture the T-34C
retracts. You can contact us directly to
obtain these retracts. You may use
other commercially available retracts,
however, you would need to modify the
mounting system to fit your specific
equipment.
You will need to supply your own
pneumatic support gear including a
medium and a small air tank, control
valve (such as the Ultra Precision, U.P.
2 valve) air lines, tees, disconnects, air
pressure gauge and air cylinders if you
plan to use a pneumatic system to
operate your gear doors. You could
also use an electronic gear door
sequencer for the nose wheel doors.
Robart® or Sierra Precision® are good
sources for the required air support
accessories. (www.robart.com or
www.sierragiant.com)
You will need 4 ½” main tires (we
recommend the Robart® Tuff Treads™)
and a 3” nose wheel tire. You may want
to consider using pneumatic brakes
(Robart Part No. 140 and 13845A0) as
this can provide extra insurance against
taxi and landing accidents.
Scale Cockpit and Pilot
This kit can be assembled with a false
cockpit floor that would allow the use of
a pilot bust and not require the
assembly of cockpit detail.
We recommend that you open up the
false cockpit floor to expose the pre-
routed cockpit cavities so that you can
detail the cockpit with our optional scale
cockpit kit. The cockpits of the T-34C
are just too big and obvious to ignore.
We can also supply you with a light
weight and proper fitting military pilot
figure complete with flight suit and
helmet. Add two pilots for that authentic
Navy trainer appearance.
Other scale details
Make a list of the details you want to
build into your model, such as working
navigation/strobe lights, antennas, pitot
tube, etc. and determine when these
details need to be installed on the
model.

5
Many details can be done after
assembly, but some details need to be
done before certain assembly steps. For
example, to install wiring for wing
navigation lights it is much better to do
this task before the wings are skinned.
Plan your details ahead of time so the
installation goes smoothly.
Finishing
Painting your model will be a great
source of pride for you and your efforts
will be rewarded by the fact that you
have created your own version of the T-
34C unlike any you will see at the field.
In a day and age of pre-finished ARFs,
your completed T-34C will truly stand
out. Painting is a skill all scale modelers
must acquire. If you lack skill in this
area consult with more experienced
modelers and go online to sources like
www.rcscalebuilder.com to acquire
more knowledge of painting techniques.
You can paint your model with many
types of paint but we recommend that
you use a flexible paint system like latex
or polyurethane. Use a primer that is
compatible with the type of paint you
chose. Some paints may require very
little or no primer – always test primers
and paints before painting the model.
Tip: Be aware that the various pen
reference marks you make on the skins
will need to be wiped off prior to
painting. Mineral spirits works well to
remove the permanent ink (from a
Sharpie® pen). The reason that this is
important is that the pen marks can be
difficult to cover up with paint, especially
light colors like white and orange.
Therefore, try not to make marks on the
under surface of a skin where they
cannot be wiped away once the skin is
attached.
Other Items Required
These are the additional items that you
will need to complete you T-34C model
that have not already been mentioned.
*3’ push rods (2)
*4-40 clevises and threaded music wire
for control linkages
*24 oz. Du-Bro® fuel tank
*Fuel line
*1/2A control horns, 4-40 threaded ball
link sets (main gear attachments), 2-56
threaded ball link sets (gear door
attachments) and misc. linkages
*T-nuts for mounting your engine – size
dependent on your engine bolts
*Micro drill bits (.040”) for small screw
pilot holes
*Servo wire extensions
*6-9 Channel radio
*4” spinner (Electro Dynamics sells a
spun aluminum, spinner (Part No.
SR400, $24) close to the scale shape
1-800-337-1638,
http://www.electrodynam.com/ )
The hardware included in the kit
provides many of the fasteners and
accessories you will need but there are
components that you will need to supply
like small pieces of wood or
miscellaneous fasteners that are
common for giant scale models.
Safety Notes
Use caution when performing assembly
tasks that might involve the use of
potentially dangerous tools like X-acto
knives, soldering irons and rotary tools.
Wear eye and breathing protection while
using these and other potentially
dangerous tools. Some assembly steps
might show the use of a soldering iron
or heated rod to burn EPP foam. This
optional technique will produce fumes
so it should only be done with proper
ventilation. If you are not comfortable
with this technique, then you can always
cut the foam with an appropriate tool to
achieve the desired task. You will be
cutting and sanding fiberglass parts so
be sure to take appropriate precautions
when working with these materials. You
may want to wear rubber gloves when
applying the polyurethane adhesive that
adheres the polycarbonate skins to the
foam if you’re sensitive to that kind of
material. We recommend wearing shop
clothes as the polyurethane adhesive
can stain fabrics.
Warning: The PL® Window, Door and
Siding Sealant provided, while a
commercially available product, does
contain a chemical know to the State of
California to cause cancer. Ingredient
name: Silica Quartz, CAS Number:
14808-60-7, Percent: Trace.

6
About the EPP Airframe
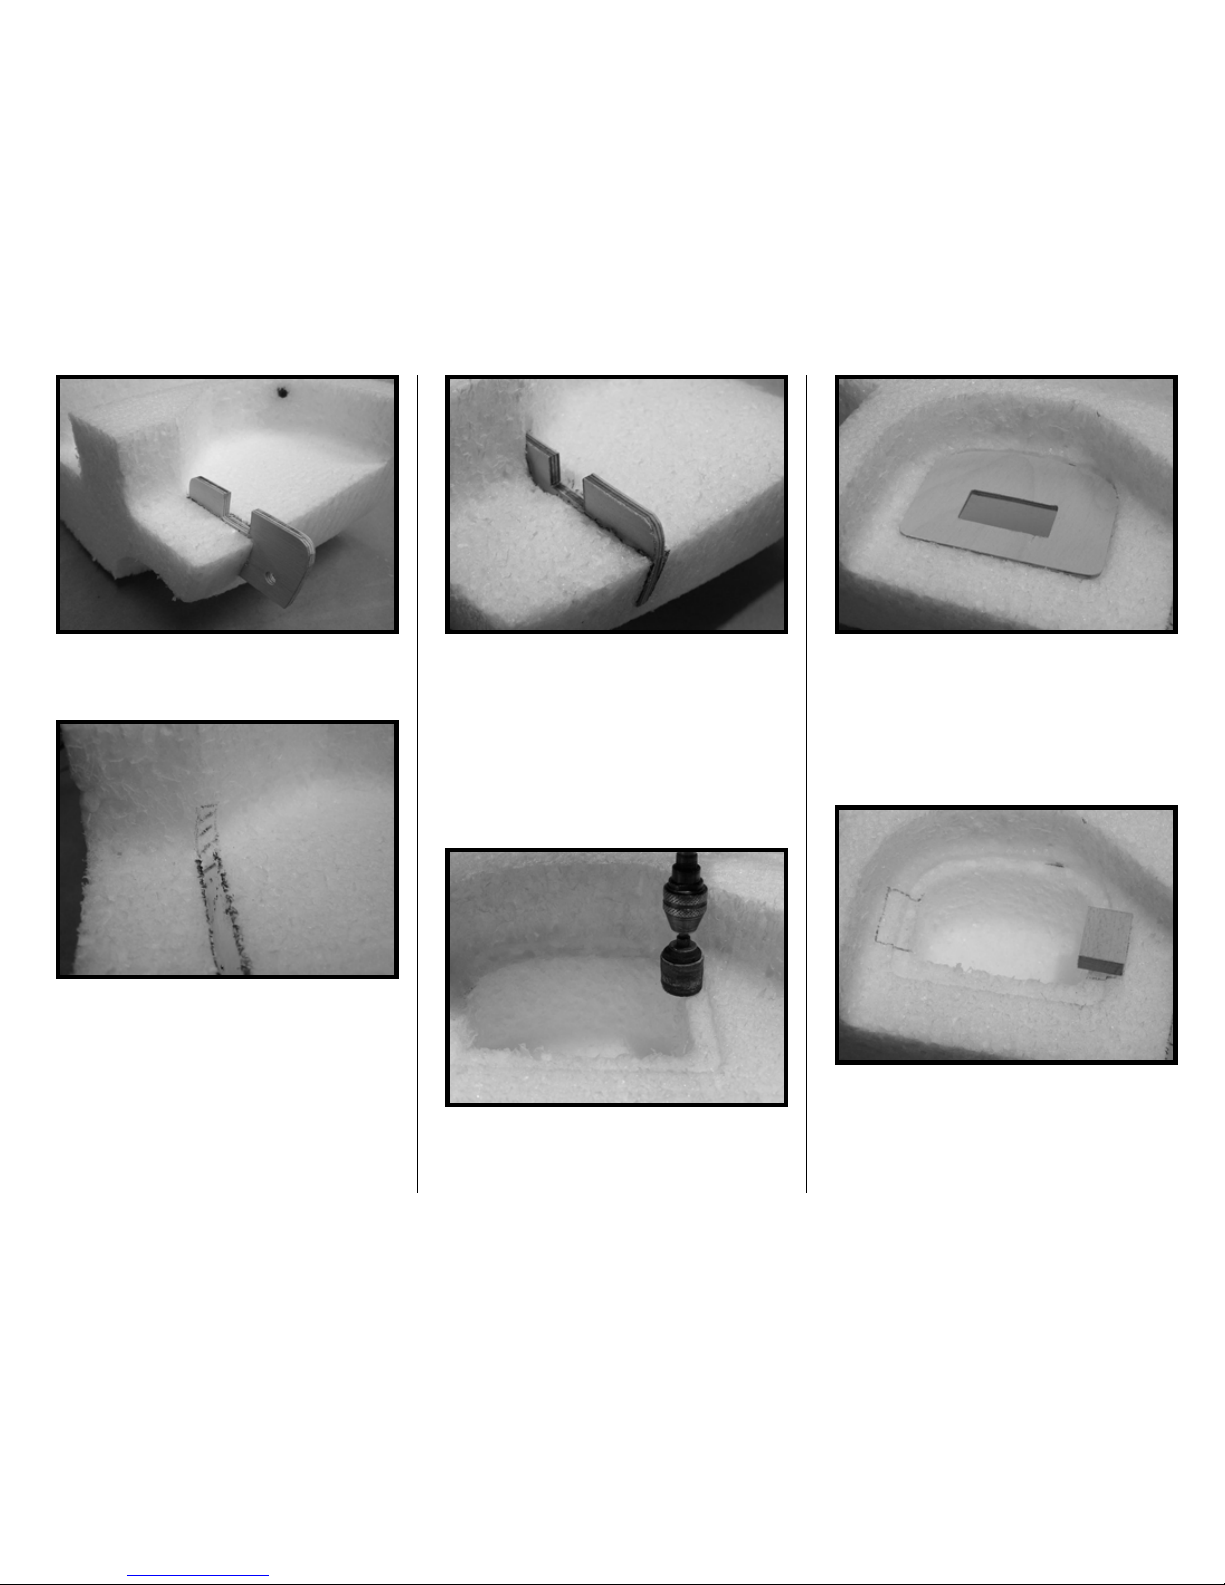
Your EPP parts are 1.3 lbs/cu.ft., so that
makes them light weight yet still posses
enough structural integrity to take a
great deal of abuse without breaking.
If you ever break a foam component you
can use a variety of adhesives to fix a
break. Use epoxy or expanding
polyurethane glues, like Gorilla Glue®,
in areas you want to make stiffer. Use
flexible glues like the polyurethane
sealant used to attach the skins or
products like Zap-A-Gap™, Goop™, or
silicone-based adhesive to keep a repair
area capable of flexing. You can even
use regular CA glue as it will not harm
EPP. CA glues vary so testing is
suggested.
Your airfoil components come with their
foam saddles. After assembly, you can
use this extra foam for repairs (to
replace heavily damaged sections of the
airframe), transportation cushioning, etc.
Unlike expanded polystyrene
(Styrofoam™), EPP is not adversely
affected by gasoline or glo fuels,
however, due to its cellular structure, the
foam could absorb liquids so those
areas exposed to fluids, (under the
lower cowl, nose wheel cavity and fuel
tank area) should be coated with a thin
coat of epoxy to act as a barrier.
In the back of this manual there is an
inventory of all provided EPP
components. Please check that your kit
includes these parts before you begin
assembly.
About the Polycarbonate Skins
This material is amazingly durable
compared to other plastics used in the
modeling industry. Here are some facts
about polycarbonate and our use of this
material as model aircraft skin.
Do not apply solvents like M.E.K.,
acetone, turpentine or toluene to the
skins as this will cause them to crack.
To clean bare polycarbonate use
products like mineral spirits or mild
cleaning agents like Windex. To learn
more about polycarbonate’s
compatibility with other chemicals go to:
http://www.sheffieldplastics.com/web_do
cs/BRO002.pdf
Applying paint to the skins will protect
the polycarbonate from fuel residue, so
only run an installed engine on a model
with primer or paint. As with most
plastics, polycarbonate could tear if a
crack is present so radius corners of cut
lines, where possible.
We form the skins using both male and
female vacuum form molds, therefore,
some skins may have the green
protective film on the outside surface
and the clear protective film on the
inside. Other skin parts may be the
opposite. Some skins may not have film
on one side and some skins may have
no film at all. Your parts may look
different from parts shown in this
manual.
Throughout the manual we will direct
you to trim the skins to fit a specific
airframe part. We will use primarily two
terms; rough trim and finish trim. Rough
trim is basically cutting off the remaining
flashing – the part of the plastic that is
not part of the formed skin detail,
whereas finish trimming will involve
measurements, trial fitting, marking and
cutting to final shape. Since you won’t
initially know where a certain part needs
to be finished trimmed, your rough trims
should maximize the material that can
be distinguishable as the part’s skin. If
you make a mistake and remove too
much material you could use scrap
plastic to make a scale-like panel or call
us and we can get a replacement skin to
you quickly. We suggest you retain all
cut off plastic pieces (except the very
small remnants) so you can use the
excess as scrap when needed during
the assembly process or a future crash
repair.
The skins are primarily .010” thick. This
is good from a weight standpoint.
Additionally, the use of this thin material
as skin will produce the slightly wavy
appearance similar to the aluminum
surface on a full-size aircraft. The
model’s surfaces will not be perfectly
smooth. Smooth surfaces are a
condition we have come to expect in
model aviation, however such conditions
rarely occur in full-scale and certainly

7
not with a 35+ year old trainer. So you
should expect the skins to not lay
perfectly flat and, by accepting that fact,
you can embrace the unique character
of the model you created.
Due to some molds’ deep draw
characteristics, some skins may have
“webbing”. This is when the plastic folds
over and joins with itself. Most of the
webbing occurs outside (below) the
useful portion of the skin, but if a small
amount does enter the useful area,
apply thin CA to the inside of the web
and, when cured, the web can be
sanded down.
In the back of this manual there is an
inventory of all provided Polycarbonate
skins. Please check that your kit
includes all these parts before you begin
assembly.
About the Wood Components
Most of the plywood included in this kit
is 1/8” thick aircraft grade plywood cut
by a laser. You can use thick CA or
epoxy for joining the wood pieces
together or attaching them to the foam
airframe. Some of these pieces are
intended to be ¼” thick and will require
you to laminate two identical pieces of
the 1/8” plywood together. To help you
register the pieces, you can insert a
small piece of 1/8” music wire into the
guide holes that are cut into the pieces.
The photos in this manual do not show
the use of laser cut parts, so your cut
pieces may vary slightly in appearance.
You could choose to laminate all the ¼”
pieces (primarily Sheet C, on page 197)
before getting into the assembly process
so that these parts are ready for
installation.
In the back of this manual is diagram of
the laser cut part sheets and a reference
list of these parts. The parts that require
lamination are also identified. Before
assembly, ensure that all the pieces are
accounted for. Additionally, you will find
an inventory of loose wood components
provided in the kit so check the provided
parts against this list. Some wood
pieces may be located in the supplied
hardware bag.
Manual Conventions
Unless otherwise stated, after these
instructions explain a task (adding skin
to the left stabilizer, for example) that is
logically duplicated on the other side of
the model it is expected that you will
complete the tasks for both sides at that
time, even though the manual may not
state to do so.
When we instruct you to glue a part we
will identify the recommended glue. We
use the term “adhesive” to reference the
supplied PL® brand polyurethane
sealant applied from a caulk gun. We
recommend a CA glue that has been
designed for use with plastics, and
generally a thick formula. Test your
brand by gluing together two pieces of
scrap polycarbonate. Use a thick CA
unless directed otherwise.
Abbreviations:
LE = Leading edge of the part
TE = Trailing edge of the part
Stab = Stabilizer
“ = inch
R = Radius
CA = Cyanoacrylate glue
Rt = Right
Lf = Left
Tx = Transmitter
Rx = Receiver

8
Assembling the Fuselage
The first step in assembling the fuse is
for you to decide if you want a full depth
cockpit or to utilize the existing foam
false floor. If you’re going with the false
floor option, skip to Step 5 and disregard
cockpit instructions presented later in
the instructions.
1. For full depth cockpits, mark cut lines
as shown: 1/2” from the top outside
edges and also, on the fuse centerline,
extend the instrument panel and cockpit
back surfaces to the fuse top.
2. Your fuse should be marked as
shown above. With a new X-acto blade,
cut along the lines. Cutting EPP with a
dull blade does not work well so make
sure the blade is sharp.
3. Next, cut the cockpits’ false floor
supports as shown below. Note the
bench where the scale, side instruments
go – retain this bench.
Getting a knife down into the cockpit can
be difficult so you can cut this support
away in sections.
4. Use a sanding block to level any
remains of the support. Alternatively, a
tool that we like to use is a Sure-Form
tool – it works faster.

9
This is what you have when finished.
5. As a precautionary measure, coat the
bottom and lower sides of the fuel tank
cavity with a thin coat of epoxy. This is
just in case of a fuel tank or fuel line
leak. EPP foam will not dissolve when
exposed to gasoline like Styrofoam™,
however it will absorb fuel and swell a
little until the fuel evaporates. While
you’re at it, treat the nose wheel well
and lower fuse sides just behind the
firewall location too as fuel residue will
find its way down there also.
Note: With the fuse halves taped
together, check the fit of your selected
fuel tank into the provided cavity and
modify the cavity as needed. Your
firewall opening may also need to be
modified to fit certain fuel tanks – you
can do that later.
6. Adding a drain will help get any
leaked fuel out of the fuel tank cavity
and alert you that something is leaking
so you can fix it. To do this, heat a
piece of music wire with a lighter and
push the hot wire into the roof of the
wheel well near the rear and into the
tank cavity. Important: whenever
burning EPP, use proper ventilation.
Use a scrap piece of Ny-rod outer tubing
about 1.5” long and insert it into the
hole, then use CA to glue it.

10
Cut any excess tube that protrudes into
either cavity.
7. Before joining the fuse halves you
will be making the cavities for the nose
wheel retract’s rear supports as it is
easier to do this now. Mark a line on
each side of the nose wheel cavity 5”
from the back of the cavity.
Mark another line 1/4” aft of the first line.
You will be cutting a channel about one
inch deep within the lines to
accommodate the rear rail support. The
easiest way to do this is to burn the
foam with a brass tube and soldering
iron. You could also use a long X-acto
knife, route with a dremel, or heat a
tube/wire with a torch/lighter. In the
photo below we inserted a 1/8” brass
tube into a soldering iron (you want the
tube or wire to be less than 1/4” as the
foam will melt easily).
The rear rail support is the first of the
laminated 1/8” plywood pieces you will
be working with. If you have not already
done so, laminate two pieces together to
form a piece ¼” thick.
Tip: Inserting a 1/8” dia. music wire into
a scrap wood block provides a stable
alignment tool for the lamination
process. Make two. Use a clamp to
squeeze the 1/8” parts together.
Taping a metal ruler to the wheel cavity
will help guide the soldering iron.
Once you make the initial cut in the side,
you will need to remove more material
from the roof of the cavity to
accommodate the length of the ply
support. The slightly curved end of the
support matches the bottom contour of
the fuse.

11
Below, material to be removed from the
roof area is highlighted.
Test fit the support into the channel.
Do not glue in the supports at this time.
You will do this later when working with
the firewall.
8. Use a dremel sanding wheel or
similar to remove the corner radius from
the recess surrounding the steering
servo cut out in the left fuse wheel well.
Test the fit of the 1/8 ply servo plate.
Once satisfied with the fit, trace an
outline of two 1”x3/8”x3/4” basswood
blocks as shown below. The blocks
should protrude slightly into the cavity.
These blocks will anchor the servo plate
screws.
Use a dremel tool to remove the foam
within the drawn boundary of the blocks
so that the top of the blocks are even
with the recess. Glue the blocks in
place with epoxy or CA.

12
Once cured, position the servo plate into
position and drill 7/64” holes through the
plate and blocks. To facilitate easy
screw removal you should angle the
screw holes toward the bottom of the
fuse as shown below. Install #4 screws.
9. Attach airlines to the small and
medium sized air tanks (it’s easier to do
it now when they are outside the fuse).
Note: You can later tee the tanks
together or use the small tank for
optional brakes. Also check the fit of
your receiver battery(ies) in the battery
cavities under the rear cockpit -
accessible in the wing saddle.
This is one of three locations where you
can choose to place your battery to
obtain proper CG (see page 184). It is
easier to enlarge the battery cavity (if
needed) now rather than after the fuse
is glued together.
To use the supplied glue you will need a
caulk gun like this.
They are available at hardware stores
for just a few dollars. In preparation for
gluing the fuse halves together, we
recommend that you cut several paper
towels into quarter sheets and lightly
soak a few of them with mineral spirits
to help clean your hands. Remember to
wear shop clothes.
10. Apply glue beads to the mating
surfaces of just the left half of the fuse.
You could, optionally, use spray contact
cement, like 3M-77 or 3M-90 behind the
wing to save some weight. The skins

13
will help keep everything together, so
you could just apply medium coats of
contact cement to both sides – mask the
push rod channels. Use the supplied
adhesive over the wing and forward
fuselage.
10. Using a putty knife or scrap piece of
wood, level the adhesive bead and
ensure the mating surface is covered
with adhesive (or spray contact cement,
if used).
Wipe excess adhesive onto a paper
towel – you can use some of this excess
if you need more elsewhere on the fuse
centerline. To seal the end of the
adhesive dispenser when not in use,
you can use some non-hardening clay
(found at craft stores) and push a good
size ball of it over the tip or cover the tip
with plastic wrap and tape.
11. Insert the two air tanks into the left
half of the fuse (airline end first) so the
air lines exit out the left side. Now
position the right side over the left side
by aligning the right side’s air tank
cavities over the ends of the air tanks.
12. Flip the fuse on to its right side and
begin to align the fuse halves’ edges.
Critical edges are the firewall and wing
saddle.

14
Begin to apply tape across the fuse
centerline. Press one half of the tape
down firmly to one side first then pull
tightly across the centerline and apply
the other half. Remove any excess
adhesive that squeezes out of the joint.
Let the fuse cure for 24 hours.
11. Once the fuse has cured, remove
the tape. Using a Sure–Form tool or an
80 grit sanding block, lightly go over the
fuse to knock down the top of the
machined ridges. Very little pressure is
needed to accomplish this task and it
should only take a few minutes.
12. Assemble the ply tail assembly
pieces together using CA being careful
to keep the assembly square. You can
temporarily place the assembly on the
fuse to check its alignment. Once the
assembly is glued together, place 30
minute epoxy on the fuse surfaces that
will mate with the tail assembly. Use
masking tape to securely position the
assembly onto the fuse.
Installing the Stabilizers
The stabilizers are designed as
removable pieces and their assembly is
detailed in this section. The kit provides
you with laser cut, 1/8” ply stab
alignment supports. The supports
shown in these photos are cardboard.

15
1. Collect the following parts:
EPP stabs, ply root caps, anti-rotation
rod and its plastic sleeves, aluminum
spar and its phenolic sleeves and the
ply stab alignment supports.
2. Center the aluminum spar and anti
rotation rod in the tail assembly and
mark the center for reference. CA short
pieces of the plastic sleeve into the anti-
rotation hole in the tail assembly –this
will center the music wire within the
hole. These short sleeves can extend a
bit toward the fuse centerline.
3. Using a work surface that is flat and
level, level the fuse from forward to back
and from left to right using the cockpit
area as your level reference. If you
opened up the cockpits use a plank of
wood to span the cockpits. If you left
the cockpit’s false floor you can use that
surface. Place wood blocks under the
rear wing saddle area to achieve level.
4. Mark the centerline of the stabilizers’
TE. Place tape on the stabs’ bottom
surface directly under the routed spar
channel (this will keep glue from
seeping through).

16
5. Cut sections of the plastic sleeve to
cover the ends of the anti-rotation rod
where it enters the stab. Apply masking
tape over the ends of the plastic and
phenolic sleeves so that no glue can
seep inside, then place the stabs’ ply
end caps over the other end of the
sleeves. Position the end cap and
sleeves onto the spar and anti-rotation
rod – make sure the sleeves’ ends enter
into the ply cap and stay flush against
the tail assembly.
Note: The ply cap is not symmetrical so
make sure the cap has more material
under the spar than over the spar. The
ply cap gets glued to the stab after the
gluing process described in Step 10.
6. A small tip of the stab’s LE near the
root will need to be removed to fit inside
the tail assembly.
7. Install the stabs and use the ply
templates to support them. The inner
support should be placed near the root
and the outer support is placed about
mid-span. Add spacers under the
templates’ bottom so that the stabs’ TE
centerline is level (the spacer thickness
should be the same under each
template).
Use small weights to help keep the
stabs resting on the curved portion of
the templates. You can tack glue the
templates to the stabs to keep them
from moving during the following
adjustments.

17
8. Tape a straight piece of wood to both
stabs’ TE (the supplied ½” x 1” x 48
balsa works well). This is important as
these edges need to be aligned for
proper elevator movement.
9. Using a string or ruler, measure the
distance from the centerline of the fuse
to the stabs’ LE tip on booth sides. You
want the same distance on each side.
We inserted a round toothpick into the
fuse at its centerline in front of the
cockpit and used a 4’ straight edge.
To achieve equal distances, you can
shift the stabs slightly due to the play in
the spar channels. You can enlarge the
channels if necessary to get more
movement. The important thing is to
adjust the stabs together so their trailing
edges remain aligned. If, after your
adjustments, there is a gap between the
stab cap and the tail assembly this can
be filled with balsa later. You can
temporarily insert a wedge (screw driver
shown on the next page) in the gap to
maintain the adjustment during gluing.
Now that you know your adjustments, if
any, you can properly align the stabs.
You should make some final checks
before the gluing process begins.
Perform the following checks.
*Make sure sleeves are pushed into the
stab cap.
*Stab TE centerlines are level
*Fuse is level
*Stab tips are equal distances from fuse
centerline reference.
*Stabs are sitting flush against
templates
10. The best glue for securing the stab
to the sleeves is a polyurethane glue
like Gorilla Glue® or Elmer’s Ultimate
Glue® because of their expanding
nature. You can also choose to use 30
minute epoxy.

18
Separate the stab from the tail assembly
so that you can add glue to the bottom
of the channel. Note: If you use
expanding glue be careful not to use too
much glue and remember that you will
need to watch the glue as it cures
(about 1 hour) and remove excess glue
that rises above the channel.
Reposition the stab in place and begin
rechecking alignment (see check list
above). Remember to add the TE wood
piece to help keep the stabs aligned.
Use more weights to help keep the stab
in place. If the expanding glue is
pushing the spar out of the channel,
place a small block of balsa on top of
the spar sleeve and place a weight on
the balsa block. Don’t worry about
cleaning up every last bit of glue that
runs out of the channels as you can
remove it later.
If, after the expanding glue cures, there
are any areas that need more glue you
can add some epoxy to those areas.
11. With the stabs still in position, use a
dremel tool or sanding block to remove
any excess glue that is above the
channels. Later you will add some filler
so don’t worry about removing a little of
the stab in the process.
12. Apply CA between the stab and its
cap to secure the cap. Later, when you
remove the stab, you can apply CA to
the bottom in a similar way. You’ll leave
the stabs in position until after the next
step.
13. Place a mark where the center of
the spar is located about 4” out from the
stab’s root. At the mark, drill a 7/16”
hole all the way through the sleeve, spar
and stab. Keeping the stab installed,

19
now tap the aluminum spar (both top
and bottom holes) with a 6-32 tap.
Once tapped, temporarily thread a 6-32
bolt in the spar from the top making sure
the bolt is threaded into both the top and
bottom holes of the spar. Now mark,
drill and tap the other stab.
14. If you needed to adjust one or both
stabs away from the tail assembly
during the alignment and spar sleeve
gluing process, use some scrap balsa to
fill the gap between the cap and the tail
assembly. Glue the balsa blocks in
place - you can trim these pieces later.
15. Remove the stabs from the tail
assembly. Sand the spar at the drill
hole locations so that the spar can pass
through the tail assembly easily. You
can now add some CA to the bottom
stab/cap joint.
16. Remove the tape from the bottom of
the stab. Draw a one inch square
around the drilled hole locations on the
bottom of the stab.
Use a dremel tool or other means to
remove foam from within this one inch
square to a point where the spar sleeve
is just visible – do not damage the spar
sleeve. Try to make this cavity’s bottom
surface as level as possible.

20
Temporarily thread the stab retaining
bolt through the stab from the top so
that it protrudes into the cavity you just
made. Center a one inch square piece
of 1/8” thick ply over the cavity and
press it down onto the bolt so that a light
impression is left where the bolt is. Drill
a 5/32” hole in the ply at the impression.
Apply CA to secure the ply in the cavity
with the bolt centered in the drilled hole.
To secure the stab from here on out,
you will insert the bolt from the bottom
surface.
17. The stab’s hinge locations will
require balsa blocks to provide for a
solid mounting of the Robart® Point
Hinges (you will be doing this task for all
other hinge locations too). Start by
marking the hinge locations on the
stab’s TE. The scale placement of the
hinges are at approximately 4”, 7.5” and
14” from the root.
Next, center a one inch square balsa
block at the hinge location on the stab’s
upper surface, then trace its outline on
the stab. Use an X-acto knife to cut out
the foam. Using CA, glue the balsa
blocks into the stab.
Tip: Level either the top or bottom
surface of the block even with the stab –
that way you only have to sand one
side.
Sand down the protruding block side
even with the stab.
18. Cut out the stab’s tip shape
template from Appendix A at the end of
this manual. Tape the stab to its EPP
middle strip (the scrap foam from
between the stab and the elevator) and
the EPP elevator.

21
Trace the curved, outer edge from the
template onto the stab and elevator, and
then cut along this line.
Draw a centerline on the tip end of the
stab/elevator as well as a line about ½”
in from the cut edge, top and bottom.
This is the line where the rounded tip
edge would begin to form.
The trailing edge of the elevator does
not need much shaping.
Using a sanding block (heavy grit)
create a rounded edge from the top and
bottom lines out to the tip centerline.
The shape of the foam tip will be
covered by the molded, polycarbonate
skin so getting the exact curvature is not
too critical. After the next step, you can
test the fit of the molded tips over the
foam and further sand the foam for its
best fit. With that said, it is better to
leave the tips more blunt now than too
tapered. It is usually fine if there is a
little air space between the foam and
plastic, but you should strive for the
foam to fill the molded piece.
19. Cut the outer edge of the elevator’s
counter balance tip (CBT) from the
template.
Position the CBT template onto the
stab/elevator and mark the diagonal line
of the CBT onto the stab – then cut it off.
Do the same for the other stab. Mark
each CBT left or right.
20. Remove the tape, middle strip and
elevator from the stab. Cut a piece of
1”x1/8” balsa as long as the stab’s TE.
Epoxy the balsa TE onto the stab and
secure with tape.
Table of contents
Popular Toy manuals by other brands

Radio Shack
Radio Shack 60-2809 user manual

Mattel
Mattel Barbie T9560 instructions

Hobby
Hobby 4 CH BlitzRCWorks Sky Surfer RC Trainer... user manual

Learning Resources
Learning Resources Pizza Fraction Fun manual

Enabling Devices
Enabling Devices Ring Around Bells Switch Toy user guide

Eduard
Eduard Bf 109K-4 manual

Bachmann
Bachmann On30 Davenport Gears Instructions to Repair

Vinh Quang
Vinh Quang Cap 10 90 Class instruction manual

The Great American Train Company
The Great American Train Company Pioneer Mogul 2-6-0 owner's manual

AMATI
AMATI Bismarck manual

AeroWorks
AeroWorks EXTRA 330L Assembly manual

Heli-Max
Heli-Max BLACK HAWK instruction manual