manuals.online logo
Brands
  1. Home
  2. •
  3. Brands
  4. •
  5. Viessmann
  6. •
  7. Toy
  8. •
  9. Viessmann Vollmer 43545 User guide

Viessmann Vollmer 43545 User guide

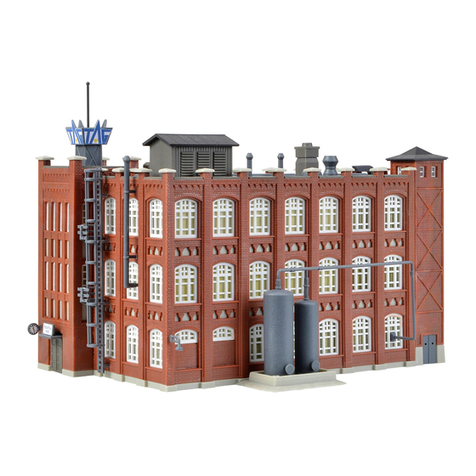
55536 55532 2 55534 2 20927 2 55533 2 13229 4 20911 2 13602 13228 2 55531 55523 2 55528 2 55535 3 13235 4 20909 2 55525 2 55527 4 20914 2 20908 2 55530 2 20919 20904 2 55524 2 55526 2 20925 2 55529 4 Spr.-Nr. Teile-Nr. StückSpr.-Nr. Teile-Nr. StückSpr.-Nr. Teile-Nr. StückDekopapier: 139474Stand 03/sw09/2020SzT139477Montageanleitung435451H0 Platform hall with LED lighting, functional kitH0 Bahnsteighalle mit LED-Beleuchtung, FunktionsbausatzMounting instructionBlumen-flockenFlower flackesFlocons des fleurs1381104. Anschluss der LED-Beleuchtung . . . . . . 53. Einbau der LED-Beleuchtung . . . . . . . . 52. Montage.........................21. Inhalt ...........................15. Beleuchtungs-Tipp ...............102. Mounting . . . . . . . . . . . . . . . . . . . . . . . . 21. Contents ........................13. LED lighting............5Mounting of 4. Connection of LED lighting..........55. Illumination-tip ...................102. Montage.........................23. Montage des LED .................51. Contenu .........................14. Connexion des LED................55. Tuyau d'éclairage . . . . . . . . . . . . . . . . 10
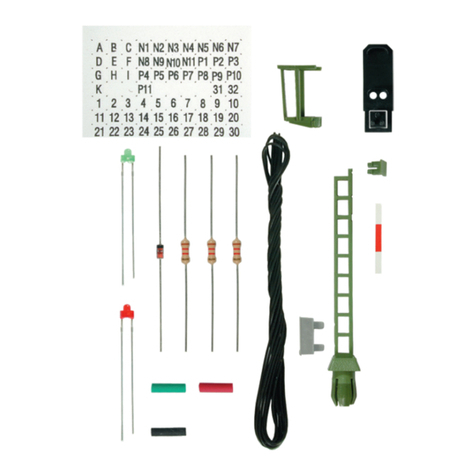
LED-Streifen mit 6 LEDs LED strip with 6 LEDs2. Montage............................................21. Inhalt ..............................................14. Anschluss des LED-Streifens . . . . . . . . . . . . . . . . . . . . . . . . . . . . 43. Einbau des LED-Streifens. . . . . . . . . . . . . . . . . . . . . . . . . . . . . . . 32. Mounting ...........................................21. Contents ............................................13. LED strip..................................3Mounting of 4. Connection of LED strip................................41. Inhalt/ContentsDEENBitte legen Sie die Einzelteile nach Buchstabengruppen zusammen und beginnen Sie dann mit dem Zusammenbau.entsprechend der ZeichnungenArrange the individual parts by letter groups, and then begin assembling in accordance with the drawings.Entsorgen Sie dieses Produkt nicht über den (unsortierten) Hausmüll, sondern führen Sie es der Wiederverwertung zu.Do not dispose this product through (unsorted) general trash, but supply it to the recycling.DEENWir verwenden den recyclefähigen Kunststoff Polystyrol.We use recyclable polystyrene.Congratulations on your purchase of this Vollmer product. Our high quality kits will bring you much joy.Wir gratulieren Ihnen zum Erwerb dieses hochwertigen Vollmer-Bausatzes. Die hohe Passgenauigkeit unserer Bausätze wird Ihnen viel Freude bereiten.Änderungen vorbehalten. Keine Haftung für Druckfehler und Irrtümer.Diverse Kleber für die Bausätze finden Sie im Vollmer Sortiment.No liability for mistakes and printing errors.Subject to change without prior notice. You will find various glues for the kits in the Vollmer product range.Made in Europe37,2 cm
14 cm4,5 cm
Von vorne e inkleben!FensteraufsätzeBitte zuerst2 139477/435452. Montage Mounting ACBDEBlumenflockenFlower flackesFlocons des fleurs138110Möchten Sie das Modell von innen beleuchten, verwenden Sie bitte die Viessmann Art.-Nr. 6832 Hausbeleuchtungssockel mit Glühlampe E5,5, klar. Möchten Sie die Fenster einzeln und individuell beleuchten, so empfehlen wir das Startset Etageninnenbeleuchtung Art.-Nr. 6045 von Viessmann.Siehe Produkthinweis auf der letzten Seite.Tip: For detailed illumination of each window and room, please use Viessmann starter floor interior lighting item-No. 6045.Tipp: See product information on the last page.If you wish to illuminate the complete model from inside, please use Viessmann item-No. 6832 House illumination socket with bulb E5,5, clear.For detailed illumination of each window and room, please use Viessmann starter floor interior lighting item-No. 6045.Möchten Sie die Fenster einzeln und individuell beleuchten, so empfehlen wir das Startset Etageninnenbeleuchtung Art.-Nr. 6045 von Viessmann.Siehe Produkthinweis auf der letzten Seite.See product information on the last page.Tip: Tipp: Tipp: Tip: Möchten Sie das Modell von innen beleuchten, verwenden Sie bitte die Viessmann Art.-Nr. 6832 Hausbeleuchtungssockel mit Glühlampe E5,5, klar. If you wish to illuminate the complete model from inside, please use Viessmann item-No. 6832 House illumination socket with bulb E5,5, clear.Tipp: Tip: For detailed illumination of each window and room, please use Viessmann item-No. 6005 House illumination start-set.See product information on the last page.If you wish to illuminate the complete model from inside, please use Viessmann item-No. 6832 House illumination socket with bulb E5,5, clear.Möchten Sie die Fenster einzeln und individuell beleuchten, so empfehlen wir das Hausbeleuchtungs-Startset Art.-Nr. 6005 von Viessmann.Siehe Produkthinweis auf der letzten Seite.Möchten Sie das Modell von innen beleuchten, verwenden Sie bitte die Viessmann Art.-Nr. 6832 Hausbeleuchtungssockel mit Glühlampe E5,5, klar.2x2x2x2x2xCEfahrtAkunfnbAtAfnuknrhafbAtt
555305553413235132282090455539209272x 555295552355546209145554620908555442x 555452090955540555455554413235209112x 5554220925
Von vorne e inkleben!FensteraufsätzeBitte zuerst139477/43545 3FGBlumenflockenFlower flackesFlocons des fleurs138110Tipp: Möchten Sie das Modell von innen beleuchten, verwenden Sie bitte die Viessmann Art.-Nr. 6832 Hausbeleuchtungssockel mit Glühlampe E5,5, klar. Möchten Sie die Fenster einzeln und individuell beleuchten, so empfehlen wir das Startset Etageninnenbeleuchtung Art.-Nr. 6045 von Viessmann.Siehe Produkthinweis auf der letzten Seite.Tip: For detailed illumination of each window and room, please use Viessmann starter floor interior lighting item-No. 6045.See product information on the last page.If you wish to illuminate the complete model from inside, please use Viessmann item-No. 6832 House illumination socket with bulb E5,5, clear.Tipp: Tip: Möchten Sie die Fenster einzeln und individuell beleuchten, so empfehlen wir das Startset Etageninnenbeleuchtung Art.-Nr. 6045 von Viessmann.Siehe Produkthinweis auf der letzten Seite.For detailed illumination of each window and room, please use Viessmann starter floor interior lighting item-No. 6045.See product information on the last page.Tip: If you wish to illuminate the complete model from inside, please use Viessmann item-No. 6832 House illumination socket with bulb E5,5, clear.Möchten Sie das Modell von innen beleuchten, verwenden Sie bitte die Viessmann Art.-Nr. 6832 Hausbeleuchtungssockel mit Glühlampe E5,5, klar. Tipp: For detailed illumination of each window and room, please use Viessmann item-No. 6005 House illumination start-set.See product information on the last page.Möchten Sie das Modell von innen beleuchten, verwenden Sie bitte die Viessmann Art.-Nr. 6832 Hausbeleuchtungssockel mit Glühlampe E5,5, klar.Tipp: Möchten Sie die Fenster einzeln und individuell beleuchten, so empfehlen wir das Hausbeleuchtungs-Startset Art.-Nr. 6005 von Viessmann.Siehe Produkthinweis auf der letzten Seite.Tip: If you wish to illuminate the complete model from inside, please use Viessmann item-No. 6832 House illumination socket with bulb E5,5, clear.3. Einbau des LED-Streifens LED stripMounting of LED-Streifen mit 6 LEDs LED strip with 6 LEDsDAADDDuknAAafbfnttrhtfkuAnnbfahrtA
1322913229555241322913229555243x 55535AtkunfAnftnuknAabrfatAbftrh
2x 555282x 55525
Von vorne e inkleben!FensteraufsätzeBitte zuerst4 139477/435452. Montage Mounting MontageHABlumenflockenFlower flackesFlocons des fleurs138110For detailed illumination of each window and room, please use Viessmann starter floor interior lighting item-No. 6045.Möchten Sie das Modell von innen beleuchten, verwenden Sie bitte die Viessmann Art.-Nr. 6832 Hausbeleuchtungssockel mit Glühlampe E5,5, klar. Möchten Sie die Fenster einzeln und individuell beleuchten, so empfehlen wir das Startset Etageninnenbeleuchtung Art.-Nr. 6045 von Viessmann.Tip: Tipp: Siehe Produkthinweis auf der letzten Seite.If you wish to illuminate the complete model from inside, please use Viessmann item-No. 6832 House illumination socket with bulb E5,5, clear.See product information on the last page.Tipp: Möchten Sie die Fenster einzeln und individuell beleuchten, so empfehlen wir das Startset Etageninnenbeleuchtung Art.-Nr. 6045 von Viessmann.Siehe Produkthinweis auf der letzten Seite.Tip: For detailed illumination of each window and room, please use Viessmann starter floor interior lighting item-No. 6045.See product information on the last page.Tip: Tipp: If you wish to illuminate the complete model from inside, please use Viessmann item-No. 6832 House illumination socket with bulb E5,5, clear.Möchten Sie das Modell von innen beleuchten, verwenden Sie bitte die Viessmann Art.-Nr. 6832 Hausbeleuchtungssockel mit Glühlampe E5,5, klar. Tipp: Möchten Sie die Fenster einzeln und individuell beleuchten, so empfehlen wir das Hausbeleuchtungs-Startset Art.-Nr. 6005 von Viessmann.Siehe Produkthinweis auf der letzten Seite.Tip: For detailed illumination of each window and room, please use Viessmann item-No. 6005 House illumination start-set.See product information on the last page.If you wish to illuminate the complete model from inside, please use Viessmann item-No. 6832 House illumination socket with bulb E5,5, clear.Möchten Sie das Modell von innen beleuchten, verwenden Sie bitte die Viessmann Art.-Nr. 6832 Hausbeleuchtungssockel mit Glühlampe E5,5, klar.Tipp:Viessmann Art. 5205Verteilerleiste mit PowermodulVerhindert Flackern bei Wechselstrom. Annähernd doppelte Helligkeit gegen-über reinem Wechselstrombetrieb.
gelb/yellow
braun/brown
braun brown
ViessmannAvoids flickering with AC power supply. Approx. double brightness of the lamps.Tip:Viessmann item-No. 5205Power module with distribution strip
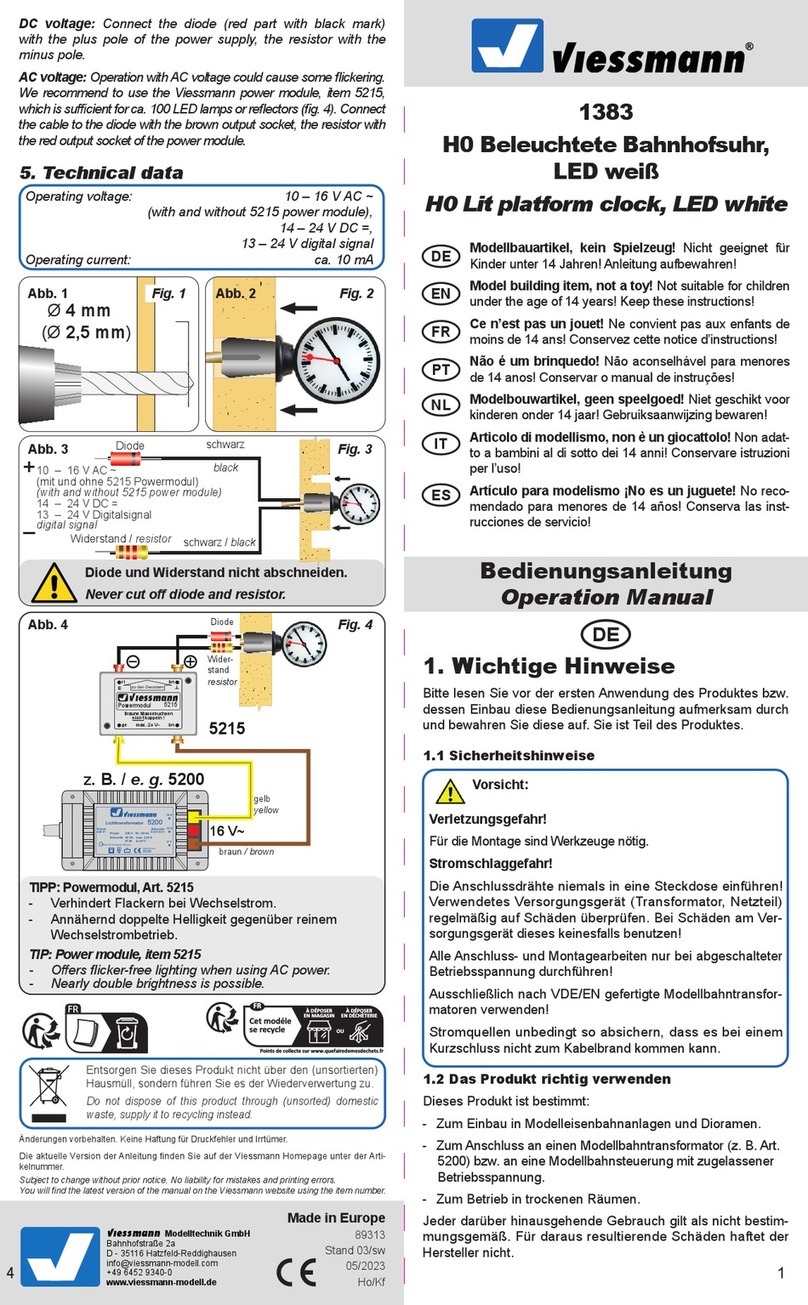
3. Einbau der LED-Streifen LED stripMounting of Montage des bande de LED Am Einbauort ein Loch (Ø 2,5 mm) zur Montage bohren (Abb. 1).Drill a hole (Ø 2,5 mm) at the mounting place (fig. 1).4. Anschluss des LED-Streifens4. C L striponnection ofEDAbb. 2Fig. 2
z. B./e. g. 5550z. B./e. g. 5215
z. B./e. g. 5200
schwarzblackschwarzblackgelbyellowgelbyellowLED-Streifen mit 6 LEDs LED strip with 6 LEDsBBnAnkuhafbAtfrt
2x 5552755532555265552755527555265553355532555332,5 mmAbb. 1Fig. 1PowermodulTipp:Viessmann Art. 5215 Verhindert Flackern bei Wechselstrom. Annähernd doppelte Helligkeit gegenüber reinem Wechselstrombetrieb.Viessmann item 5215 Power moduleTip:Avoids flickering with AC power supply. Approx. double brightness of the lamps.Plug-in rail for interiorlighting, 12-foldSteck-Verteilerleiste12-polig, für BeleuchtungTipp:Viessmann Art. 6049gelbyellowschwarzblack Achtung:14 – 24 V DC = (Mit und ohne Viessmann Powermodul Art. 5215/5205) matoren (z. B. Viessmann Art. 5200) verwenden!13 – 24 V DigitalsignalBetriebsspannung: 10 – 16 V AC ~ Ausschließlich nach VDE/EN-gefertigte Modellbahntransfor-Widerstand und Diode an den Enden der Anschlussdrähte sind für die Funktion erforderlich. Keinesfalls entfernen! Widerstand nicht mit Isolationsmaterial umhüllen, da sonst keine ausreichende Kühlung möglich ist!Alle Anschluss- und Montagearbeiten nur bei abgeschalteter Betriebsspannung durchführen!Stromquellen unbedingt so absichern, dass es bei einem Kurzschluss nicht zum Kabelbrand kommen kann. Only use VDE/EN tested special model train transformers (with and without Viessmann power module 5215/5205)14 – 24 V DC = Caution:Make sure that the power supply is switched off when you mount the device and connect the cables!13 – 24 V Digital signalPower supply: 10 – 16 V AC ~ (e. g. Viessmann item 5200) for the power supply!The power sources must be protected to prevent the risk of burning cables.Resistor and diode at the cables are needed for proper function of the lamp. Never cut them off! Never cover resistor or diode with insulation material, because they have to be cooled by surrounding air!Widerstand mit dem Minus-Pol.Schließen Sie den LED-Streifen an den Lichtausgang eines Modellbahntransformators (z. B. Viessmann Art. 5200) an. Gleichspannung: Verbinden Sie die Diode (rotes Bauteil mitschwarzer Markierung) mit dem Plus-Pol des Netzteils, denWechselspannung: Beim Betrieb mit Wechselspannung kann es zu leichtem Flackern kommen. Daher empfehlen wir den Betrieb mit der Verteilerleiste mit Powermodul vonViessmann, Art. 5205 (Abb. 1). Die oben auf dem Modul gut zugängliche Steck-Verteiler- leiste ermöglicht den bequemen lötfreien Anschluss von 12 Stromverbrauchern durch einfaches Einstecken ihrer Wider-stände und Dioden in die Buchsen der Leiste.Zum einfachen Ein- und Ausschalten der Beleuchtung ver-Stecken Sie das Anschlusskabel mit der Diode in eine An-schlussbuchse der braunen Anschlussleiste, das Anschluss-kabel mit Widerstand in eine Anschlussbuchse der gelben Anschlussleiste auf dem Powermodul.wenden Sie einen Schalter (z. B. Viessmann Art. 5550).Connect the LED-strip to the light output of a model traintransformer (e. g. Viessmann item 5200). Therefore, we recommend to use the Viessmann powermodule with distribution strip item 5205 (fig. 1). Plug the connection cable with the diode into an output socket of the brown connection rail, the connection cable with the resistor into an output socket of the yellow connection rail on top of the power module. For easy on-off switching of the lighting use an on-off switchDC voltage: Connect the diode (red part with black marking) with the positive pole of the transformer, the resistor with the negative pole.The distribution strip on the top allows a comfortable connec-tion of 12 loads without soldering, just by plugging the leads of the resistors and the diodes into the sockets of the distribution strip.AC voltage: While operation with AC voltage it may flicker slightly.(e. g. Viessmann item 5550).

Other Viessmann Toy manuals

Viessmann 1397 User manual

Viessmann

Viessmann 1397 User manual

Viessmann kibri 36829 User guide

Viessmann

Viessmann kibri 36829 User guide

Viessmann eMotion Series User manual

Viessmann

Viessmann eMotion Series User manual

Viessmann 5052 User manual

Viessmann

Viessmann 5052 User manual

Viessmann 4027 User manual

Viessmann

Viessmann 4027 User manual

Viessmann 4502 User manual

Viessmann

Viessmann 4502 User manual

Viessmann 5547 User manual

Viessmann

Viessmann 5547 User manual

Viessmann 6049 User manual

Viessmann

Viessmann 6049 User manual

Viessmann 6337 User manual

Viessmann

Viessmann 6337 User manual

Viessmann Vollmer 45616 User guide

Viessmann

Viessmann Vollmer 45616 User guide

Viessmann 4175 User manual

Viessmann

Viessmann 4175 User manual

Viessmann 2680 User manual

Viessmann

Viessmann 2680 User manual

Viessmann 5098 User manual

Viessmann

Viessmann 5098 User manual

Viessmann 5023 User manual

Viessmann

Viessmann 5023 User manual

Viessmann H0 5100 User manual

Viessmann

Viessmann H0 5100 User manual

Viessmann 6305 User manual

Viessmann

Viessmann 6305 User manual

Viessmann eMotion 1542 User manual

Viessmann

Viessmann eMotion 1542 User manual

Viessmann 4172 User manual

Viessmann

Viessmann 4172 User manual

Viessmann 6333 User manual

Viessmann

Viessmann 6333 User manual

Viessmann 26091 User manual

Viessmann

Viessmann 26091 User manual

Viessmann Vollmer 47709 User guide

Viessmann

Viessmann Vollmer 47709 User guide

Viessmann 5085 User manual

Viessmann

Viessmann 5085 User manual

Viessmann Vollmer 47749 User guide

Viessmann

Viessmann Vollmer 47749 User guide

Viessmann 4515 User manual

Viessmann

Viessmann 4515 User manual

Popular Toy manuals by other brands

Fisher-Price Imaginex 78331 Assembly instructions

Fisher-Price

Fisher-Price Imaginex 78331 Assembly instructions

roco 70051 operating manual

roco

roco 70051 operating manual

Lionel FA Diesel Locomotive owner's manual

Lionel

Lionel FA Diesel Locomotive owner's manual

HOMCOM 350-081 manual

HOMCOM

HOMCOM 350-081 manual

REVELL Grumman F-14A Black Tomcat Assembly manual

REVELL

REVELL Grumman F-14A Black Tomcat Assembly manual

Chicco TEDDY COUNT-WITH-ME manual

Chicco

Chicco TEDDY COUNT-WITH-ME manual

THE WORLD MODELS Extra 300 EP instruction manual

THE WORLD MODELS

THE WORLD MODELS Extra 300 EP instruction manual

QuickWorldWide Little Sweetie 10 Pro Assembly & Maintenance Manual

QuickWorldWide

QuickWorldWide Little Sweetie 10 Pro Assembly & Maintenance Manual

Eduard Tempest Mk.II landing flaps Assembly instructions

Eduard

Eduard Tempest Mk.II landing flaps Assembly instructions

WowWee Chippies user manual

WowWee

WowWee Chippies user manual

Mattel Mega Bloks Hot Wheels Boneshaker manual

Mattel

Mattel Mega Bloks Hot Wheels Boneshaker manual

Hasbro GIJoe Hurricane instructions

Hasbro

Hasbro GIJoe Hurricane instructions

Rebel Toys ZAB0117G user manual

Rebel Toys

Rebel Toys ZAB0117G user manual

Eduard Weekend Edition F6F-3 Assembly instructions

Eduard

Eduard Weekend Edition F6F-3 Assembly instructions

Activision Wii SkylanDers SWAP Force Instruction booklet

Activision

Activision Wii SkylanDers SWAP Force Instruction booklet

Fisher-Price BFH85 manual

Fisher-Price

Fisher-Price BFH85 manual

Eduard U-boat IXC part 1 Assembly instructions

Eduard

Eduard U-boat IXC part 1 Assembly instructions

marklin 29200 user manual

marklin

marklin 29200 user manual

manuals.online logo
manuals.online logoBrands
  • About & Mission
  • Contact us
  • Privacy Policy
  • Terms and Conditions

Copyright 2025 Manuals.Online. All Rights Reserved.