pyrex PY-6910 User manual

User’s manual • Gebrauchsanleitung • Manual de instrucciones
PRESSURE COOKER • SCHNELLKOCHTOPF
OLLA A PRESIÓN
Pyrex is a trademark of Corning Incorporated
used under license by Bergner Europe.
Customer service phone / Kundendiensttelefon: 945.155.032
In case of difculty using the product, contact us at the following email /
Bei Schwierigkeiten bei der Verwendung Kontaktieren Sie uns unter der folgenden E-Mail:
INDUCTION
Induktion
Inducción
GAS
Gas
Gas
CERAMIC
Keramik
Cerámica
ELECTRIC
Elektrisch
Eléctrico

EN EN
- 01 -
CATALOGUE
I The structure drawing and the model of products---
II Attention points of operation-----------------------
III Safety of products--------------------------------------
IV Special characters--------------------------------------
V How to use------------------------------------------
VI Trouble shooting------------------------------------
VII Maintenance-----------------------------------------
VIII Questions and answers-----------------------------
IX Steps and times for cooking---------------------------
Customer service phone: 945.155.032
- 02 -
This series products are
designed and made on the
basis of the standard of
EN12778:2002.
Specifications of Grace series stainless steel pressure cooker
Model PY-6910 PY-6910 PY-6910
Ø22cm Ø22cm Ø22cm
4L 6L
100kPa
300kPa
7L
Caliber
Capacity
PS
Working
Pressure
Fig.1
Safety valve
Pressure Limiting valve
Exhaust button Face plate
Push button Upper handle
Lid
Safety window
Tight nut Open-preventing valve
Sealing ring
Helper Handle
Body
Complex bottom
Lower Handle
I. The structure drawing and the model of products
02
03-05
06
07
08-10
10-11
11-13
13-14
15

EN EN
Ⅱ. Attention points of operation
- 03 -
Use only after read and understood all about the manual.
Do not put the pressure cooker in the heated oven.
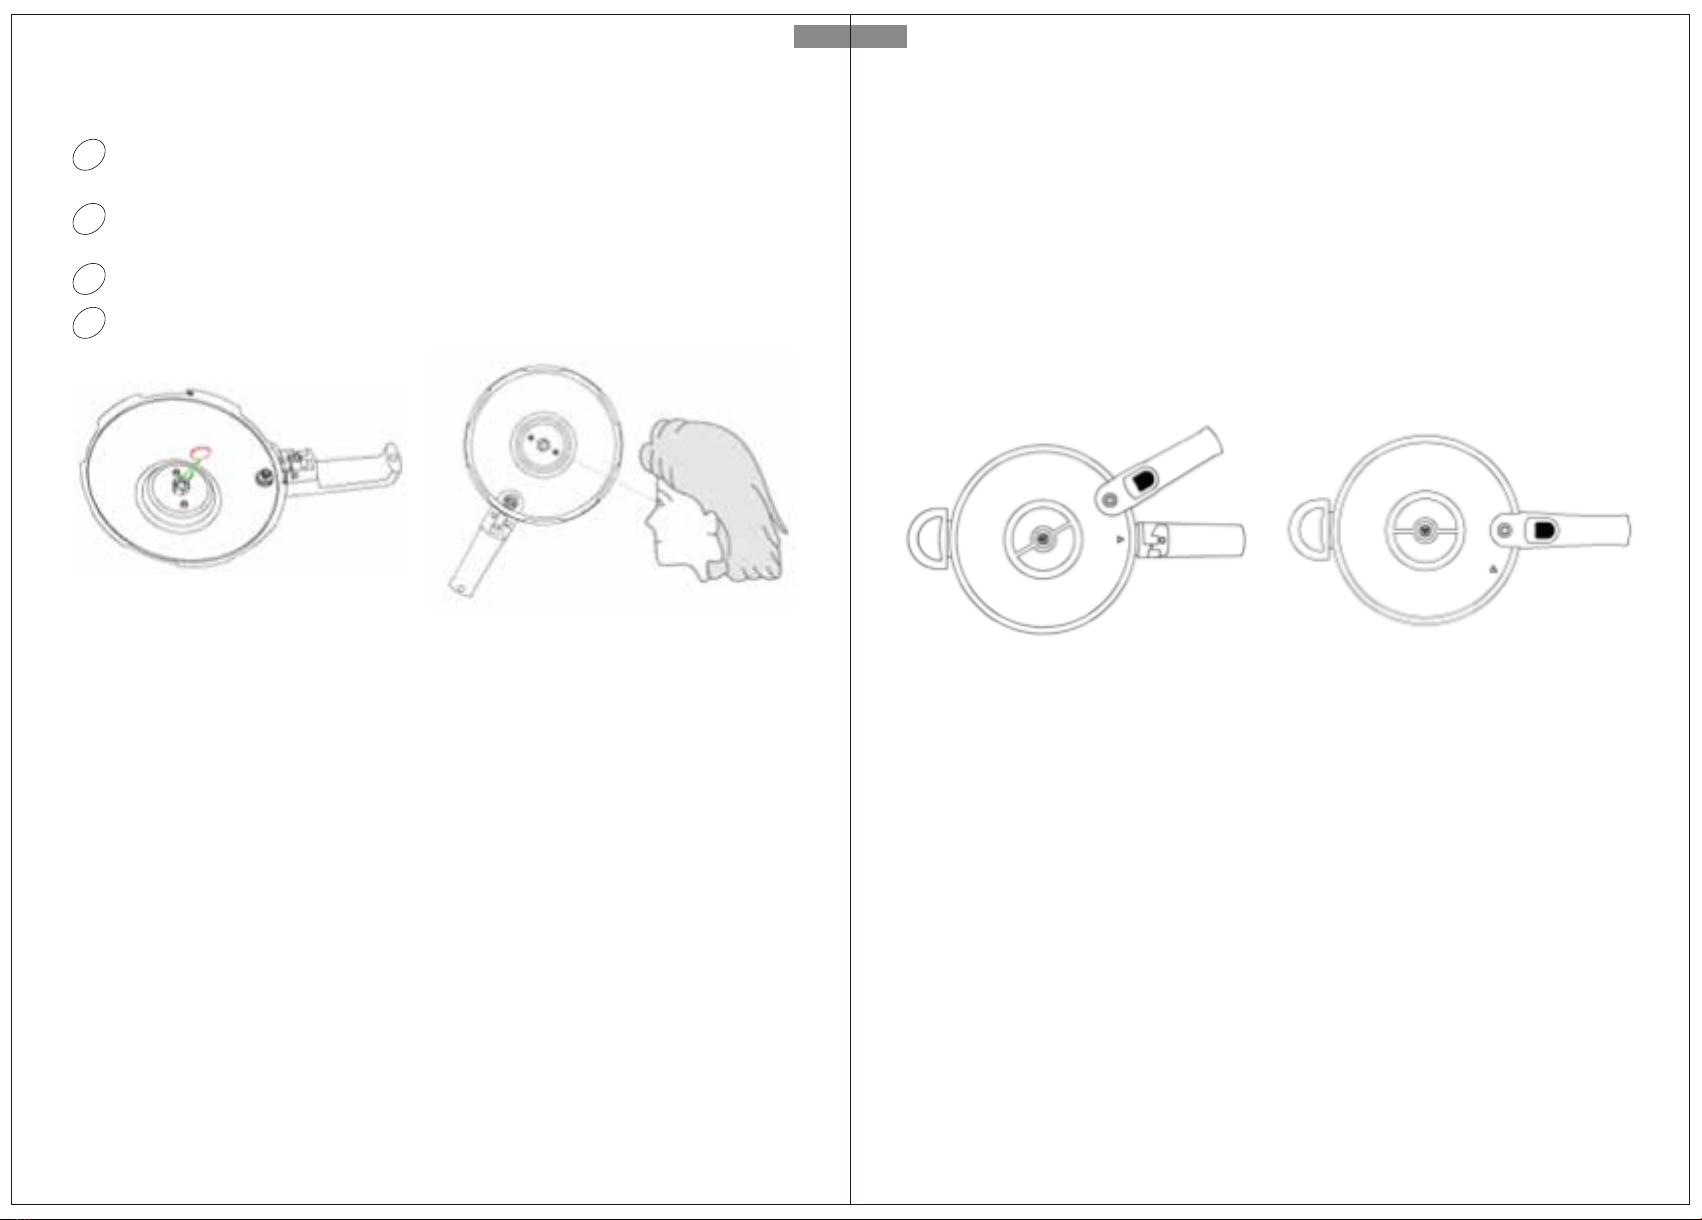
Be very careful when moving the cooker with pressure. Don’t touch the
surface of metal, use handle and take protection if necessary.
Pressure cooker only can be used on purpose as per manual, not for any
other purpose.
Because cooker cooks food under the pressure, it can lead burn if use improper-
ly. Make the cooker close correctly before using. (See user’s manual).
Don’t compel to open cooker. Make sure to open it after pressure release.
(See user’s manual).
Don’t dry heating, it will damage cooker badly.
Less than 2/3 of the cooker’s capacity for cooking food. Less than 1/4 of the
cooker’s capacity for cooking expansive food such as rice or dry vegetable, etc.
This pressure cooker is suitable for gas, electric, induction and ceramic
stove.
Cooking food with skin (such as oxtongue), it will be expansive because of
pressure after cooking. Don’t sting it to avoid scald.
Cooking for soft food, shake cooker slightly before open to avoid spray out
food.
Check if the pressure valve is blocked before using, see user’s manual.
Don’t fry food under the pressure.
Don’t deviate from maintenance specified in manual. Don’t change any
safety system by yourself.
Only use matching spare parts provided by manufacturer, exceptionally, use
body and lid as per manufacturer’s direction.
Please keep this manual properly.
( 01 ).
( 02 ).
( 03 ).
( 04 ).
( 05 ).
( 06 ).
( 07 ).
( 08 ).
( 09 ).
( 10 ).
( 11 ).
( 12 ).
( 13 ).
( 14 ).
( 15 ).
( 16 ).
( 17 ).
Keeping in mind, the user will take the responsibility when an accident
occurs due to the operation not follows the manual.
It needs person to watch when using, adjusting the fire in time after pressure
regulator releasing, keeping the pressure under the limited pressure for a while.
01
02
03
04
05
06
07
08
09
10
11
- 04 -
The pressure cooker is a family cookware and can not be used for any other
purpose. Juveniles and persons who don’t know how to use it are suggested
not to use. Must have person watching and keep away from children when
using the pressure cooker.
Under the pressure limit, the boiling point of the liquid is below 120ºC (250F).
Please operate carefully because a lot of steam and soup juice will come out
when boiling and especially when the pressure reducing fast.
Do not cook expansive food such as apple jam, seaweed, oatmeal, etc. to
avoid blocking of the steam-releasing hole.
Keep the pressure-limiting valve, Safely open-preventing valve, sealing ring,
block-preventing cap, lid and cooker body clean and out of nastiness and
greasiness before and after using.
Do not point the safety window to the user or to the area person often walk
about.
If steam sprays out from safely open-preventing valve , or the sealing ring is
squeezed out from the safety window, the power shall be shut off immedi-
ately. The problem must be found out and solved before use again.
Be very carefully when you moving the cooker with pressure. Carry it
horizontally and lay down gently. Do not bump.
Do not open the cooker when there is pressure inside. Do not cook in case
of the lid is not closed well.
Do not store salt, soy sauce, alkali, sugar, vinegar, or steam water inside the
cooker for a long time. Clean and dry it every time after use.
Do not heat water off or dry heating. Not use for frying or baking food.
The pressure cooker should be used on a steady oven. Do not put the pressure
cooker on electric oven that has
a bigger plate’s diameter than the
cooker’s bottom. When cooking on
a gas oven, the fire shall not reach
the cooker’s wall. The pressure
cooker is applicable to 1.5KW oven.
(Fig.2) Fig.2

EN EN
- 05 -
12
When cooking jelly-liked food with pressure cooker, shake lightly for several
times before open to avoid food spay out.
It is prohibited to put anything on the pressure-limiting valve.(Fig.5)
13
14
Allowed volume of food inside the pressure cooker.
• Less than 2/3 of the cooker height for non-expansive food such as meat,
vegetable, etc.(Fig.3)
• Less than 1/4 of the cooker height for expansive food such as rice, bean,
etc.(Fig.4)
Fig.3 Fig.4
2/3
1/4
Fig.5
Ⅲ. Safety of products
( 01 ).
- 06 -
01
The block-preventing cap and dredging
needle are to be used for preventing
blocking of the pressure-limiting valve.
02
The open-preventing device ensures the lid
to be closed properly as well as safely.
03
The Fourth -degree pressure release device
ensures using safely. Fig.6
• We designed and equipped multi-device for safety.(Fig.6)
Druckregelventil: Wenn der Innendruck den vorgesehenen Betriebsdruck
erreicht, tritt Dampf stabil aus dem Ventil.
( 02 ). Entlassungsventil: Bei funktionslosem Druckregelventil wird das
Entlassungsventil Topfinnendruck reduzieren.
( 03 ). Verriegelungsstift: Wenn der Innendruck 4 kPa erreicht hat, steigt der
Verriegelungsstift, was die Öffnung des Deckels verhindert. Dabei ist die
Rotkappe des Verriegelungsstiftes sichtbar.
( 05 ). Dichtungsring: Bei funktionslosem Druckregels- und Entlassungsventil wird
der Dichtungsring aus dem Schlitz gepresst, um Topfinnendruck zu reduzie-
ren.
( 04 ). Schiebeschalter: Den Schiebeschalter kann man erst nach Senken des
Verriegelungsstifts bewegen, um den Topf zu öffnen.
Position for releasing the pressure.

EN EN
01
The composed bottom of the cooker is made by friction pressure machine,
which makes it strong and reliable, and without any chink.
02
The diameter of composed bottom is bigger than common products, which
makes cooker absorb heat faster.
03
Do not open the lid when the open-preventing valve not fall down .
04
The tight nut can be fixed by coin after long time use.
Ⅳ. Special characters
- 07 -
Fig.7 Fig.8
Make sure that the safely open-preventing valve hole and the steam-releasing
valve hole is not obstructed every time before using. If any of them is obstructed,
clear away the dirt with the dredging needle.
• Please clean the pressure cooker before first time using.
• Stand by and watching while cooking.
• Do not touch the cooker’s metal surface with hands or body.
Cook carefully and use the handles to avoid a burn.
1. Making sure that the steam-releasing hole is unobstructed.
Align the mark “O” on the lid to the mark “O” on the lower handle to close the
cooker properly before heating. (Fig.9)
2. Closing the cooker.
In order to raise the temperature quickly, heat with strong fire till the pressure-limiting
valve begins to work. Pay attention not to using stronger fire than which is enough. It is
normal that a little steam seeps from the safely open-preventing valve after heating for
a while. There should be no steam seeps after the open-preventing valve rises and the
cooker works normally. When the pressure-limiting valve raised and steam comes out
continuously, should use gentle fire and start to count heating time.
3. Heating.
Ⅴ. How to use
Caution: Heating time is from the pressure-limiting
valve starting to work to turning off the fire.
- 08 -
Fig.9

EN EN
Two open ways after cooking.
Natural cold. When heating time is up, turn off the fire and leave it for a while waiting
for the pressure reduced. Take off the lid when the safely open-preventing valve fell
down. The opening procedure is contrary to the closing. Push the opening button
back and make it on estate of opening when you open the lid. Contrarotate upper
handle to align the mark “O” on the lid to and the mark “O” on the lower handle to
open the lid. (Fig.10)
Cooling down quickly. Sometimes it needs cooling down quickly, put the
cooker on a level place and shower the cooker with cold water slowly till the
safety valve falls down. (Fig.11)
• Caution: Avoid water flowing into the cooker through safely
open-preventing valve and the pressure limiting.
• Note: Push the button to open lid, then the button naturally
stays a ready-to-close place. If the button goes back, you
should push it forward. Otherwise the lid won’t be normally
closed.
4. Turning off fire, releasing pressure and opening the cooker.
- 09 -
Fig.10
①
• Don’t push the button till the safety valve falls down.
• When cook pasty state food such as porridge, shake the cooker slightly before
open to reduce the bleb.
②
Fig.11
Ⅵ. Trouble shooting
Please remove the working valve through loose nut by coin until lid temperature
cool down . (Fig.12)
• Note : Do not remove the silicone ring from parts when you put
valve under water .
5.Clean
- 10 -
If any abnormal phenomenon been found, you shall turn off the fire immediately
and take the cooker to a level place and shower the cooker with water slowly to
reduce the temperature and the pressure. Find the reason and solve the problem
with the table below.
Fig.12

EN EN
Ⅶ. Maintenance
1. The cooker should be cleaned before first time using.
• Maintenance of the whole cooker.
• Clear away the dirt.
• Then wipe off the water and keep the cooker dry.
• Do not touch the cooker with other kinds of metal to avoid electrochemical
corrosion.
• Do not store food inside the cooker for a long while.
• Do not scrape the cooker surface with hard material such as metal to avoid abrasion.
- 11 -
Problem
Steam comes out from the
underside of the lid.
Lid cannot fix properly. The shape of the lid changed. Change the lid.
1.Sealing ring is dirty.
1. The releasing hole of pressure
regulator is obstructed. The safety
function of the safety valve is
working.
1. The releasing hole of pressure
regulator is obstructed.
2. The safety valve has lost its
function.
1.Clean the sealing ring,
cooker mouth and lid.
1. Take the cooker away
from the fire. After it is
cool, take down the
pressure regulator and
clean the releasing hole.
1. Take the cooker away
from the fire. After it is
cool, take down the
pressure regulator and
clean the releasing hole.
2. Change safely open-
preventing valve.
2.Change the sealing ring.2.Sealing ring is too old.
Reason Solution
Steam and liquid leaks from the
releasing hole of second safety
valve suddenly.
Steam and liquid leaks from the
safety valve suddenly.
• Remove the sealing ring from the lid. Clear away the dirt from the ring and the lid.
• Check the steam-releasing pipe. If it is blocked, clear away the dirt with the
dredging needle. Then wash and rinse the pipe with water. (Fig.14)
• Clear away the dirt from the safely open-preventing valve with the dredging
needle.
• Wash and rinse with water. The pin of the safely open-preventing valve should be
moved freely.
• If the screw on the safely open-preventing valve is found loose, tighten it right
away.
• If the screw on the pressure-limiting valve is found loose, tighten it right away.
• Wipe off the water and keep the sealing ring dry.
• Put the sealing ring back to the lid. Do not put the lid on when not using the
cooker to avoid the sealing ring being squeezed.
2. Maintenance of the sealing ring(Fig.13)
3. Maintenance of the pressure-limiting valve and the steam-releasing
pipe
4. Maintenance of the safely open-preventing valve
- 12 -
Fig.13 Fig.14
Safety valve
Pressure limited valve
Safety opening-preventing valve

EN EN
Ⅷ. Questions and Answers
Heating the cooker with strong fire till steam sprays out from ressure-limiting
valve.
Change the fire from strong to gentle when steam starts to spray out
from pressure-limiting valve.
Let the pressure inside the cooker reduce naturally.
Too strong fire will make water over-evaporate and cause burnt to the food
inside the cooker.
Q: How to cook good meals and dishes?
A:
Check if the cooking time is controlled properly or not.
Check if the pressure-limiting valve is placed properly or not.
Check if the heating fire is too strong or too weak.
Check if the volume of water and soup is proper or not.
Check if the pressure is normal or not. (Is there any steam spraying out from
pressure-limiting valve or not.)
Q: Cannot do cooking well?
A:
Begin from the upspring of the steam spraying out from safely pressure-limiting
valve.
Q: What is heating time?
A:
The maximum volume of the food to be cooked is below 2/3 of the depth of the
cooker. Beans are below 1/4. Cooking material has nothing to do with cooking
time. Besides, the volume of the cooker has nothing to do with cooking time,
either.
Q: Does different material need different heating time?
A:
Caution: Do not lose small parts such as pressure-limiting valve.
It is suggested to change the sealing ring once in on or two
years according the usage frequency. But it must be changed
immediately if there is any damage or shape changing. Please
contact your dealer or the sales department of our company for
the replacement parts. Never use substitutes.
- 13 -
Cooking under high temperature and high pressure, the amino acid and
saccharides are decomposed by the heat. Thus the food containing rich
protein and carbohydrate may change its color to grey. But it is harmless and
the taste will not change.
After heating, soya-bean milk mixed with sugar sprays out from the safety
valve.
When heating, liquid food mixed with high-thick sugar will spray out from the
safety valve because of the high pressure steam inside the cooker.
When cooking this kind of food, don’t cook with pressure on, which means not
to place the pressure-limiting valve on.
Q: Why the rice color changes to grey?
A:
Put off the fire immediately, take the cooker away from the fire and let it cool
naturally. Don’t pour water onto the cooker.
Q: What to do in case of cooker is heated dry?
A:
- 14 -

EN
- 15 -
IX. Steps and times for cooking
Notes: The time mentioned above is just for reference. The changes
in detail are as per food. Users can adjust it to the suitable time
according to your practical experiences.
Name of
food
Beef 1/2 15-20 Very mushy Cut into
pieces
1/2 8-12 Meat and bone
are separated
Cut into
pieces
1/2 15-20 Meat and bone
are separated Cross-cutting
1/2 8-10 Meat and bone
are separated
1/3 2-4 Well cooked
1/2 8-12 Well cooked
2/3 10-15 Well cooked
2/3 5-8 Well cooked
2/3 6-10 Well cooked
1/4 4-6 Well cooked,
good smell
1/3 10-15 Mushy
1/4 12-16 Well cooked
2/5 15-25 Very mushy
Whole
chicken
Chop
Pig elbow
Chicken
Fish
Mutton
Zong Zi
Old corn
Sweet
potato
Rice
Porridge
Legume
Tremella
Volume of
food+water
State of food
cooked after it is
cooling naturally
Remarks
The time of gentle fire
after steam sprayingout
steadily from the
pressure regulator
Chicken and egg croquettes
Ingredients (4-6 people):
For 6-8 people:
1 chicken thigh
2-3 eggs 1 onion
1 leek 1 carrot
1 spring onion 135 gr. flour
1/2 l. of milk Flour, beaten egg and breadcrumbs
Water Extra virgin olive oil
Salt Nutmeg
Parsley
Instructions
In the pressure cooker with water and salt, cook chicken with leek, onion and carrot. Close the lid
and cook for 20-25 minutes. When chicken is tender, separate from bones and skins and mince.
Boil the eggs in a small saucepan with water and salt for 10 minutes.
Chop the onion and fry in a pan with oil over medium heat. Add flour and stir with a whisk until
lightly browned. Take 1/2 l. of milk and stir well and add the same amount of broth, stirring
constantly. Work the dough over low heat. Sprinkle with grated nutmeg. Add the béchamel sauce
to the chicken together with chopped eggs. Mix well and cook over low heat for 20 to 25 minutes.
Pour batter to a source and allow it to cool down.
Once the dough is cold, cut and shape into croquettes, roll them in flour, then in eggs and
breadcrumbs and fry in a pan with hot oil.
When they are done, remove them from the pan to a plate covered with absorbent (or a tissue) to
drain the excess oil.
Serve
Cake in a pressure cooker
Ingredients (8 people):
1 ½ flour 1 cup sugar
1 egg ½ cup oil
1 cup milk 1 teaspoon of vanilla extract
For the glaze: 200 g of powdered sugar
10 tablespoons of water (about 75 ml)
Instructions
Put eggs in a mixer and mix until smooth and frothy with as much as twice of
its initial volume. Mix the eggs with sugar and oil, slowly add flour alternately
with milk until smooth and lump-free. Add the vanilla essence.
Pour the mixture to a previously greased Bonio biscuit mould.
Place the mould inside of the pressure cooker and put the lid on and leave at high heat for 2 minutes,
then lower the intensity of the fire and let it cook for 40-45 minutes.
Leave it for 10 minutes with fire turned off and check if the cake is baked with a knife, if it comes out
dry, the cake is ready. Remove and unmould on a wire rack.
Preparation of the glaze
Mix water with sugar and stir until completely integrated.
Once we have the icing ready we can cover the cake. Place the cake on a rack. It is important to pour
the glaze at once and at the centre of the cake. Let it cool down at room temperature.
Ready for serving.
- 16 -
EN

EN EN
Cheesecake in a pressure cooker
Ingredients
4 Eggs
4 tablespoons of sugar
1 can of milk powder
200ml cream cheese
Caramel or sugar to caramelize
Black and red berries
Liquid Chocolate
Instructions
Put all the ingredients in a bowl and beat until blended.
Caramelize the pan and put the mixture in it.
Close the mould with a lid or aluminium foil, fitting well into the mould so that no water gets in
during cooking. Put the mould into the pressure cooker with two fingers height of water. Close
the pressure cooker and cook for 15 to 20 minutes.
After a while and once the pressure is reduced in the pot, let it cool in the refrigerator.
Serving
Unmould on a platter.
Decorate with liquid chocolate, black and red berries.
Spanish Flan Recipe
Ingredients (4-6 people):
1/2 l. milk
4 eggs
6 tablespoons of sugar
Water
Instructions
We start with putting 4 tablespoons of sugar in a bowl, beat eggs and whip
well with a whisk. Then we add milk gradually, stirring constantly. When
whipped, set aside for a while.
To make caramel, we add 2 tablespoons of sugar in a pan. Add 2
tablespoons water and let it caramelize. Then you can place the caramel in the bottom of the
pan and add the egg mixture which was set aside.
Add a bit of water in the pressure cooker and add the mixture to it. Cover the pan with aluminium
foil, place the lid on the pot and cook (setting number 2) for 4 minutes after the steam starts
coming out.
Allow the flan to rest for a while.
Take out and serve.
Cauliflower and chicken with béchamel sauce
Ingredients (4-6 people):
1 cauliflower 400 gr. chopped chicken meat
2 slices of bacon 100 gr. cheese
1 onion 1 green pepper
Flour 1/2 l. milk
Water Extra virgin olive oil
Salt
Black Pepper
Parsley
Instructions
Clean cauliflower and separate the florets. Boil cauliflower in the pressure
cooker with water and salt. Let it cook over medium heat for 5 minutes. Drain and set aside.
Chop onion and add it to a frypan with oil. Add green pepper, also chopped. Season and let it
brown. Add bacon and diced chicken and sauté.
For the sauce, put the butter melted in a pan, add the flour, season and sauté. Pour the milk
gradually and cook for about 5-6 minutes.
Place the cauliflower florets in a pan suitable for the oven, pour over the white sauce with
vegetables and meat. Bake at 220 degrees for 5 minutes
Serve hot.
Pumpkin cream soup
Ingredients (4-6 people):
1 kg. Pumpkin
2 large potatoes
1 medium onion
2 ripe tomatoes
1 bay leaf
1 package of cream (200 ml.)
Oil
Salt
3 hard-boiled eggs
Instructions
Peel the pumpkin and cut to pieces.
Peel potatoes and cut equally.
Clean the onion and cut in half and do the same with tomato.
Mix everything together in the pressure cooker, adding the bay leaf, just enough water to cover,
a little oil and salt. Cover the pot and put on the fire. When steam starts coming out cook it for
10 minutes and lower heat slightly. After some time remove the lid and mash potato, onion and
tomato as if it were passed through the blender.
Serve
Pour the soup into a plate and add the cooking cream, mix well and serve with the chopped
eggs.
- 17 - - 18 -

EN EN
Vegetable Panache
Ingredients
250 g of beans
1 zucchini
1 slice of pumpkin
8 green asparagus
100 gr of Iberian bacon
2 potatoes
Water
Extra virgin olive oil
Salt
Instructions
Peel and dice potatoes and cook in the pressure cooker with water. Place clean beans into
steamer basket and cut into strips. Season. Close the pot and let it cook over medium heat for
4 minutes. Keep the beans warm while mashing potatoes finely.
Cut zucchini into large chunks. Add zucchini and asparagus with oil, place them on a plate and
let them be for 6-8 minutes.
Chop bacon and brown in a frypan.
Cover the bottom of a plate with mashed potatoes and place steamed vegetables and roasted
beans on plate.
Serve.
Onion soup with melted cheese
Ingredients (for 4 persons):
6 onions Three beef bones
2 leeks 3 cloves of garlic
400 gr. chickpea 75 gr. of day-old bread
100 gr. of emmental cheese Water
Extra virgin olive oil Salt
Parsley
Instructions
Soak the chickpeas in the water first.
Cook the leeks in the pressure cooker, one onion half, drained chickpeas,
peeled garlic cloves, beef bones, some sprigs of parsley and a pinch of salt.
Place the lid and cook for 30 minutes after it starts steaming. After this time, remove the meat,
chickpeas and vegetables. Strain the broth. Put aside.
Peel and finely mince the remaining onions and put them to fry in a pan with oil. Season and
cook until well poached.
Chop the bread, add it and stir briefly. Pour the broth and cook everything for about 10 minutes.
Beat with a whisk until the bread dissolves.
Serve.
Serve the onion soup and sprinkle with cheese and put in the oven all together to melt the
cheese. Serve cups and sprinkle with a little chopped parsley.
Lentil Soup with curry
Ingredients (6 persons):
1/2 cup pardina lentils
1 leek
1 onion
1 carrot
2 cloves of garlic
1 can of 400 gr. whole tomatoes
1 potato
1 teaspoon curry
1 plain yogurt
Water
Extra virgin olive oil
Salt
Instructions
Cut onion and carrot into cubes and chop leek and add into pressure cooker with oil. Add garlic,
fry and season well. Stir in the lentils, cover with water and add the teaspoon of curry. Cover and
cook for 7 minutes.
Once the lentils are cooked, add diced tomatoes and let it cook for another 2-3 minutes.
In a frying pan fry peeled potatoes and cut into cubes. Remove it with a slotted spoon and add
into the soup.
Serve.
Rice with chicken in pressure cooker
Ingredients (4):
1 and 1/2 cup of rice 4 glasses of water
1/2 kg chicken pieces without skin 1 dried bell pepper
2 garlic cloves 1 tomato
1 broccoli 1 green pepper
1 yellow pepper 1 carrot
Salt Oil
Instructions
Boil the water in a saucepan and salt it by taste.
Add some oil to the pressure cooker. When the oil is hot, add dried bell pepper
and garlic. When browned remove and crush everything in the mortar.
Sauté chicken in the pot and grate it while peeling tomato and when the chicken gets golden
color add tomato together with broccoli, peppers and carrots cut into strips.
Add rice and give a few stirs, add water and the contents from the mortar. Stir and close the pot.
As the water is boiling keep it over low heat for 10 minutes. Stir and leave for about 5 more
minutes and remove the lid.
Serve hot.
- 19 - - 20 -

Stuffed squid
Ingredients:
Squid Pork or beef
Egg 1 grated tomato
2 medium onions, chopped Stuffed olives
400 g of crushed tomatoes 1 potato
Olive oil Salt
200 ml of white wine 1 cubeof fish broth
Parsley
Instructions
In a frypan with olive oil, fry a medium onion, add 1 chopped tomato and
simmer for a few minutes. Then add minced pork or beef, stir it and take a hard boiled egg cut into
pieces, the wings and legs of squid stuffed with sliced olives and salt. Cook for about 3 minutes on low
heat.
If you like thicker texture, add some breadcrumbs. Leave it to cool down.
Spread on each squid a little bit of olive oil, fill with the previously prepared mixture and close with a
toothpick.
Add chopped onion to the pressure cooker with some olive oil, sauté and add 400 g of crushed
tomatoes, one sliced potato, 200 ml of white wine and fish broth cube.
Cook in a covered pot for about 7 minutes. Add it to the plate and decorate nicely with some parsley.
If you have leftover squid stuffing, add it to the sauce.
Serve.
Sole fish with Mushroom Sauce
Ingredients:
200g fungi
1 small, peeled and finely chopped onion
600g fillets of sole fish, well-seasoned
1 dl of white wine
1 Tablespoon of Butter
3 tablespoons of cooking cream
1 Tablespoon Parsley, chopped finely
Instructions
Melt the butter in the pressure cooker and fry the mushrooms
Briefly cook the onion
Put the sole fillets on top of the onion and sauté
Pour the red wine over the fish.
Close the lid and cook for 2 min at low level.
After the cooking time, remove the pressure cooker away from heat, quickly remove steam and
open when the pressure is gone completely.
Put sole fillets in a preheated dish
Refine sauce with cream, add the parsley, season and simmer briefly.
Serve.
Put the fish on the plate, pour the sauce over the fish and serve with rice or boiled potatoes.
Lamb ribs with salad
Ingredients (4 people):
1.5 kg. Lamb ribs 3 tomatoes
1 spring onion 12 black olives (pitted)
2 cloves of garlic Water
Extra virgin olive oil Vinegar
Salt 1/2-teaspoon of paprika
2 sprigs of rosemary Pepper
Parsley
Instructions
Cut the ribs into pieces and place them into the pressure cooker. Add a sprig
of rosemary, cover with water and season. Cover and cook for 10-12 minutes from the time the
steam starts getting out. Remove them and place them on a baking sheet. Put aside.
Place garlic cloves, peeled and chopped, 4 tablespoons oil, 1 vinegar, paprika, the leaves of a
sprig of rosemary and salt into a slicer. Grind the mixture.
Salt and pepper the meat and grease it with the sauce. Bake at 190 for 20 minutes. Halfway
through cooking, turn them over and water them with the remaining sauce. Keep them warm in
the oven with the residual heat.
Peel 2 tomatoes, cut into irregular pieces and place in a bowl, chop the onion into strips and add
it along with some corn salad. Add also olive oil, vinegar and salt.
Serve.
Serve the salad with lettuce, tomato and lamb chops.
Mushroom cannelloni with chestnuts
Ingredients (for 4 persons):
20 sheets of cannelloni 500 gr. mushrooms
8 fresh garlic cloves 1 spring onion
500 gr. chestnuts 800 ml. milk
80 gr. flour 80 gr. butter
100 gr. grated cheese Water
Extra virgin olive oil Salt
Parsley
Instructions
Place the chestnuts in the pressure cooker. Cover with water, season, place
the lid and cook for 5 minutes after it starts steaming. Peel them. Set aside.
Put plenty of water in a large saucepan. Bring to the boil, and add cannelloni sheets. Cook them
for 10-12 minutes. Drain, cool and spread them on a clean cloth.
Finely chop garlic and onion and put fry them. Chop the mushrooms and add them. Sauté
briefly. Season. Add the chopped chestnuts. Mix well and set aside.
For the sauce, put the butter melted in a pan, add the flour, season and sauté it. Pour milk
gradually and cook for about 5-6 minutes.
Mix half the béchamel sauce. Fill the cannelloni. Cover them if you want with the rest of the
sauce, sprinkle with cheese and grate them for 3 minutes.
Serve.
EN EN
- 21 - - 22 -

Brownie
Ingredients:
2 eggs
100 gr sugar
50 gr of butter
70 grams of flour
1 teaspoon baking powder
25g pure cocoa
25g chopped almonds
One tablespoon vanilla flavouring
Instructions
Beat with electric mixer the eggs with the sugar and butter (which we melted previously in the
microwave) until it turns into light foam and add the vanilla flavour. Then add the flour and cocoa
and continue beating well.
When integrated add whole almonds and toss the move with a spatula to finish mixing.
Pour into a greased and floured mould.
We add 2 fingers height of water into the pot and then we add the pan and put on the fire and
wait for the valve on the pot to go up one level then turn off heat and leave until the valve is off
again.
Serve.
Unmould, leave to cool down and then serve.
EN
- 23 -
CATALOGUE
I Le dessin de la structure et le modèle des produits--
II Points d'attention de l'opération-------------------
III Sécurité des produits-----------------------------------
IV Caractères spéciaux------------------------------------
V Mode d'emploi--------------------------------------
VI Dépannage------------------------------------------
VII Maintenance-----------------------------------------
VIII FAQ---------------------------------------------------
IX Étapes et temps de cuisson---------------------------
Numéro de téléphone du service clients: 945.155.032
02
03-05
06
07
08-10
10-11
11-13
13-14
15
FR
- 01 -

Les produits de cette série
sont conçus et fabriqués
sur la base de la norme
EN12778:2002.
Spécifications de l'autocuiseur en acier inoxydable de la série Grace
Modèle PY-6910 PY-6910 PY-6910
Ø22cm Ø22cm Ø22cm
4L 6L
100kPa
300kPa
7L
Diamètre
Capacité
PS
Pression de
fonctionnement
Fig.1
Soupape de sécurité
Soupape de limitation
de la pression
Bouton d'échappement
Plaque frontale
Bouton poussoir Poignée supérieure
Couvercle
Fenêtre de sécurité
Écrou étanche Clapet anti-ouverture
Bague d'étanchéité
Poignée d'aide
Corps
Poignée inférieure
Poignée inférieure
I. Le dessin de la structure et le modèle des produits
Ⅱ. Points d'attention de l'opération
( 01 ). Utiliser seulement après avoir lu et compris le mode d’emploi.
( 02 ). En gardant à l'esprit que l'utilisateur sera tenu pour responsable en cas
d'accident dû à une utilisation non conforme au manuel. Il est nécessaire de
surveiller l'utilisation de l'appareil, de régler le feu à temps après la libération
du régulateur de pression, de maintenir la pression sous la pression limite
pendant un certain temps.
( 03 ). Ne mettez pas l'autocuiseur dans la cuve de chauffe.
( 04 ). Soyez très prudent lorsque vous déplacez l'autocuiseur sous pression. Ne
touchez pas la surface métallique, utilisez la poignée et prenez des protec-
tions si nécessaire.
( 05 ). L'autocuiseur ne peut être utilisé qu'aux fins indiquées dans le manuel, et
non à d'autres fins.
( 06 ). Comme la cocotte cuit les aliments sous pression, elle peut provoquer des
brûlures si elle n'est pas utilisée correctement. Assurez-vous que la cocotte
se ferme correctement avant utilisation. (Voir le mode d’emploi).
( 07 ). Ne pas forcer l'ouverture de la cocotte. Veillez à l'ouvrir après la libération
de la pression. (Voir le mode d’emploi).
( 08 ). Ne pas chauffer à vide, cela endommagerait gravement l'autocuiseur.
( 09 ). Moins de 2/3 de la capacité de l'appareil pour la cuisson des aliments.
Moins de 1/4 de la capacité de l'appareil pour la cuisson d'aliments expan-
sifs tels que le riz ou les légumes secs, etc.
( 10 ). Sélectionnez correctement la cuisson en suivant les instructions.
( 11 ). En cuisinant des aliments avec de la peau (comme la langue de bœuf),
ceux-ci vont s'expandre à cause de la pression après la cuisson. Ne piquez
pas pour éviter l'ébouillantage.
( 12 ). Pour la cuisson d'aliments mous, secouez légèrement l'appareil avant de
l'ouvrir afin d'éviter la projection d'aliments.
( 13 ). Vérifiez si la soupape de pression est bloquée avant de l'utiliser, voir le
mode d'emploi.
( 14 ). Ne pas frire les aliments sous la pression.
( 15 ). Ne déviez pas de l'entretien spécifié dans le manuel. Ne changez aucun
système de sécurité par vous-même.
( 16 ). N'utilisez que les pièces de rechange correspondantes fournies par le
fabricant, exceptionnellement, utilisez le corps et le couvercle selon les
instructions du fabricant.
( 17 ). Veuillez conserver ce manuel correctement.
( 01 ).
FR FR
- 02 - - 03 -

01
02
03
04
05
06
07
08
09
10
11
L'autocuiseur est un ustensile de cuisine familial et ne peut être utilisé à
d'autres fins. Il est conseillé aux jeunes et aux personnes qui ne savent pas
comment l'utiliser de ne pas s'en servir. Une personne doit surveiller l'auto-
cuiseur et le tenir éloigné des enfants pendant utilisation.
Sous la pression limite, le point d'ébullition du liquide est inférieur à 120ºC
(250F). Utilisez l'autocuiseur avec précaution car beaucoup de vapeur et de
jus peuvent s'échapper lors de l'ébullition et surtout lorsque la pression
diminue rapidement.
Ne pas faire cuire d'aliments expansifs tels que la confiture de pommes, les
algues, les flocons d'avoine, etc. pour éviter de bloquer l'orifice de libération
de la vapeur.
Veillez à ce que la soupape de limitation de la pression, la soupape de
prévention de l'ouverture en toute sécurité, la bague d'étanchéité, le
bouchon de prévention des blocages, le couvercle et le corps de l'autocui-
seur soient propres et exempts de toute saleté ou graisse avant et après
l'utilisation.
Ne dirigez pas la fenêtre de sécurité vers l'utilisateur ou vers la zone où il se
déplace souvent.
Si de la vapeur s'échappe de la soupape de sécurité ou si la bague
d'étanchéité est écrasée par la fenêtre de sécurité, l'appareil doit être
immédiatement mis hors tension. Le problème doit être trouvé et résolu
avant de réutiliser l'appareil.
Soyez très prudent lorsque vous déplacez l'autocuiseur sous pression.
Transportez-le horizontalement et posez-le doucement. Ne pas le cogner.
Ne pas ouvrir l'autocuiseur lorsqu'il y a de la pression à l'intérieur. Ne pas
cuire si le couvercle n'est pas bien fermé.
Ne conservez pas de sel, de sauce soja, d'alcali, de sucre, de vinaigre ou
d'eau de vapeur à l'intérieur de l'appareil pendant une longue période.
Nettoyez et séchez l'appareil après chaque utilisation.
Ne pas faire chauffer de l'eau à l'arrêt ou à vide. Ne pas utiliser pour faire frire
des aliments ou pour une cuisson type four.
L'autocuiseur doit être utilisé sur une plaque de cuisson stable. Ne pas placer
l'autocuiseur sur une plaque de cuisson
électrique dont le diamètre de la plaque
est plus grand que celui de l'autocuiseur.
Lorsque vous cuisinez sur une plaque de
cuisson à gaz, le feu ne doit pas atteindre
la paroi de l'autocuiseur. L'autocuiseur
peut être utilisé avec une plaque de
cuisson de 1,5 kW. (Fig.2) Fig.2
12
Lorsque vous cuisinez des aliments gélifiés avec l'autocuiseur, secouez
légèrement plusieurs fois avant d'ouvrir pour éviter que les aliments ne se
répandent.
Il est interdit de mettre quoi que ce soit sur la soupape de limitation de pres-
sion (fig. 5).
13
14
Volume autorisé des aliments à l'intérieur de l'autocuiseur.
•Moins de 2/3 de la hauteur de l'autocuiseur pour les aliments non expansifs
comme la viande, les légumes, etc.(Fig.3)
•Moins de 1/4 de la hauteur de l'autocuiseur pour les aliments expansifs tels
que le riz, les haricots, etc. (Fig.4)
Fig.3 Fig.4
2/3
1/4
Fig.5
- 04 - - 05 -
FR FR

Ⅲ. Sécurité des produits
( 01 ).
01
Le bouchon anti-blocage et l'aiguille de
dragage doivent être utilisés pour empêcher
le blocage de la soupape de limitation de
pression.
02
Le dispositif de prévention de l'ouverture
permet de fermer le couvercle correctement
et en toute sécurité.
03
Le dispositif de libération de pression de
quatrième degrébpermet une utilisation en
toute sécurité.
Fig.6
• Nous avons conçu et équipé des dispositifs multiples pour la
sécurité.(Fig.6)
Régulateur de pression : Si la pression intérieure est supérieure à la limite de
fonctionnement normale, le régulateur de pression libère la vapeur excéden-
taire. La pression de fonctionnement est de 100kPa ;
( 02 ). Soupape de sécurité d’ouverture : elle se lève lorsque la pression atteint 4
kPa. Assurez-vous que la vapeur s'échappe d'ici sous la pression de sécu-
rité lorsque l'orifice d'échappement de la vapeur est bloqué.
( 03 ). Deuxième soupape de sécurité : Lorsque le régulateur de pression et la
soupape de sécurité ne sont pas valides, la vapeur s'échappe par l'orifice
de libération de la deuxième soupape de sécurité pour garantir une utilisa-
tion sûre.
( 05 ). Bouton poussoir d'ouverture : Pour ouvrir le couvercle, il faut appuyer sur le
bouton.
( 04 ). Fenêtre de sécurité:lorsque le régulateur de pression et la soupape de sécurité
sont hors de fonction, la pression excédentaire sera évacuée par la fenêtre de
sécurité du couvercle.
01
Le fond composé de la cocotte est fabriqué par une machine à pression de
friction, ce qui le rend solide et fiable, et sans aucune fissure.
02
Le diamètre du fond composé est plus grand que celui des produits
courants, ce qui permet à la cocotte d'absorber la chaleur plus rapidement.
03
Ne pas ouvrir le couvercle lorsque la valve de prévention de l'ouverture ne
tombe pas.
04
L'écrou étanche peut être réparé par une pièce après une longue période
d'utilisation.
• Différentes positions du régulateur de pression, différentes
fonctions.
Position pour relâcher la pression.
Ⅳ. Caractères spéciaux
Fig.7 Fig.8
- 06 - - 07 -
FR FR

Avant chaque utilisation, assurez-vous que le trou de la valve de prévention
d'ouverture sécurisée et le trou de la valve de libération de la vapeur ne sont pas
obstrués. Si l'un d'eux est obstrué, éliminez la saleté à l'aide de l'aiguille de
dragage.
• Veuillez nettoyer l’autocuiseur avant la première utilisation.
• Tenez-vous à l'écart et surveillez pendant la cuisson.
• Ne touchez pas la surface métallique de la cocotte avec les
mains ou le corps. Cuisinez avec précaution et utilisez les poi-
gnées pour éviter toute brûlure.
1. S'assurer que le trou de la valve de libération de la vapeur
n'est pas obstrué.
Alignez le repère "O" du couvercle sur le repère "O" de la poignée inférieure pour
fermer correctement la cocotte avant de la faire chauffer. (Fig.9)
2. Fermeture de l’autocuiseur.
Afin d'augmenter rapidement la température, chauffez avec un feu puissant jusqu'à ce
que la soupape de limitation de pression commence à fonctionner. Veillez à ne pas
utiliser un feu plus fort que ce qui est nécessaire. Il est normal qu'un peu de vapeur
s'échappe de la soupape de sécurité après un certain temps de cuisson. Il ne devrait
plus y avoir de perte de vapeur après la montée de la soupape de sécurité et que
l’autocuiseur fonctionne normalement. Lorsque la soupape de limitation de pression
est levée et que de la vapeur s'échappe continuellement, il faut utiliser un feu doux et
commencer à compter le temps de cuisson.
3. Cuisson.
Ⅴ. Mode d’emploi
Attention : Le temps de cuisson s'entend du début du
fonctionnement du limiteur de pression à l'extinction
du feu.
Fig.9
Deux façons d’ouverture après la cuisson.
Refroidissement naturel. Quand le temps de cuisson est écoulé, éteignez le feu et
laissez-le un moment en attendant que la pression diminue. Enlevez le couvercle
lorsque la valve de sécurité est tombée. La procédure d'ouverture est inverse à
celle de la fermeture. Repoussez le bouton d'ouverture et mettez-le en position
d'ouverture lorsque vous ouvrez le couvercle. Tournez en sens inverse la poignée
supérieure pour aligner la marque "O" sur le couvercle et la marque "O" sur la
poignée inférieure pour ouvrir le couvercle. (Fig.10)
Refroidissement rapide. Parfois, l'autocuiseur a besoin d'être refroidi rapide-
ment, mettez l'autocuiseur sur un endroit plat et arrosez-le d'eau froide lente-
ment jusqu'à ce que la soupape de sécurité tombe. (Fig.11)
• Attention: Évitez que l'eau ne s'écoule dans la cocotte par le
biais de la soupape de sécurité ouverte et du limiteur de pres-
sion.
• Remarque: Appuyez sur le bouton pour ouvrir le couvercle,
puis le bouton reste naturellement en position de fermeture. Si
le bouton revient en arrière, vous devez le pousser vers l'avant.
Sans quoi le couvercle ne sera pas normalement fermé.
4. Éteindre le feu, relâcher la pression et ouvrir l'autocuiseur.
Fig.10
①
• N'appuyez pas sur le bouton jusqu'à ce que la soupape de sécurité tombe.
• Lorsque vous faites cuire des aliments pâteux, comme du porridge, secouez
légèrement l'appareil avant de l'ouvrir pour réduire les bulles.
②
Fig.11
- 08 -
FR FR
- 09 -

Ⅵ. Dépannage
Veuillez retirer la valve de fonctionnement à l'aide de l'écrou desserré par une
pièce jusqu'à ce que la température du couvercle refroidisse. (Fig.12)
• Remarque : Ne pas retirer l'anneau de silicone des éléments
lorsque vous mettez la valve sous l'eau.
5. Nettoyage
Si vous constatez un phénomène anormal, éteignez immédiatement le feu, mettez
l'autocuiseur à l'horizontale et arrosez-le lentement avec de l'eau pour réduire la
température et la pression. Trouvez la raison et résolvez le problème à l'aide du
tableau ci-dessous.
Fig.12
Ⅶ. Maintenance
1. L’autocuiseur doit être nettoyé avant la première utilisation.
• Entretien de l'ensemble de l’autocuiseur.
• Enlevez la saleté.
• Essuyez ensuite l'eau et gardez l’autocuiseur sec.
• Ne pas toucher la cocotte avec d'autres types de métal pour éviter la corrosion
électrochimique.
• Ne pas conserver d'aliments à l'intérieur de l'appareil pendant une longue
période.
• Ne pas gratter la surface de la cocotte avec un matériau dur comme le métal pour
éviter l'abrasion.
Problème
De la vapeur sort par le dessous
du couvercle.
Le couvercle ne se fixe pas
correctement. La forme du couvercle change. Changer le couvercle.
1. L'orifice de libération du
régulateur de pression est
obstrué. La fonction de sécurité
de la soupape de sécurité
fonctionne.
1. L'orifice de libération du
régulateur de pression est
obstrué.
2. La valve de sécurité a perdu
sa fonction.
1.Nettoyer la bague
d’étanchéité, la bouche
du cuiseur et le
couvercle.
1. Mettre l’autocuiseur
hors du feu. Après
refroidissement,
démonter le régulateur
de pression et nettoyer
l’orifice.
1. Mettre l’autocuiseur
hors du feu. Après
refroidissement,
démonter le régulateur
de pression et nettoyer
l’orifice.
2. Changer la valve de
prévention d’ouverture
de sécurité.
2.Changer la bague
d’étanchéité.
1.La bague d’étanchéité
est sale.
2.La bague d’étanchéité
est trop veille.
Raison Solution
De la vapeur et du liquide de
l’orifice de libération s’échappent
soudainement de la valve de
sécurité.
De la vapeur et du liquide
s’échappent soudainement de la
valve de sécurité.
FR FR
- 11 -- 10 -

• Retirez la bague d'étanchéité du couvercle. Enlevez la saleté de la bague et du
couvercle.
• Vérifiez le tuyau de libération de la vapeur. S’il est bouché, éliminez la saleté à
l'aide de l'aiguille de dragage. Nettoyez ensuite et rincez le tuyau à l’eau. (Fig.14)
• Enlevez la saleté de la valve de prévention d’ouverture sécurisée avec l’aiguille
de dragage.
• Nettoyez et rincez à l’eau. La tige de la valve de sécurité doit pouvoir bouger
librement.
• Si la vis de la valve de prévention d'ouverture sécurisée est desserrée, serrez-la
immédiatement.
• Si la vis de la soupape de limitation de pression est desserrée, serrez-la immédi-
atement.
• Essuyez ensuite l'eau et gardez la bague d’étanchéité sèche.
• Remettez la bague d'étanchéité sur le couvercle. Ne mettez pas le couvercle
lorsque vous n'utilisez pas la cocotte pour éviter que la bague d'étanchéité ne soit
comprimée.
2. Entretien de la bague d’étanchéité (Fig.13)
3. Entretien de la soupape de limitation de pression et du tuyau de
libération de vapeur
4. Entretien de la valve de prévention d'ouverture sécurisée
Fig.13 Fig.14
Safety valve
Pressure limited valve
Safety opening-preventing valve Ⅷ. FAQ
Chauffez l’autocuiseur à feu vif jusqu'à ce que la vapeur sorte de la soupape
de limitation de pression.
Passez du feu fort au feu doux lorsque la vapeur commence à sortir de la
soupape de limitation de pression.
Laissez la pression à l'intérieur de la cocotte se réduire naturellement.
Un feu trop fort entraîne une évaporation excessive de l'eau et brûle les
aliments à l'intérieur de la cocotte.
Q: Comment préparer de bons repas et petits plats ?
R:
Vérifiez si le temps de cuisson est contrôlé correctement ou non.
Vérifiez si la soupape de limitation de la pression est placée correctement ou
non. Vérifiez si le feu de cuisson est trop fort ou trop faible.
Vérifiez si le volume d'eau et de bouillon est approprié ou non.
Vérifiez si la pression est normale ou non. (Y a-t-il de la vapeur qui s'échappe
de la soupape de limitation de pression ou non).
Q: Vous n'arrivez pas à bien cuisiner ?
R:
Il commence à partir du moment où la vapeur s'échappe de la soupape de limita-
tion de pression en toute sécurité.
Q: Qu'est-ce que le temps de cuisson ?
R:
Le volume maximal des aliments à cuire est inférieur aux 2/3 de la profondeur du
cuiseur. Les haricots sont inférieurs à 1/4. Le produit de cuisson n'a rien à voir
avec le temps de cuisson. D'ailleurs, le volume du cuiseur n'a rien à voir non
plus avec le temps de cuisson.
Q: Est-ce que des produits différents nécessitent un temps de
cuisson différent ?
R:
Attention : Ne pas perdre les petites pièces comme la valve de
limitation de pression. Q : Pourquoi la couleur du riz devi-
ent-elle grise ?
Il est suggéré de changer la bague d'étanchéité une fois tous les
un ou deux ans selon la fréquence d'utilisation. Mais elle doit
être changée immédiatement si elle est endommagée ou si sa
forme change. Veuillez contacter votre revendeur ou le service
commercial de notre société pour obtenir les pièces de
rechange. Ne jamais utiliser de substituts.
FR FR
- 12 - - 13 -

Lors de la cuisson à haute température et sous haute pression, les acides
aminés et les saccharides sont décomposés par la chaleur. Ainsi, les aliments
riches en protéines et en glucides peuvent changer de couleur et devenir gris.
Mais c'est inoffensif et le goût ne change pas.
Après la cuisson, le lait de soja mélangé au sucre s'échappe par la valve de
sécurité.
Lors de la cuisson, les aliments liquides mélangés à du sucre épais sont
projetés par la soupape de sécurité en raison de la pression élevée de la
vapeur à l'intérieur du cuiseur.
Lorsque vous cuisinez ce type d'aliments, ne cuisinez pas sous pression, ce
qui signifie ne pas mettre la soupape de limitation de la pression.
Q: Pourquoi la couleur du riz devient-elle grise ?
R:
Éteignez immédiatement le feu, éloignez la cocotte du feu et laissez-la refroidir
naturellement. Ne versez pas d'eau sur l'autocuiseur.
Q: Que faire en cas de cuisson à vide de la cocotte ?
R:
IX. Étapes et temps de cuisson
Remarque : Le temps mentionné ci-dessus sert juste de référence.
Les changements dans les détails sont en fonction des aliments.
Les utilisateurs peuvent l'ajuster à la durée appropriée en fonction
de leurs expériences pratiques.
Nom des
aliments
Bœuf 1/2 15-20 Très tendre Couper en
morceaux
1/2 8-12 Viande et os
sont séparés
Couper en
morceaux
1/2 15-20 Viande et os
sont séparés
Découper
en tranche
1/2 8-10 Viande et os
sont séparés
1/3 2-4 Bien cuit
1/2 8-12 Bien cuit
2/3 10-15 Bien cuit
2/3 5-8 Bien cuit
2/3 6-10 Bien cuit
1/4 4-6 Bien cuit,
bonne odeur
1/3 10-15 En bouillie
1/4 12-16 Bien cuit
2/5 15-25 Très tendre
Poulet
entier
Côtelette
Jarret de
porc
Poulet
Poisson
Mouton
Zong Zi
Épis de
maïs
Patate
douce
Riz
Porridge
Légume
Trémelle
Volume de
nourriture
+ eau
État des aliments
cuits après
refroidissement
naturel
Remarques
Temps de cuisson à feu
doux après le début
l’évacuation de la vapeur par
le régulateur de pression
FR FR
- 14 - - 15 -
Table of contents
Languages: