The Showersave®QB1 is considered a device. The space it is installed in should be large enough so that
inspections can be carried out properly and if necessary the Showersave®QB1 can be replaced easily. Access
has to be possible without extra work. When this is not respected any garantee claim will not be valid.
Possible positions of installation are a fixed cabinet, cilinder shaft with removable panel, technical area, stair
cupboard etc.
Positioning in a Electrical meter cupboard is only allowed when properly compartimented and only when
accordated by local building authority.
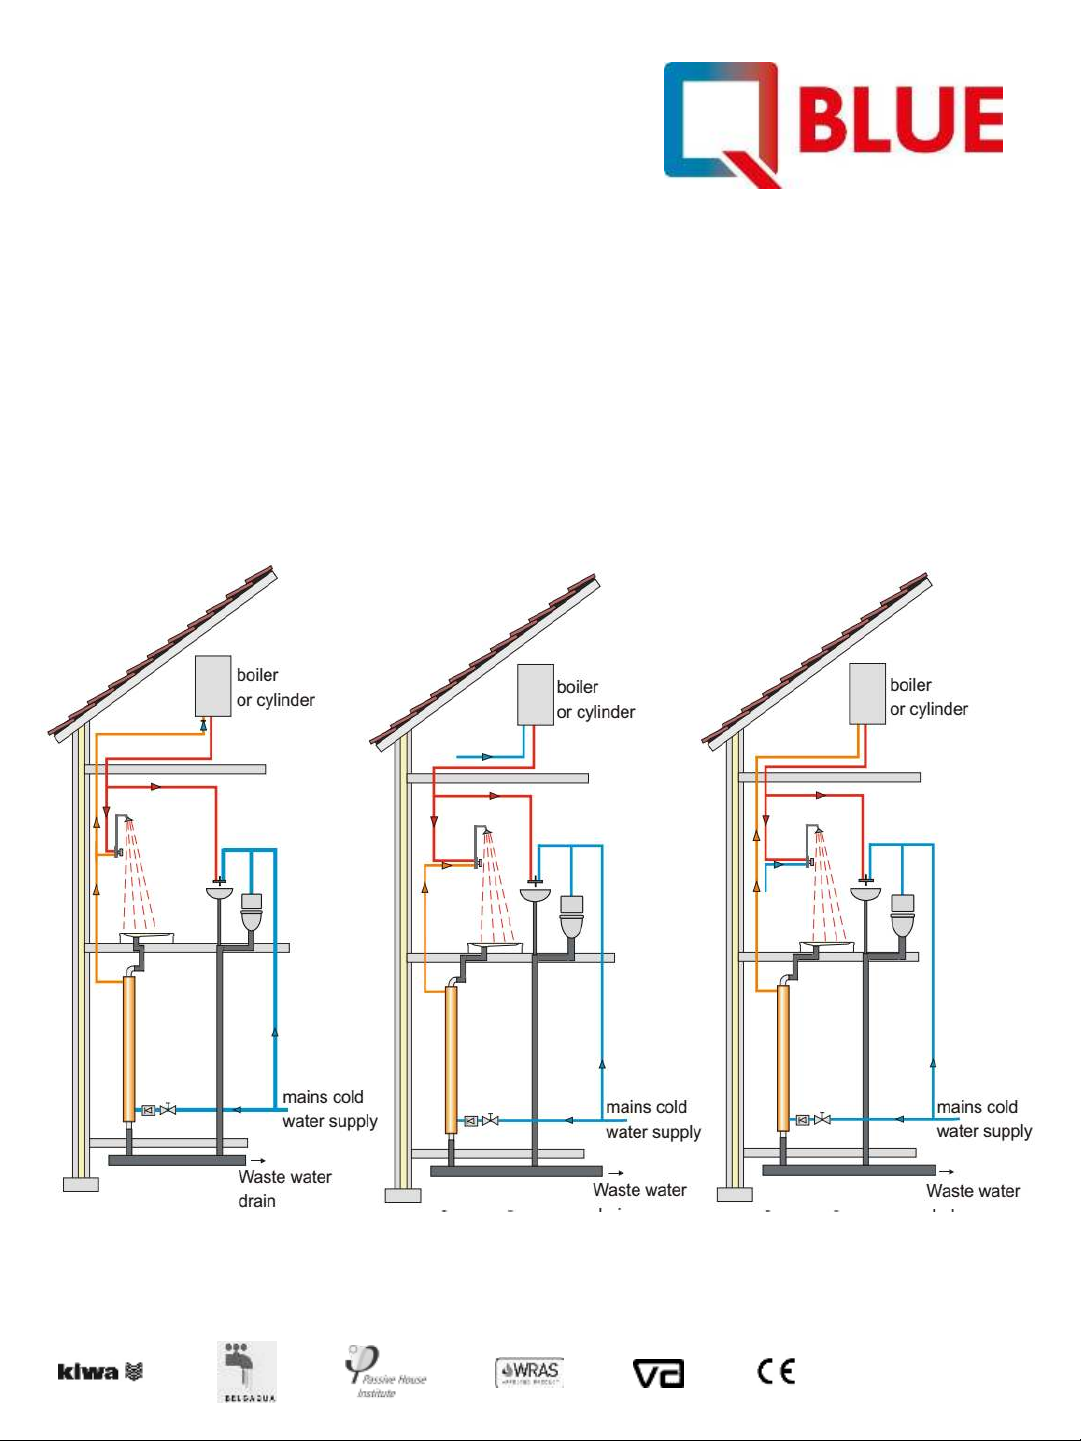
3.2 Connections
3.3 Positioning of the Showersave®QB1
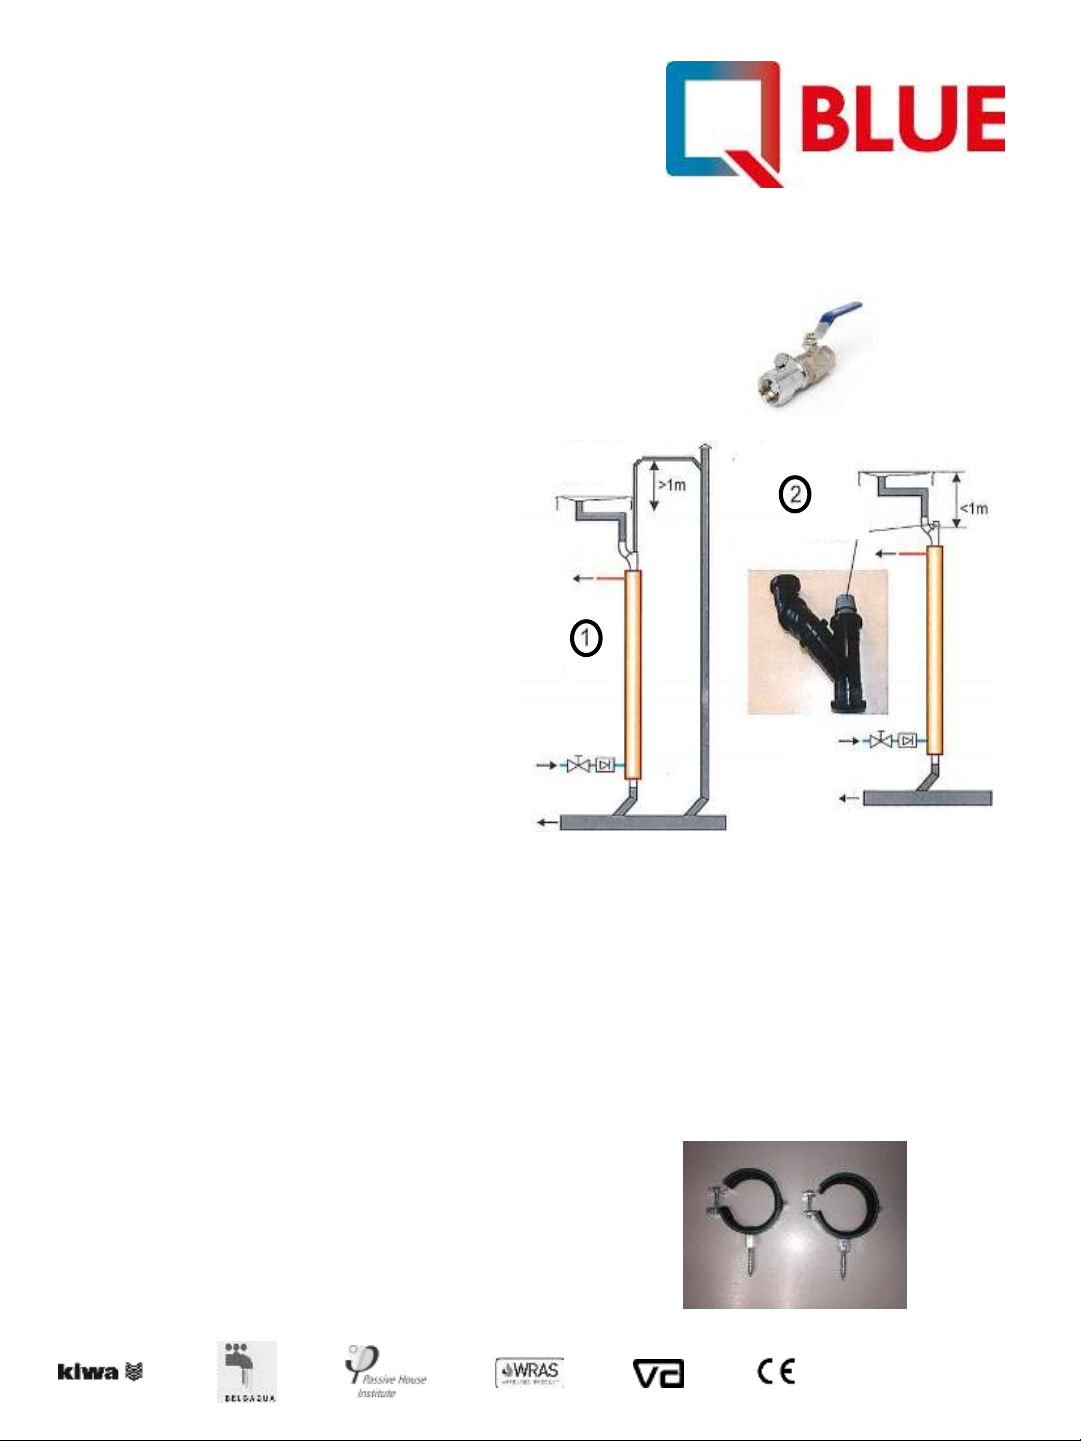
The tap water connections should be demountable. Just before the
tap water connection a non-return valve and a shut-off valve should
be mounted (type EA) (see afb. 1).
3.4 Fixation of the Showersave®QB1
The Showersave®QB1 is mounted to the wall with two
special braces (see afb. 2). It is important to take good
care of that the Showersave®QB1 is mounted strictly
vertical, seen from the front as from the side.
Extra aeration
Dearation of the Showersave®QB1 is not
necessary, all air will disappear automatically
because the water flows from the bottom on the
top.
If aeration of the drainage area between the
showerplace and the Showersave®QB1 is
desired it can be achieved in two ways:
1. A connection to a relief pipe or stand pipe
(with relief pipe) of the shower (see fig. 4).
2. By using an aerator. The aerator must be
mounted vertically above the heat
exchanger and may not be placed lower
than 1 meter below the top of the shower
place. The aerator can be placed on the
rotator by replacing the 45 degrees bend for
a T-connector (see fig. 5).
(note: aerator is not standardly supplied)
fig. 4 fig. 5
Afb. 2
Page 5
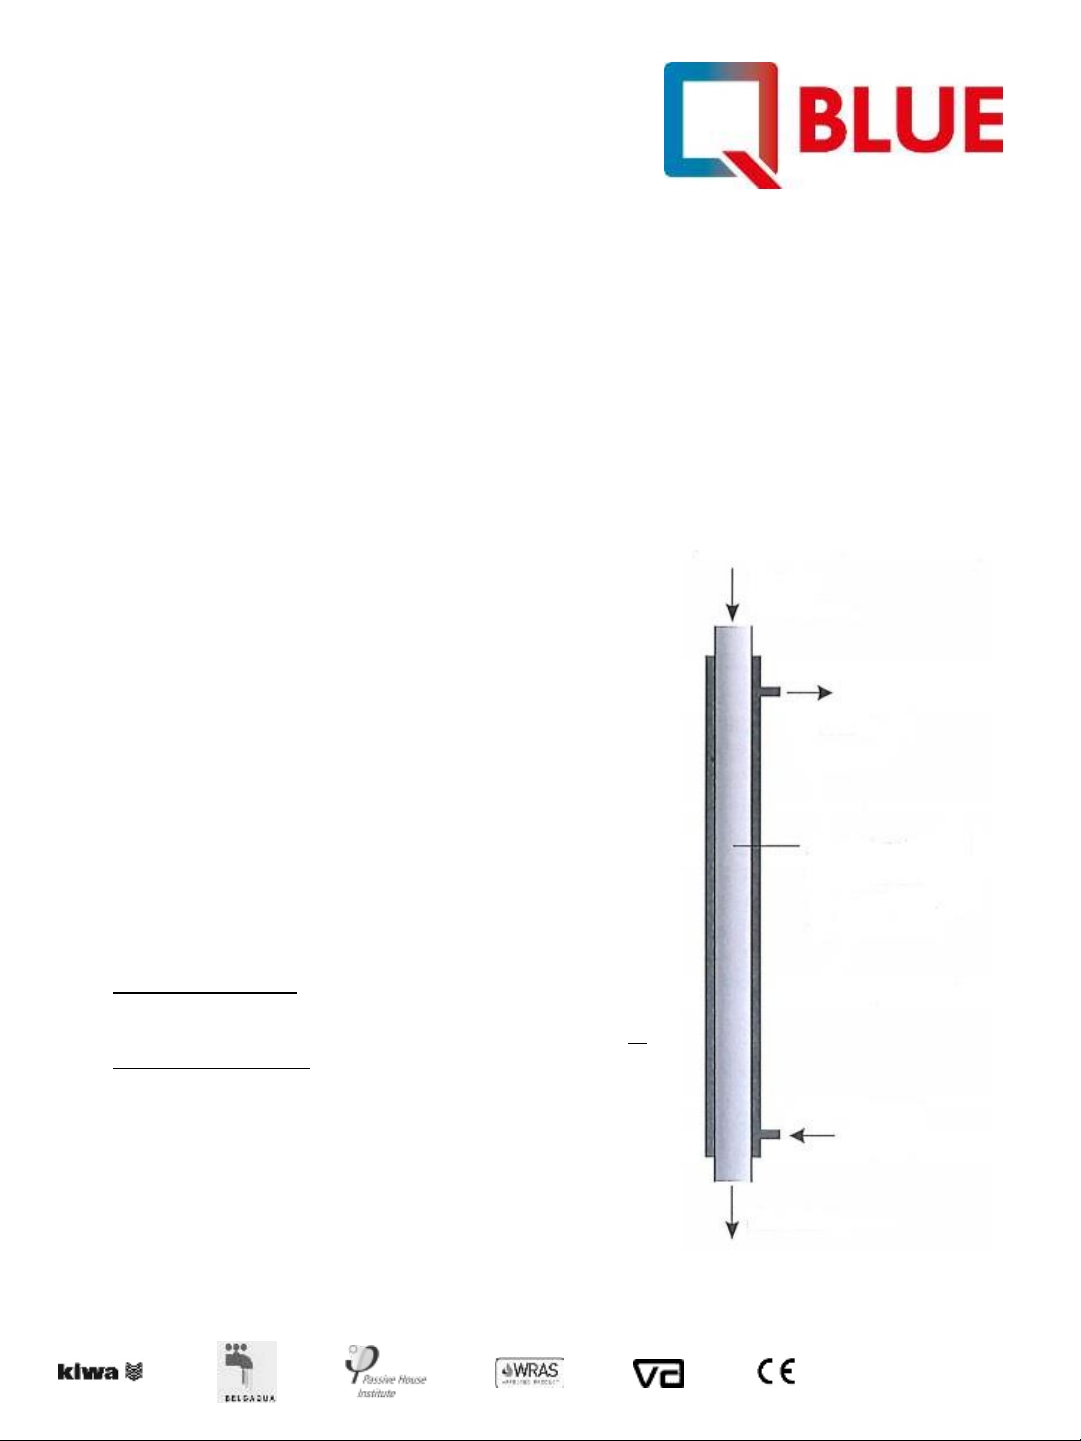
Showersave®QB1-21 (heatexchanger)
QB1-16
QB1-12
Afb. 1
EA beveiliging
EA beveiliging
a
aeration pipe
(relief pipe)
aerator
Non-return and
shut off valve Non-return and
shut off valve