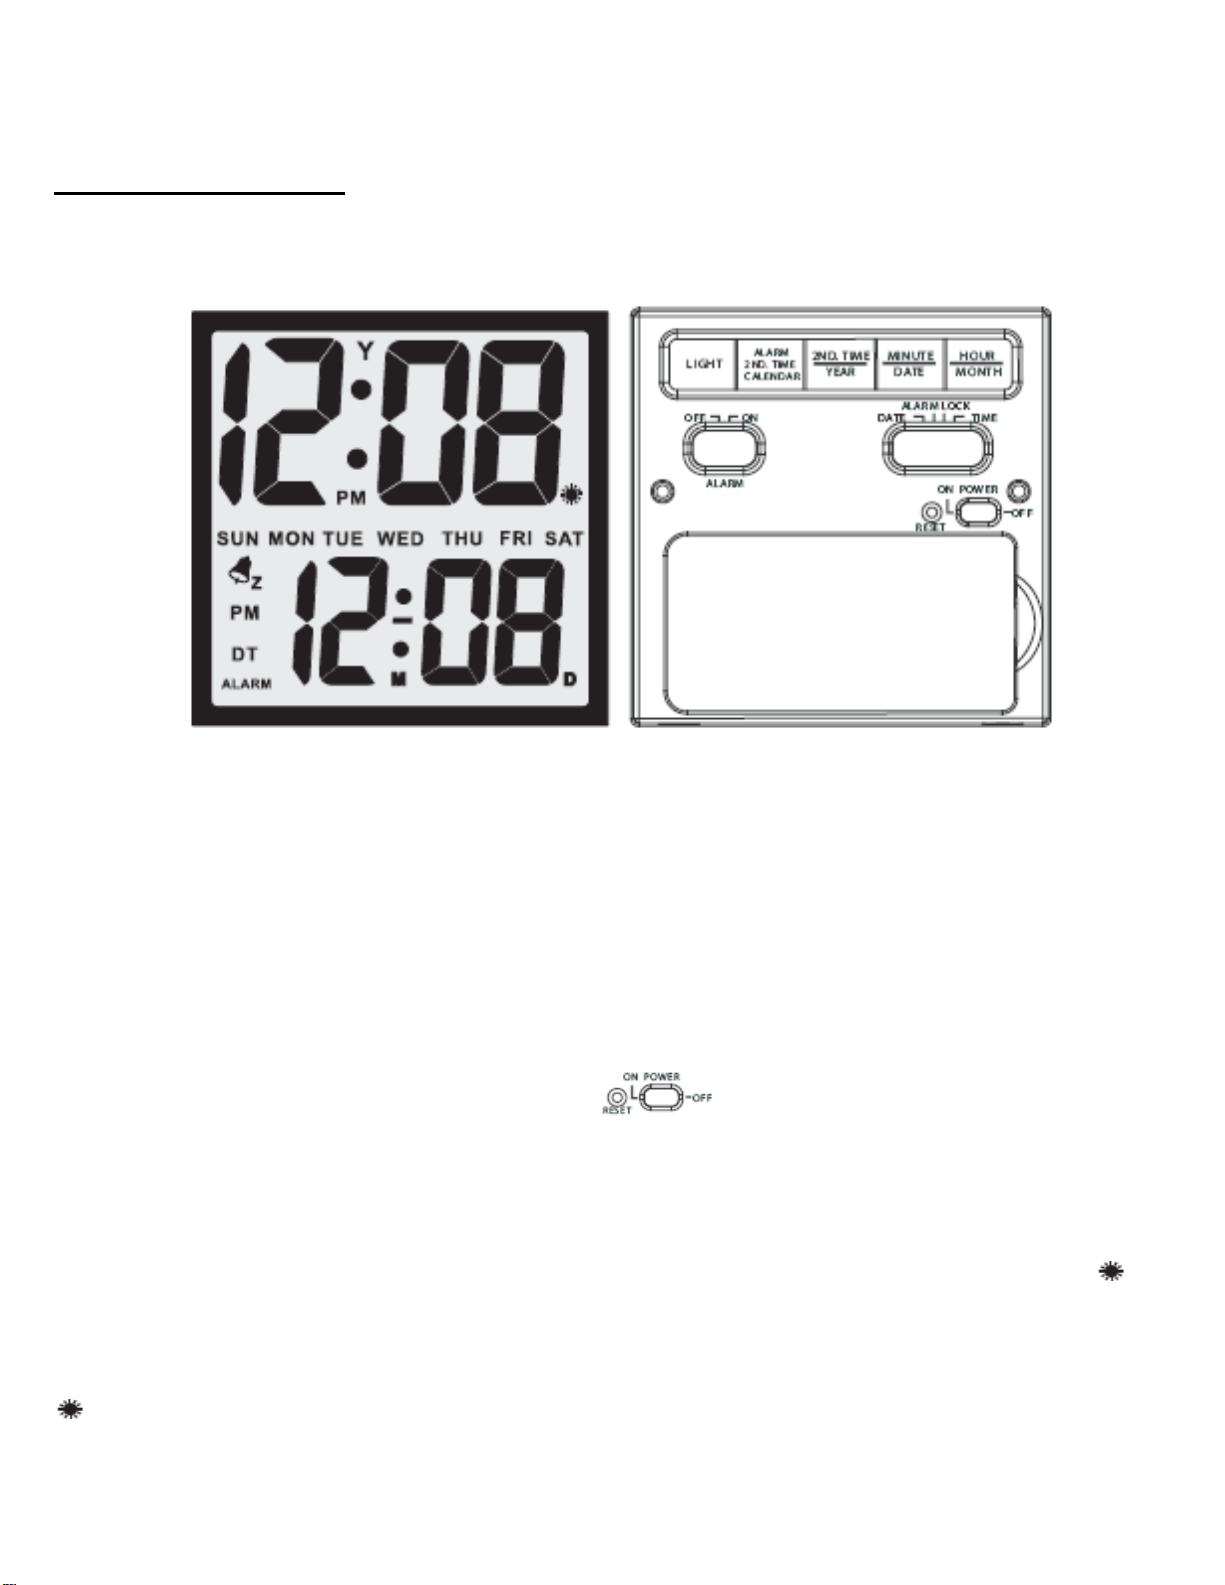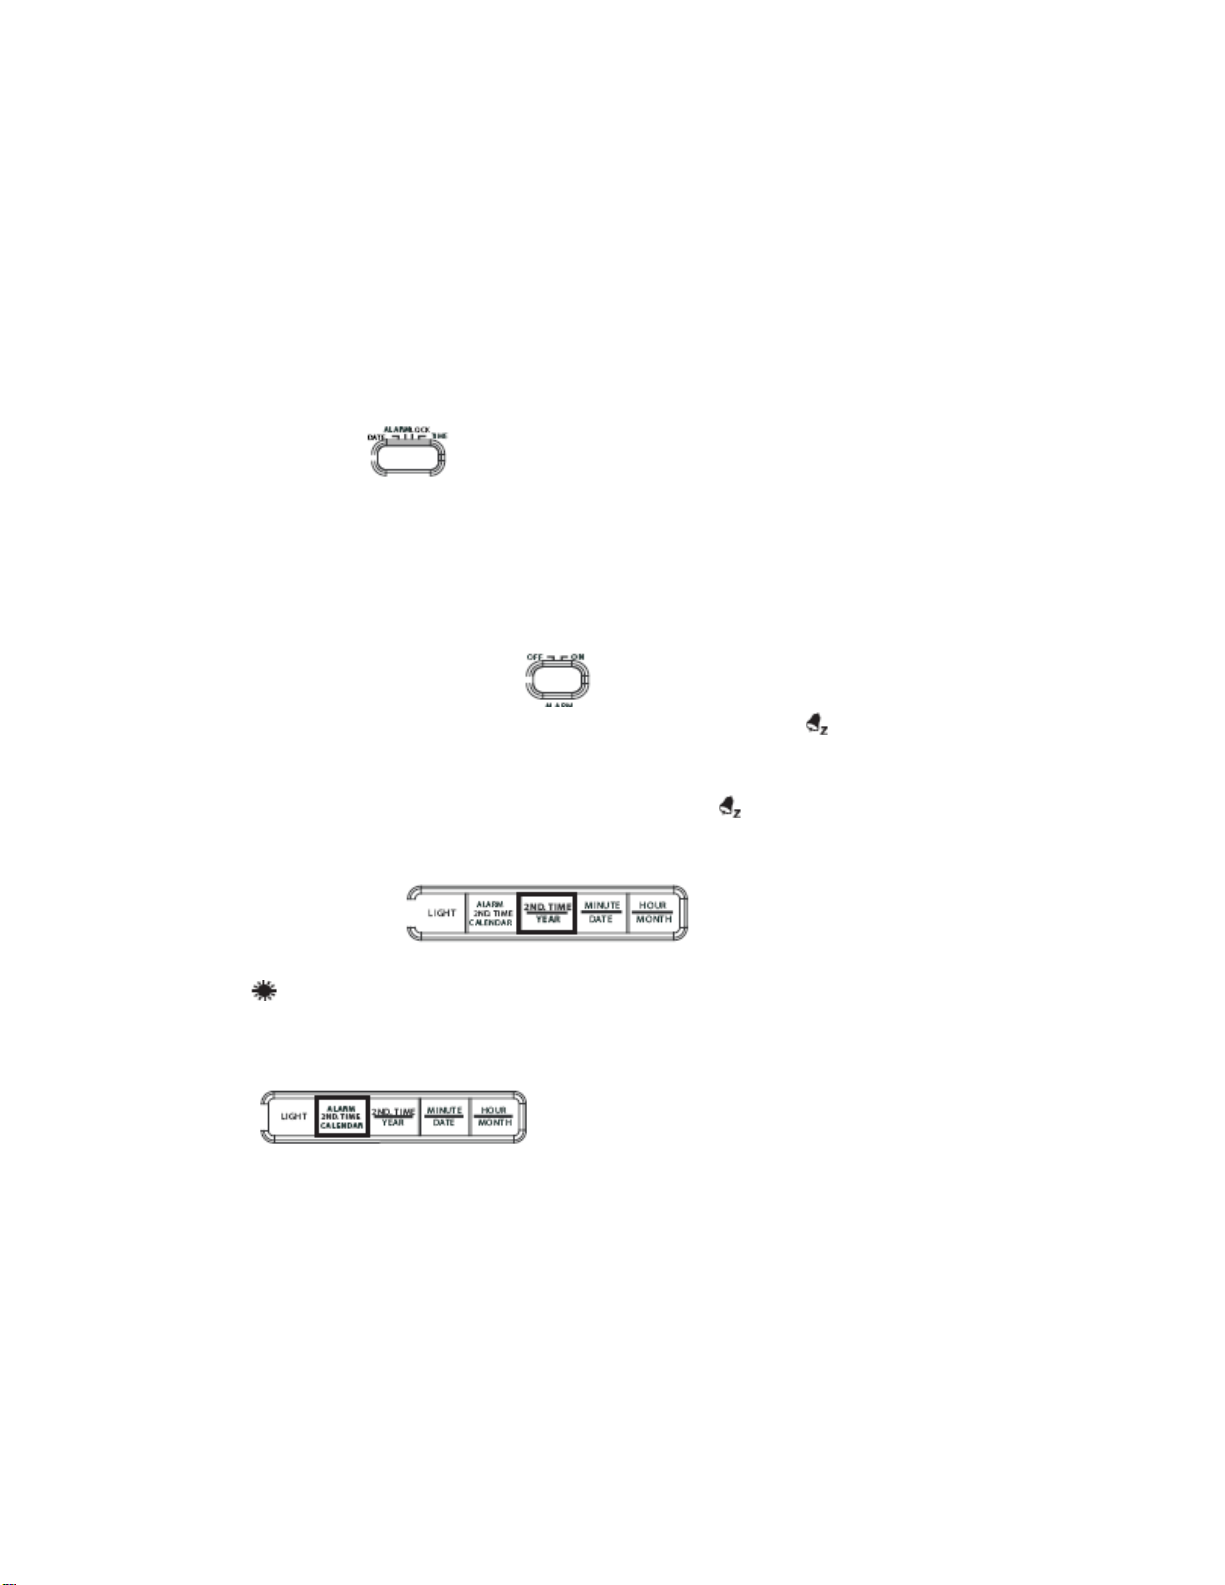
3. Slide the switch (DATE/ALARM/LOCK/TIME) to the DATE position.
4. Press and hold down the YEAR button to advance to the correct year.
5. Press and hold down the DATE button to advance to the correct date.
6. Press and hold down the MONTH button to advance to the correct month.
7. Slide the mode switch to the TIME position.
8. Press and hold down the HOUR button to advance to the correct hour, making sure AM/PM is set
correctly, the “PM” indicator will appear on the display for PM time only.
9. Press and hold down the MINUTE button to advance to the correct minute.
Your clock also has the feature of storing a second time zone – maybe a holiday destination, relative
abroad, or business contact. To set this time, press the 2ND. Time button to advance the hour digit in the
second time zone (DT). Maker sure the “PM” indicator will appear on the display for PM time only.
10. Slide the mode switch to the LOCK position to complete the time setting.
TO SET THE ALARM TIME
1. Slide the switch to the ALARM position.
2. Press and hold the HOUR button to advance to the desired hour.
3. Press and hold the MINUTE button to advance to the desired minute. A “PM” indicator will appear on
the display for PM time only.
4. Slide the mode switch to the LOCK position to complete the alarm time setting.
ACTIVATING THE ALARM AND SNOOZE
1. Move the Alarm ON/OFF switch to ON position. The alarm symbol ( ) will appear on the display.
2. The alarm will activate at the preset time and sound for 60 seconds.
3. When the alarm activates you may press the SNOOZE/LIGHT button and the alarm will stop and
activate after approximately five ( 5 ) minutes. The symbol ( ) will flash. This snooze feature may be
repeated over and over again.
DST (DAYLIGH SAVING TIME)
Press the 2ND, TIME/YEAR button once to turn ON/OFF the DST (daylight saving time).
The DST symbol ( ) will appear on the display to indicate summer time. Turning this feature ON
advances the time by one hour. At the end of DST simply press the button again and the time will move
back one hour.
DISPLAY MODES
Press the 2ND, TIME/YEAR button to select between
•2
nd Time zone display, a DT icon will appear on the display.
•Alarm time display, the word “ALARM” appears on the display.
•Calendar display, a M & D icon will appear on the display.
LIGHT
Press the SNOOZE/LIGHT or the LIGHT button to light up the display.
NOTE: Frequent use of the light will drain the batteries more quickly.