5
• Built-in sound type product supports binary input 31 channels.
①
6RXQGFKDQQHOVHOHFWLRQVZLWFK)RUPRUHLQIRUPDWLRQSOHDVHUHIHUWR‡7\SHVDQG&RPELQDWLRQVRIVRXQGV·
②
Volume dial
)RUPRUHLQIRUPDWLRQSOHDVHUHIHUWR‡9ROXPH$GMXVWPHQW·
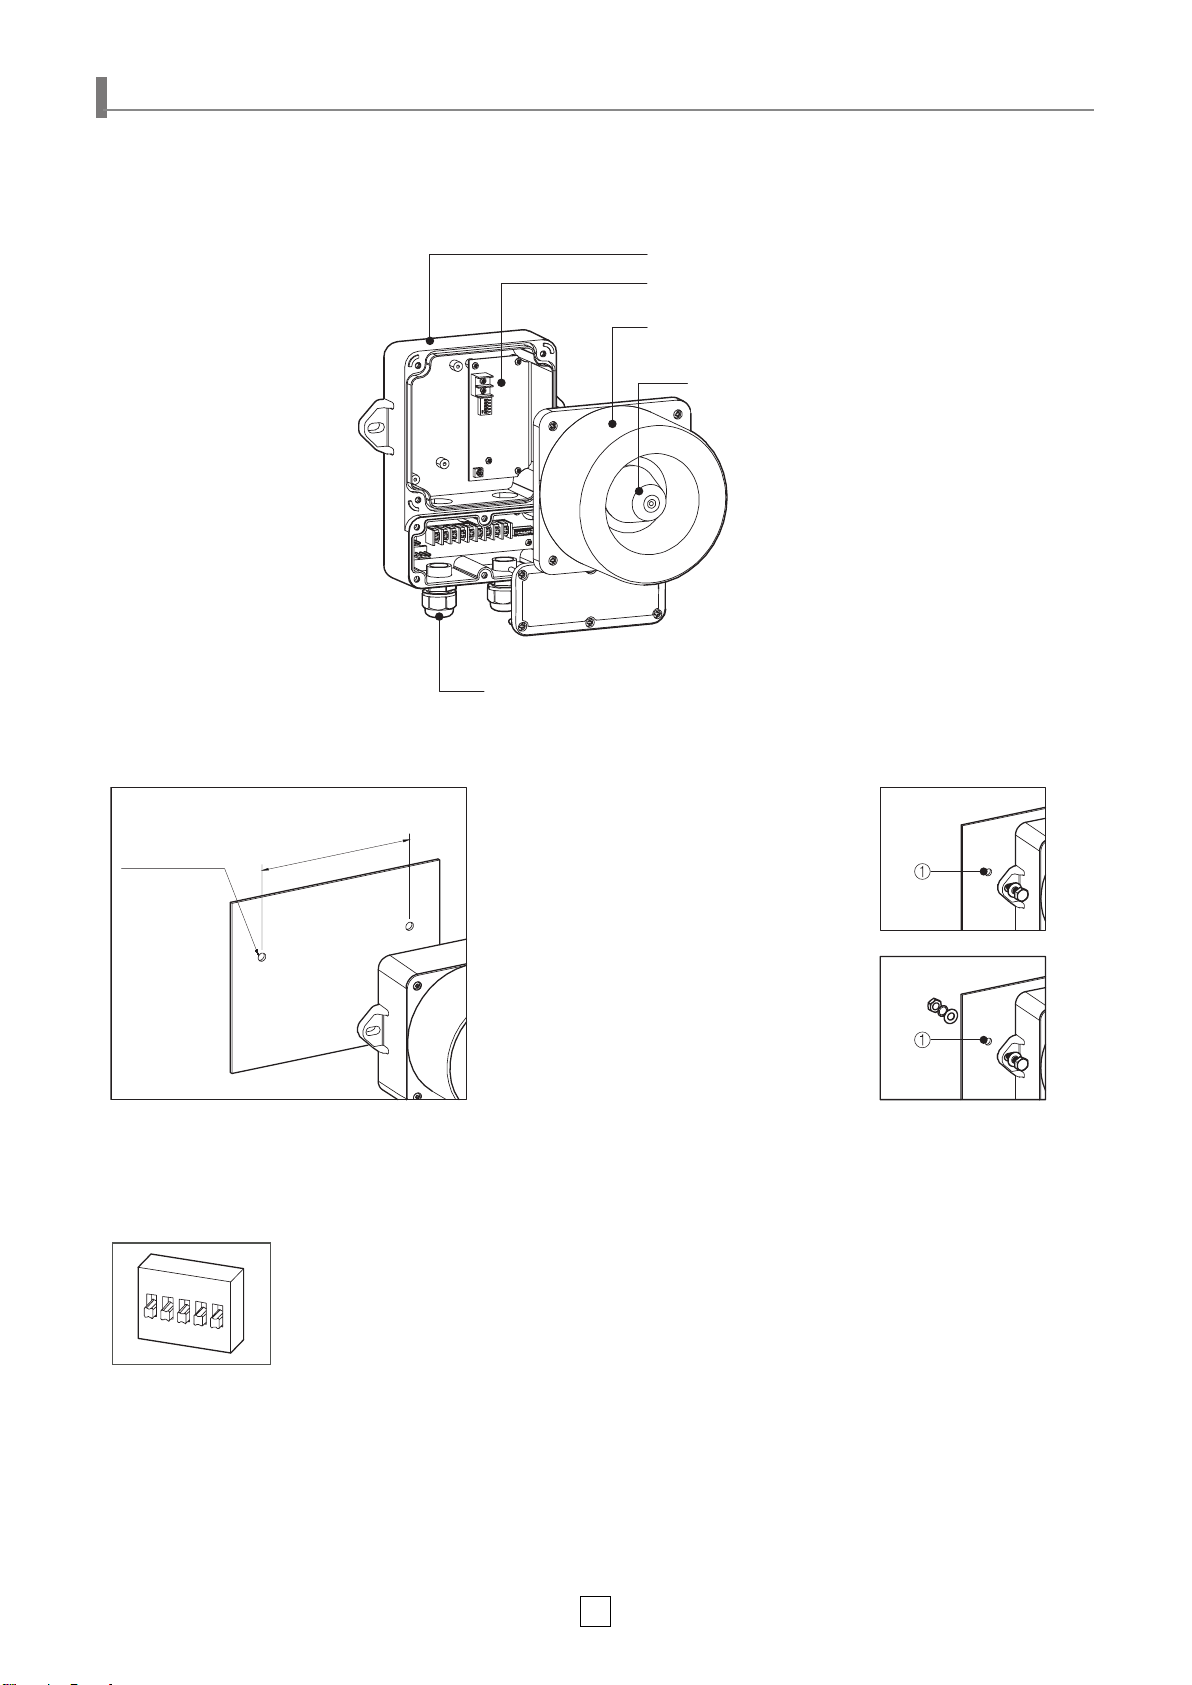
■QWH35-TI / QWH50-TI(Built-in Sound Type)
QWH35-TI
①
QWH50-TI
②
Operation Parts Conguration
②
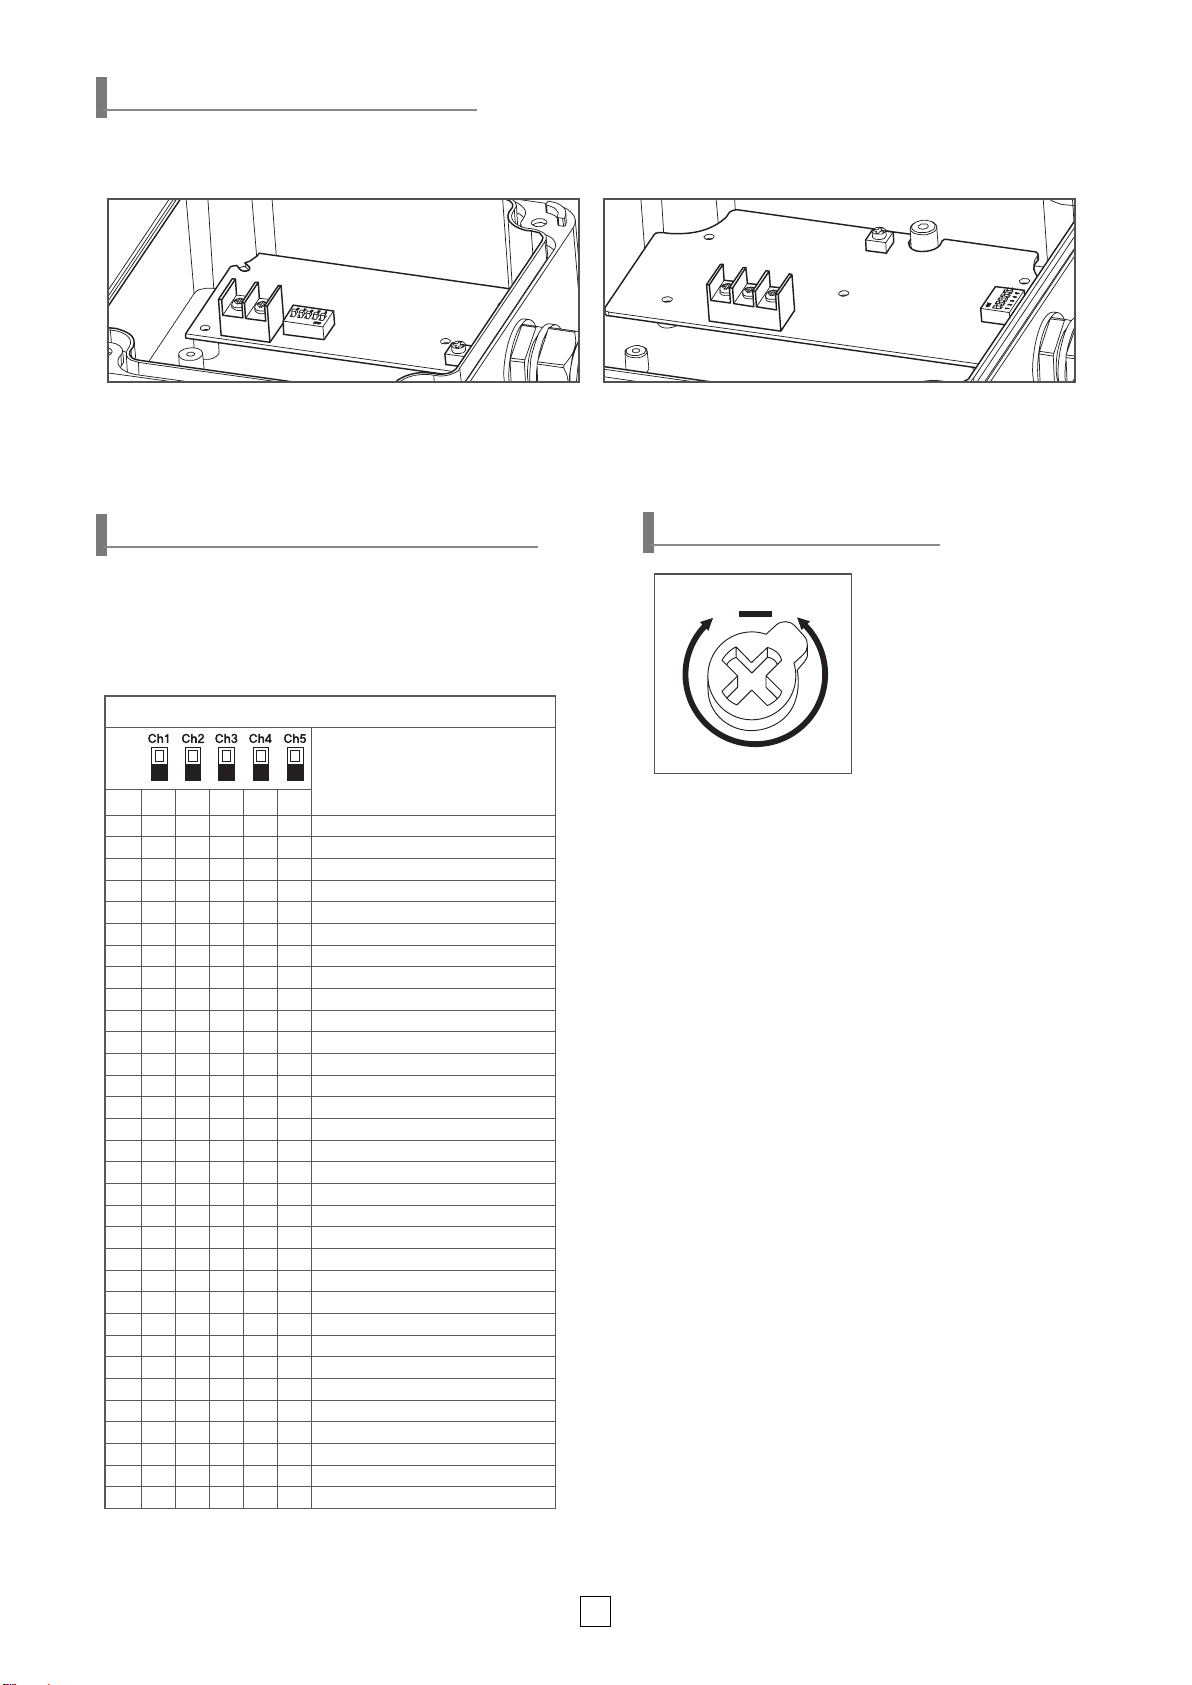
Volume Dial
Volume Adjustment
• The volume output of this
product is adjustable.
•
Turn the volume dial clockwise
to increase the volume, and
turn counter clockwise to
decrease the volume.
• There will be no sound when
WKHGLDOLVSXWDW0,1
92/
0,1MAX.
%LQDU\LQSXWPHWKRGVRXQGFRQ¿JXUDWLRQ
Type of sound
1R 1 2 3 4 5
0 0 0 0 0 0 1RVRXQG
1 0 0 0 0 1 Rel rel rel
2 0 0 0 1 0 Slow Ambulance PI-PO
3 0 0 0 1 1 Oit Oit warning sound
4 0 0 1 0 0 (PHUJHQF\:$8<HOS
5 0 0 1 0 1 Pi- buzzer
6 0 0 1 1 0 6KRUW3,/RQJ
7 0 0 1 1 1 Pi o Pi o
8 0 1 0 0 0 Phone Ring
9 0 1 0 0 1 Pi- buzzer
10 0 1 0 1 0 Pi pi pi short
11 0 1 0 1 1 Di o Di o 2 tones buzzer
12 0 1 1 0 0 Oit Oit warning sound
13 0 1 1 0 1 Slow Ambulance PI-PO
14 0 1 1 1 0 Slow Di o Di o
15 0 1 1 1 1 )DVW/LROLR
16 1 0 0 0 0 )LUH$$1*
17 1 0 0 0 1 Fast Ambulance PI-PO
18 1 0 0 1 0 Slow Ambulance PI-PO
19 1 0 0 1 1 Ri ro ri ro warning sound
20 1 0 1 0 0 Repeat Di-o 3 times
21 1 0 1 0 1 )LUH$$1*
22 1 0 1 1 0 Ambulance PI-PO
23 1 0 1 1 1 6ORZ)LUH$$1*
24 1 1 0 0 0 Pi-pi- buzzer low frequency
25 1 1 0 0 1 Pi-pi- buzzer high frequency
26 1 1 0 1 0 Di-di- buzzer high frequency
27 1 1 0 1 1 Di-di- buzzer low frequency
28 1 1 1 0 0 Rising Po-ong
29 1 1 1 0 1 Fast Ambulance PI-PO
30 1 1 1 1 0 Rising frequency
31 1 1 1 1 1 5HSHDW$$1*
ON(1)
OFF(0)
• When playing the built-in sound, select the sound in binary
input mode.
• In binary input mode, you can choose one sound from 31
VRXQGVE\FRQ¿JXULQJWKHFKDQQHOV
Sound Type and Combination Manual
■ Binary Input - Playing Built-in Sound