QRS PNO3User Guide
QRS Music Technologies, Inc. Technical Support - 800-247-6557
www.qrsmusic.com
Table of Contents
Major Components 4
Introduction To PNOmation35
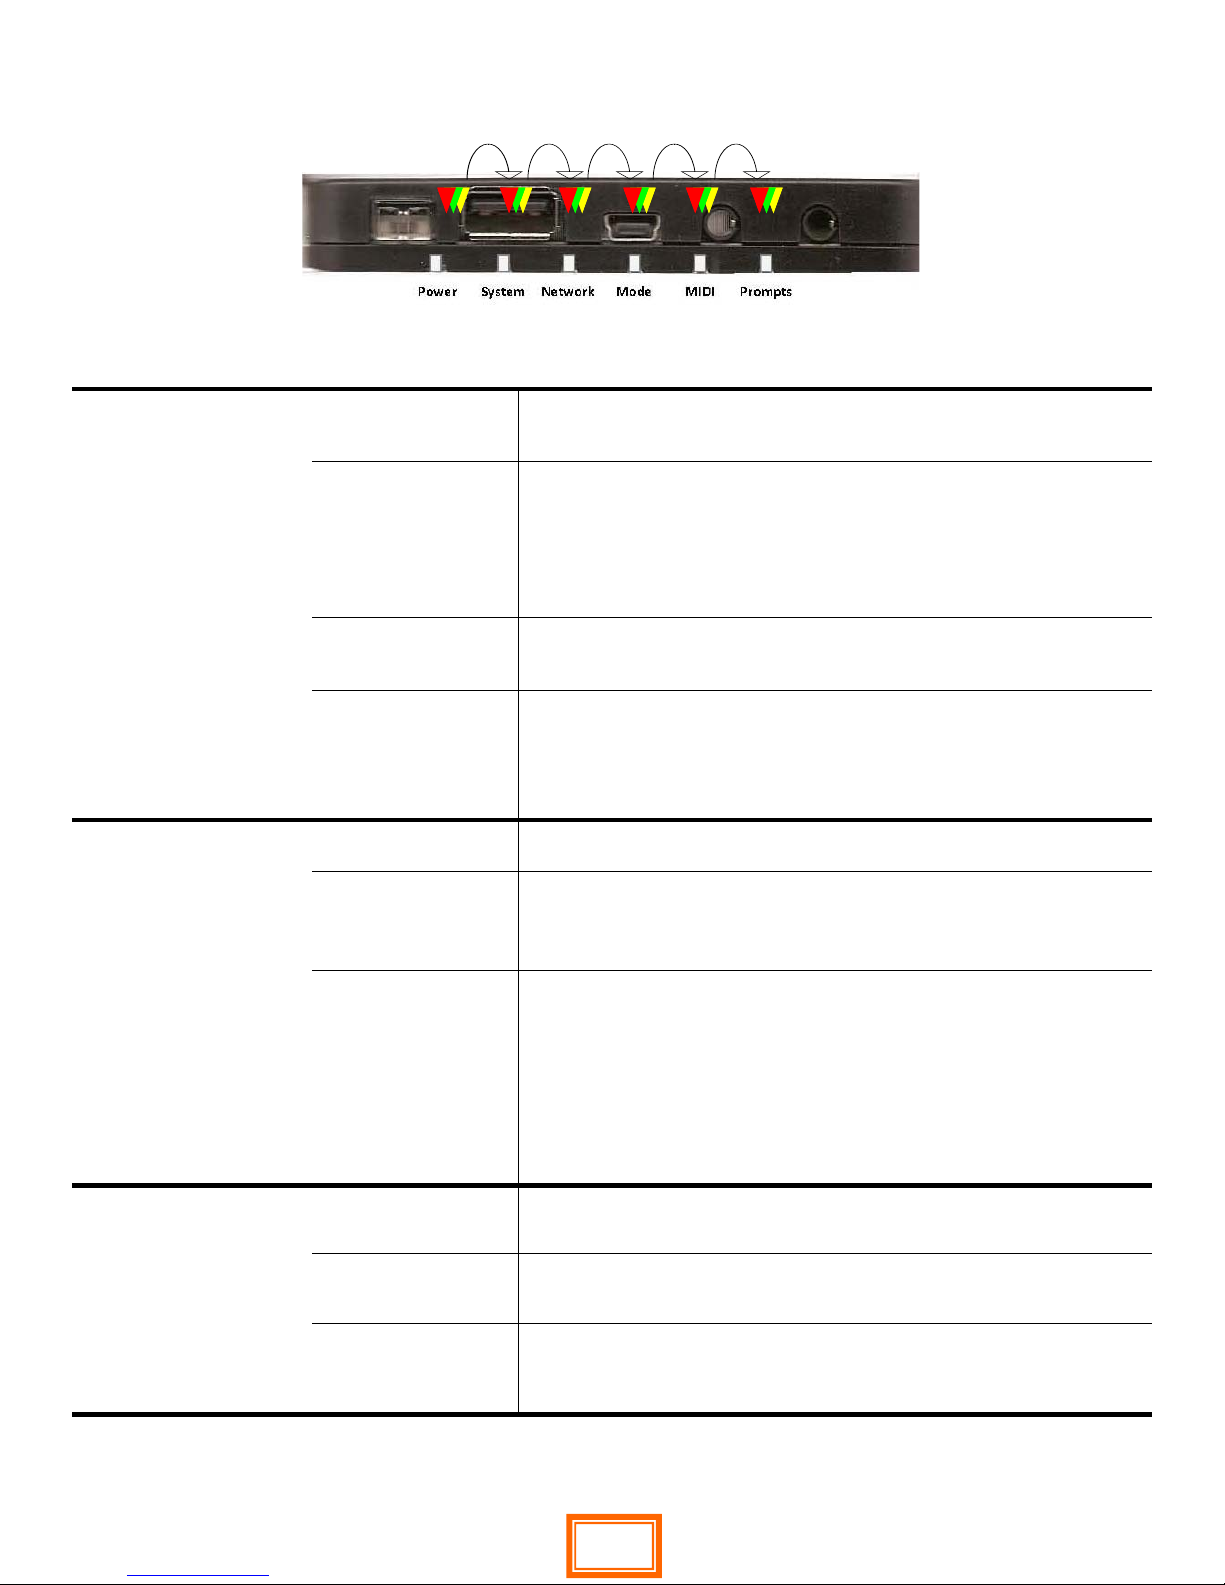
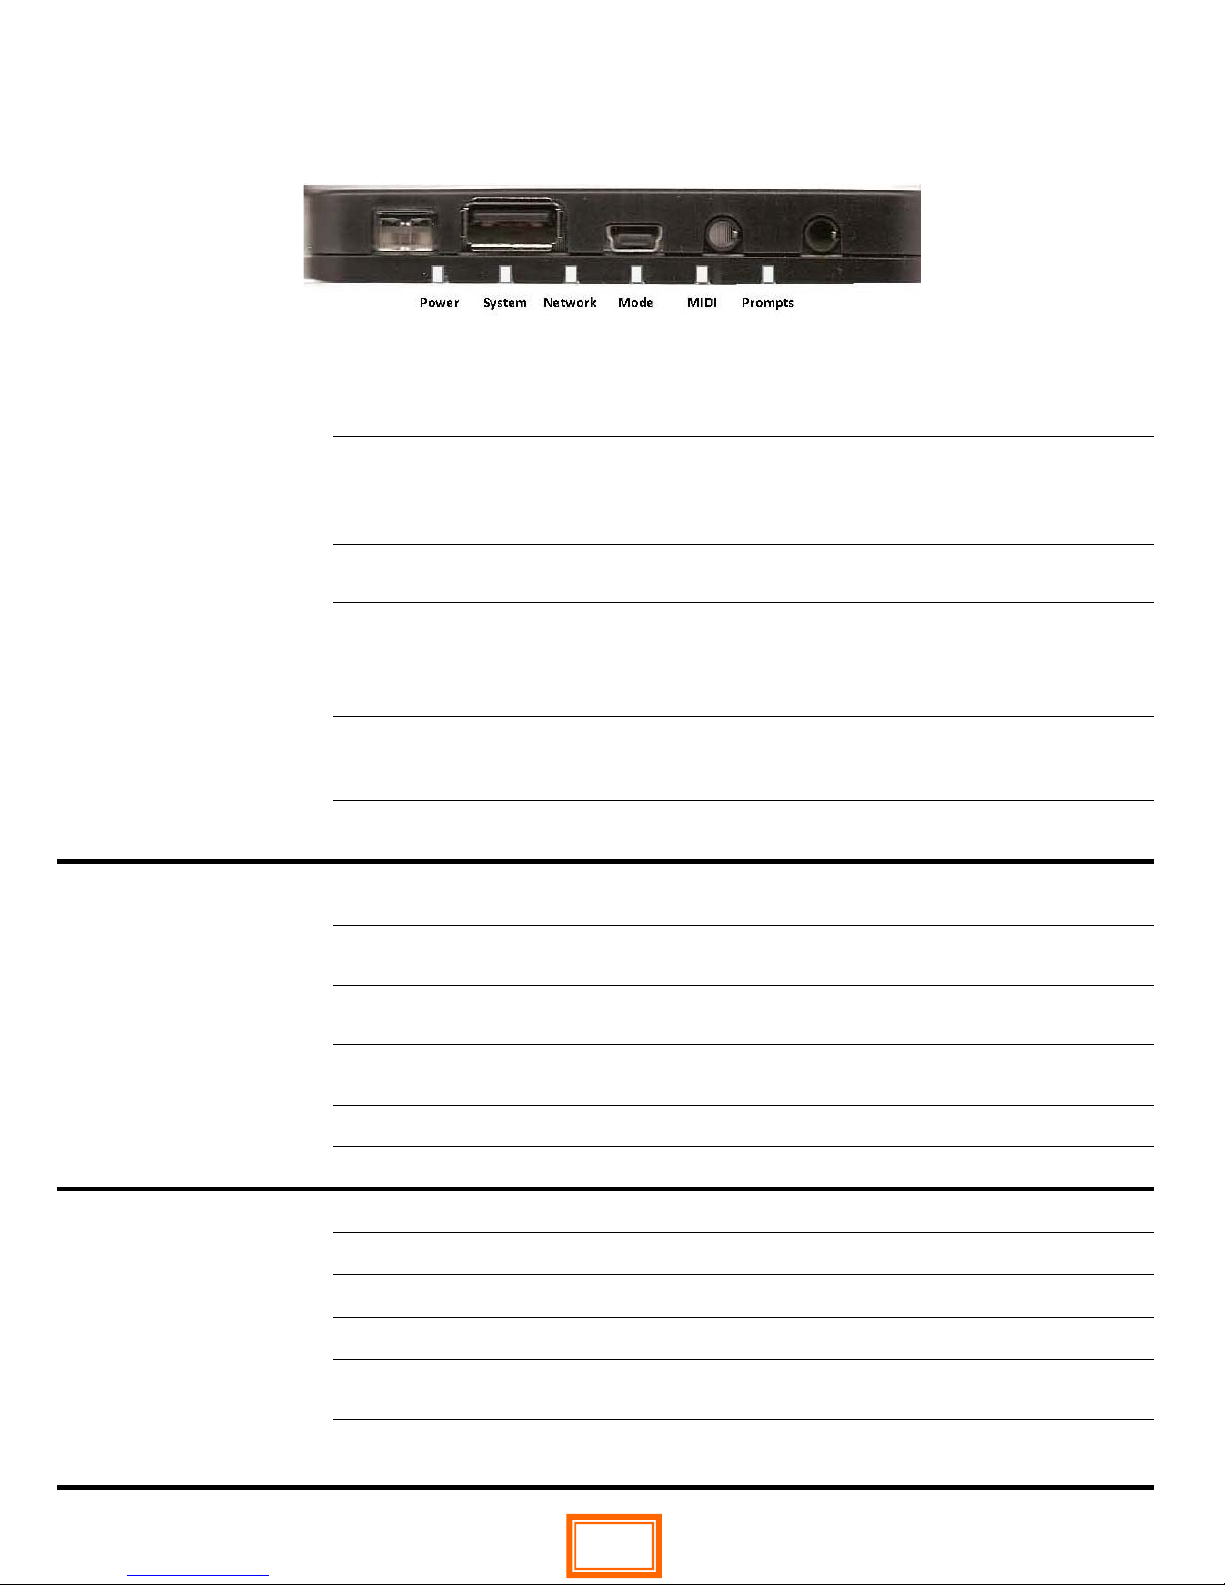
The Pin Light Port Extender (PLx)
Initial Start Up LED Status 6
Operating System Updating Status 6
Button Push (s) 6
The Pin Light Port Extender (PLx)
Power/Status—LED 1 7
System Activity Status—LED 2 7
Network Status—LED 3 7
The Pin Light Port Extender (Plx)
Operating Mode/Source—LED 4 8
MIDI Activity & Record Status—LED 5 8
System & Prompt Statuse—LED 6 8
Infrared Remote Control
Batteries—is it working? 9
Source Selection 9
Volume Control 9
Transport Buttons 9
Second Row Special Functions 9
Light 6 AMI and Voice Prompt 9
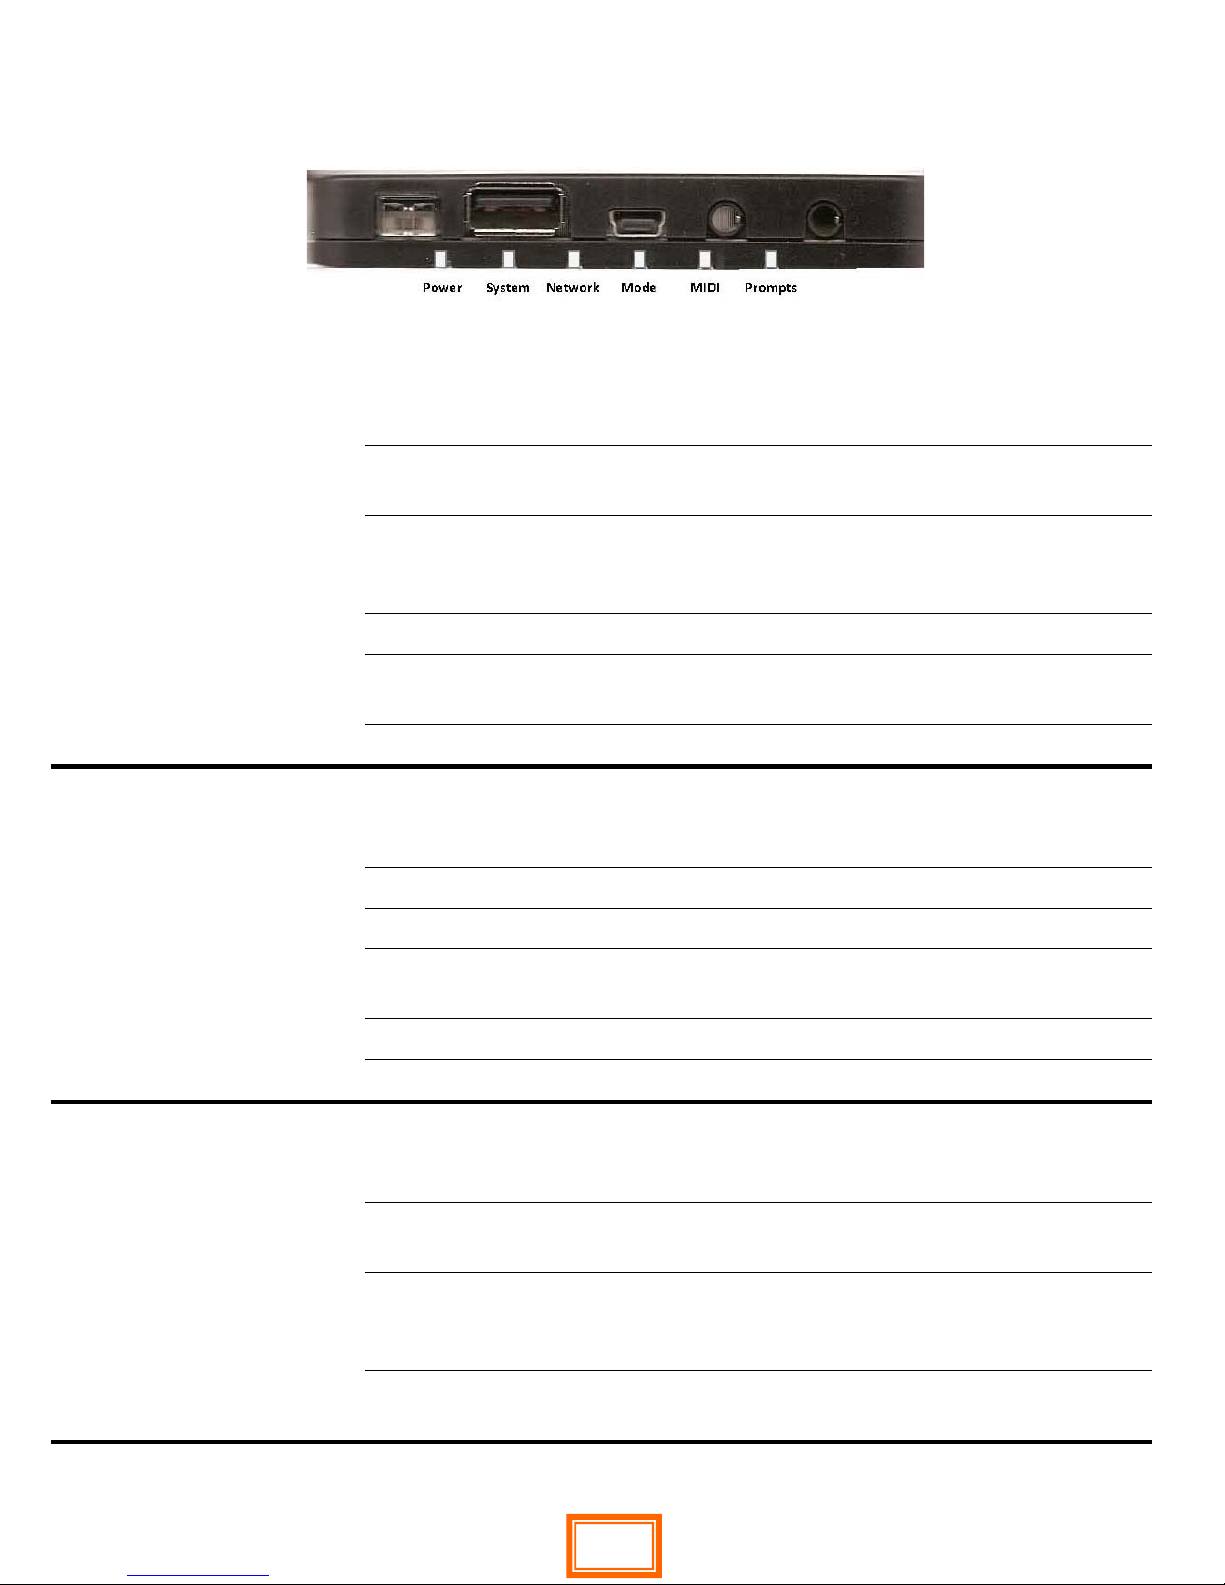
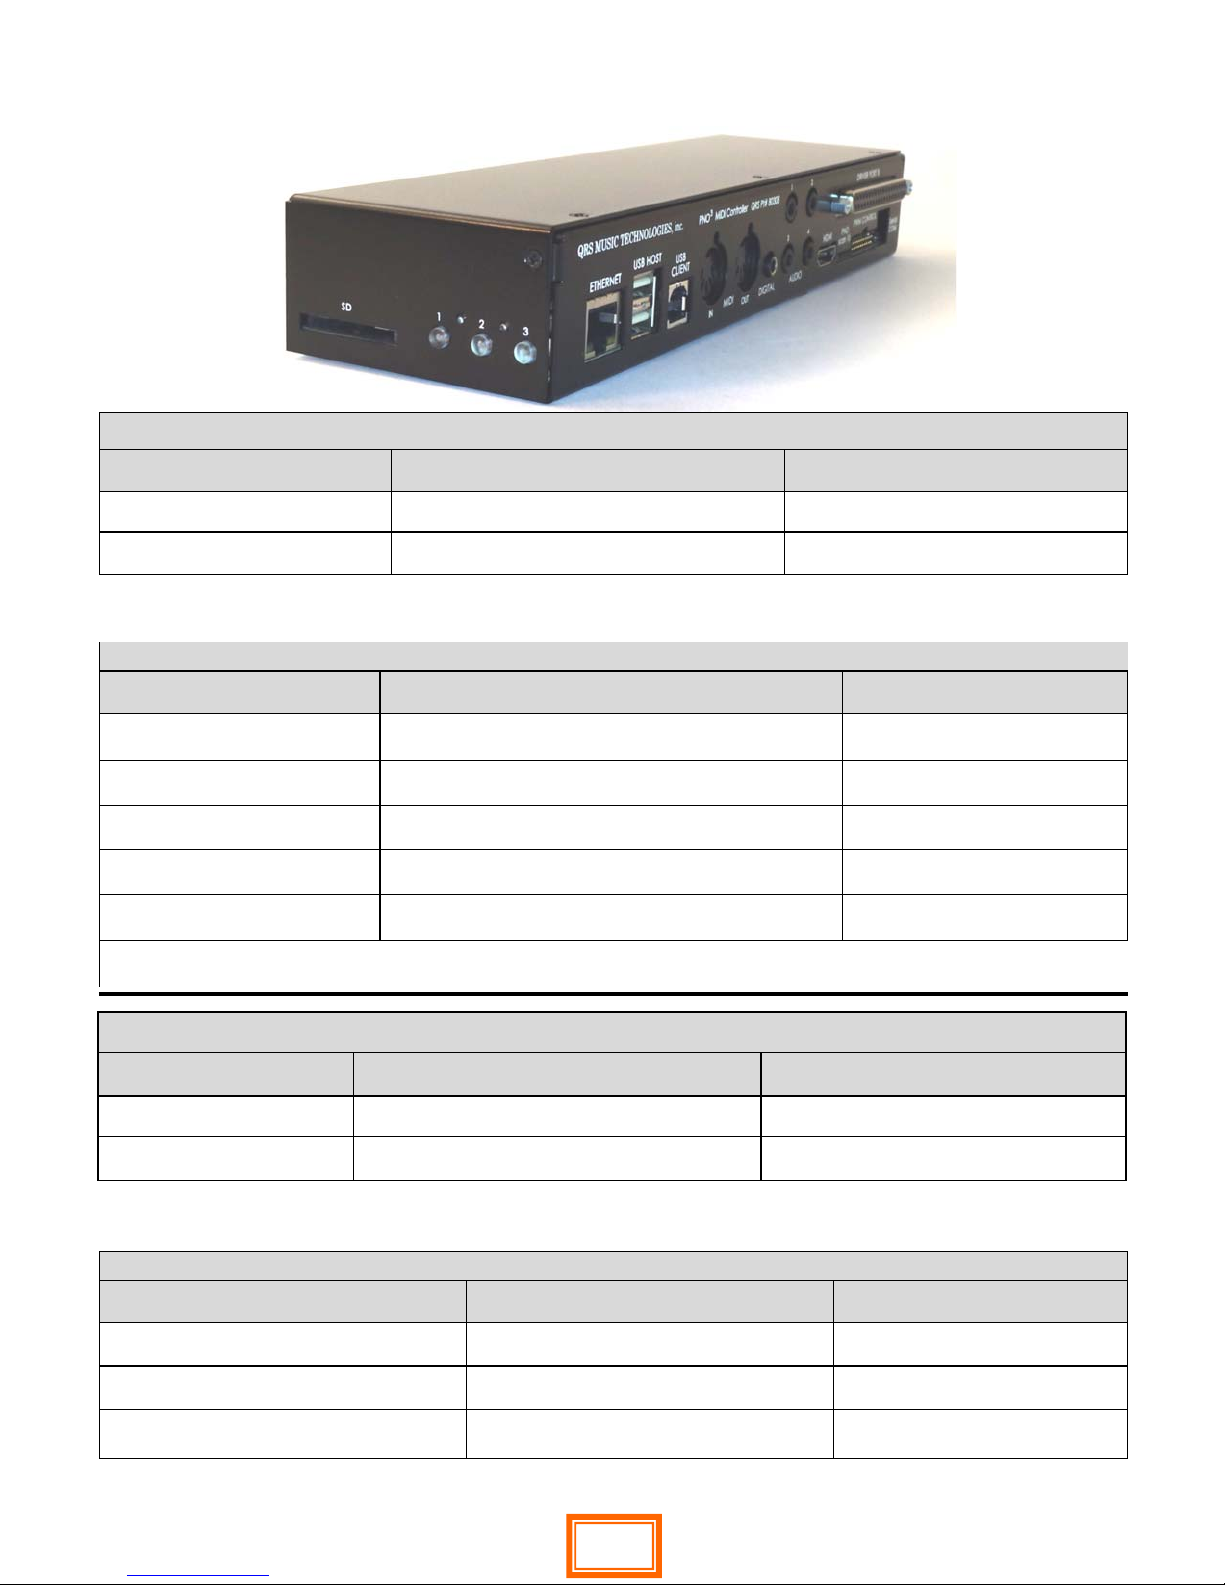
PNO3 Main Processor/Controller Buttons & LEDs
Button LED 1 MIDI and AMI activity 10
Button LED 1 Press, >2s, <2s, 8s,... 10
Button LED 2 Indexing, Playback Status 10
Button LED 2 Press, >2s, <2s, 8s,... 10
Button LED 3 Network 11
Button LED 3 Press, >2s, <2s, 8s,... 11
PNO3 Solenoid Driver Board LED indication 12
PNO3 Power LED Status Lights & Fuse 12
Netgear Wi-Fi Extender - Buttons and LEDs
Buttons and LEDs what they mean 13
Network Status LED 13
Client Link LED Status 13
Power LED, WPS LED 13
Blinking Arrows 13
Netgear Wi-Fi Ext - Network Setup Description
Brief How To 14
Network Mode Setup -Step by Step 15
Stand Alone Mode - Step by Step 16 -18
Connecting in Stand Alone Mode 19
Connecting in Network Mode 20
The Playback Screen Basic Understanding 21
Volume Controls 22
Creating a Playlist 22
Activating Your Trial 23
Verify Trial, Music Plans & Purchases 24
System Setup of Piano Performance
Global Playback Parameter 25
Key Adjust—Min Note Volumes 26
Sustain Pedal Adjust and Dynamics 27
Playback Dynamics of File Types 28
Master Volume Mapped to File Type 29-30
Record Setup
Global Record Parameter Setups 31
PNOscan Setup 32
PNOscan Advanced Setting 33
2