LCD DISPLAY
8 9 FUNCTION INSTRUCTION
FUNCTION INSTRUCTION
To make a call, press and hold the “PTT” Key, then speak to the microphone
in normal tone. Pls keep the microphone 3-4CM away from your lips, to make
good communications.
Release "PTT" to receive.
Long hold to turn on the squelch, release to turn it off.
Short hold to turn on jacklight, press again to turn it off.
Press “F” key to enter Function interface.
Press Exit key to exit
Full frequency pattern, short hold and frequency goes upwardly, “F+A” in
MHz upwardly.
Channel Pattern, short hold and channel goes upwardly.
Frequency pattern, short hold and channel goes upwardly.
Full frequency pattern, short hold and frequency goes downwardly, “F+A”
in MHz downwardly.
Channel Pattern, short hold and channel goes downwardly.
Frequency pattern, short hold and channel goes downwardly.
“F+C” key scan upwardly
Full frequency pattern, scan frequency.
Channel pattern or frequency pattern, scan channel.
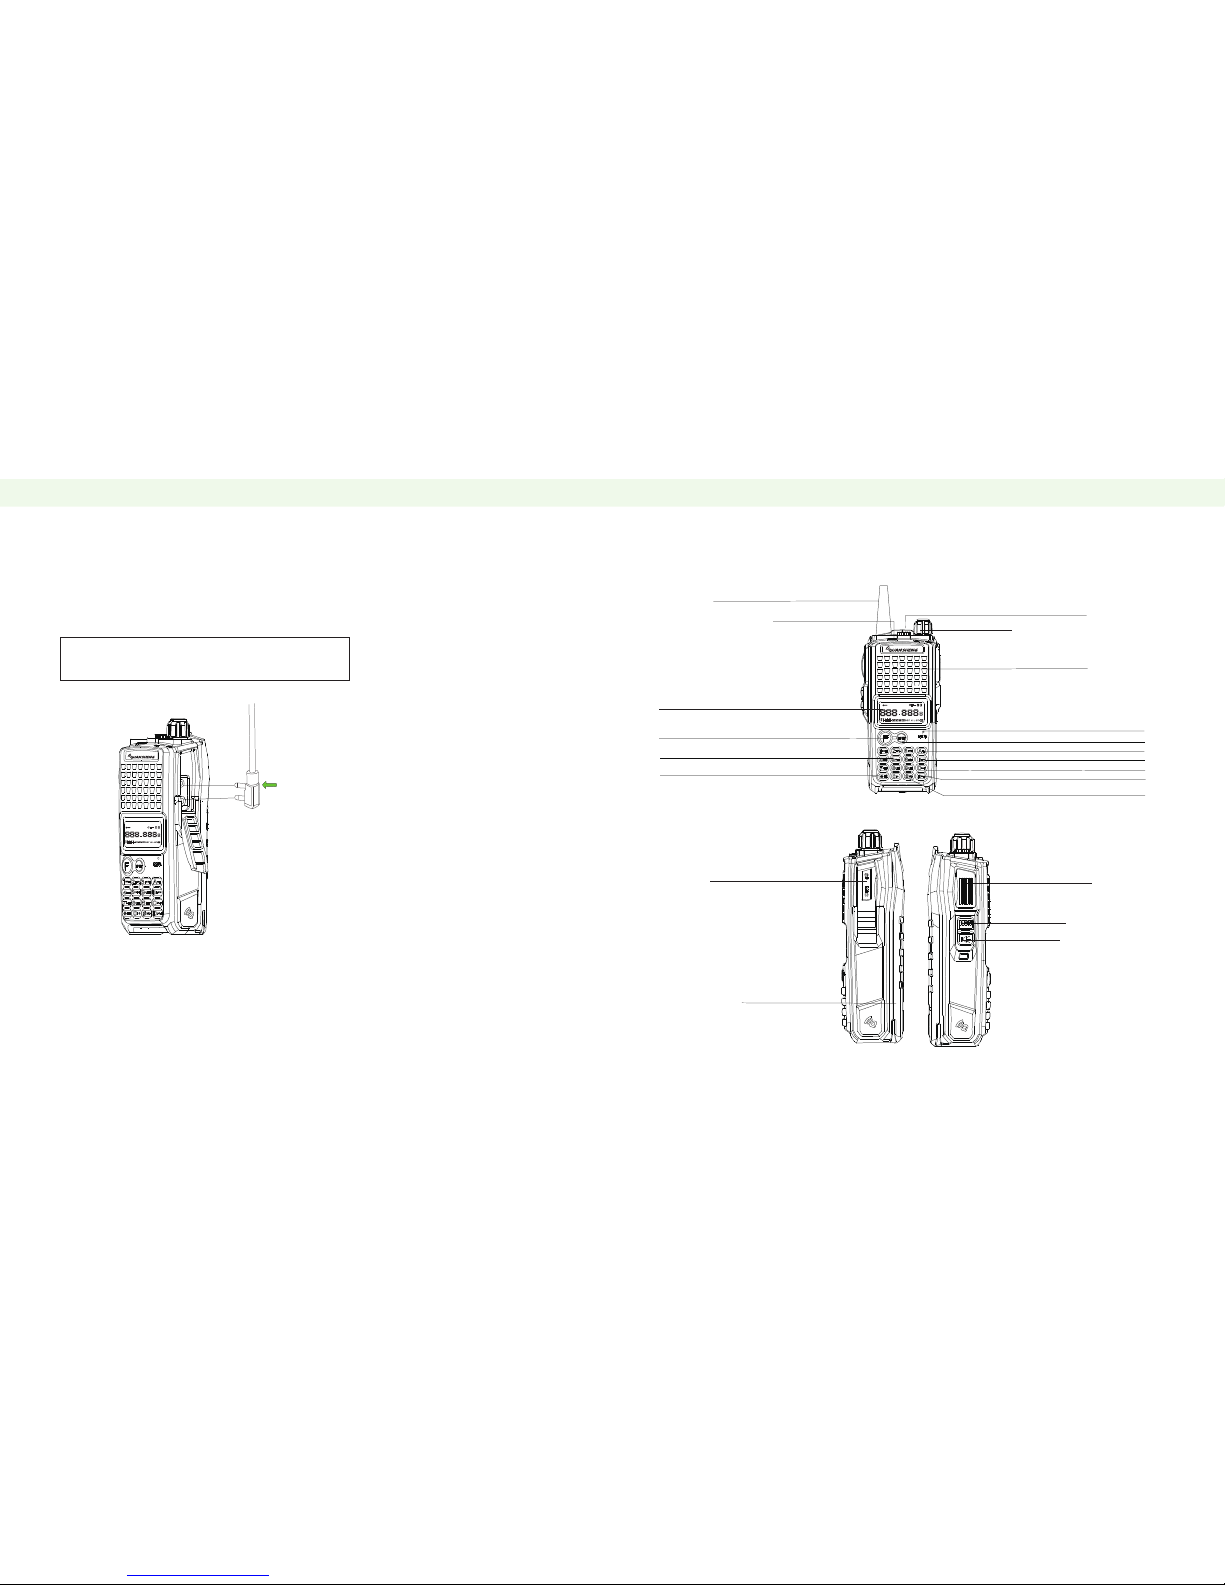
PTT key
MON key
Jacklight Key
Function (F) key / Exit key.
A key
B key
C key
●
●
●
●
●
●
●
●
●
●
●
●
●
●
●
LCD DISPLAY
You could check the different designated simbols in the LCD. The following
chart helps you to understand them.
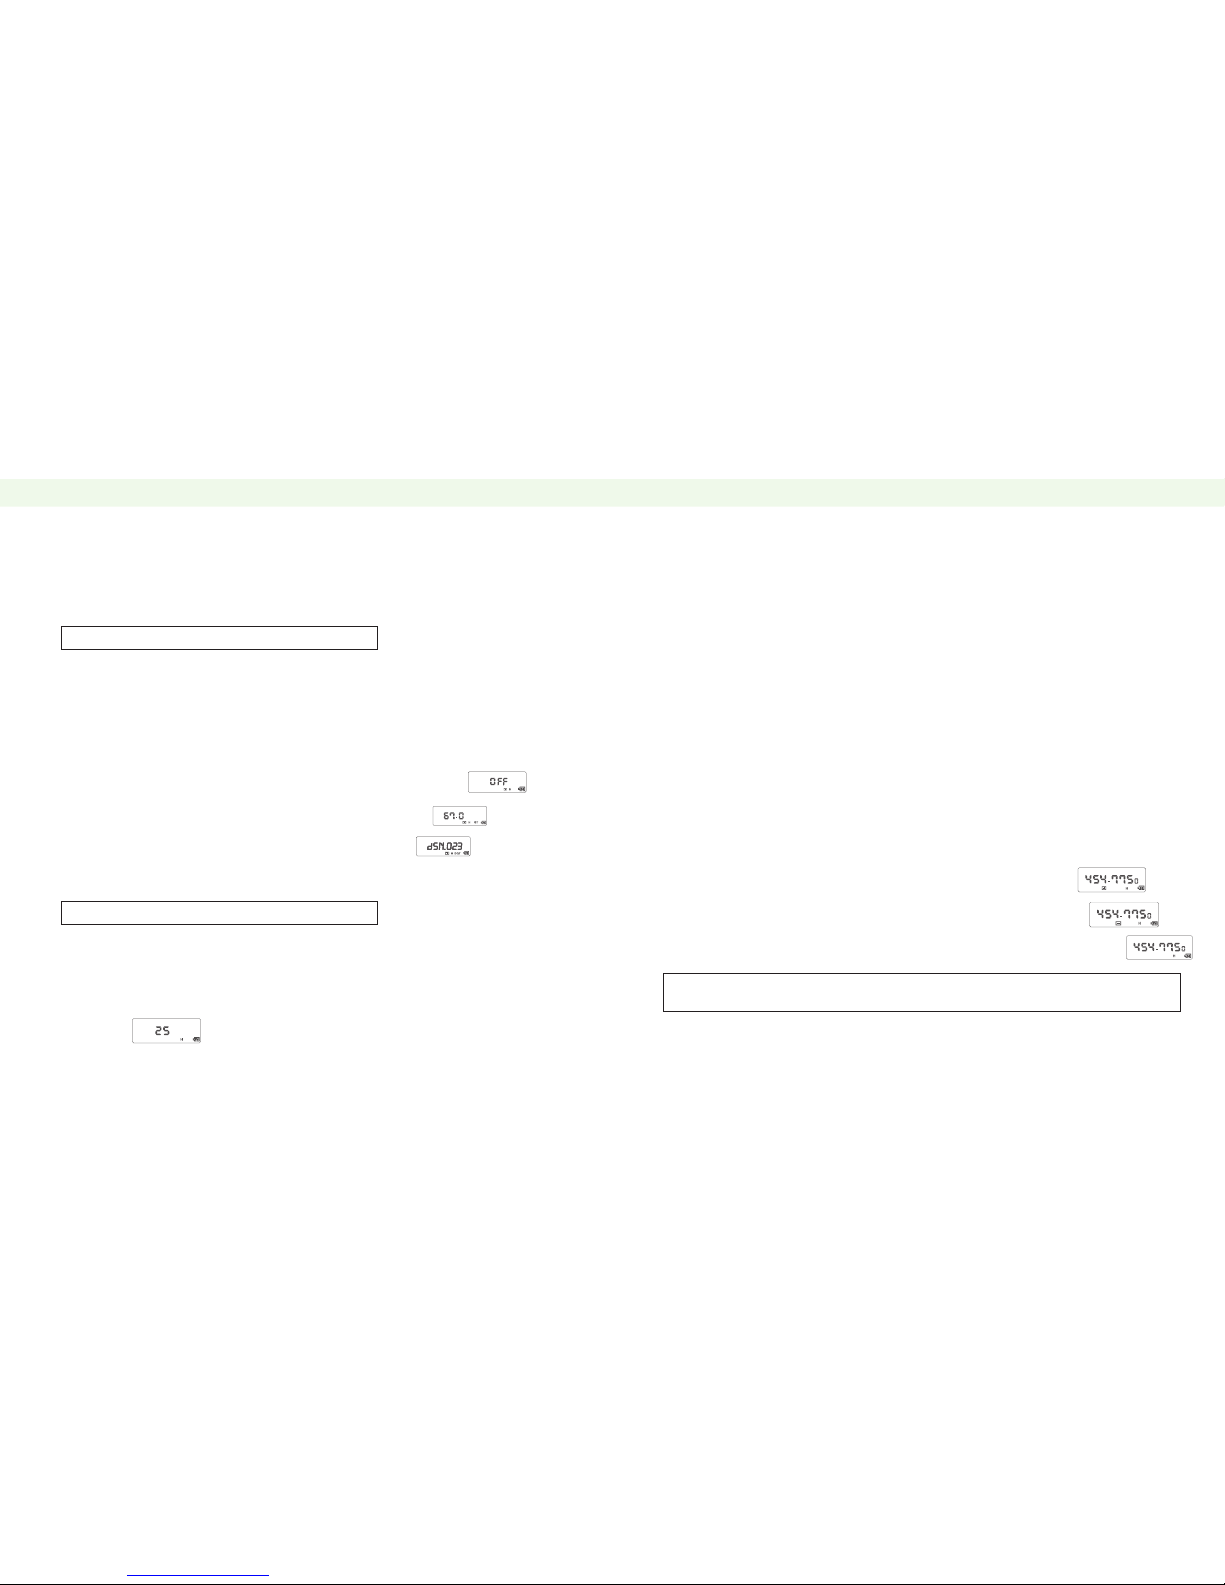
It refers to CTCSS, which will appear when transmitting, and it means transmitting CTCSS.
It refers to DCS, which will appear when transmitting, and it means transmitting DCS.
It appears under frequency pattern, which means the transmitting frequency is receiving
frequency plus one frequency difference. Frequency differences can be set in Menu 25.
It appears under frequency pattern, which means the transmitting frequency is receiving
frequency minus one frequency difference. Frequency differences can be set in Menu 25.
It refers that the current channel transmits CTCSS.
It refers that the current channel receiving CTCSS.
The current transmitting power is high.
The current transmitting power is low.
Signal strength indication, R means receiving, T means transmitting
Shows the dump energy of the battery. It will blink when the the battery is nearly exhausted.
Transmitting is forbidden at this time.
It appears when the keypad is locked. Hold #/LOCK key to relieve.
Under channel pattern,Under frequency and channel name display pattern, it refers to
the channel NO, And it refers to the prior menu NO. when setting the menu.
LCD ICON EXPLANATION