.1.
1.1 SAFETY WARNING
IMPORTANT:
●
●
●
●
●
●
●
●
●
●
This product must be installed by a qualified professional.
Always operate the equipment as described in the user manual.
A minimum distance of 0.5m must be maintained between the equipment
and combustible surface.
The product must always be placed in a well ventilated area.
Always make sure that the equipment is installed securely.
DO NOT stand close to the equipment and stare directly into the LED light
source.
Always disconnect the power supply before attempting and maintenance.
Always make sure that the supporting structure is solid and can support
the combined weight of the products.
The earth wire must always be connected to the ground.
Do not touch the power cables if your hands are wet.
●
●
●
●
●
●
●
●
●
This product left the place of manufacture in perfect condition. In order to
maintain this condition and for safe operation, the user must always follow
the instructions and safety warnings described in this user manual.
Avoid shaking or strong impacts to any part of the equipment.
Make sure that all parts of the equipment are kept clean and free of dust.
Always make sure that the power connections are connected correct and
secure.
If there is any malfunction of the equipment, contact your distributor
immediately.
I t is important that the power cable is frequently inspected to ensure that
there is no damagein any position. If the power cable is damaged in any way,
it should be replaced by a qualified electrical technician.
When transferring the product, it is advisable to use the original packaging
in which the product left the factory.
Shields, lenses or ultraviolet screens shall be changed if they have
become damaged to such an extent that their effectiveness is impaired.
The lamp (LED) shall be changed if it has become damaged or thermally
deformed.
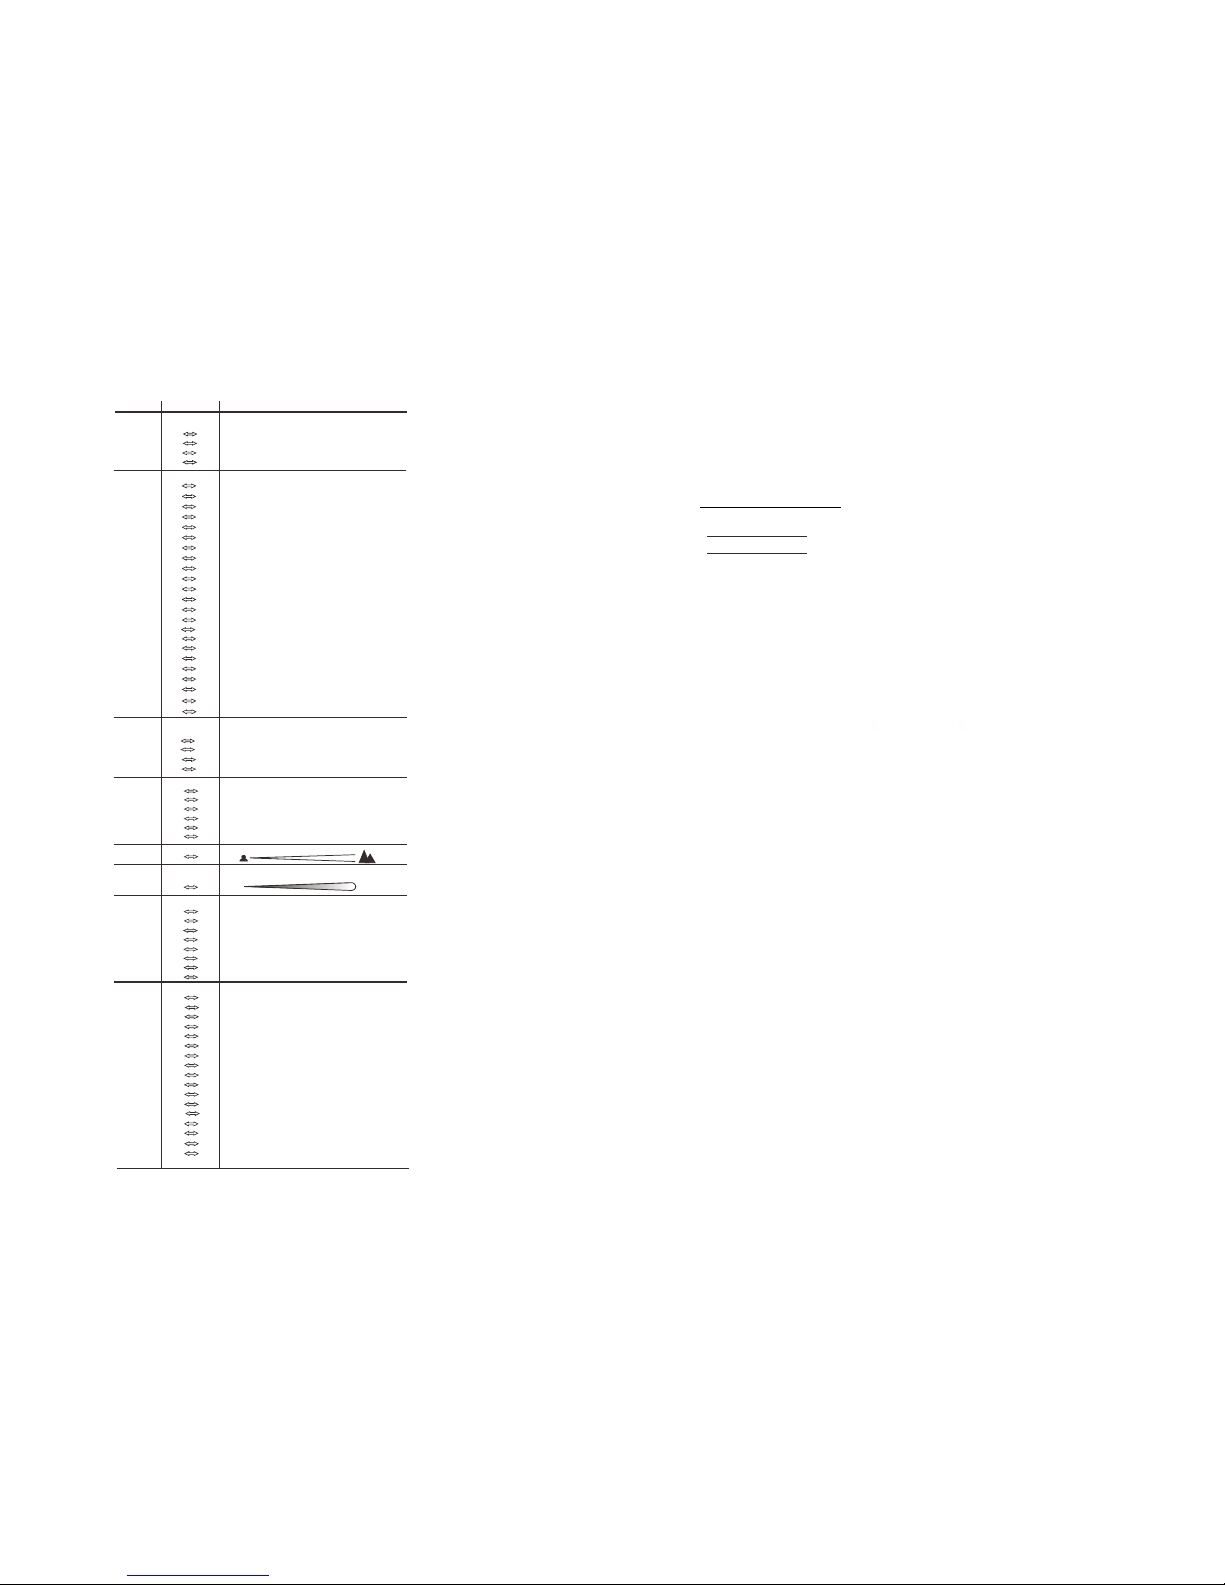
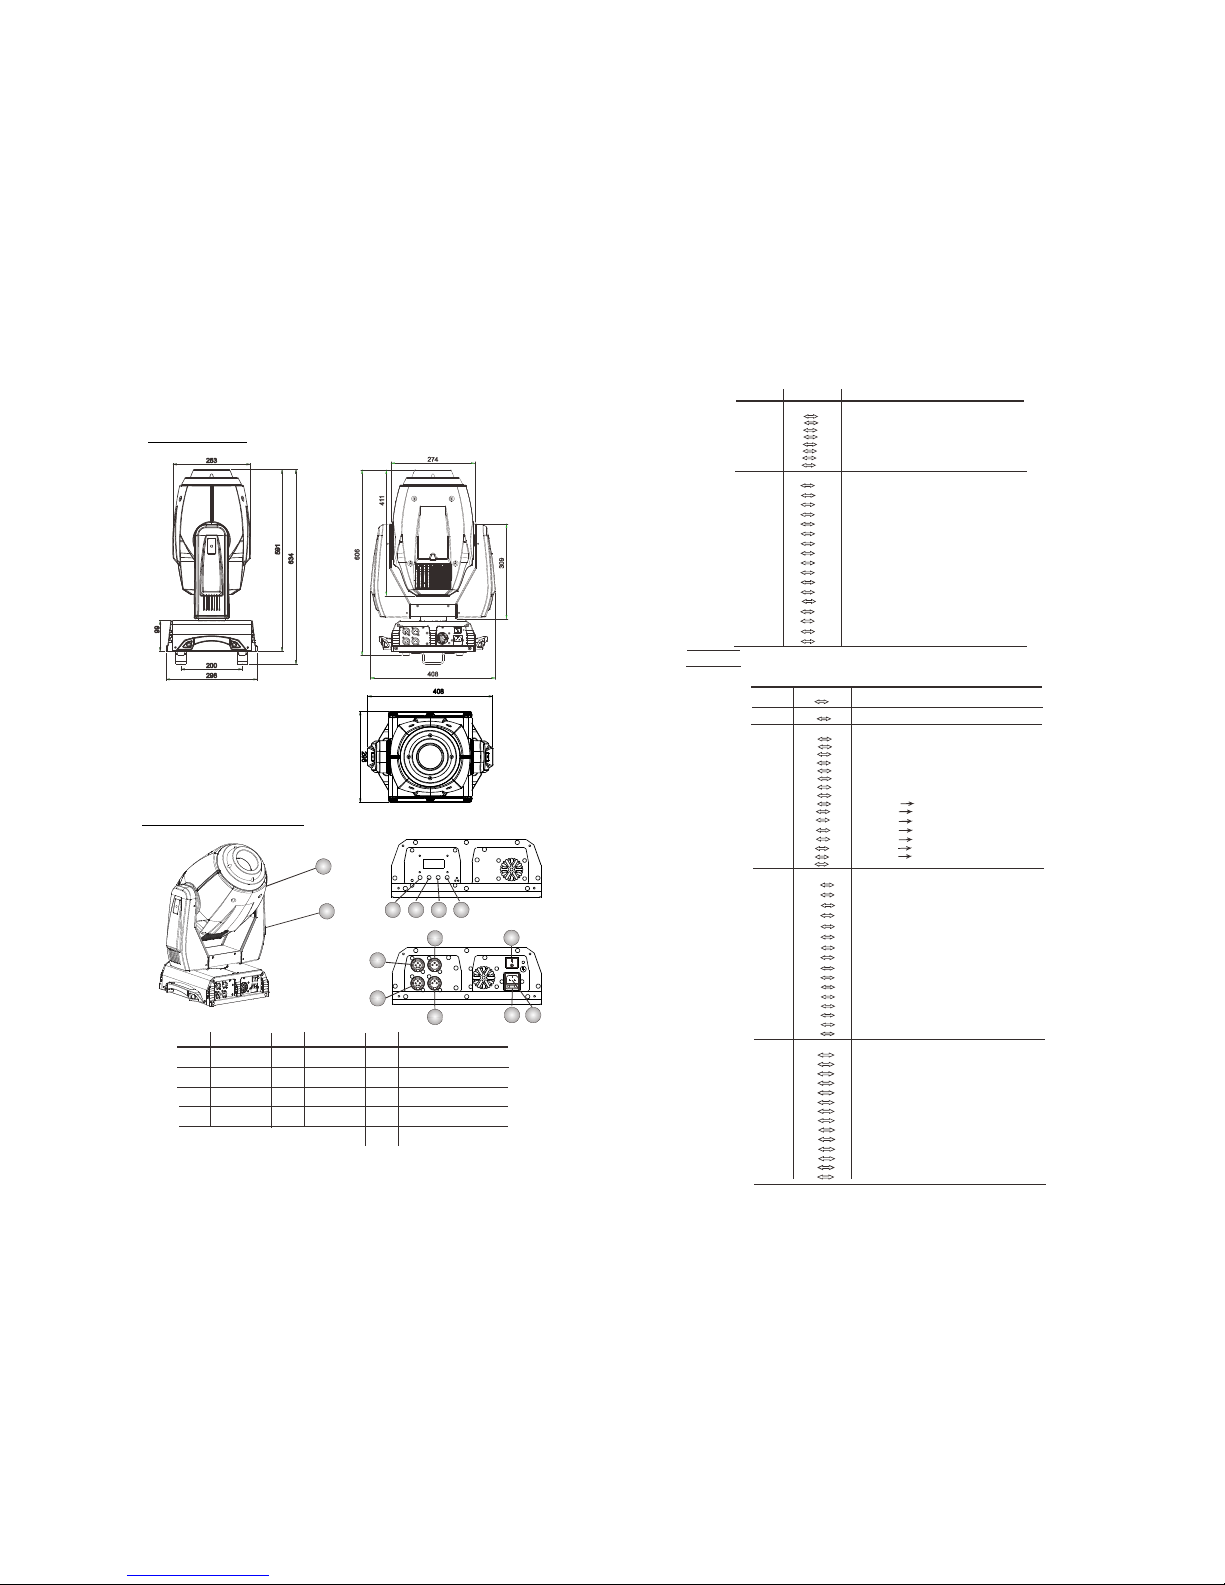
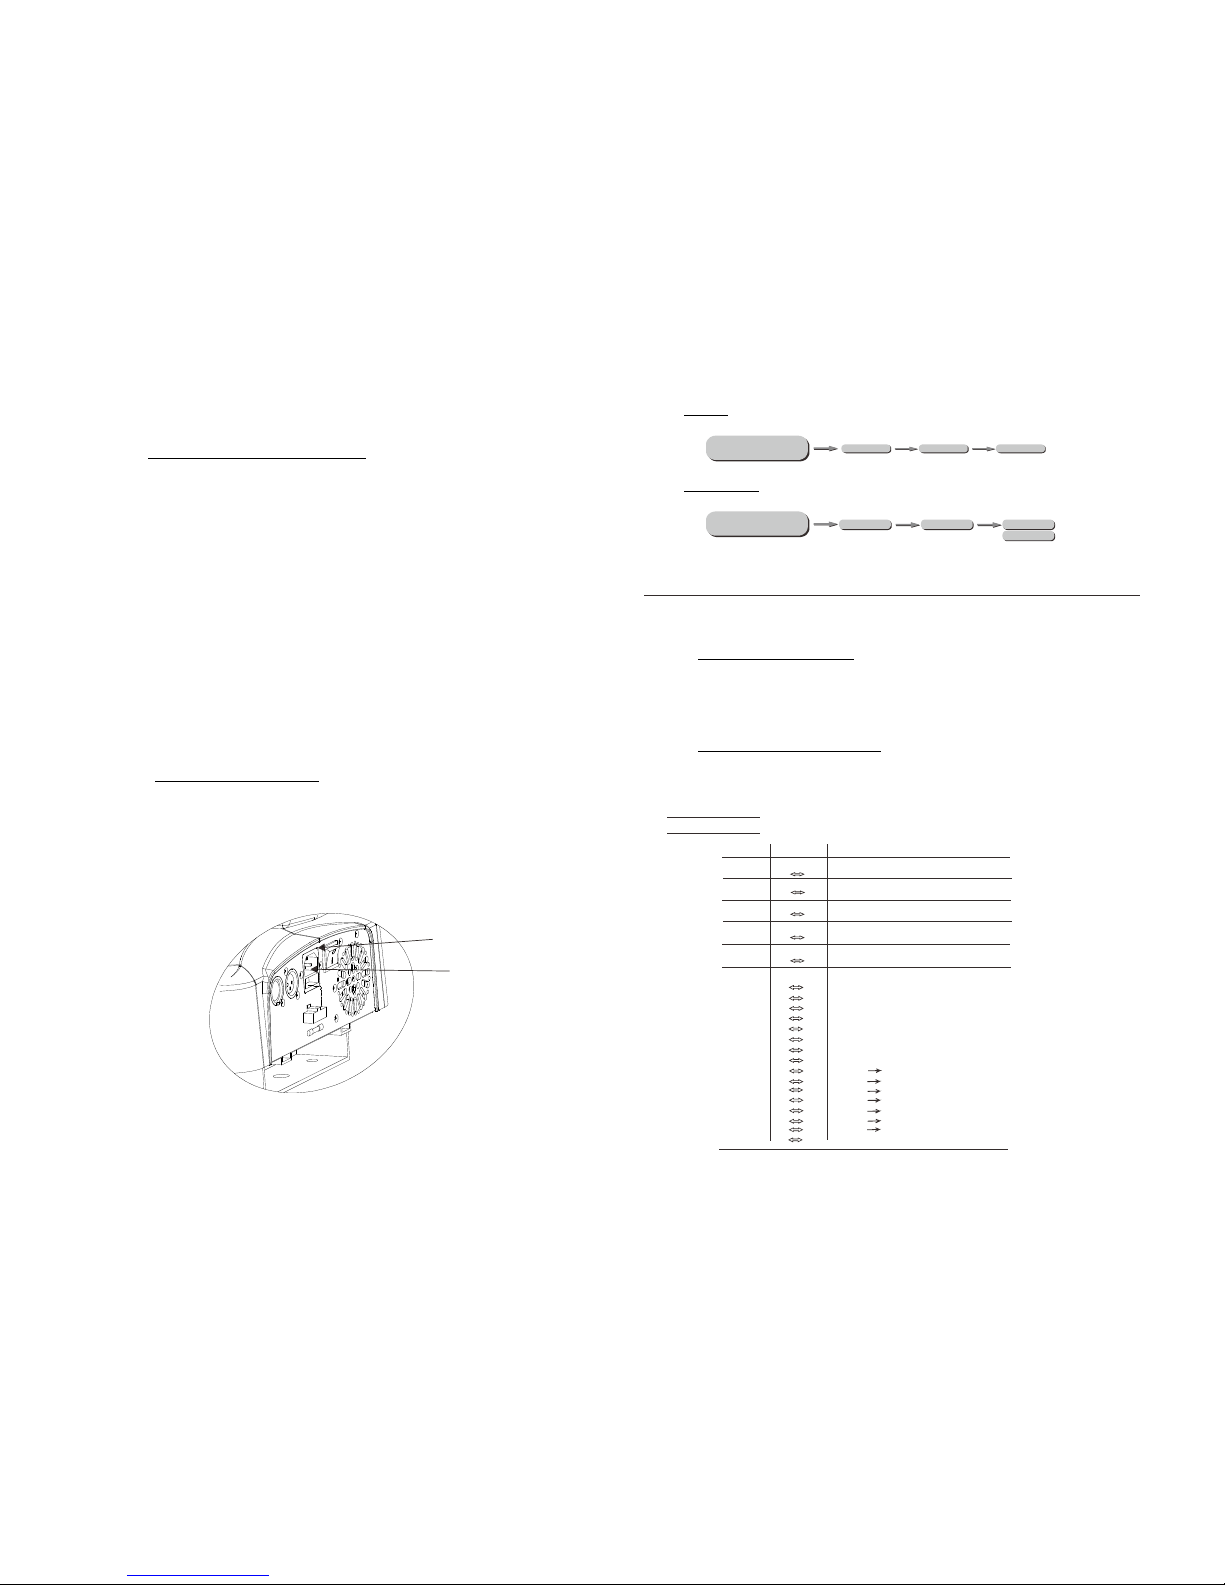
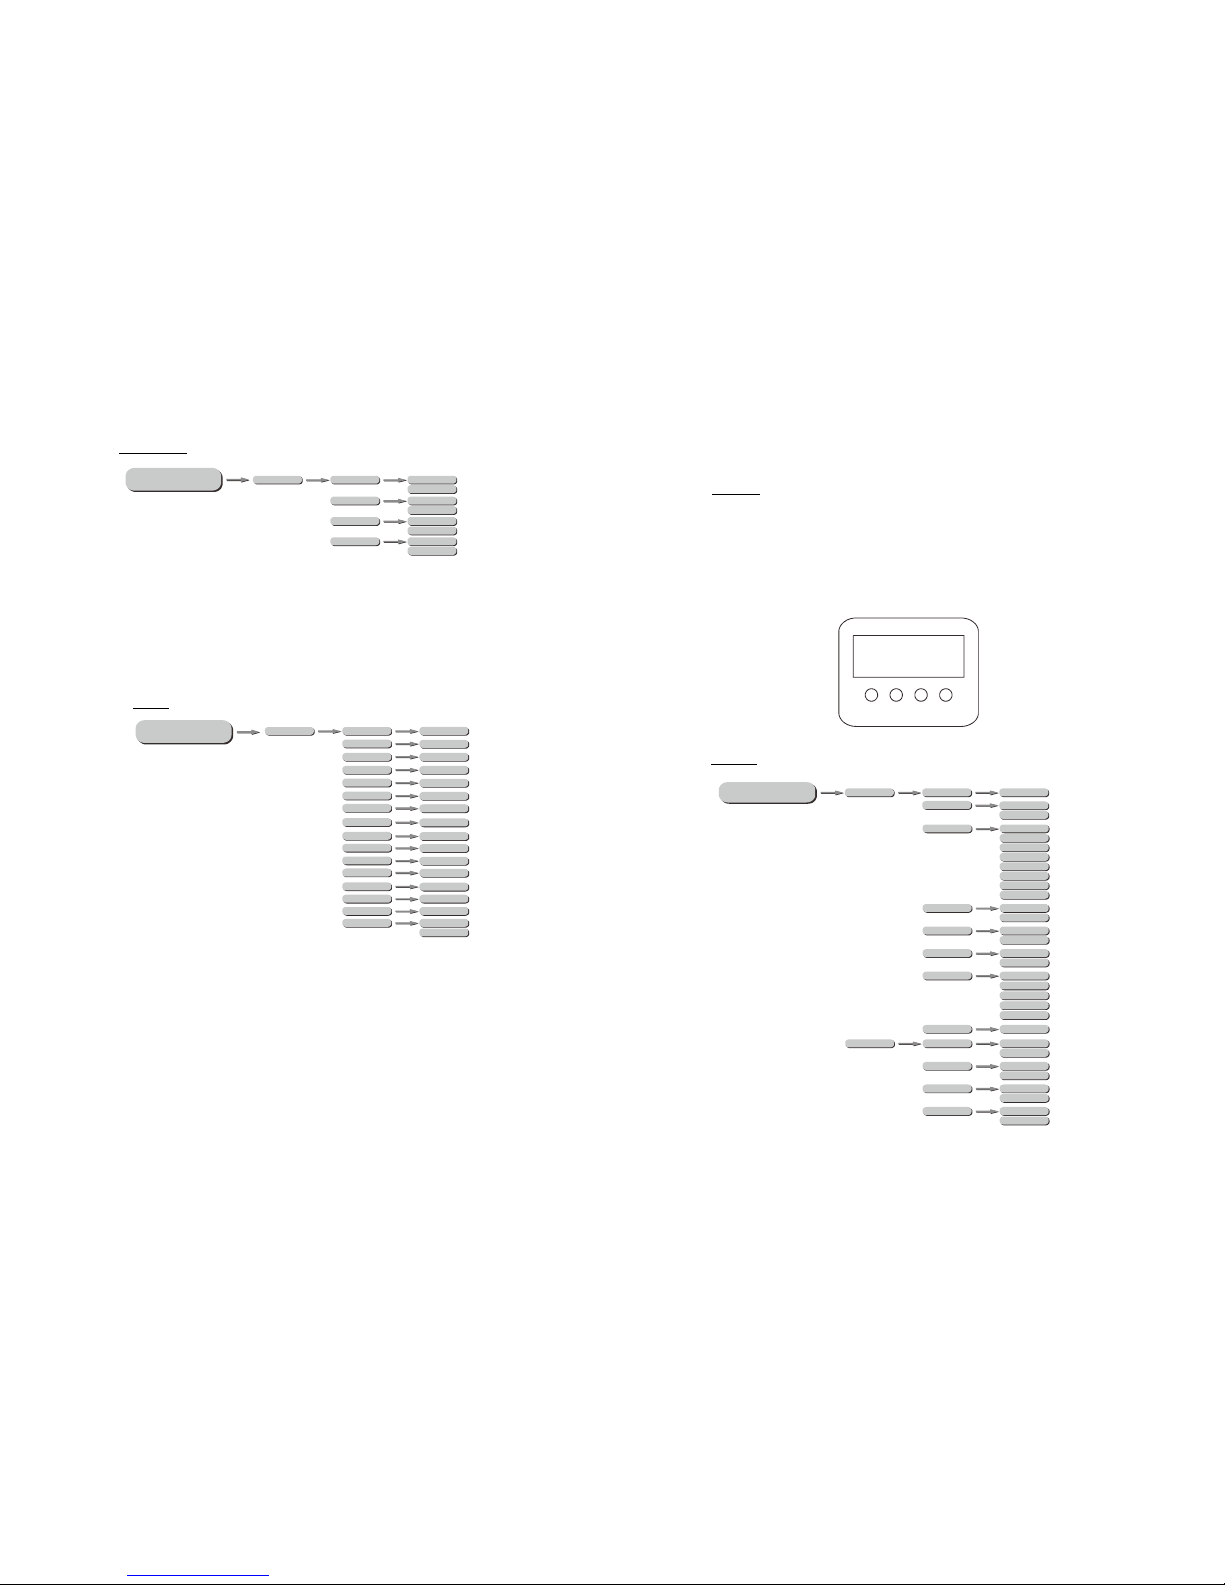
CHANNEL FUNCTION
VALUE
1 SAFETY WARNING
6
0 60
61 150
151 165
166 255
360
o
i ndexing
GOBO WHEEL 2 ROTATION
No function
Clockwise rotate from slow to fast
Anti-clockwise rotate from slow to fast
8
9
IRIS
0 199
200 209
210 219
220 229
230 239
240 255
Linear Iris
Iris effct: fast close & slow open (slow to fast)
Iris effct: close & open (slow to fast)slow slow
Iris effct: fast close & pen (slow to fast)fast o
Iris effct: close & open (slow to fast)slow fast
Iris effct: Random (slow to fast)
0 31
32 63
64 95
96 127
128 159
160 191
192 223
255
12
11
0 255
DIMMER
Dark Bright
STROBE
Close
Open
Strobe: Slow > Fast
Rulse strobe effect: Slow > Fast
Random strobe effect: Slow > Fast
Open
Open
Open
10
0 255
FOCUS NearFar
PRISM ROTATION
NO
Clockwise rotate from slow to fast
NO
Anti-clockwise rotate from slow to fast
0 9
10 119
120 129
130 255
PRISM
7
NO
0 9
Prism
10 39
40 49
50 59
60 69
70 79
80 89
90 99
100 109
110 119
120 129
130
140
150
170
180
190
200
210
220
230
240
139
149
159
179
189
199
209
219
229
239
255
Effect1(pattern or prism)
Effect2( )pattern or prism
Effect3( )pattern or prism
Effect4( )pattern or prism
Effect5( )pattern or prism
Effect6( )pattern or prism
Effect7( )pattern or prism
Effect8( )pattern or prism
Effect9( )pattern or prism
Effect10
Effect11
Effect12
Effect13
Effect14
Effect15
Effect16
Effect17
Effect18
Effect19
Effect20
224
0 19
20 39
40 59
60 139
140 149
150 159
Pan/tilt black activated (activated after 3 secs)
Pan/tilt black deactivated (activated after 3 secs)
No function
Auto1(activated after 3 secs)
Auto2(activated after 3 secs)
CONTROL
Dim settings according to display preset(activated after 3 secs)
.12.
13
160 169
170 179
180 189
190 199
Test(activated after 3 secs)
Custom(activated after 3 secs)
Sound 1(activated after 3 secs)
Sound 2(activated after 3 secs)
200 219
220 235
Reset(activated after 3 secs)
No function
236 239
240 243
244 247
248 251
252 255
DIM0(activated after 3 secs)
DIM1(activated after 3 secs)
DIM2(activated after 3 secs)
DIM3(activated after 3 secs)
DIM4(activated after 3 secs)
160 169
PRISM