3EN
DATA CONNECTION TIPS
• Use shielded twisted-pair cable designed for RS-485 devices: standard
microphone cable cannot transmit control data reliably over long runs. 24 AWG
cable is suitable for runs up to 300 meters (1000 ft.). Use heavier gauge cable
and/or an amplier for longer runs.
• Never use both outputs to split the link. To split the serial link into branches use a
signal splitter.
• Do not overload the link. Up to 32 devices may be connected on a serial link.
• Terminate the link by installing a termination plug in the output socket of the last
xture. The termination plug, which is a male XLR plug with a 120 ohm, 0.25 watt
resistor soldered between pins 2 and 3, “soaks up” the control signal so it does not
reect and cause interference.
DMX CONTROL MODES
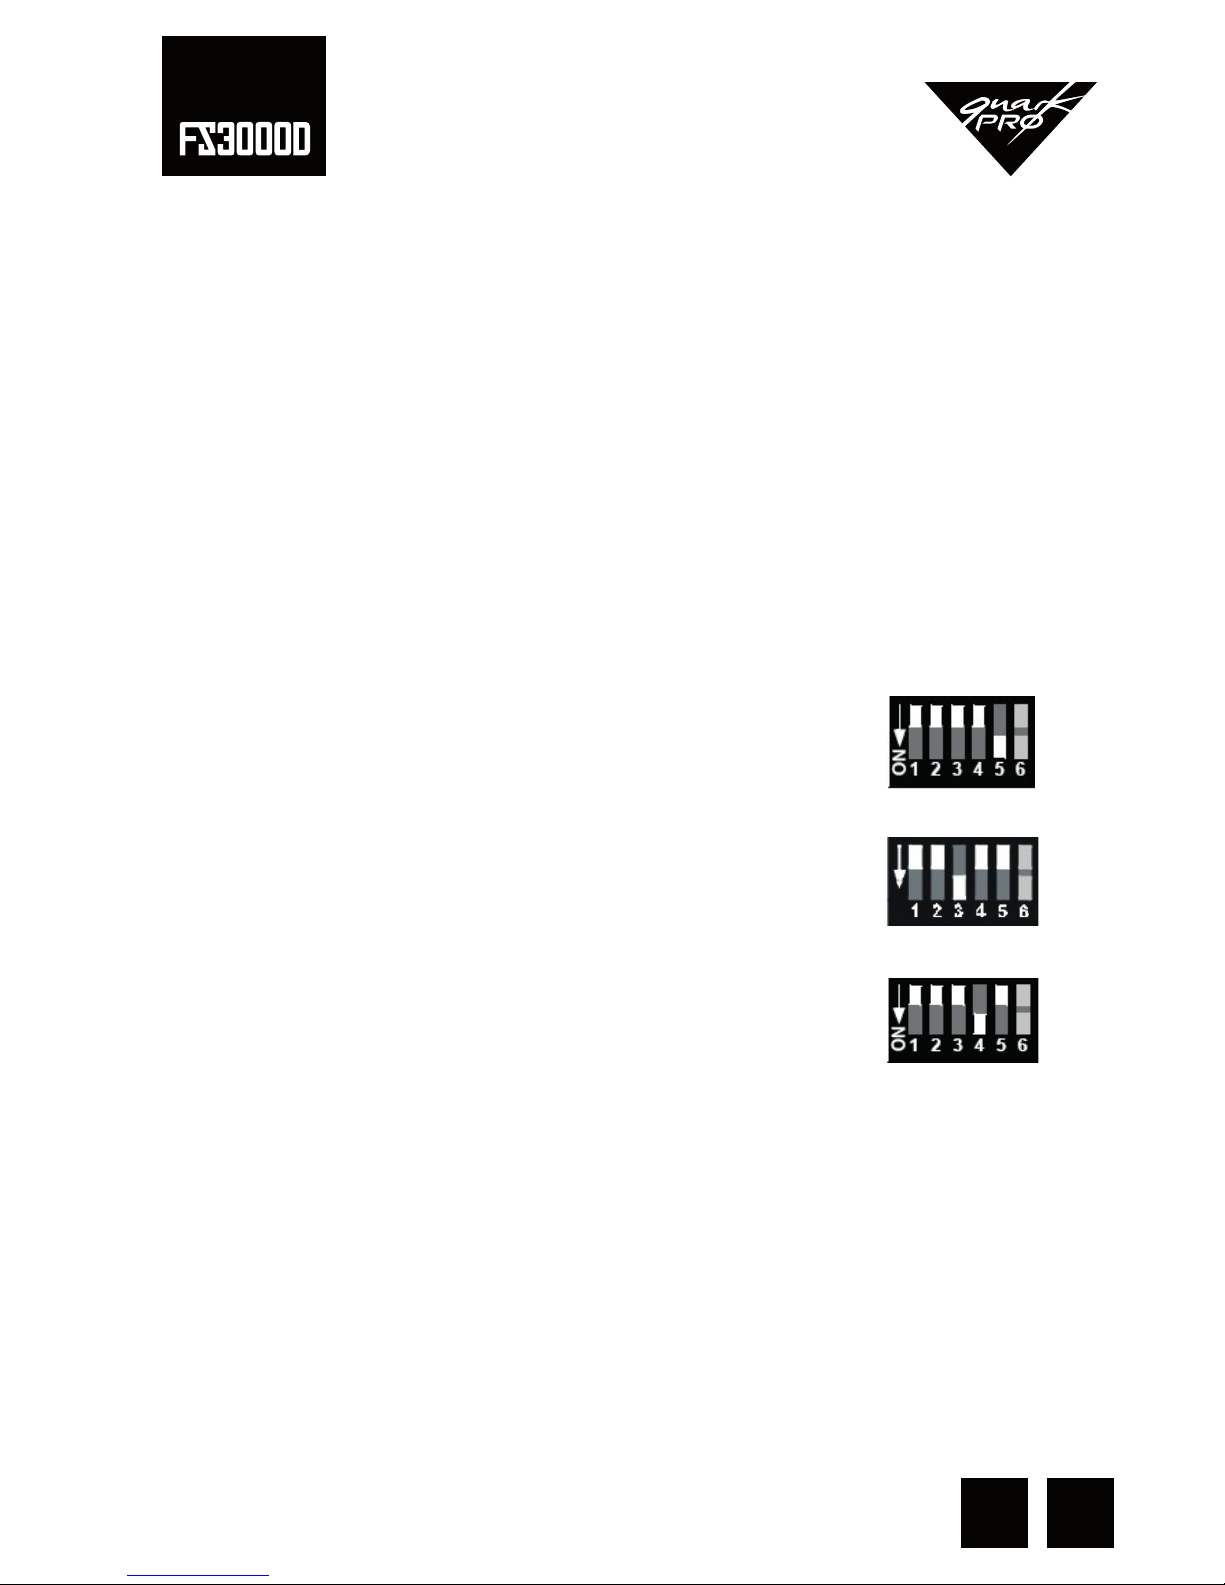
The DMX control options are selected on the Mode DIP switch
1 Channel DMX mode allows you to strobe from 0 ashes
per second to the maximum ash rate and trigger the blinder
effect from the controller. To select 1ch DMX operation, set pin 5
of the mode DIP switch to ON; set pins 1 to 4 to OFF
3 Channel DMX mode provides control of ash intensity, ash duration
and ash rate for more advanced control than 1 channel mode.
To select 3 channel DMX operation, set pins 1 to 5 of the mode DIP switch
to OFF.
4 Channel DMX mode provides six special effects in addition to
ash intensity, duration and rate control. To select this 4 ch DMX
operation, set pins 1,2,3 and 5 to OFF,set pin 4 to ON
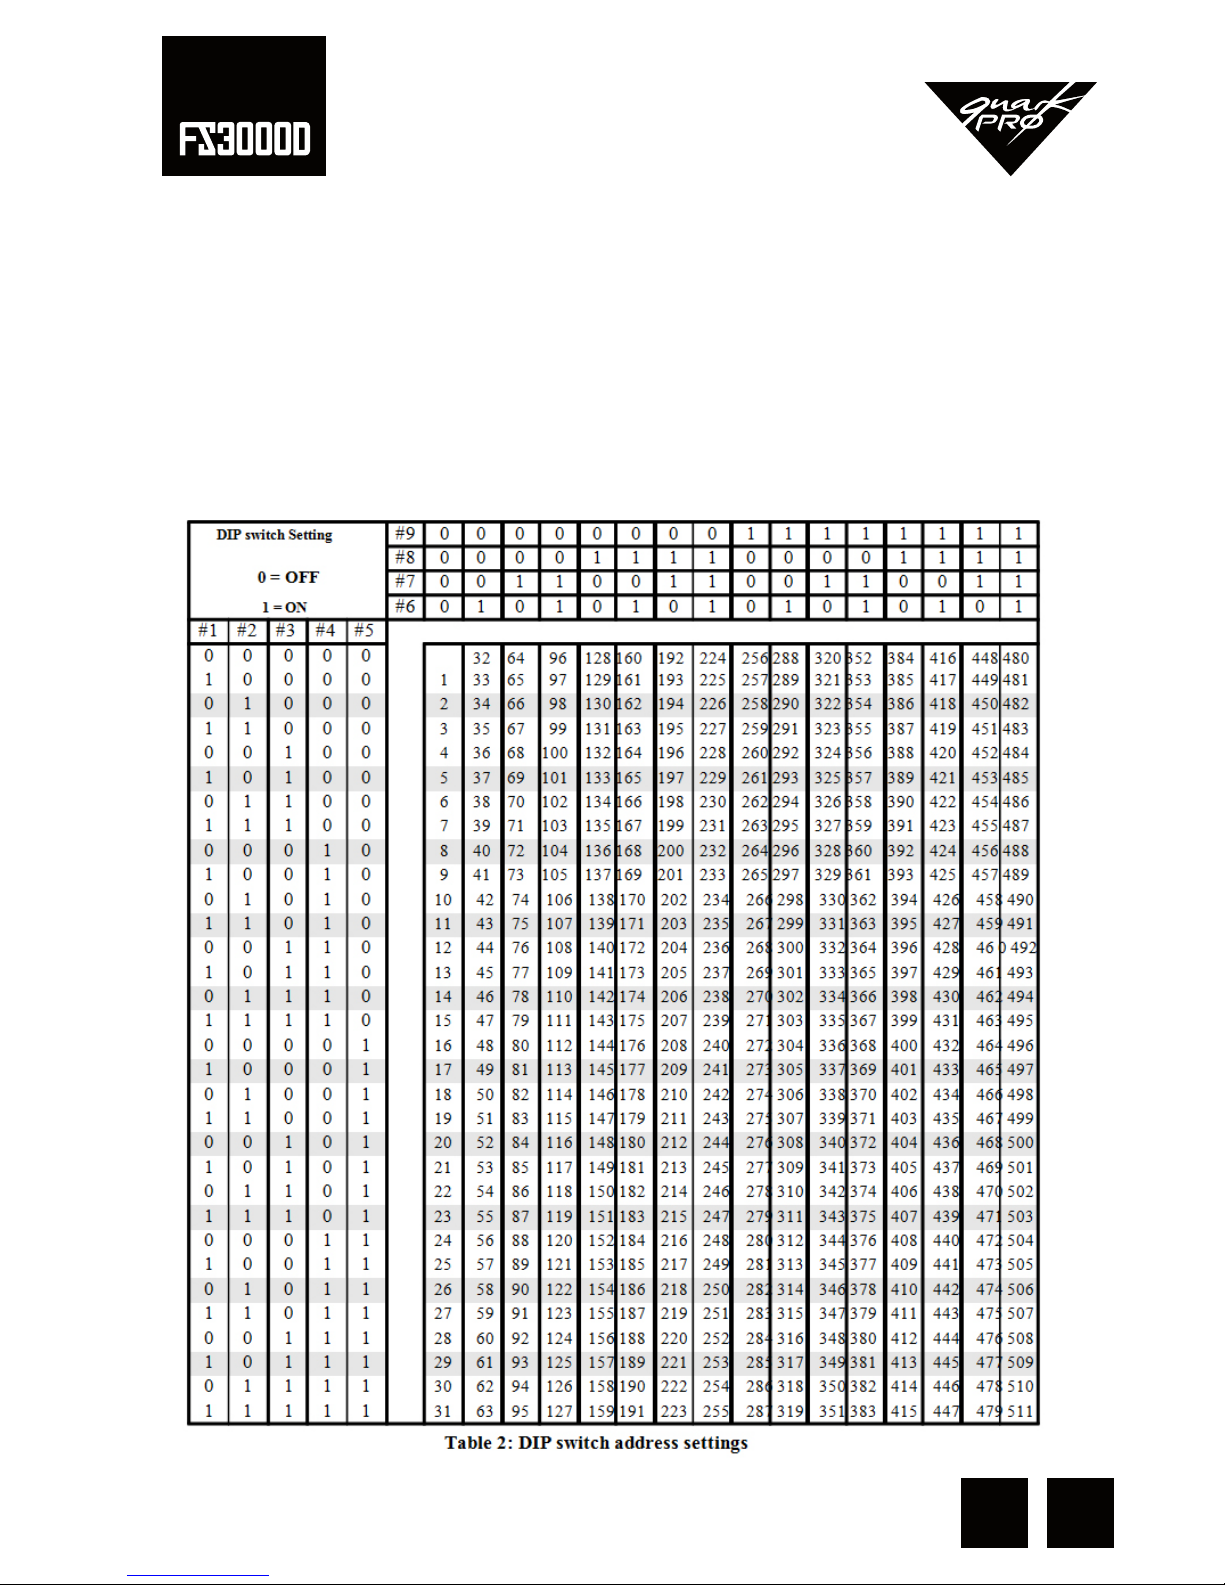
CONTROL ADDRESS
The control address, also known as the start channel, is the rst channel used to receive
instructions from the controller. The adress may be any channel from to 1 to 511 and is
set on the address DIP switch.
The FS-3000D uses 1,3 or 4 channels depending on the control mode. For independent
control, each xture must be assigned its own address and nonoverlapping control
channels. Two or more FS-3000D may share the same address if individual control is not
required.