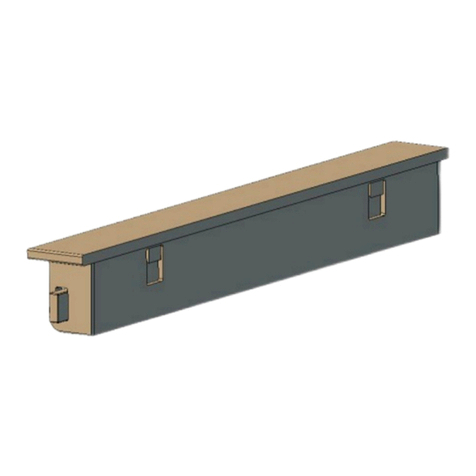
Quilt Display Products MAXI WALL HANGER User manual

Copyright 2017 Quilt Display Products ●Customer Service 937-506-0032 ●www.quiltdisplayproducts.com
HANGING INSTRUCTIONS
1
MAXI QUILT WALL HANGER
COMMITMENT TO EXCELLENCE
We want you to be pleased with our products and our service, so if you need verbal
assistance with the assembly or hanging of any of our quilt display products or if you have
any suggestions on what we can do to improve our service to you, please feel free to
contact us in any way listed here:
our website at www.quiltdisplayproducts.com.
EXAMINE THE PACKAGE CONTENTS
Carefully examine the contents of this package. If you suspect that there is damage or
missing parts, contact Quilt Display Products at (937) 506-0032 between the hours of
8:00 AM and 5:00 PM Eastern Standard Time for directions on how to proceed. Please
keep the original package and packing material in the event that you need to return the
product to us.
THE CONTENTS OF THE BOX
Make note of the existence of the following contents.
1. One Quilt Wall Hanger Left Front
2. One Quilt Wall Hanger Right Front
3. One Quilt Wall Hanger Back Center
4. Two Quilt Wall Hanger Back Shorts
5. One Spanner
6. One small bag containing:
a. Two Metal Wall Anchors (E-Z Ancor™)
b. Two Phillips Head Screws
c. Two Wooden Supports with Holes
d. Four Short Phillips Head Bolts
e. Eight Long Phillips Head Bolts
HANGING PROCEDURE
Begin with Step 1 on the next page and follow the directions exactly. All of our wall hangers
are designed to hold about 100 lbs, so they should be secure enough for even your largest
quilt. When you have finished hanging your quilt wall hanger, stand back and enjoy your
accomplishment!

Copyright 2017 Quilt Display Products ●Customer Service 937-506-0032 ●www.quiltdisplayproducts.com
HANGING INSTRUCTIONS
2
Step 1
Lay the Left Front and Right Front parts together on a nice flat and smooth surface as
shown below. These parts that will be joined at the center by the Spanner and Four Small
Bolts.
Loosely install all Four Small Bolts through the Spanner and into both the Right and Left
Front Parts. Adjust the butt joint as tightly and squarely together as possible and then
tighten the bolts with a Phillips Screwdriver.
Insure that the Left and Right Front Parts are in a straight line and the joint between them is
closed as tightly as possible.
WARNING
Do not lift this assembly once it is bolted together. The Spanner may break or the
bolts may be pulled out. The Wall Hanger will not have its full strength until fully
assembled.

Copyright 2017 Quilt Display Products ●Customer Service 937-506-0032 ●www.quiltdisplayproducts.com
HANGING INSTRUCTIONS
3
Step 2
Keeping the assembly from Step 1 in the same position, lay the binding of the quilt you
want to display in the groove. You should be looking at the back of the quilt at this point.
Center your quilt in the wall hanger and make sure no part of it interferes with the bolt
inserts.
Place the Back Center over the top of the front, trapping your quilt’s binding between the
two parts. Be sure that the wedge is towards the top as shown below.
Insert four Long Phillips Head Bolts through the Back Center and into the front and tighten
them just enough to securely clamp your quilt in place. Use your hands to hold the front
and back together, gripping both edges to keep the top and bottom aligned while you
tighten the bolts.

Copyright 2017 Quilt Display Products ●Customer Service 937-506-0032 ●www.quiltdisplayproducts.com
HANGING INSTRUCTIONS
4
Step 3
Install the two remaining Back Shorts on either end of the Back Center using two Long
Phillips Head Bolts each. Adjust your quilt so that it is tight from the Back Center towards
the edge of the front assembly while you are tightening the bolts.
There will be a small gap between these shorts and the back center to allow for
dimensional tolerances, so seeing a small gap is OK.
Loosen, adjust the quilt, and re-tighten as many of the 8 bolts as necessary to clamp your
quilt securely in place without any sags or pinches.
At this point, your wall hanger will be good and solid and can be hung on the wall according
to step 4.
Step 4
Mark two locations on the wall at the same height “H” from the ceiling where you want to
mount your wall hanger. The distance “D” between these marks needs to be the same as
the distance “D” between the centers of the mounting features on the back of your wall
hanger.
In all cases, there will only be two hanging features.

Copyright 2017 Quilt Display Products ●Customer Service 937-506-0032 ●www.quiltdisplayproducts.com
HANGING INSTRUCTIONS
5
Step 5
Use a Phillips screwdriver to insert an E-Z Ancor™ at each marked location on the wall by
gently pushing and turning in a clockwise direction. Be sure after tightening, that the
surface of the E-Z Ancor™ is flush with the wall.
E-Z Ancor™ and Phillips Screwdriver
If you are installing the E-Z Ancor™ into a location on your wall that has a stud behind it,
you may need to apply more pressure with the screwdriver to insert it. The E-Z Ancor™ is
designed to be installed into drywall, or drywall backed by a wooden stud. If this doesn’t
work for you, remove the E-Z Ancor™ and drill a 1/8” hole into the stud, and then reinsert
the E-Z Ancor™.
Note:
If your wall is not made of drywall, you will need to purchase fasteners recommended for
your type of wall from a local hardware store and install them according to the
manufacturer’s suggestions. You will still need to screw the wooden support to your wall.
Step 6
Use the screws provided to attach a wooden support to each E-Z Ancor™.
Position the wooden support such that the sharp edge is pointing toward the ceiling and
away from the wall. The side with the recessed hole is the one through which the screw is
inserted. Be sure the sharp edge is parallel with the ceiling when tightening the screw.

Copyright 2017 Quilt Display Products ●Customer Service 937-506-0032 ●www.quiltdisplayproducts.com
HANGING INSTRUCTIONS
6
Step 7
Place your wall hanger on the two wooden supports you attached to your wall earlier, by
lowering it onto them so that the two beveled surfaces interlock providing a secure
connection.
Note: For very long hangers and/or heavy quilts, you may need to solicit the help of
a second set of hands to put your hanger and quilt on the wall.
Table of contents
Other Quilt Display Products Indoor Furnishing manuals