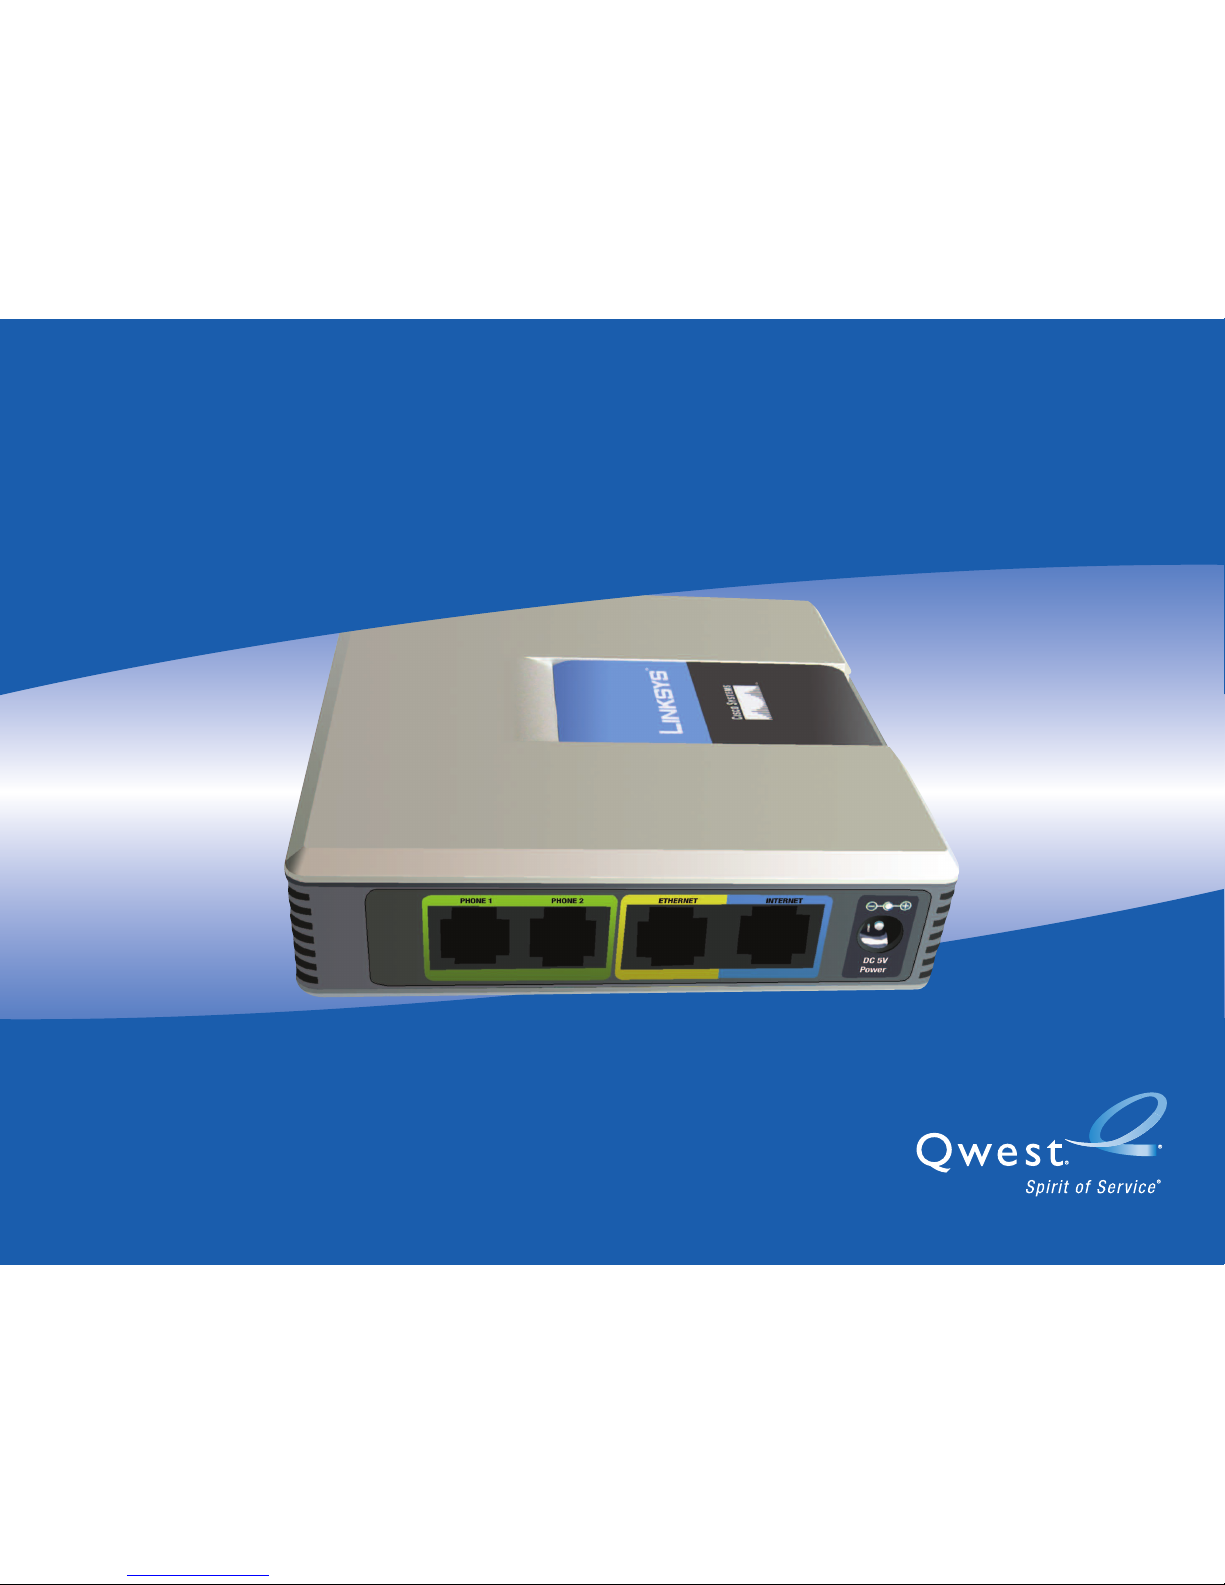
Broadband Phone Adapter
Chapter 2: Networking Basics - The Use of IP Addresses
USER GUIDE
A dynamic IP address is automatically assigned to a device on the network. These IP addresses are called dynamic because
they are only temporarily assigned to the PC or other device. After a certain time period, they expire and may change. If a
PC logs onto the network (or the Internet) and its dynamic IP address has expired, the DHCP server will assign it a new
dynamic IP address.
A DHCP server can either be a designated PC on the network or another network device, such as the Broadband Phone
Adapter. By default, the Broadband Phone Adapter’s Internet Connection Type is DHCP (obtain an IP address automatically).
The PC or network device obtaining an IP address is called the DHCP client. DHCP frees you from having to assign IP
addresses manually every time a new user is added to your network.
PPPoE
Devices that connect to Qwest®Broadband Subscriber Service do not use PPPoE. Do not use the steps
described below if you are connecting your Broadband Phone Service to Qwest Broadband Subscriber Service.
For broadband (DSL) users, many ISPs may require you to log on with a user name and password to gain access to the
Internet. This is a dedicated, broadband connection type called Point to Point Protocol over Ethernet (PPPoE). PPPoE is
similar to a dial-up connection, but PPPoE does not dial a phone number when establishing a connection. It also will provide
the Broadband Phone Adapter with a dynamic IP address to establish a connection to the Internet.
Note: By default, a DHCP server (on the LAN side) is enabled on the Phone Adapter. You should only run one DHCP server
on your network. If you run more than one DHCP server on your network, you will experience network errors, such as
conflicting IP addresses. To disable DHCP on the Phone Adapter, see the Router - LAN Setup section in “Chapter 5: Using
the Web-based Utility.”
dynamic ip address: a temporary IP address
assigned by a DHCP server.
dhcp (dynamic host configuration
protocol): a protocol that lets one device on a
local network, known as a DHCP server, assign
temporary IP addresses to the other network
devices, typically computers.
5