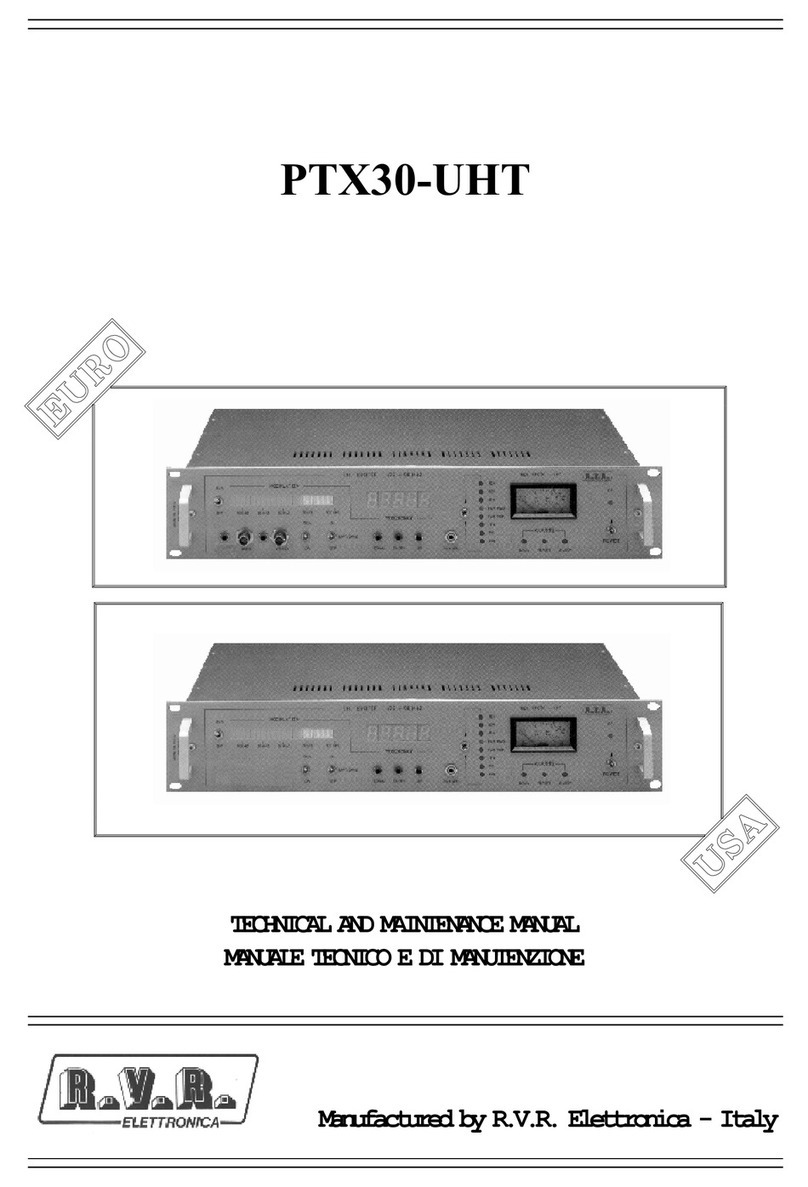
R.V.R. Elettronica HC3 User manual

TECHNICAL AND MAINTENANCE MANUAL
HC3
Manufactured by R.V.R. Elettronica -
Italy

HC3 - Technical and Maintenance Manual
R.V.R. Elettronica S.r.l. (Bo) Pag. 2
HC3
3 KW 3-Way Hybrid
Splitter & Combiner
Technical and Maintenance Manual

HC3 - Technical and Maintenance Manual
R.V.R. Elettronica S.r.l. (Bo) Pag. 3
INDEX
Preliminary Instructions and Warranty Information Pag. 5
Safety Regulations Pag. 7
SECTION 1
General Description Pag. 10
Electrical Specifications (Table A) Pag. 12
Dimensional & Environmental Specifications (Table B) Pag. 13
SECTION 2
Electrical Description Pag. 14
Front Panel View Description Pag. 16
Front Panel View (Fig. 1) Pag. 17
Rear Panel View Description Pag. 18
Rear Panel View (Fig. 2) Pag. 19
Block Diagram (Fig. 3) Pag. 20
SECTION 3
Installation Procedures Pag. 21
Recommend Test Equipment (Table C) Pag. 23
SECTION 4
Maintenance Pag. 24
SECTION 5
Calibration Procedures of Modules Pag. 26
APPENDIX A
Circuit Diagram, Bills of Material and Layouts Pag. 31
Wiring Diagram Pag. 32
Power Splitter Pag. 34
Power Coupler Pag. 38
Unbalancing Power Card Pag. 42
Unbalancing Power Measure Card Pag. 46
Alarms Card Pag. 50

HC3 - Technical and Maintenance Manual
R.V.R. Elettronica S.r.l. (Bo) Pag. 4
Telemetry Card Pag. 56
Remote Card Pag. 60

HC3 - Technical and Maintenance Manual
R.V.R. Elettronica S.r.l. (Bo) Pag. 5
PRELIMINARY INSTRUCTIONS AND WARRANTY INFORMATION
WARNING: This is a "CLASS A" equipment. In a resident place this equipment
can cause hash. In this case can be requested to user to take the necessary
measures.
Please observe safety precautions when handling this unit. This equipment
contains dangerous currents and high voltages.
This manual is written as a general guide for those having previous knowledge
and experience with this kind of equipment. It is not intended to contain a
complete statement of all safety warnings which should be observed by personnel
in using this or other elettronic equipment.
R.V.R. doesn't assume responsability for injury or damage resulting from
improper procedures or practices by untrained/unqualified personnel in the
handling of this unit.
Please observe all local codes and fire protection standards in the operations
of this unit.
CAUTION: always disconnect power before opening covers or removing any
part of this unit. Use appropriate grounding procedures to short out
capacitors and high voltage points before servicing.
Any damage to the goods must be reported to the carrier in writing on the
shipment receipt.
Any discrepancy or damage discovered subsequent to delivery, shall be reported
to R.V.R. within five (5) days from its receipt.
R.V.R. extends to the original end-user purchaser all original manufacturers
warranties which are transferable and all claims are to be made directly to
R.V.R. per indicated procedures.
All manufacturers warranties will be supported by R.V.R. to ensure precise
and speedy service where possible.
R.V.R. shall not be liable for any damage of whatsoever nature, arising out
of or in connection with the product or its use thereof.
R.V.R.'s warranty shall not include:
1) Re-shipment of the unit to R.V.R. for repair purposes
2) Any unauthorized repair/modification
3) Incidental/consequential damages as a result of any defect
4) Nominal non-incidental defects
5) Re-shipment costs or insurance of the unit or replacement
units/parts
Warranty shall come into force from invoice date and for the period of
the manufactures warranty.

HC3 - Technical and Maintenance Manual
R.V.R. Elettronica S.r.l. (Bo) Pag. 6
The warranty for a period of 12 months is referred to any R.V.R. product,
while for products as transistors, Mos-Fets and Tubes of the final stages
is applied the manufacture's warranty of these devices.
To claim your rights under this warranty:
a. Contact the dealer or distributor where you prchased the unit. Describe
the problem and ask if he has an easy solution. Dealers and Distributors
are supplied with all the information about problems that may occur
and usually they can repair the unit quicker than what the manufacturer
could do. Very often installing errors are discovered by dealers.
b. If your dealer cannot help you, contact R.V.R. in Bologna and explain
the problem. If it is decided to return the unit to the factory, R.V.R.
will mail you a regular authorization with all the necessary
instructions to send back the goods.
c. When you receive the authorization, you can return the unit. Pack it
carefully for the shipment, preferably using the original packing and
seal the package perfectly. The customer always assumes the risks of
loss (i.e., R.V.R. is never responsible for damage or loss), untill
the package reaches R.V.R. premises. For this reason, we suggest you
to insure the goods for the whole value. Shipment must be effected
C.I.F. (PREPAID) to the address specified by R.V.R.'s service manager
on the authorization.
DO NOT RETURN UNITS WITHOUT OUR AUTHORIZATION AS THEY WILL BE
REFUSED.
Be sure to enclose a written technical report where mention all the problems
found and a copy of your original invoice establishing the starting date of
the warranty.
Replacement and warranty parts may be order from the following address. Be
sure to include the equipment model and serial number as well as part
description and part number.
R.V.R. Elettronica S.r.l. - Broadcasting Equipment -
Via del Fonditore, 2/2c
40138 Bologna - Italy
R.V.R. reserves the right to modify the design and specifications of the
equipment in this manual without previous notice.

HC3 - Technical and Maintenance Manual
R.V.R. Elettronica S.r.l. (Bo) Pag. 7
WARNING!
The currents and voltages in this equipment are dangerous!
Personnel must at all times observe safety regulation!
This manual is intended as a general guide for trained and qualified personnel
who are aware of the dangers inherent in handling potentially hazardous
electrical and electronic circuits.
It is not intended to contain a complete statement of all safety precautions
which should be observed by personnel in using this or other electronic
equipment.
The installation, operation, maintenance and service of this equipment
involves risks both to personnel and equipment, and must be performed only
by qualified personnel exercising due care.
R.V.R. ELETTRONICA s.r.l. shall not be responsible for injury or damage
resulting from improper procedures or from the use of improperly trained or
inexperienced personnel performing such tasks.
During installation and operation of this equipment, local building codes and
fire protection standards must be observed.
WARNING!
Always disconnect power before opening covers,
doors, enclosures, gates, panels or shields.
Always use grounding sticks and short out high
voltage points before servicing. never make
internal adjustments, perform maintenance or
service when alone or when fatigued.
Do not remove, short-circuit or tamper with interlock switches on access
covers, doors, enclosures, gates, panels or shields.
Keep away from live circuits, know your equipment and don’t take chances.
WARNING!
In case of emergency ensure that power has been disconnected

HC3 - Technical and Maintenance Manual
R.V.R. Elettronica S.r.l. (Bo) Pag. 8
Treatment of electrical Shock
1) If victim is not responsive follow the A-B-C's of basic life support.
PLACE VICTIM FLAT ON HIS BACK ON A HARD SURFACE
A AIRWAY B BREATHING
IF UNCONSCIOUS, IF NOT BREATHING,
OPEN AIRWAY BEGIN ARTIFICIAL
BREATHING
LIFT UP NECK, TILT HEAD,
PUSH FOREHEAD BACK, PINCH NOSTRILS,
CLEAR OUT MOUTH IF NECESSARY, MAKE AIRTIGHT SEAL,
OBSERVE FOR BREATHING. 4 QUICK FULL BREATHS.
REMEMBER MOUTH TO MOUTH
RESUSCITATION MUST BE
COMMENCED AS SOON AS
POSSIBLE.
C CIRCULATION
CHECK CAROTID PULSE DEPRESS STERNUM 1 1/2" TO 2"
IF PULSE ABSENT, APPROX. 80 SEC. : ONE RESCUER, 15 COMPRESSIONS,
BEGIN ARTIFICIAL 2 QUICK BREATHS.
CIRCULATION APPROX. 60 SEC. : TWO RESCUERS, 5 COMPRESSIONS,
1 BREATH
NOTE: DO NOT INTERRUPT RHYTHM OF COMPRES-
SIONS WHEN SECOND PERSON IS GIVING BREATH.
Call for medical assistance as soon as possible.
2) If victim is responsive.
a. Keep them warm.
b. Keep them as quiet as possible.
c. Loosen their clothing (a reclining position is recommended).

HC3 - Technical and Maintenance Manual
R.V.R. Elettronica S.r.l. (Bo) Pag. 9
FIRST-AID
Personnel engaged in the installation, operation,
maintenance or servicing of this equipment are urged
to become familiar with first-aid theory and practices.
The following information is not intended to be a
complete first-aid procedure, it is brief and is only
to be used as a reference. It is the duty of all
personnel using the equipment to be prepared to give
adequate Emergency First Aid and thereby prevent
avoidable loss of life.
Treatment of electrical Burns
1) Extensive burned and broken skin.
a. Cover area with clean sheet or cloth.
(Cleanest available cloth article).
b. Do not break blisters, remove tissue, remove adhered particles of
clothing, or apply any salve or ointment.
c. Treat victim for shock as required.
d. Arrange transportation to a hospital as quickly as possible
e. If arms or legs are affected keep them elevated.
NOTE
If medical help will not be available within an hour and the victim is conscious
and not vomiting, give him a weak solution of salt and soda: 1 level teaspoonful
of salt and 1/2 level teaspoonful of baking soda to each quart of water (neither
hot or cold).
Allow victim to sip slowly about 4 ounces (half a glass) over a period of 15
minutes.
Discontinue fluid if vomiting occurs (Do not give alcohol).
2) Less severe burns - (1st & 2nd degree)
a. Apply cool (not ice cold) compresses using the cleanest available
cloth article.
b. Do not break blisters, remove tissue, remove adhered
particles of clothing, or apply salve or ointment.
c. Apply clean dry dressing if necessary.
d. Treat victim for shock as required.
e. Arrange transportation to a hospital as quickly as possible.
f. If arms or legs are affected keep them elevated.

HC3 - Technical and Maintenance Manual
R.V.R. Elettronica S.r.l. (Bo) Pag. 10
CHAPTER 1
GENERAL DESCRIPTION
1.1 EXTERNAL DESCRIPTION
The HC3 is housed in a 3U, 19" rack. On the front panel there are: four
alarms leds (3-7-8-9 Fig.1), the button for the Alarms Reset (4
Fig.1), two signalling leds (1-2 Fig.1) for A.C. line presence and external
Stand-By, the anlog meter (5 Fig.1) and the relative selector of the parameters
that can be measured (10 Fig.1). On the rear panel are mounted: the mains voltage
selector and A.C. Line inlet (1-2 Fig.2), the R.F. output connector to antenna
(14 Fig.2), the R.F. input connector from exciter (9 Fig.2), three R.F. output
connectors for the driving of the three amplifiers (10-11-12 Fig.2), three
R.F. input connectors from the the three amplifiers (16-17-18 Fig.2). There
are also present an auxiliary out A.C. Line socket and relative protection
fuse, one BNC Interlock connector (7 Fig.2), a D-type Telemetry connector (5
Fig.2), the R.F. Test Connector at -60 dB (15 Fig.2) and one BNC connector
correlated to unbalanced power signal for "Fold-Back" utility regarding the
exciter.
1.2 ELECTRICAL DESCRIPTION
The HC3 Hybrid Coupler, realized with "Suspended-Substrate-Strip-Lines"
technology, allows to combine on the antenna the outputs of three power
amplifiers (max. 1200 W) and to split their driver power coming from a single
exciter.
The exciter and the HC3 are connected in cascade through the Alarms/Interlock
connectors. This allows to shut down the exciter in the event of a fault on
either amplifiers the system.
The exciter's AGC connection, if connected to HC3 Fold Back signal, allows
the reduction of the unbalanced power transients and the absolute riduction
of the exciter power output for the best system working. In the event that
a failure occurs on two of the amplifiers and the user wishes to operate at
the best power out, the exciter must be disconnected from the coupler and
connected to the functionig amplifier that in the same way, must be connected
directly to the antenna. If this connection isn't made, on the coupler's output
can be obtained approximately an output power less of a 1/2 of the nominal
value for one amplifier out of game) or less of 1/6 for two amplifier out of
game, the lost power of the working amplifiers is dissipated as unbalanced
power on the 50Ohm power reistors to the absorption outputs.
1.3 METERS AND INDICATORS
The operating parameters can be measured with the analog multimeter (9
Fig.1) situated on the front panel. The measurament being made by the analog
multimeter selectable via the corresponding control (8 Fig.1).
Four alarm conditions leds provide indication of overtemperature (1
Fig.1), excess of V.S.W.R. (2 Fig.1), excess of unbalanced power (3 Fig.1)

HC3 - Technical and Maintenance Manual
R.V.R. Elettronica S.r.l. (Bo) Pag. 11
and exciting power overdrive (4 Fig.1).
1.4 DEVICE SPECIFICATIONS
Refer to table A for electrical specifications of the HC3, and table B
for dimensional and enviromental specifications.

HC3 - Technical and Maintenance Manual
R.V.R. Elettronica S.r.l. (Bo) Pag. 12
TABLE A
ELECRICAL SPECIFICATIONS
A.C. Power 117 or 230V ± 10%
50-60 Hz
Max. Rating power 3.6 KW - for HC3 version
Cooling Forced ventilation
Operating Frequency from 87.5 to 108 MHz
Power Splitter Section
Input Impedance 50 Ohm
Input Connector "N-type" connector
Output Impedance 50 Ohm
Output Connector "N-type" connector
Power Coupler Section
Input Impedance 50 Ohm
Input Connector "N-type" connector
Output Impedance 50 Ohm
Output Connector EIA 7/8" Flange for HC2/2 version

HC3 - Technical and Maintenance Manual
R.V.R. Elettronica S.r.l. (Bo) Pag. 13
TABLE B
MECHANICAL SPECIFICATIONS
Chassis dimensions 132.5 mm (5.2") H
507.5 mm (19.98") D
447 mm (17.6") W
Panel dimensions 483 mm (19") W
132.5 mm (5.2") H
Ambient operating temp. from -10°C to +50°C
Humidity 90% maximum, non-condensed
Weight 17.5 Kg

HC3 - Technical and Maintenance Manual
R.V.R. Elettronica S.r.l. (Bo) Pag. 14
CHAPTER 2
ELECTRICAL DESCRIPTION
2.1 INTRODUCTION
This section describes, in detail, the operating theory of the HC3.
To aid understandig, the unit has been subdivided into blocks, each of which
is fully described below. A block diagram is shown in Fig.4.
2.2 POWER SUPPLY
This equipment has only a transformer (32 VA) with a primary 0-
100-120-220-240 V and a secondary 16-0-16 V, 1A to supply Alarms card, the
Telemetry card and Remote card.
2.3 ALARMS CARD
This module is composed of a board mounted on the front panel, in left
position, as show in Fig.1.
On this board, the electronics detect any system anomaly such as excessive
SWR, overtemperature, excessive unbalanced power, exciting power overdrive.
This module will also, whenever possible, reset the system to its original
conditions, after a fault has accused.
2.4 TELEMETRY CARD
Thanks to this card mounted on the rear part of the Alarms Card, the
essential parameters and alarms status are externaly available for remote
measurements purposes on a Telemetry Connector (D-Type 25-pin).
SIGNAL TELEMETRY CONNECTOR PIN VOLTAGE LEVEL
Not Used 1 /
Calibration 2 2.0 V full scale
Ground 3 0.0 V
Reflected Power 4 2.0 V full scale
Inhibit Tx 5 12.0 V
Exc. Unbalancing 6 15.0 V when fault
Ground 7 0.0 V
Unlock 8 15.0 V
Not Used 14 /
Unbalancing Power 15 2.0 V full scale
Forward Power 16 2.0 V full scale
Exc. Temperature 17 15.0 V when in faulty
Antenna S.W.R. 18 15.0 V when in faulty
Overdrive 19 15.0 V when in faulty
Lock 20 15.0 V
Ground 21 0.0 V
The other pins are not connected.

HC3 - Technical and Maintenance Manual
R.V.R. Elettronica S.r.l. (Bo) Pag. 15
2.5 REMOTE CARD
This Card mounted on the right side of the equipment in rear position,
allows to switch off the Auxiliary Out A.C. Line in case of any faulty of the
equipment.
2.6 POWER SPLITTER
The Power Splitter circuit mounted on the rear part of the equipment on
the right side, is used to splitt exciter's driving power to three amplifiers.
The circuit is realized with strip plus coaxial cables and three specific
circuits can adjust (equalize) phases on the three outputs that are used to
drive the amplifiers.
Three resistive termination placed near to the output serves to absorb any
unbalanced powers in case of faulty or performance differences of some
amplifier to prevent excessive power driving on the well functioning (well
loaded) outputs.
2.7 POWER COMBINER
The Power Combiner circuit mounted on the rear part of the equipment on
the left side, is used to combine the output powers of the two amplifiers.
The circuit is realized with suspended-substrate strip lines plus 50Ohm coaxial
cables and guarantee equal phases on the three input power ways that are
combined to obtain the antenna output power.
Three resistive terminations placed on the main cooler serve to absorb any
unbalanced powers in case of faulty or performance differences of some
amplifier.
2.8 UNBALANCING POWER CARD
This card, mounted on the rear part of the Alarms card, is used to calculate
the voltage proportional to Unbalancing Power, coming from the unbalancing
measuring section placed on the Power Coupler, to send it to Alarms card and
then to the analog meter.

HC3 - Technical and Maintenance Manual
R.V.R. Elettronica S.r.l. (Bo) Pag. 16
FRONT PANEL DESCRIPTION
(FIG. 1)
1 EXT. ST.BY Led indicating an External Stand-By
2 ON A.C. ON Power indicator
3 OVER DRIVE Led indicating the OVER DRIVE Alarm Status
4 ALARMS RESET Press-button to reset the Alarm Status
5 METER Analog Meter used to monitor the operating
parameters of the equipment
6 AIR FILTER Air Filter of R.F. Amplifier Module
7 TEMP Led indicating the OVER TEMPERATURE Alarm
Status
8 SWR Led indicating the S.W.R. Alarm Status
9 EXC. UNBAL. Led indicating an Excessive Unbalancing of the
two Amplifier's Output power
10 METER SELECTOR Selector to monitor the operating parameters:
OFF Not Used
OFF Not Used
CAL. Calibration of the meter
UNBAL. PWR Unbalancing Power
RFL Reflected Power
FWD Forward Power

HC3 - Technical and Maintenance Manual
R.V.R. Elettronica S.r.l. (Bo) Pag. 17
FRONT PANEL (FIG. 1)

HC3 - Technical and Maintenance Manual
R.V.R. Elettronica S.r.l. (Bo) Pag. 18
REAR PANEL DESCRIPTION
(FIG. 2)
1 VOLTAGE CHANGER & Fuse Block and Line Voltage Selector.
A.C. LINE FUSE Use a small screwdriver to change the fuse or
line voltage. Rotate the block and position it
for the desired voltage.
2 MAINS VOLTAGE A.C. Power Line for the combiner.
3 AUX. OUT A.C. LINE Auxiliary Out A.C. Power Line for external
equipment.
4 FUSE Protection Fuse (max. 4A) for Auxiliary Out
A.C. Power Line.
5 TELEMETRY CONNECTOR Connector for Remote measurament of operating
parameters.
6 FEED BACK BNC connector for the FEED BACK connection
7 INTERLOCK 1-2 BNC connector which permits the exciter to be
put in stand-by in case of one amplifier or
coupler fault or in case of EXT. ST.BY
8 HEAT SINK Heat Sink for the R.F. Output Combiner
9 INPUT Exciter's R.F. Input Connector (N-Type)
10 OUTPUT 1 Power Splitter's Output 1 (N-type connector)
to drive Power Ampl. A
11 OUTPUT 2 Power Splitter's Output 2 (N-type connector)
to drive Power Ampl. B
12 OUTPUT 3 Power Splitter's Output 2 (N-type connector)
to drive Power Ampl. B
13 UNBAL F.BACK ADJ Trimmer for UNBAL FOLD BACK adjustament
14 OUTPUT Power Combiner's Output (EIA 7/8" flange)
15 R.F. TEST R.F. Test Connector (BNC) at -60 dB
16 INPUT 1 Power Combiner's Input 1 (7/8" EIA Flange)
from the Power Ampl. A
17 INPUT 2 Power Combiner's Input 2 (7/8" EIA Flange)
from the Power Ampl. B
18 INPUT 3 Power Combiner's Input 3 (7/8" EIA Flange)
from the Power Ampl. C

HC3 - Technical and Maintenance Manual
R.V.R. Elettronica S.r.l. (Bo) Pag. 19
REAR PANEL (FIG. 2)

HC3 - Technical and Maintenance Manual
R.V.R. Elettronica S.r.l. (Bo) Pag. 20
BLOCK DIAGRAM (FIG. 3)
Table of contents
Other R.V.R. Elettronica Network Hardware manuals
Popular Network Hardware manuals by other brands

Lütze
Lütze TLM-10 operating instructions

NSFOCUS
NSFOCUS ADS NX3-M 600A installation guide

Nortel
Nortel Meridian 1 Option 11C Expansion guidelines

Baldwin Boxall
Baldwin Boxall VIGIL EVAS BVRD2M operating instructions

Crestron
Crestron 2 Channel Inductor Module CLX-2IND Specification sheet

RAK
RAK RAK11200 quick start guide