RAK WisNode TrackIt User manual

Documentation Center
RAK2171 Quick Start Guide
Prerequisites
What Do You Need?
Before going through each and every step in the guide of the RAK2171 WisNode TrackIt, make sure to prepare
the necessary items listed below:
RAK2171 WisNode TrackIt
WisGate Edge gateway
An Android or iOS device with Bluetooth
What’s Included in the Package?
2pc RAK2171 WisNode TrackIt
2pc Charging cable with magnetic plate
2pc Protective silicone case
Figure 1: Inclusion list
Product Configuration
WisNode TrackIt supports three working modes:
1. LoRaWAN Mode
2. P2P Mode,
3. Third-party LNS.
LoRaWAN Mode
To fully utilize the WisNode TrackIt and the TrackIt App in this mode, you need to use RAK WisGate Edge
gateway/s.
In this mode, the WisNode TrackIt is configured via the TrackIt application on your phone. The TrackIt application
automatically registers the RAK2171 trackers in the WisGate Edge gateways' Built-in Network Server.

Documentation Center
Figure 2: LoRaWAN mode
1. Download and install the TrackIt App on your smartphone.
2. Turn on the Bluetooth on tour smartphone.
3. Start the TrackIt App. Location permission may be requested, allow it.
4. Agree with the Terms and Conditions and the Privacy Policy, and press the Sign in with RAK ID button.

Documentation Center
Figure 3: Welcome screen
5. Sign in with your RAK ID or sign up for a new RAK ID if you don’t have an account. If you do not have a RAK
ID, press the Create new link and fill the needed information.
Figure 4: Sign in screen
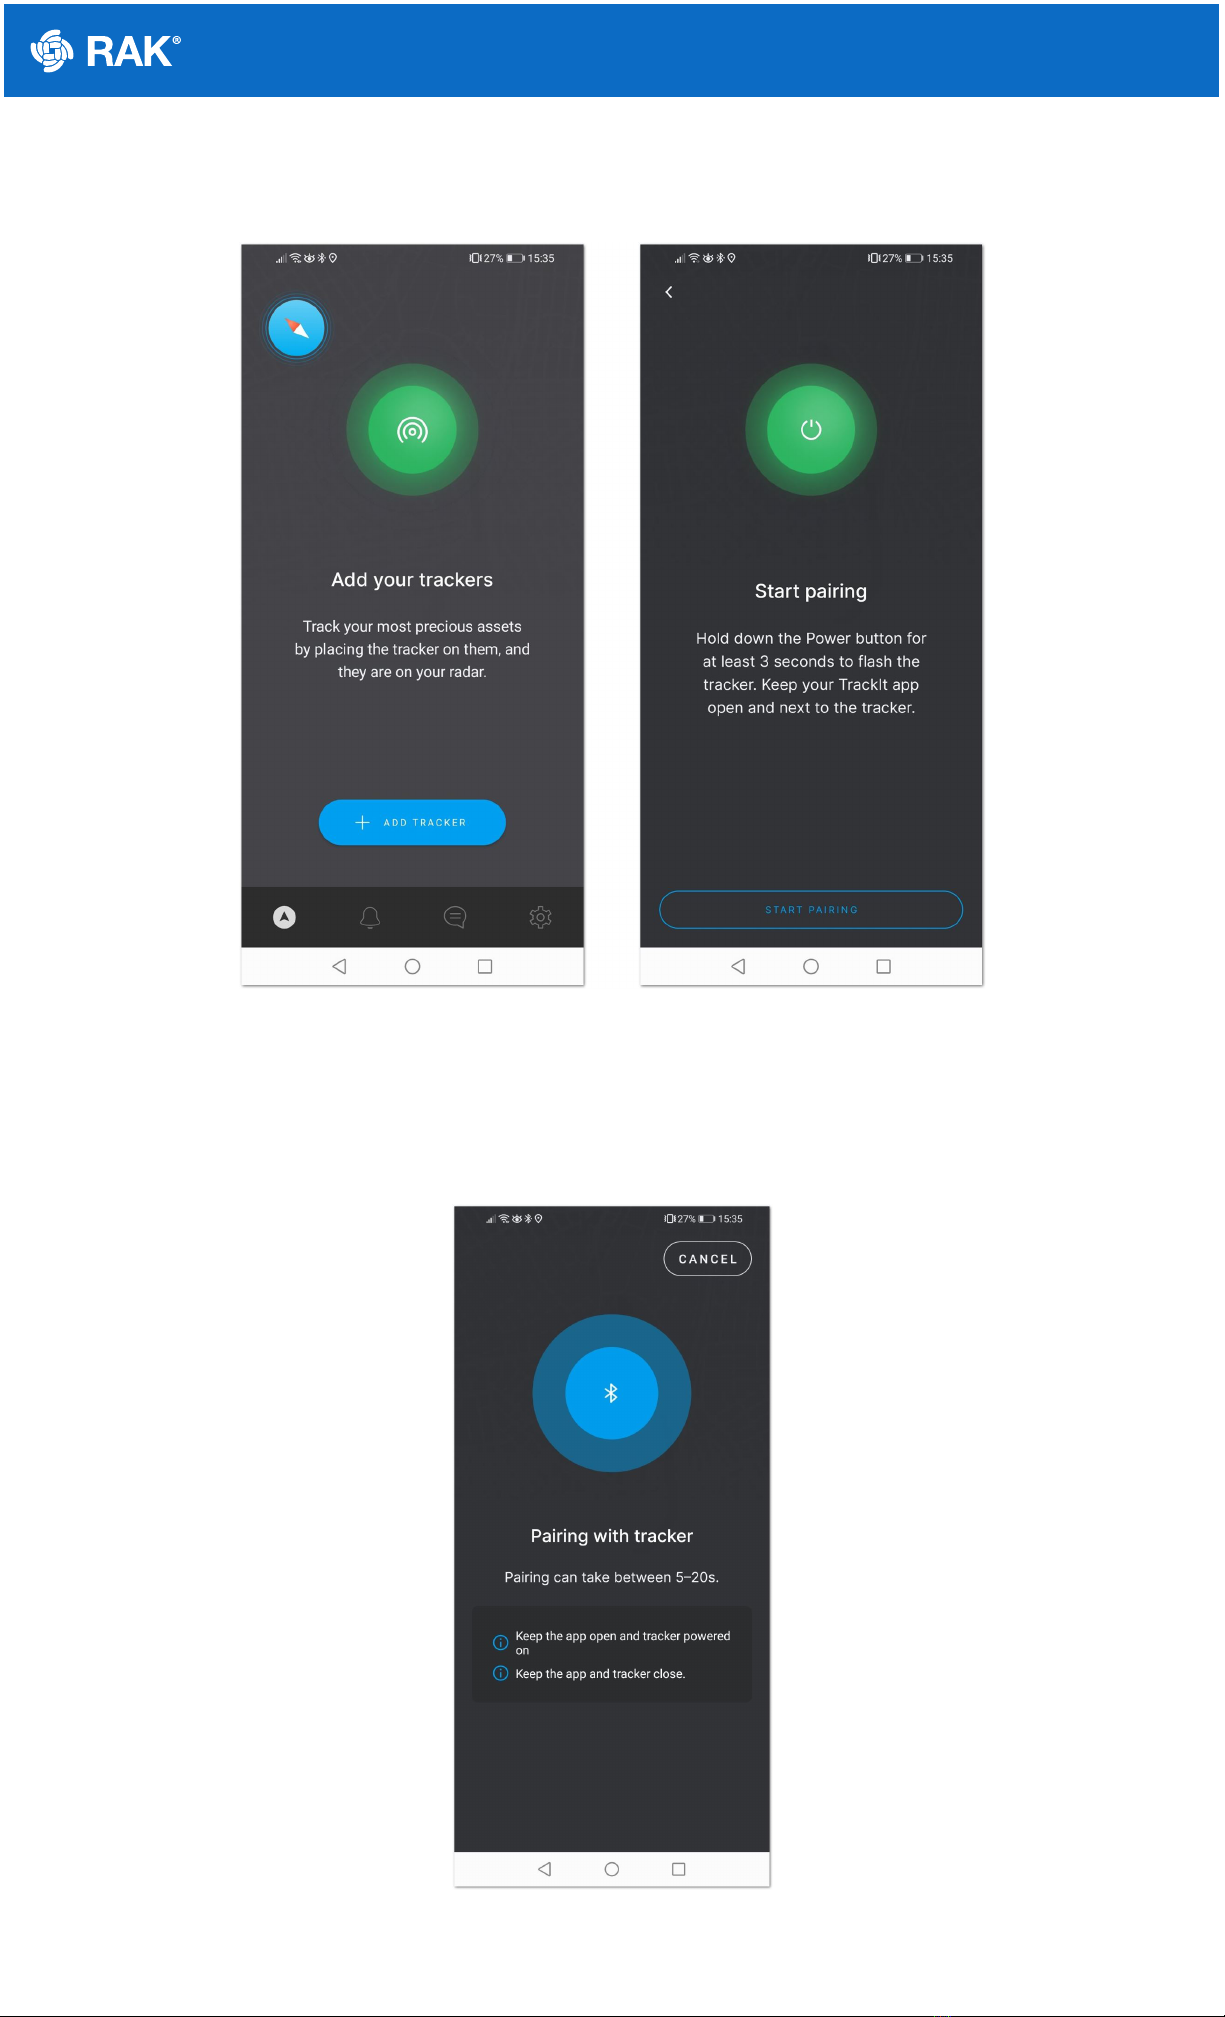
6. After you log in, the App will prompt you to add a tracker. To start the pairing process, press the + ADD
TRACKER button.

Documentation Center
Figure 5: Add tracker and Start Pairing screen
7. Hold the Power button of your RAK2171 for 3 seconds to turn it on. If the device was turned on previously, you
may need to restart it, as the Bluetooth is available for pairing for 3 minutes.
8. Press the Start Pairing in the app. An information screen will be displayed to inform you of the process.
Figure 6: Pairing screen
If the tracker is turned off or the Bluetooth pair period has expired, you will see a Tracker not found message.
Restart the tracker and try again.

Documentation Center
Figure 7: Pairing screen
9. After successful pairing, you will see a configuration screen, where you will be able to change the tracker's
default name and the working mode. This section is for the LoRaWAN mode, so press the LoRaWAN button to
change the mode from LoRa P2P to LoRaWAN.

Documentation Center
Figure 8: Set up screen
10. You will see two options: RAK Embedded NS and Third Party NS. For this mode, press RAK Embedded NS.
11. Confirm that the gateway is powered and ready by pressing the GATEWAY ON button.
Figure 9: Gateway on confirmation
12. You will be prompted to connect to the Wi-Fi AP of your RAK gateway. Press the GO TO WI-FI SETTINGS
button. You will be redirected to your phone's Wi-Fi settings, where you need to find the RAK WisGate Edge
gateway Wi Fi AP and connect to it. You will be promoted for the gateway's login credentials.

Documentation Center
By default,
Username: root
Password: root
Figure 10: Connect to the gateway's Wi-Fi screen
13. After successful login, the TrackIt app will create an application in the gateway's built-In NS and will register the
TrackIt device automatically. Once you are done, press the VIEW ON MAP button to see the WisNode TrackIt
location on the application map.

Documentation Center
Figure 11: Successful connection screen
LoRa Peer-to-Peer (P2P) Mode
In this mode, no LoRaWAN gateway is needed, but you need at least two RAK2171 devices. One of the trackers is
permanently connected via Bluetooth to the TrackIt App on your smartphone and acts a Host. The other tracker/s
is/are registered as Client and send their data to the Host tracker.
Figure 12: P2P mode
1. Download and install the TrackIt App on your smartphone.
2. Turn on the Bluetooth on tour smartphone.

Documentation Center
3. Start the TrackIt App. Location permission may be requested, allow it.
4. Agree with the Terms and Conditions and the Privacy Policy, and press the Sign in with RAK ID button.
Figure 13: Welcome screen
5. Sign in with your RAK ID or sign up for a new RAK ID if you don’t have an account. If you do not have a RAK
ID, press the Create new link and fill the needed information.
Figure 14: Sign in screen
Documentation Center
6. After you log in, the App will prompt you to add a tracker. To start the pairing process, press the + ADD
TRACKER button.
Figure 15: Add tracker and Start Pairing screen
7. Hold the Power button of your RAK2171 for 3 seconds to turn it on. If the device was turned on previously, you
may need to restart it, as the Bluetooth is available for pairing for 3 minutes.
8. Press the Start Pairing in the app. An information screen will be displayed to inform you of the process.
Figure 16: Pairing screen
This manual suits for next models
1
Other RAK GPS manuals


