10
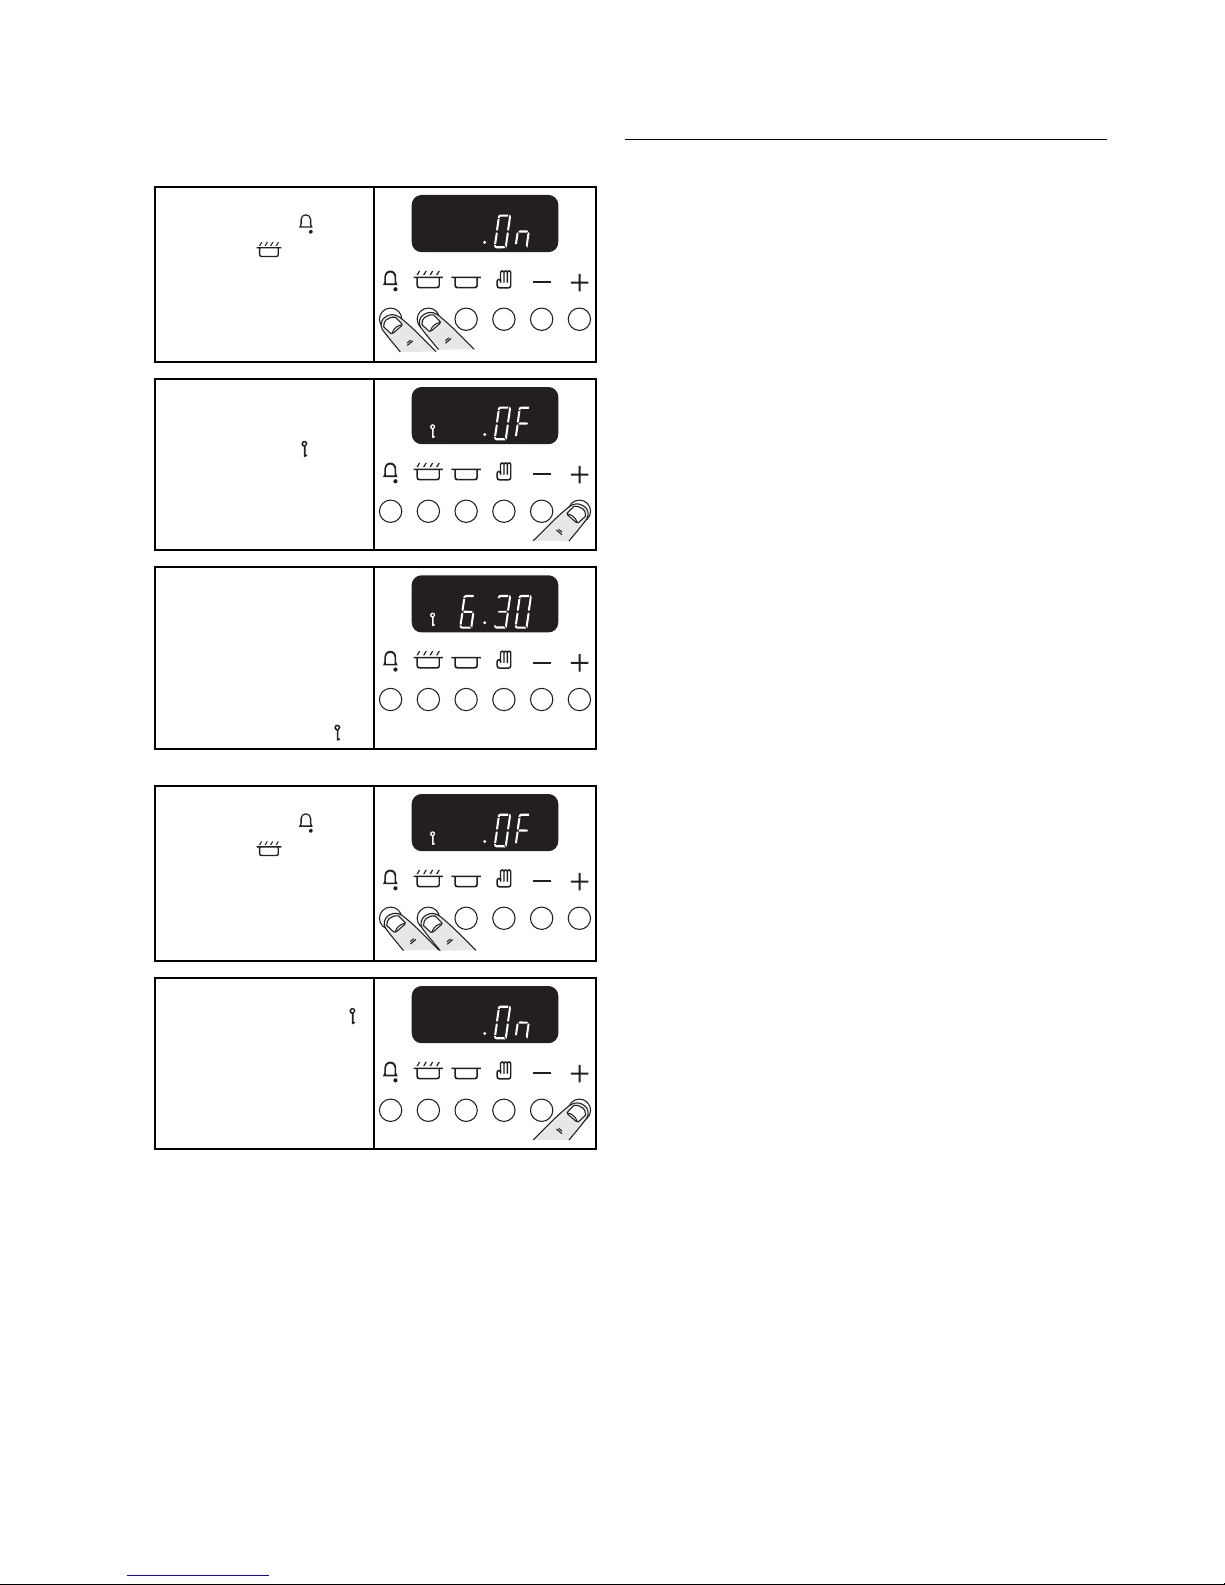
To activate the key lock
Make sure that the clock is in manual mode and
cancel any active programs.
Hold the
Minute Minder ( ) and
Cooktime ( ) buttons
for about 8 seconds.
‘On’ will appear on the
display.
Press the ‘+’ button
once.
The key symbol ( ) and
‘Of’ will appear on the
display. Let go of the
buttons.
The clock oven control
functions are now
locked.
After a few seconds the
display will revert to
show the time of day
and the key symbol ( ).
To turn off the key lock
Hold the
Minute Minder ( ) and
Cooktime ( ) buttons
for about 8 seconds.
‘Of’ will appear on the
display.
Press the ‘+’ button
once. The key symbol ( )
goes out and ‘On’ shows
on the display. Let go of
the buttons
After a few seconds the display will revert to show the
time of day.
The oven and the clock oven control functions can
now be used normally.
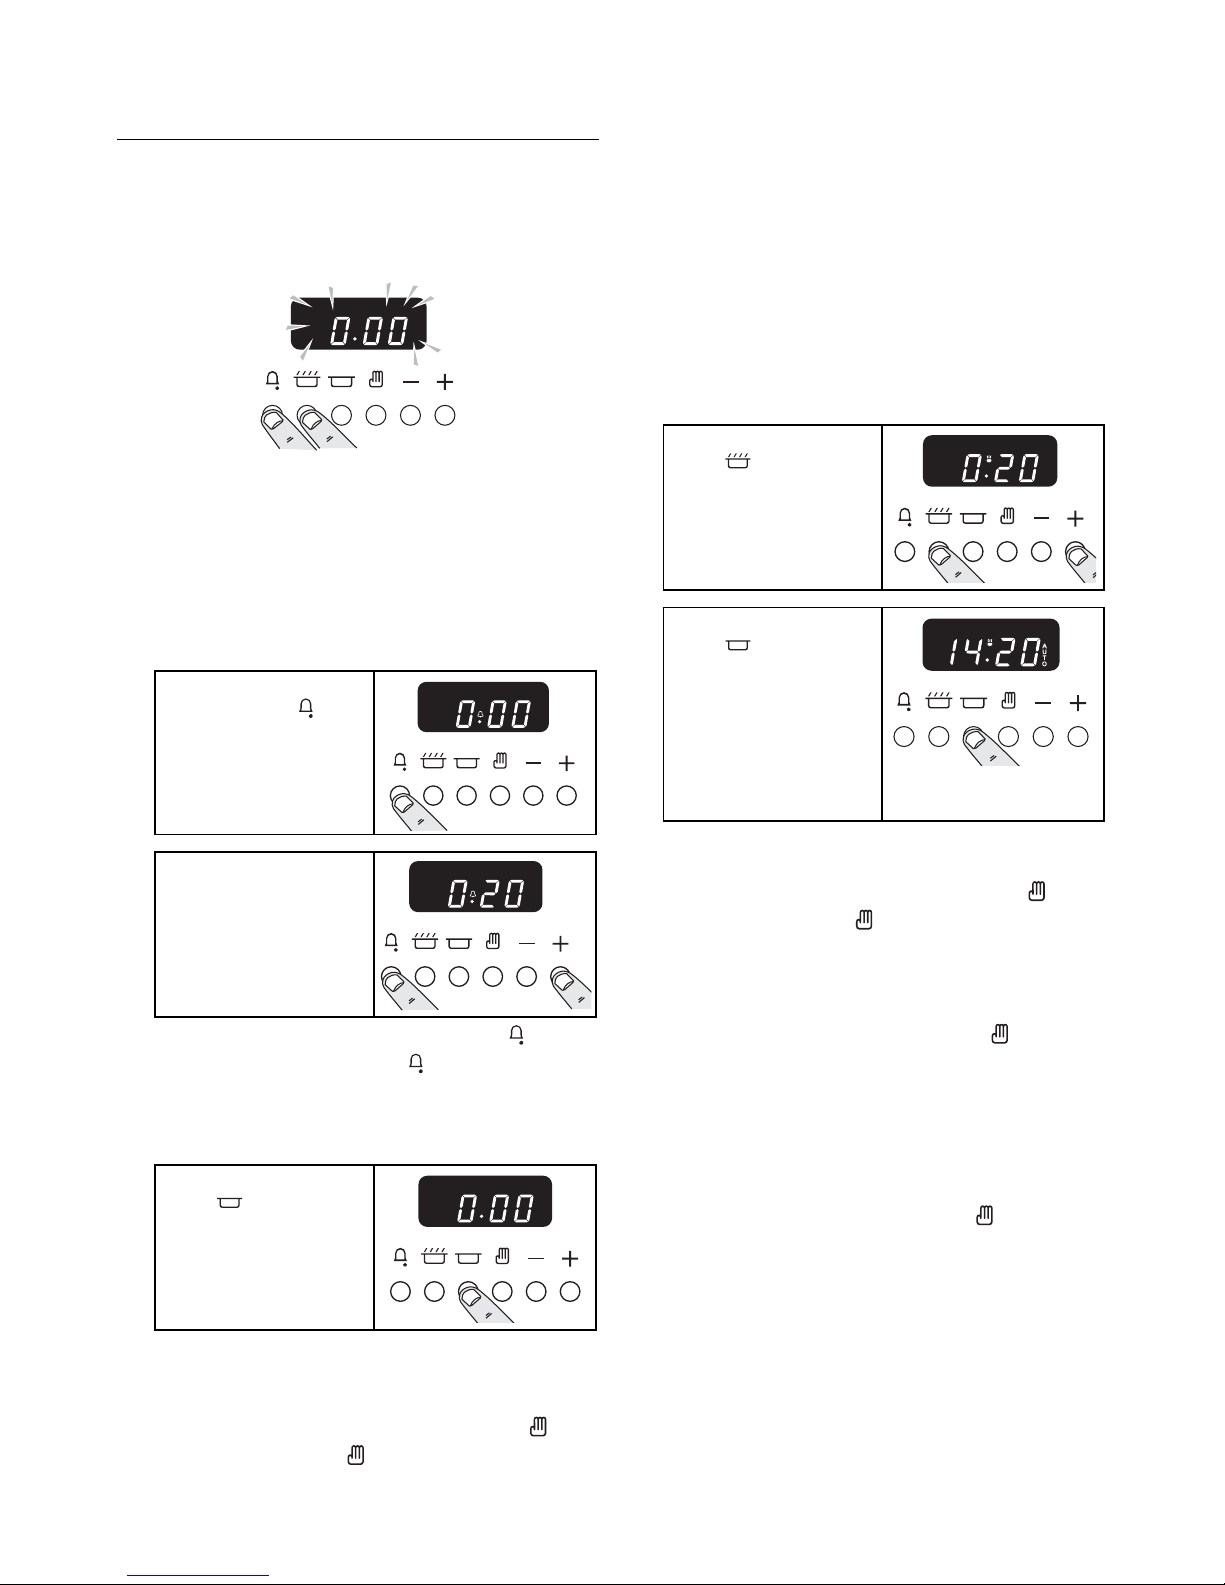
Cooking using the timer
The timer can control the right hand Fan oven only.
You can set the oven to turn on any time over the
following 24 hour period
If you want to cook more than one dish, choose
dishes that require approximately the same time.
However, dishes can be ‘slowed down’ slightly by
using small containers and covering them with
aluminium foil, or ‘speeded up’ slightly by cooking
smaller quantities or placing in larger containers.
Very perishable foods such as pork or fish should be
avoided if a long delay period is planned, especially in
hot weather.
Don’t place warm food in the oven.
Don’t use an oven already warm.
Don’t use if an adjoining oven is warm.
Avoid using wine or beer if there is a delay period, as
fermentation may take place.
To avoid curdling, cream should be added to dishes
just before serving.
Fresh vegetables, which may discolour during a delay
period, should be coated in melted fat or immersed in
a water and lemon juice solution.
Fruit pies, custard tarts or similar wet mixtures on top
of uncooked pastry are only satisfactory if there is a
short delay period. Dishes containing leftover cooked
meat or poultry should not be cooked automatically
if there is a delay period.
Whole poultry must be thoroughly defrosted before
placing in the oven.
Check that meat and poultry are fully cooked
before serving.
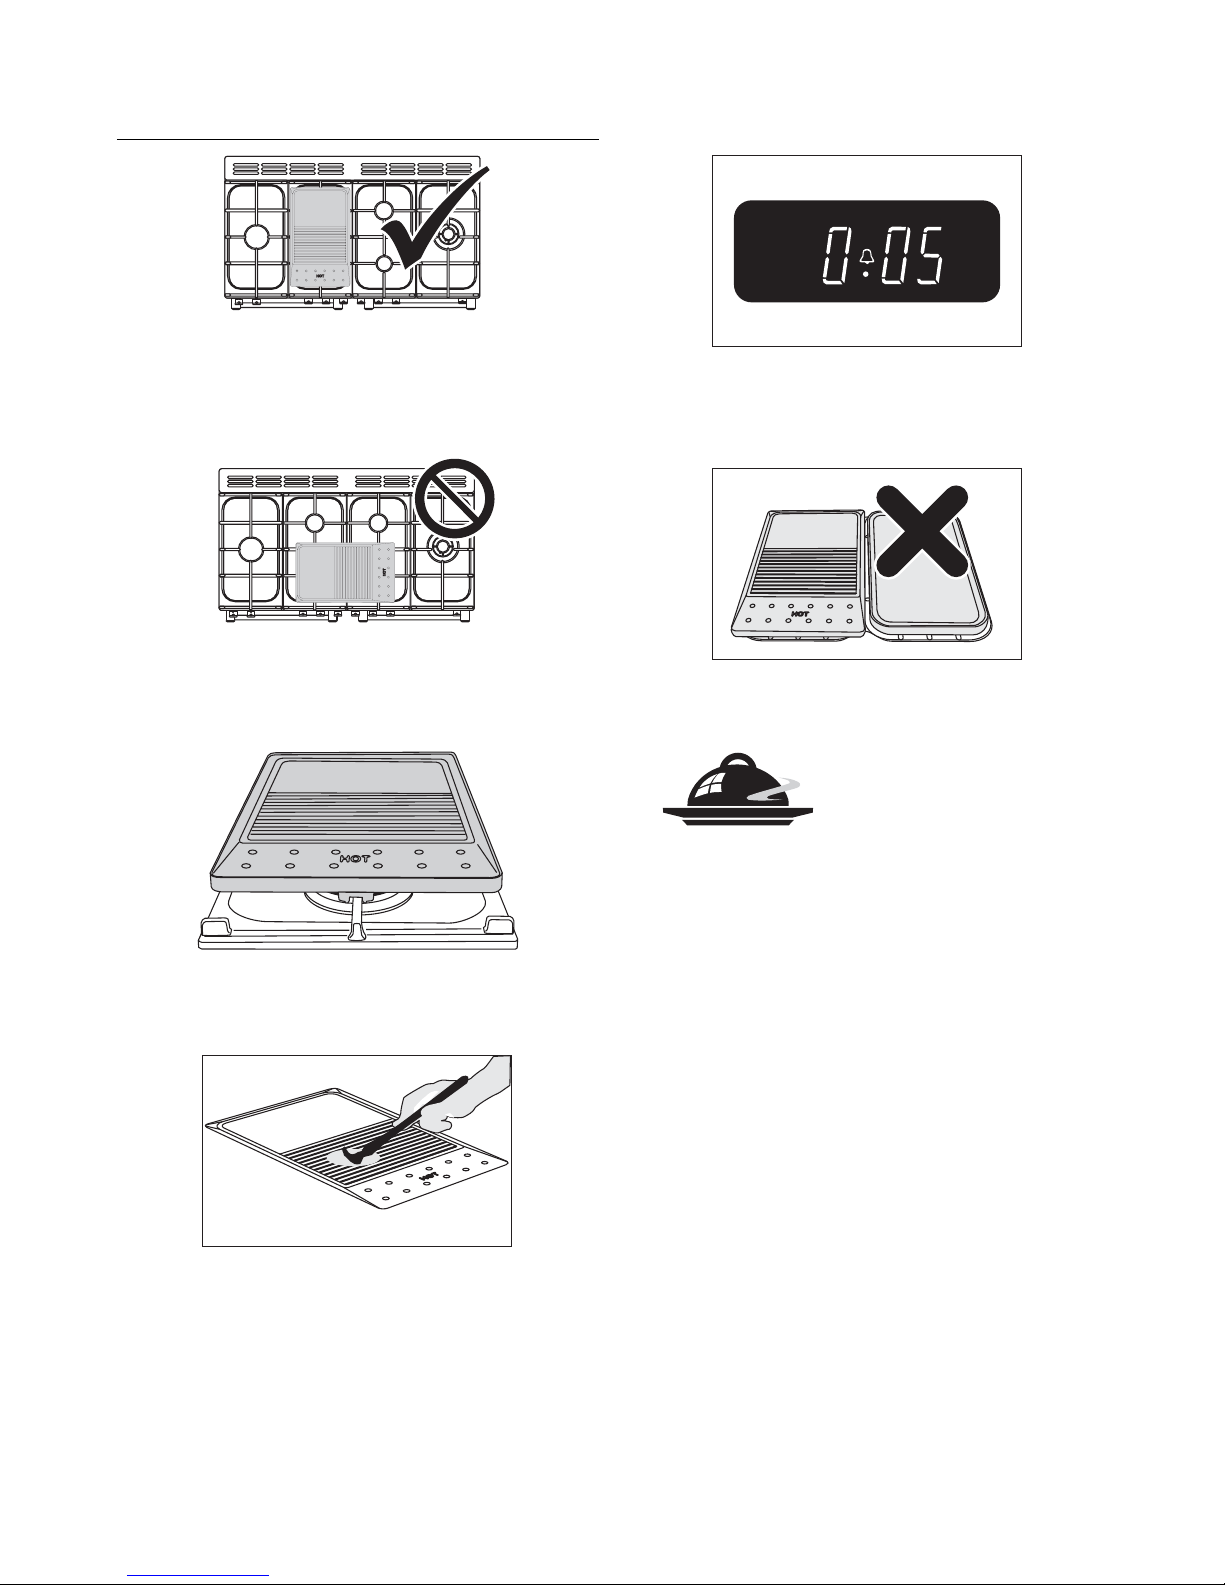
Both Ovens
Before using for the first time, to dispel
manufacturing odours turn the ovens to 240°C
and run for an hour. To clear the smell make sure
the room is well ventilated to the outside air, by
opening windows for example.
The wire shelves should always be pushed firmly to
the back of the oven.
Baking trays meat tins etcetera should be placed
level centrally on the oven’s wire shelves. Keep all
trays and containers away from the sides of the
oven, as overbrowning of the food may occur.
For even browning, the maximum recommended size
for a baking tray is 340mm by 340mm.
Cooking high moisture content foods can create a
‘steam burst’, when the oven door is opened. When