Rato RBDM40 User manual

Brush cutter
RBDM40
WWW.RATO-EUROPE.COM
Read all safety rules and instructions carefully before operating this tool

Original instructions
CONTENTS
Contents ................................................................................................................................................................................2
Symbols..………………………………………………………………………………………………………………………………………………..……..……...3
Safety Instructions… .............................................................................................................................................................5
Operation………..………..…………………………………………………………………………………………………………………………………………..9
Know your 40V brush cutter/grass trimmer..................................................................................................................... 12
Functional description........................................................................................................................................................13
Assembly...............................................................................................................................................................................15
Maintenance ........................................................................................................................................................................20
Troubleshooting...................................................................................................................................................................22
Technical data ..................................................................................................................................................................... 23
EC- Declaration of Conformity ...........................................................................................................................................24
2-English

Original instructions
SYMBOLS
WARNING! Brush cutter can be dangerous!
Careless or incorrect use can result inserious or fatal injury to the operator or others. It is extremely
important that you read and understand the contents of the operator’s manual. Please read the
operator’s manual carefully and make sure you understand the instructions before using the machine.
Beware of blade thrust
Keep bystanders away.
This unit is not intended for use with a toothed saw type blade. Do not use toothed blade.
Always wear:
•Approved hearing protection
•Approved eye protection
•Approved head goggles or a visor
Max. speed of output shaft, rpm MAX 7000
The operator of the machine must ensure, while working, that no persons or animals
come closer than 15 meters (50 ft.)
Always wear approved protective gloves.
Wear sturdy, non-slip boots.
Symbols on the product or its packaging indicate that this product cannot be handled as domestic waste. This
product must be deposited at an appropriate recycling facility. (Applies to Europe only)
Watch out for thrown objects and ricochets
Do not expose to rain.
Direct current
Noise emission to the environment according to the European Community’s Directive
The machine’s emission is specified in the Technical data chapter and on the label.
3-English

Original instructions
SYMBOLS
Symbols on the battery and/or on the battery charger:
This product must be deposited at an appropriate recycling facility (Applies to Europe only)
Li-ion
Fail-safe transformer
Use and store battery charger only indoors.
Double insulation
4-English

Original instructions
SAFETY INSTRUCTIONS
WARNING!
Read all safety warnings and all instructions. Failure to follow the warnings and instructions may result in electric
shock, fire and/or serious injury.
Save all warnings and instructions for future reference.
General instructions
1.Do not allow persons unfamiliar with the brush cutter/grass trimmer or these instructions to operate the tool.
Brush cutter and grass trimmers are dangerous in the hands of untrained users.
2.Be sure that anyone who is to operator the brush cutter/grass trimmer has first read the instruction manual.
3.Never allow people unfamiliar with these instruction, people(including children) with reduced physical, sensory or
mental capabilities, or lack of experience and knowledge to use the tool. Local regulations can restrict the age of the
operator.
4.Use the tool with the utmost care and attention.
5. Operate the equipment only if you are in good physical condition. Perform all work calmly and carefully. Use
common sense and keep in mind that the operator or user is responsible for accidents or hazards occurring to
other people or their property.
6. Never use the equipment after consumption of alcohol or drugs, or if feeling tired or ill.
7. Avoid Unintentional Starting. Do not carry battery-installed equipment with finger on switch. Be sure switch is
off when installing a battery cartridge.
8. The motor is to be switched off immediately in case that the equipment shows any problem or abnormal sign.
9. Switch off and remove the battery cartridge when resting and when leaving the equipment unattended, and
place it in a safe location to prevent danger to others or damage to the equipment.
10. Don't force the equipment. it will do the job better and with less likelihood of a risk of injury at the rate
for which it was designed.
11. Don't overreach. Keep proper footing and balance at all times.
Check before starting
•Always remove the battery to prevent the machine being started by accident. Always disconnect the
battery before any maintenance on the machine.
•Before using the machine and after any impact, check for signs of wear or damage and repair as necessary.
•Inspect the working area. Remove all loose objects, such as stones, broken glass, nails, steel wire, grass, etc. that
could be thrown out or become wrapped around the cutter or cutter guard.
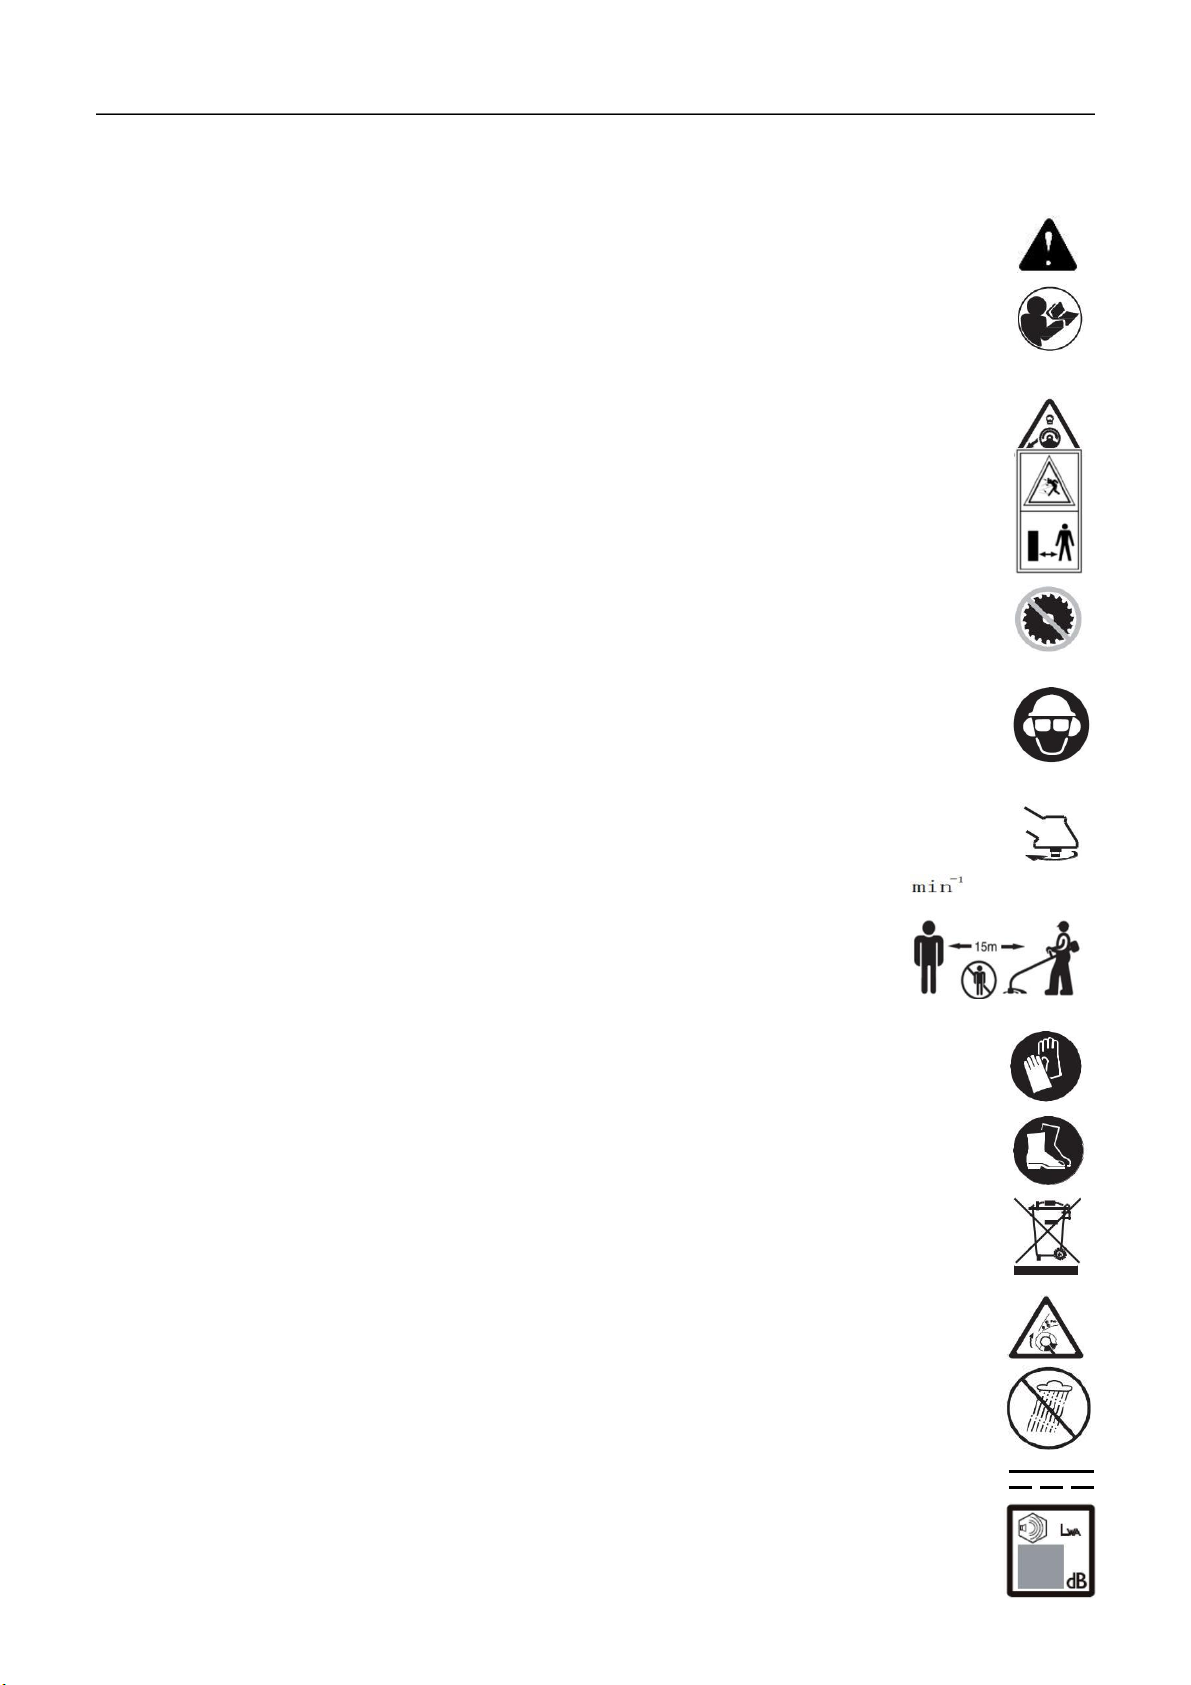
•The machine operator must ensure that no people or animals come closer than 15 meters(50 ft.)while working.
When several operators are working in the same area the safety distance should be at least 15 meters(50 ft.).
•Do an overall inspection of the machine before use, see maintenance schedules.
Intended use of the tool
1.Use right tool. The cordless brush cutter/grass trimmer is only intended for cutting grass, weeds, brushes and
undergrowth. It should not be used for any other purpose such as edging or hedge cutting as this may cause injury.
Personal safety
•The cutting tool does not stop immediately after the machine is turned off.
•The machine is only design for brush/grass. Do not use the Brush cutter/grass trimmer for any job except that
for which it is intended.
•Stay alert, watch what you are doing and use common sense when operating a power tool. Do not use a power
tool while you are tired or under the influence of drugs, alcohol or medication. A moment of inattention while
5-English

Original instructions
SAFETY INSTRUCTIONS
operating power tools may result in serious personal injury.
•This appliance is not intended for use by person (including children) with reduced physical, sensory or mental
capabilities, or lack of experience and knowledge, unless they have been given supervision or instruction
concerning use of the appliance by a person responsible for their safety. Children should be supervised to ensure
that they do not play with the appliance.
•Never allow children or other persons not trained in the use of the machine and/or the battery to use or service it.
Local laws may regulate the age of the user.
•Store the equipment in a lockable area so that it is out of reach of children and unauthorized persons.
•Keep hands and feet away from the cutting area at all times and especially when switching on the motor.
•Dress properly. Do not wear loose clothing or jewelry. Keep your hair, clothing and gloves away from moving parts.
Loose clothes, jewelry or long hair can be caught in moving parts.
•Never use the machine if you are tired, if you have drunk alcohol, or if you are taking medication that could
affect your vision, your judgement or your co-ordination.
•Wear personal protective equipment. See instructions under the heading ”Personal protective equipment”.
•Turn off the machine when it has to be moved. Always remove the battery when passing the machine to
another person.
Power tool use and care
•The only accessories you can operate with this product are the cutting attachment we recommend in the
technical data chapter.
•Never use a machine that has been modified in any way from its original specification. Never use the machine
near explosive or flammable materials.
•Never use a machine that is faulty. Carry out the safety checks, maintenance and service instructions described
in this manual. Some maintenance and service measures must be carried out by trained and qualified specialists.
See instructions under the heading Maintenance.
•Only use original spare parts.
•Always ensure that ventilation openings are kept clear of debris.
•All covers, guards and handles must be fitted before starting.
•Only use the machine in daylight or in other well-lit conditions.
•Never use the machine in bad weather, for instance in fog, in rain, damp or in wet locations, strong winds,
intense cold, risk of lightning, etc. Extremely hot weather may cause overheating of the machine.
Always use common sense
It is not possible to cover every conceivable situation you can face. Always exercise care and use your common
sense. Avoid all situations which you consider to be beyond your capability. If you still feel uncertain about operating
procedures after reading these instructions, you should consult an expert before continuing.
Important
WARNING!
This machine produces an electromagnetic field during operation. This field may under some circumstances
interfere with active or passive medical implants. To reduce the risk of serious or fatal injury, we recommend
persons with medical implants consult their physician and the medical implant manufacturer before operating
this machine.
6-English

Original instructions
SAFETY INSTRUCTIONS
WARNING!
Never allow children to use or be in the vicinity of the machine. Since the machine is easy to start, children may
be able to start it if they are not kept under full surveillance. This can mean a risk of serious personal injury.
Therefore disconnect the battery when the machine is not under close supervision.
Personal protective equipment
IMPORTANT!
A Brush cutter can be dangerous if used incorrectly or carelessly, and can cause serious or fatal injury to the
operator or others. It is extremely important that you read and understand the content of this operator’s manual.
You must use approved personal protective equipment whenever you use the machine. Personal protective
equipment cannot eliminate the risk of injury but it will reduce the degree of injury if an accident does happen. Ask
your dealer for help in choosing the right equipment
WARNING!
Listen out for warning signals or shouts when you are wearing hearing protection. Always remove your hearing
protection as soon as the motor stops.
HEARING PROTECTION
Wear hearing protection that provides adequate noise reduction.
EYE PROTECTION
Always wear approved eye protection. If you use a visor then you must also wear approved protective goggles.
Approved protective goggles must comply with standard ANSI Z87.1 in the USA or EN 166 in EU countries.
GLOVES
Gloves should be worn when necessary, e.g., when fitting cutting attachments.
BOOTS
Wear sturdy, non-slip boots.
7-English

Original instructions
SAFETY INSTRUCTIONS
CLOTHING
Wear clothes made of a strong fabric and avoid loose clothing that can catch on twigs and branches. Always wear
heavy, long pants. Do not wear jewelry, shorts sandals or go barefoot. Secure hair so it is above shoulder level.
FIRST AID KIT
Always have a first aid kit nearby.
Electrical and battery safety
1. Avoid dangerous environment. Don't use the equipment in damp or wet locations or expose it to rain. Water
entering an equipment will increase the risk of electric shock.
2. Recharge only with the charger specified by the manufacturer. A charger that is suitable for one type of battery
pack may create a risk of fire when used with another battery pack.
3. Use power tools only with specifically designated battery packs. Use of any other battery packs may create a risk
of injury and fire.
4. When battery pack is not in use, keep it away from other metal objects, like paper clips, coins, keys, nails, screws
or other small metal objects, that can make a connection from one terminal to another. Shorting the battery
terminals together may cause burns or a fire.
5. Under abusive conditions, liquid may be ejected from the battery; avoid contact. If contact accidentally occurs,
flush with water. If liquid contacts eyes, additionally seek medical help. Liquid ejected from the battery may
cause irritation or burns.
6. Do not dispose of the battery in a fire. The cell may explode. Check with local codes for possible special
disposal instructions.
7. Do not open or mutilate the battery. Released electrolyte is corrosive and may cause damage to the eyes or
skin. It may be toxic if swallowed.
5. Do not short the battery cartridge:
(1) Do not touch the terminals with any conductive material.
(2) Avoid storing battery cartridge in a container with other metal objects such as nails, coins, etc.
(3) Do not expose battery cartridge to water or rain. A battery short can cause a large current flow, overheating,
possible burns and even a breakdown.
SAVE THESE INSTRUCTIONS.
Tips for maintaining maximum battery life
1. Charge the battery cartridge before completely discharged. Always stop tool operation and charge the
battery cartridge when you notice less tool power.
2. Never recharge a fully charged battery cartridge. Overcharging shortens the battery service life.
3. Charge the battery cartridge with room temperature at 5 ゚C - 40 ゚C (41 ゚F - 104 ゚F). Let a hot battery cartridge
cool down before charging it.
8-English

Original instructions
OPERATION
Starting up the equipment
1. Make sure that there are no children or other people within a working range of 15 meters (50 ft.), also
pay attention to any animals in the working vicinity. Otherwise stop using the equipment.
2. Before use always check that the equipment is safe for operation. Check the security of the cutting tool and the
guard and the switch trigger/lever for easy and proper action. Check for clean and dry handles and test the
function of the start/stop.
3. Check damaged parts before further use of the equipment. A guard or other part that is damaged should be
carefully checked to determine that it will operate properly and perform its intended function. Check for alignment
of moving parts, binding of moving parts, breakage of parts, mounting, and any other condition that may affect its
operation. A guard or other part that is damaged should be properly repaired or replaced by our authorized
service center unless indicated elsewhere in this manual.
4. Switch on the motor only when the hands and feet are away from the cutting tool.
5. Before starting make sure that the cutting tool has no contact with hard objects such as branches, stones etc. as
the cutting tool will revolve when starting.
Method of operation
1. Only use the equipment in good light and visibility. During the winter season beware of slippery or wet areas,
ice and snow (risk of slipping). Always ensure a safe footing.
2. Take care against injury to feet and hands from the cutting tool.
3. Never cut above waist height.
4. Never stand on a ladder and run the equipment.
5. Never climb up into trees to perform cutting operation with the equipment.
6. Never work on unstable surfaces.
7. Remove sand, stones, nails etc. found within the working range. Foreign particles may damage the cutting
tool and can cause dangerous kick-backs.
8. Should the cutting tool hit stones or other hard objects, immediately switch off the motor and inspect the
cutting tool.
9. Inspect the cutting tool at short regular intervals for damage (detection of hairline cracks by means of
tapping-noise test).
10. Before commencing cutting, the cutting tool must have reached full working speed.
11. Operate the equipment only with the shoulder harness attached which is to be suitably adjusted before
putting the equipment into operation. It is essential to adjust the shoulder harness according to the user size to
prevent fatigue occurring during use.
12. During operation always hold the equipment with both hands. Never hold the equipment with one hand
during use. Always ensure a safe footing.
13. The cutting tool has to be equipped with the appropriate guard. Never run the equipment with damaged
guards or without guards in place!
14. All protective installations and guards supplied with the equipment must be used during operation.
15. Never use the equipment striking or bumping the weeds or similar to cut away them.
16. Except in case of emergency, never drop or cast the equipment to the ground or this may severely damage
the equipment.
17. Remember to lift the entire equipment from the ground when moving the equipment.
18. Always remove the battery cartridge from the equipment:
−whenever leaving the equipment unattended;
9-English

Original instructions
OPERATION
−before clearing a blockage;
−before checking, cleaning or working on the equipment;
−after striking a foreign object to inspect the machine for damage;
−whenever the equipment starts vibrating abnormally, for immediately check.
19. Always ensure that the ventilation openings are kept clear of debris.
Kickback (blade thrust)(see Fig.1)
1.When operating the tool, uncontrolled kickback (blade thrust) may occur.
Fig.1
2.This is particularly the case when attempting to cut within a blade segment between 10and 12 O’clock.
3.Never apply this segment between 10 and 12 O’clock.
4.Never apply this segment of the cutter blade to solids, such as brushes and tree ,etc., having a diameter in excess
of 3 cm or the cutter blade will be deflected at great force with the risk of injuries.
Kickback prevention (see Fig.2)
To avoid kickbacks, observe the following
1.Operation within a blade segment between 10 and 12 o’clock presents positive hazards, especially when using
metal cutting tools.
Fig.2
2.Cutting operations within a blade segment between 12 and 1 o’clock, and between 8 and 10 o’clock, must only be
performed by trained and experienced operators, and then only at their own risk.
3.Easy cutting with almost no kickback is possible within a blade segment between 1 and 3
o’clock. Cutting Tools
1. Employ only the correct cutting tool for the job in hand.
2. To cut thick materials, such as weed, high grass, bushes, shrubs, underwood, thicket etc.(max.2cm dia.
Thickness),perform the cutting work by swinging the tool evenly in half-circles from right to left (similar to using a
scythe)
10-English

Original instructions
OPERATION
Maintenance instructions
1. The condition of the equipment, in particular of the cutting tool of the protective devices and also of the
shoulder harness must be checked before commencing work.
2. Turn off the motor and remove the battery cartridge before carrying out maintenance,
replacing/sharpening cutting tools or cleaning the equipment or cutting tool.
3. Check loose fasteners and damaged parts such as cracks in the cutting attachment.
4. Follow instructions for lubricating and changing accessories.
5. When not in use, store the equipment indoors in dry and high or locked-up place - out of the reach of
children. Clean and maintain before storage.
6. Use only the manufacturer's recommended replacement parts and accessories.
7. Inspect and maintain the equipment regularly, especially before/after use. Have the equipment repaired only
by our authorized service center.
8. Keep handles dry, clean and free from oil and grease.
SAVE THESE INSTRUCTIONS.
WARNING:
DO NOT let comfort or familiarity with product (gained from repeated use) replace strict adherence to safety
rules for the subject product. MISUSE or failure to follow the safety rules stated in this instruction manual may
cause serious personal injury.
11-English

Original instructions
KNOW YOUR 40V BRUSH CUTTER
BATTERY
BATTERY
REAR HANDLE
SWITCH TRIGGER
LOCK OUT BUTTON
LOCK OUT
HANDLE
BUTTON
HANGER
HANGER
FRONT HANDLE
BARRIER
SWITCH TRIGGER
SHOULDER HARNESS
BUCKLE
GUARD
GUARD
BLADE TRANSPORT COVER
CUTTING TOOL
CUTTING TOOL
Fig.3
KNOW YOUR 40V CORDLESS BRUSH CUTTER(see Fig.3)
The safe use of this product requires an understanding of the information on the product and in this operator’s
manual as well as a knowledge of the project you are attempting. Before use of this product, familiarize
yourself with all operating features and safety rules.
SWITCH TRIGGER
The switch trigger, located the right handle, and the lock-off button, located the right handle(BBC236DH)/rear
handle(BBC236SH), must be depressed simultaneously to allow blade rotation.
Cutter tool diameter:
255x90x25.4x1.6mm,2T 255x25.4x1.6mm,3T 255x25.4x2.5mm,3T 255x25.4x1.6mm,4T
12-English

Original instructions
FUNCTIONAL DESCRIPTION
CAUTION:
•Always be sure that the equipment is switched off and the battery is removed before adjusting or checking
function on the equipment.
Installing or removing battery (see Fig.4)
SLIDE BUTTON BATTERY
Fig.4
•Always switch off the equipment before insertion or removal of the battery .
•To remove the battery , withdraw it from the equipment while sliding the button on the front of the battery.
•To insert the battery , align the tongue on the battery with the groove in the housing and slip it into place.
Always insert it all the way until it locks in place with a little click.
•Remove the battery from the machine by pressing the release buttons and pulling out the battery.
•Do not use force when inserting the battery . If the battery does not slide in easily, it is not being
inserted correctly.
Power switch action (see Fig.5)
CAUTION:
•Before inserting the battery cartridge into the equipment, always check to see that the switch trigger
actuates properly and returns to the "OFF" position when released.
LOCK OFF BUTTON
SWITCH TRIGGER
SWITCH TRIGGER
(for BBC236DH)
(for BBC236SH)
Fig.5
13-English

Original instructions
FUNCTIONAL DESCRIPTION
To prevent the switch trigger from being accidentally pulled, a lock-off button is provided.
To start the equipment, depress the lock-off button and pull the switch trigger. The tool speed is increased
by increasing pressure on the switch trigger. Release the switch trigger to stop.
Speed change (see Fig.6)
1(FAST SPEED)1(FAST SPEED)
2(SLOW SPEED)2(SLOW SPEED)
(For BBC236DH)(For BBC236SH)Fig.6
Two speed ranges can be preselected with the speed
To change the speed range, turn the speed change switch lever so that it points toward "2" for low speed or "1"
for high speed.
14-English

Original instructions
ASSEMBLY
CAUTION:
•Always be sure that the tool is switched off and the battery cartridge is removed before carrying out any
work on the tool Failure to switch off and remove the battery cartridge may result in serious personal injury
from accidental start-up..
•Never start the tool unless it is completely assembled. Operation of the tool in a partially assembled state
may result in serious personal injury from accidental start-up.
Installing the handle and grip (For model BBC236DH)(see Fig.7)
NUT
HANDLE
SCREW(A)
GRIP
HANDLE HOLDER
SCREW(B)
HANDLE CLAMP
Fig.7
1
2
1.Loosen knob
Place handle between handle clamp and handle holder. Adjust the handle to an angle that provides a comfortable
working position and then tighten four screws(A) so that the handle assembly cannot move.
2.Place grip cover the handle and grip hold(1). Adjust the handle to an angle that provides a comfortable working
position(2)and then tighten one screw(B)and one nut so that the grip assembly cannot move .
Installing the handle and grip (For model RBDM40)(see Fig.8-11)
FRONT
HANDLE (A)
NUT
HOLE
BARRIER
PPSITION PIN
Fig.8
Fig.9
15-English

Original instructions
ASSEMBLY
KNOB
Fig.10
Fig.11
1.Push left the front handle on the shaft tube. Then inset the barrier on the front handle until the position pin on
the shaft tube.(see Fig.8)
2. Fit the nut into the hole.(see Fig.9)
3.Fit the barrier and handle onto the shaft pipe with the knob. Make sure Position the barrier on the left side
of the tool.(see Fig.10)
4.Tight the knob so that the grip/barrier assembly cannot move or rotate on the shaft pipe.(See Fig.11)
Installing the guard (see Fig.10).
GUARD
MOTOR HOUSING
SCREW
Fig.10
•Fit the trimmer guard onto motor housing, then tighten three screws so that the guard assembly cannot move.
16-English

Original instructions
ASSEMBLY
Fitting the Cutting blade (see Fig.11-12)
•Be sure to use genuine Rato cutting blade .Turn the tool upside down so that you can replace the cutter blade
easily.
HEX NUT
CUP
CLAMP WASHER
CUTTER BLADE
RECEIVE WASHER
MOTOR HOUSING
Fig.11
To dismount the cutter blade, insert the hex wrench through the hole on the motor housing and receive washer.
rotate the receive washer until it is locked with the hex wrench. Loosen the hex nut (left-hand thread)with the hex
socket wrench and remove the nut, cup, clamp washer and hex wrench.
SPANNER
HEX WRENCH
Fig.12
Mount the cutter blade onto the shaft so that the guide of the receive washer fits in the arbor hole in the cutter
blade . Install the clamp washer, cup, and secure the cutter blade with the hex nut with 13 to 23Nm of tightening
torque during holding the receive washer with hex wrench. Then tighten the one nut by clockwise rotate.
17-English

Original instructions
ASSEMBLY
Installing of nylon cutting head (see fig. 13-15)
COVER(F)
SPOOL(E)
SPRING(D)
NUT(C)
HOUSING(B)
SPRING
NUT
RECEIVE WASHER(A)
HEX WRENCH
Fig.13
COVER
EYELETS
LATCHES
Fig.14
Fig.15
1 Fit the receive washer and housing onto the motor shaft.(see fig.13)
2. Hold the housing,insert the hex wrench through the hole on the receive washer ,then tighten the one nut by
clockwise rotate. Then fit the spring into the housing.
3. Mount the spool in the cover so that the grooves and protrusions on the spool match up with those in the cover.
18-English

Original instructions
ASSEMBLY
4.Keep the side with letters on the spool visible on the top. Now, unhook the ends of the cord from their
temporary position and feed the cords through the eyelets to come out of the cover.(see fig.14)
5. Push cover firmly onto the housing to secure it. Make sure the latches fully spread in the cover(see fig.15)
WARNING(For BBC236DH)(see fig.16)
•Always position the equipment on your right-hand side so that the shaft of the left handle is always in front of
your body. Correct positioning of the tool allows for maximum control and will reduce the risk of serious personal
injury caused by kickback.
WARNING(For RBDM40) (see fig.16)
Always position the equipment on your right-hand side so that the shaft of the barrier is always ahead of you.
The correct posture reduces the risk of injury caused by kickback.
Fig.16
Attachment of shoulder harness (see fig.17-18)
Fig.17
Fig.18
Hang the shoulder harness on your left shoulder with putting your head and right arm though it. Buckle it to the
hook unit until a click is heard. Make sure that it cannot be taken off with pulling it off. Hang the machine as
shown. Adjust the strap length so that the cutter blade will be kept parallel with the ground at the level of 10 to 30
cm (4" to 12") above the ground.(see fig.17)
In case of emergency, press the emergency detachment lever strongly.(see fig.18)
WARNING:
•Be extremely careful to maintain control of the machine at this time. Do not allow the machine to be
deflected toward you or anyone in the work vicinity. Failure to do so could result in serious injury.
19-English

Original instructions
MAINTENANCE
Replacing the nylon cord(see figure19-22)
WARNING:
•Release the switch trigger and remove the battery pack before replacing nylon cord.
•Make sure that the cover of the nylon cutting head is secured to the housing properly as described below.
Failure to do so may make it fly apart and cause serious injury.
•Use only 1.5 –2.0 mm diameter nylon line. Never use metal wire, rope, or the like
Cover
Latches
Fig.19
Fig.20
1.Press inward on the housing latches and lift upward to remove the cover. Discard any of the remaining
nylon cord(see Fig.19)
2.Hook the center of new nylon cord into the notch in the center of the spool, with one end of the cord
extending about 80 mm (3-1/8") more than the other. Then wind both ends firmly around the spool in the
direction of the head rotation (right-hand direction indicated by LH and right-hand direction by RH on the side of
the spool).(see Fig.20)
Eyelets
Fig.21
Fig.22
3.Place the ends of the line in two opposite notches in the spool, with approximately 6 in. (15 cm)
protruding(see Fig.21)
4.Mount the spool in the cover so that the grooves and protrusions on the spool match up with those in the
cover. Keep the side with letters on the spool visible on the top. Now, unhook the ends of the cord from their
temporary position and feed the cords through the eyelets to come out of the cover.(see Fig.22)
20-English
Table of contents