Raytech SynchroKing 8 User manual

RayTechAutomotive
SynchroKing 8 - Instruction Manual
www.raytechautomotive.com 1 of 8 Rev 1
Aug 2022
Application
The SynchroKing 8 is a universal vacuum synchronization/balancing tool for both carburetors
and throttle valve bodies. It is suitable for any combustion engine with up to eight intake ports
from cars, motorcycles, mopeds, scooters, karts, mowers and outboard engines. The
SynchroKing 8 is designed to provide a compact, easy to use and economical synchronisation
tool for home and workshop use. The SynchroKing 8 is primarily designed for use with engines
with eight inlet manifolds but is in principle suitable for any engine with more than one intake. If
not all eight ports are used, the device will automatically ignore the sensor input from the
disconnected ports, making it possible to use the device on 2 through 8 manifold engines. The
device comes with a set of 8 of each M5 and M6 nipples, enabling easy connection to the
vacuum test ports on most vehicles
This Owner's manual must be read in conjunction with the Workshop manual of the vehicle
before using the SynchroKing 8 . Before proceeding the user should as a minimum be familiar
with the test ports in the manifolds, the idle adjuster screws and the balancing adjuster screws.
Features:
1. Australian designed and manufactured.
2. High quality, robust housing.
3. Digital display for vacuum for four vacuum channels.
4. Bar displays for differential vacuum display.
5. Adjustable bar graph increment.
6. Adjustable electronic dampening.
7. Automatic active channel detection (20mmHg threshold).
8. Selectable number of active channels (8,6,4 or 2).
9. No moving parts.
10. No battery required.
11. Reverse polarity protection.
12. Auto calibration function at startup.
13. 1-year limited warranty for the original Purchaser.
The package includes:
1 x SynchroKing 8 device, c/w integrated power lead
8 x vacuum hoses [supplied separately]
8 x M5 brass nipples
8 x M6 brass nipples
Detailed and illustrated user manual
1 x pouch containg everything except the hoses
RayTechAutomotive
SynchroKing 8 - Instruction Manual
www.raytechautomotive.com 2 of 8 Rev 1
Aug 2022
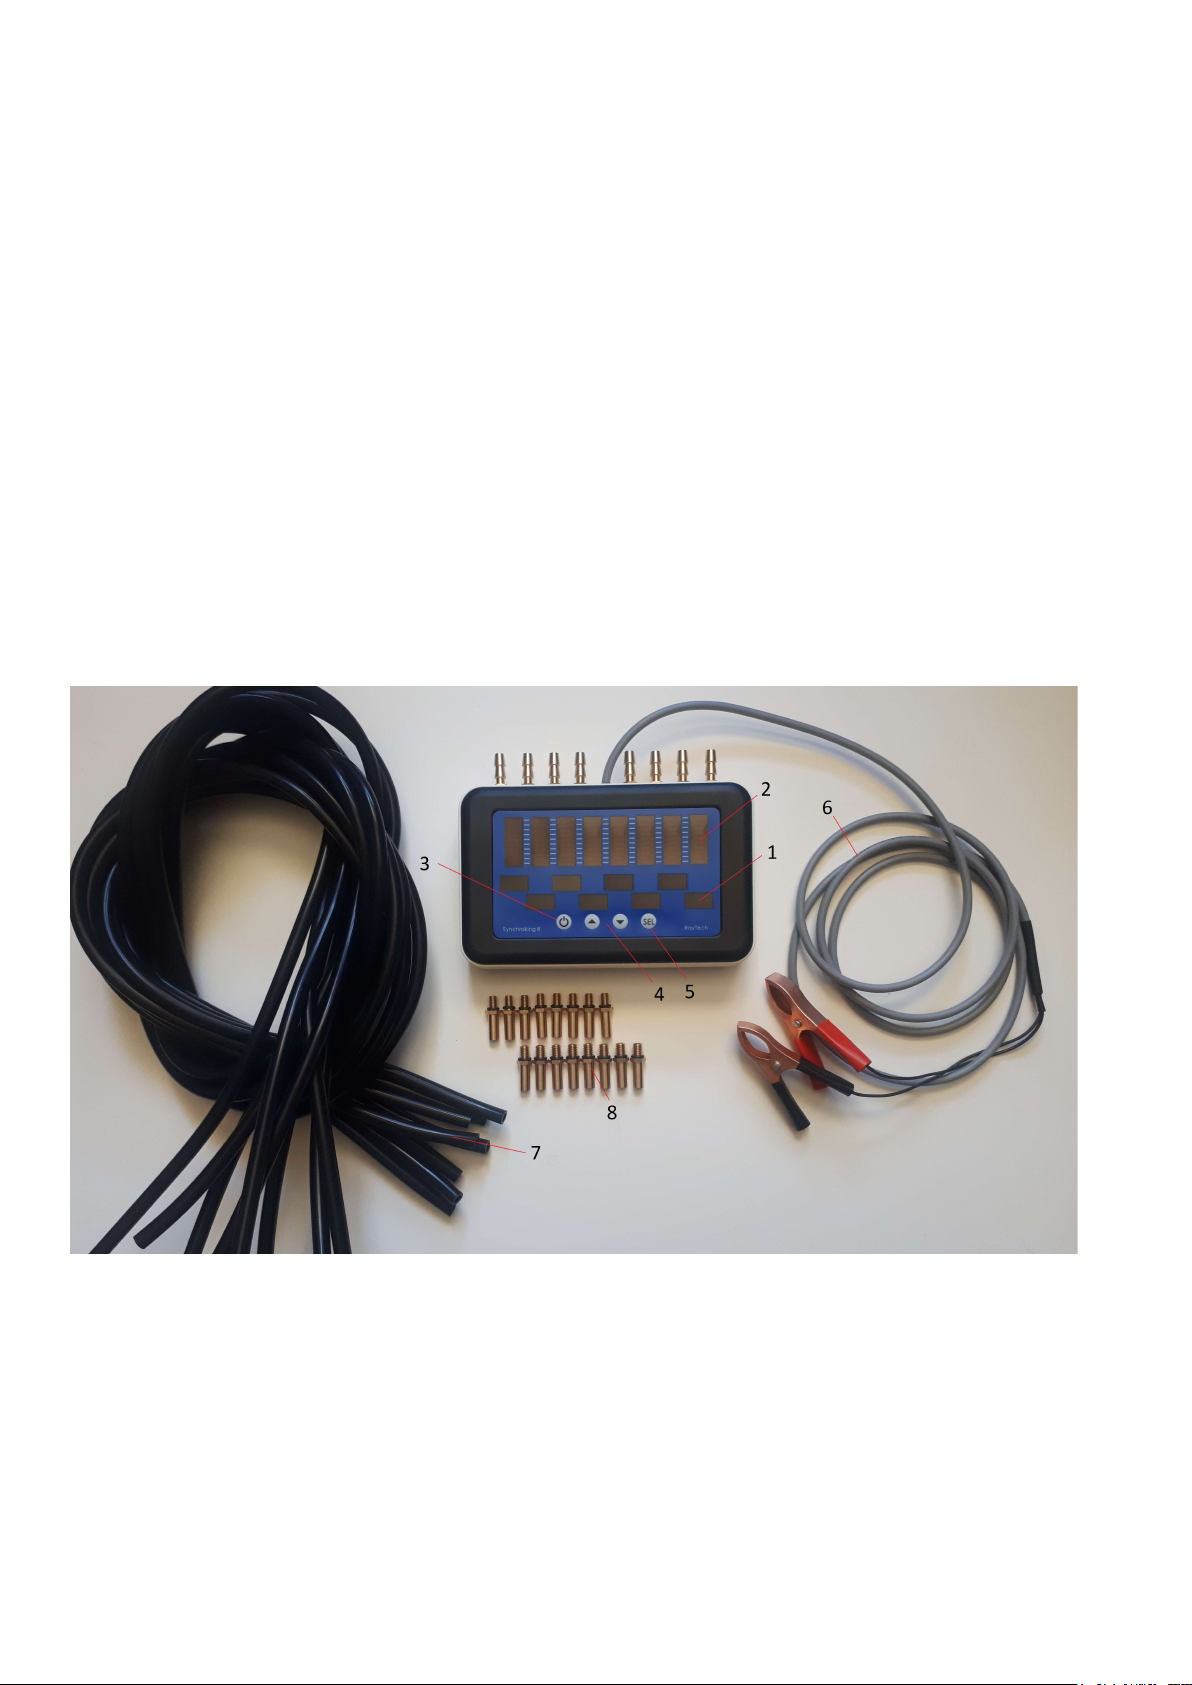
Device Description:
1. Main displays - The two main displays indicate the vacuum measured in the inlet
manifolds in mm of mercury [mmHg].
2. Bar displays - Each bar display indicates the level of vacuum relative to the average
vacuum in the inlet manifolds.
3. On/Off button [Only implemented on battery operated models]
4. Pushbuttons ' + ' and ' - ' Used to adjust device setting and initiate a manual re-
calibration
5. Sel button - Used to cycle through manu items.
6. Power cable - Connects to the vehicle's battery to power the device.
7. Hoses - Connect to the nipples in the inlet manifolds.
8. 8 x M6 and 8 x M5 nipples - screw into the test ports of the vehicle's intake manifolds.
Figure 1 - Device Overview

RayTechAutomotive
SynchroKing 8 - Instruction Manual
www.raytechautomotive.com 3 of 8 Rev 1
Aug 2022
Connections
Figure 2 shows the SynchroKing 8 connected to the battery and inlet manifolds
Figure 2 - Connection Diagram
RayTechAutomotive
SynchroKing 8 - Instruction Manual
www.raytechautomotive.com 4 of 8 Rev 1
Aug 2022
Function description
Main displays - Vacuum measurement
The SynchroKing 8 displays the vacuum of each individual channel in mmHg with a resolution
of 1 mmHg. Values under 20mmHg are supressed and the device will display ' - - - ' for any
suppressed channels. If the channel is suppressed then it will be excluded from the calculation of
the average value of all active channels.
Bar Displays - Vacuum differential
The SynchroKing 8 calculates the average value of all active channels and compares the
individual value of each channel to this average. The deviation from average is displayed on the
bar graph of the channel. The precision of the bar graphs is user selectable between a range of 1
to 20 mmHg per increment, with a default setting of 5 mmHg per increment. See the Settings
section for details
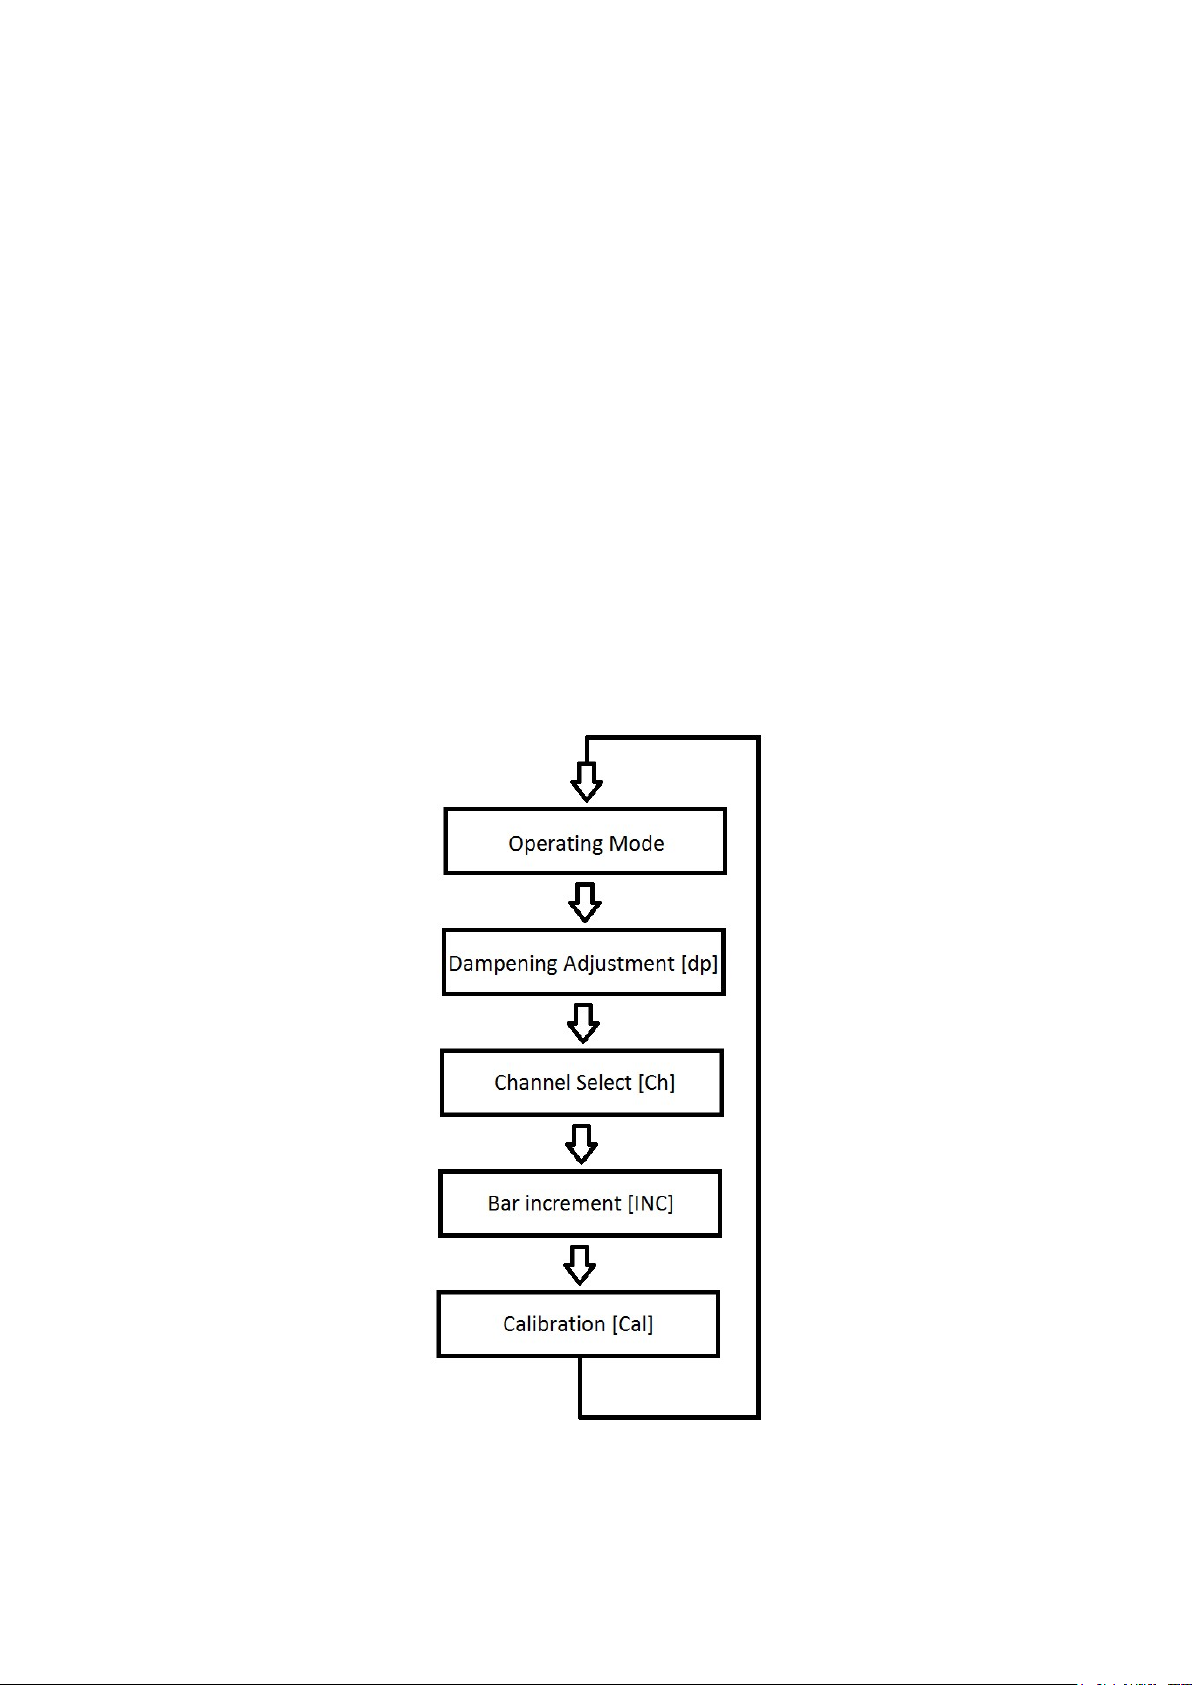
Settings
The SynchroKing 8 is equipped with a number of adjustments that can be used to set up the
device to best suit the engine characteristics. Pressing the 'Sel' button will cycle through the
adjustment settings as depicted in Figure 3 below.
The devices default settings are set such that they will suit most applications without the need to
make adjustments.
Figure 3 - Menu diagram

RayTechAutomotive
SynchroKing 8 - Instruction Manual
www.raytechautomotive.com 5 of 8 Rev 1
Aug 2022
Dampening [dp]
The SynchroKing 8 is equipped with a dampening function to produce a meaningful and
readable display of the vacuum level. The vacuum in the inlet manifold of a running engine will
fluctuate which will result in a rapidly updating readout which makes it virtually impossible to read
the vacuum level. (Equivalent to a rapidly bouncing needle on a conventional gauge).
To overcome this, the dampening function will store the average value of many measurements
into the device memory and produce a display value based on these, resulting in a more stable
readout (equivalent to a choke valve on a conventional gauge). The dampening factor is
selectable in 100 increments. A higher dampening factor will result in a more stable display but
reduced sensitivity and vice versa. The user should set the dampening factor such that a
satisfactory balance is struck between readability and sensitivity.
At startup the device will be set at the default dampening factor of 30.
The dampening factor can be adjusted in increments of 1 by selecting 'dp' with the 'SEL' button,
and pressing the 'UP' or 'DOWN' button momentarily. The dampening factor can be increased or
decreased in increments of 10 by pressing and holding the 'UP' or 'DOWN' button respectively.
Channel Select [Ch]
The SynchroKing 8 will automatically ignore any channels that read less than 20mmHg, so the
device will operate correctly whilst connected to anywhere between 1 to 8 vacuum sources.
Should the user wish to manually switch off any channels, then this can be done by selecting the
'Ch' setting using the 'SEL' button. Pressing the 'UP' or 'DOWN' buttons will cycle through 8,6,4 or
2 channel operation. The displays of the switched off channels will be turned off.
Bar Increment [Inc]
The resolution of the bar graphs can be adjusted between 1 and 20mmHg per increment.
Selecting a higher value will provide a broad measuring range but reduce precision and vice
versa.
For instance if an increment value of 15 is selected, then the bars will operate with a 165mmHg
range and 15mmHg resolution. Selecting a value of 2 will provide a 22mmHg range at a 2mmHg
resolution.
Generally it is desirable to measure at the highest possible resolution but this will likely result in
wild swings on the bar displays due to fluctuations that occur in any piston engine. The user
should strike a balance between range and resolution to suit their application and preference.
To adjust the bar increment, press the 'SEL' button until 'Inc' is displayed. Use the 'UP' and
'DOWN' buttons to select the desired setting.
Calibration [Cal]
At startup the SynchroKing 8 will perform an automatic calibration, during which the output
signal of each sensor unit is baselined at zero. (Note that values below 20 are suppressed thus
not showing on the display). This function ensures that each of the four sensors are referencing
the same start value.
The device is also equipped with a manual calibration option. In normal operation it is not
necessary to execute a manual calibration. Only in the event that the previous (auto) calibration
was not successful, manual calibration is needed. Incorrect calibration occurs for instance when
the pressure on one or more channels was not atmospheric during the calibration.
The manual calibration function is provided in order not to initiate a reset of the adjustments
options as is the case with turning the device off and on.
To execute a manual calibration, press the 'SEL' button until 'Inc' is displayed. Then press and
hold the 'UP' and 'DOWN' buttons. The No.4 display will show 'CAL'. The No.5 display will show a
count down by adding a ' - ' to the display every one second. Calibration is complete when the

RayTechAutomotive
SynchroKing 8 - Instruction Manual
www.raytechautomotive.com 6 of 8 Rev 1
Aug 2022
No.3 display goes blank. Releasing either button before the cycle is complete will abort the
calibration.
Ensure that at the time of calibration, all channels are at atmospheric pressure. Vacuum or
pressure being present at the time of calibration will result in incorrect measurements. It is
suggested to turn the engine of and have the throttle wide open when calibrating.
Operation
The following paragraphs describe the generic synchronization procedure which will be applicable
to most vehicles. The user should read these in conjunction with the vehicle's service manual.
Some manufacturers specify specific vacuum levels.
1. Find the test port plugs in the inlet manifold test ports and remove them.
2. Select the correct size of nipple (either M5 or M6) and install them into the manifold's test
ports. Apply 'snub tight' torque only, enough to compress the O-rings. Some vehicles are
fitted with vacuum test port that accept the 5mm hose to be connected directly; if this is
the case the nipples are unnecessary.
3. Push the hoses onto nipples, take note which manifold connects to which port on the
SynchroKing 8
4. Connect the alligator clamps to the vehicle's battery. The device will now come on-line
and execute to automatic calibration. - CAUTION: Observe correct polarity and take care
not to cause a short circuit.
5. The device will power up and indicate "- - -" on all displays.
6. Start the vehicle and allow the engine to warm up to normal operating temperature.
7. With the throttle fully closed, adjust, as necessary, the stationary adjuster screw on the
carburettor or throttle valve body, until the bar displays equal vacuum in both inlet
manifolds. (See Figure 3).
8. Adjus the 'dp' and 'rng' parameters as required. Bear in mind that increasing dampening,
'dp' will reduce bounce but reduces sensitivity and vice versa, whilst increasing the 'Inc'
setting will increase range and reduce resolution of the bar graphs. Most engines will not
achieve a perfect and stable readout, the user should aim for the best practically
achievable setting.
9. After the idle balancing has been completed, proceed by slowly opening the throttle and
allow the engine speed to increase to roughly 1/3 of maximum RPM. Repeat the
procedure above for idling only using the balancing adjuster screw(s) - refer to the
manual.
10. Re-check and re-adjust the idle and balancing screws as required and stop the engine.
11. Remove the hoses.
12. Allow the nipples to cool of and remove them from the manifolds.
13. Reinstall the test port plugs (do not forget any seals or gaskets, observe the instructions
in the workshop manual).

RayTechAutomotive
SynchroKing 8 - Instruction Manual
www.raytechautomotive.com 7 of 8 Rev 1
Aug 2022
Inc=5, Ch=8
Inc=3, Ch=8
Inc=3, Ch=6
Figure 4 - Examples of readout with various settings
RayTechAutomotive
SynchroKing 8 - Instruction Manual
www.raytechautomotive.com 8 of 8 Rev 1
Aug 2022
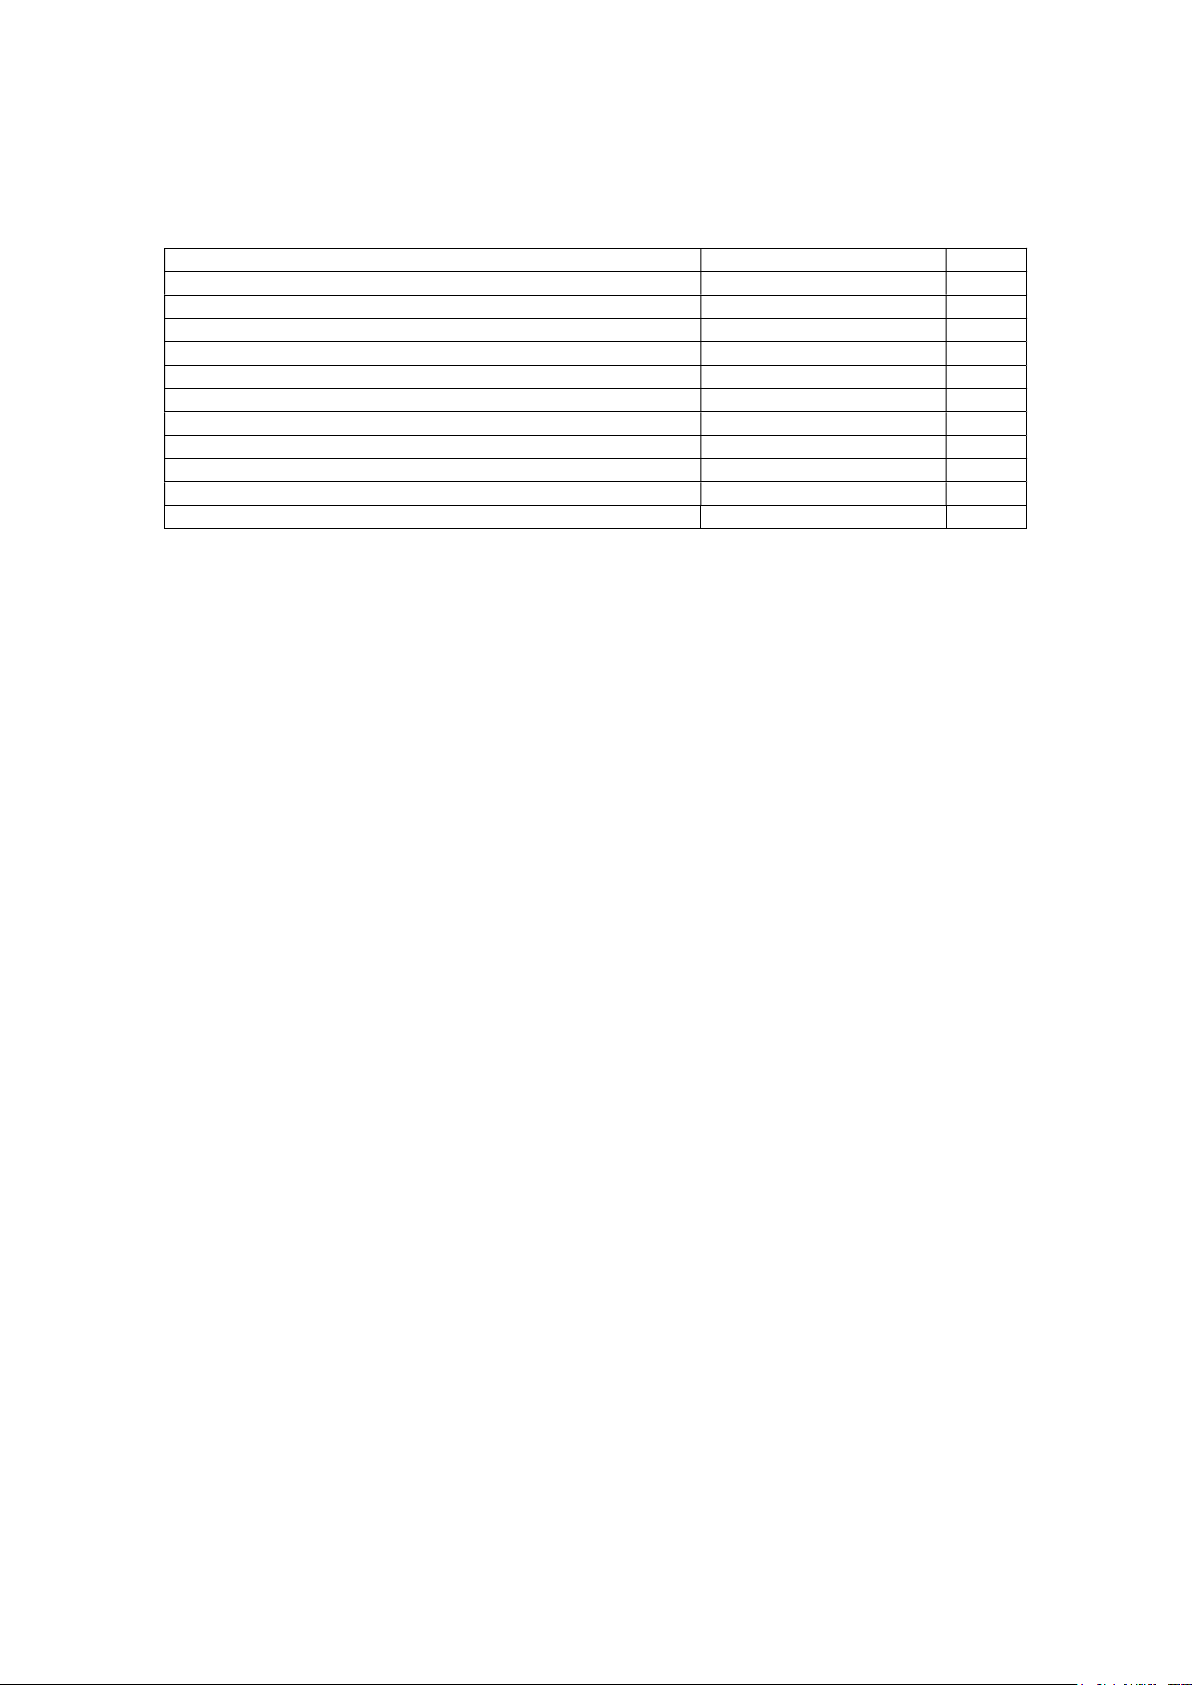
Specification
Dimensions 160 x 120 x 32 mm
Nippple, M5 dimensions M5, d_barb=6, L=25 mm
Nippple, M5 dimensions M6, d_barb=6, L=25 mm
Supply Voltage Max 15 V
Supply Voltage Min 6 V
Current draw, typical 30 mA
Current draw, max 60 mA
Operating Temp, Max 50 deg C
Operating Temp, Min -5 deg C
Measurement resolution 1 mmHg
Measurement range 0 - 400 mmHg
Typical maximum deviation between channels at 200mmHg
<2mm mmHg
Limited Warranty-
The SynchroKing 8
comes with a limited 1-year warranty for the original purchaser. RayTechAutomotive will repair,
replace or refund any unit found to have defects in material workmanship during this period. Any warranty claims must be
submitted to info@raytechautomotive.com. Opening of the device will void the Warranty.
The customer is liable for return shipping. RayTechAutomotive will pay for shipping back to the customer, only if the
device has been determined to be defective by RayTechAutomotive.
RayTechAutomotive does not guarantee the fitness of its products for any purpose other than described in this manual.
RayTechAutomotive shall not be liable for any loss from use of the product or accidental or consequential damages.
Table of contents
Other Raytech Vacuum Cleaner manuals


