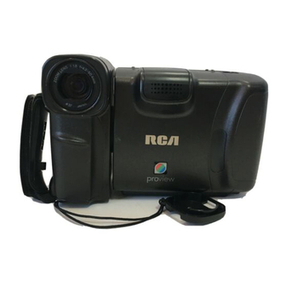
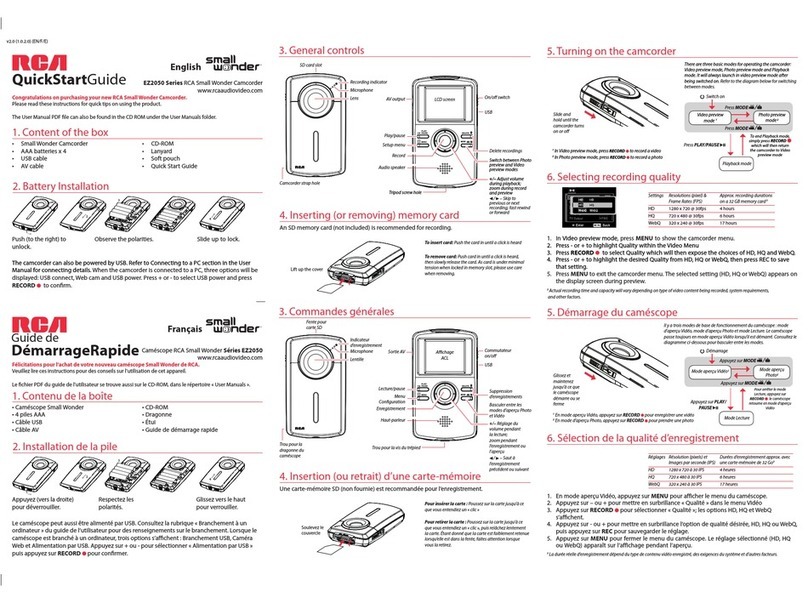
RCA CC180 User manual

First-Time
Operation
Pages 2-5
“Fimdly acamcorder manual
that is easy to understand.”
-!
it’s ritten in plain English.”
‘-2.
x>::
.-?::’
.-
.
Operating
Controls
, Pages 4-5
Recording
Pages 12-23

Safety
~cautions
apterlcharger
will operate on 100-240 volts AC,
50160
Hz, and has a polarized plug. Because one
s wider than the other, the plug
fits
in the wall socket only one way. Do not defeat the safety feature of this plug. If
sion cord, use a polarized cord.
CAUTION: To prevent electric shock, match wide blade of plug to wide slot of wall socket and fully insert the
plug. To prevent electric shock, do not use the polarized plug on the AC adapter/charger with an extension cord.
receptacle, or other outlet unless the blades can be inserted fully to prevent blade exposure.
MISE
EN GARDE: Pour eviter les chocs e’lectriques, introduire la lame la plus large de la fiche dans la borne
correspondante de la prise et pousser jusqu’au fond. Pour
pre’venir
les chocs e’lectriques, ne pas utiliser la fiche
polarisZe^de
cet appareil
avec
une rallonge, une prise de courant ou une autre sortie,
j
moins que les lames
ne
puissent etre
ins&e’es
$
fond sans qu’aucune
partie
ne
soit
laisse’e
h
de’couvert.
educe the risk of electric shock, do not remove the cover or back. No user-serviceable parts are inside. If you spill
corder, disconnect the AC adapter/charger’s power cord to prevent possible fire or shock hazard and consult
1. Moisture can damage internal parts. Refer all service to Authorized RCA Compact Camcorder
Safety Instructions for AC Adapter/Charger” below before using the AC adapter/charger.
al safety. Powerline-operated equipment or accessories connected to this unit should bear the UL listing
ark on the accessories themselves and should not have been modified so as to defeat the safety features.
ial
hazard from electric shock or fire. If in doubt, contact qualified service personnel.
t fire or shock hazard. do not expose camcorder and AC adapter/charger to rain or moisture.
A
Th
I
symbol of a lightning flash
wi hin a triangle is intended to alert
the
1
user to the presence of
uninsulated “dangerous voltage”
wi
pin
the product’s enclosure and
nitude to constitute a risk of
An exclamation point within
a triangle is intended to alert
the user to the presence of
important operating and
maintenance (service)
instructions in the literature
accompanying the product.
Caution: Avoid operating your
camcorder immediately after moving
it from a cold location to a warm
location. Give the camcorder 1
l/2
to
2 hours to reach a stable temperature
before inserting a video cassette. When
moved from a cold area to a warm
location, moisture may condense on the
head drum inside the machine. This
moisture could cause the tape to stick
to the headwheel and damage the
headwheel or tape.
Before using
thi
AC adapter/charger, read all instructions and
cautionary mar ings on
(
I)
AC adapter/charger, (2) battery, and
(3) product
usi
g battery.
,;
A.~,
Caution: To
r
duce
risk of injury, charge only rechargeable
batteries type
:
O96FS
or
FB096FL.
Other types of batteries
may burst
caus
ng personal injury and damage.
Do not expose he
adapter/charger
to moisture of any kind.
Use of an
attac
meht not recommended or sold by the battery
charger manuf
cturer
may result in a risk of fire. electric shock.
or injury to
per:ons.
To reduce risk
cord with the p ug tither than the cord when disconnecting the
adapter/charge
Make sure the
i
f damage to electric plug and cord. pull out the
from the wall outlet.
ord is located so that it will not be stepped on.
tripped over, or otherwise
subjected to damage or stress.
Use of an impr per extension cord could result in a risk of fire
and electric sh ck. If an extension cord must be used. make sure
that:
1. Pins on the
j
lug of the extension cord are the same number,
size and sha
P
as’ those of the plug on the adapter/charger.
i
2. Extension cord is properly wired and in good electrical
condition. and
3. Wire size below is met:
Minimum AWG Size Length of Extension Cord (Feet)
18
Equal to or less than 100
16
Equal to or less than 150
Do not operate adapter/charger with a damaged cord or plug.
Replace it immediately.
Do not operate adapter/charger
ifit
has received a sharp blow.
been dropped, or otherwise damaged in any way. Take it to a
qualified serviceman.
Do
not
disassemble charger. Take it to an Authorized RCA
Compact Camcorder
Servicenter
when service or repair is
required., Incorrect reassembly may result in a risk of electric
shock.
To reduce risk of electric shock, unplug charger from outlet
before attempting any maintenance or cleaning.
Be sure to save these operating instructions for future reference.
IMPOl$TANT SAFEGUARDS
2.
3.
4.
5.
6.
7.
In addition to th careful attention devoted to quality
standards in the
anufacture
of your video product, safety
fore operating your video products.
tions-The safety and operating instructions
ed for future reference.
Comply with all warnings on the video
e operating instructions.
This video product is equipped with a
g-current line plug (a plug having one
n the other). This plug will fit into the
power
way.
This is a safety feature. If you are
plug fully into the outlet, try reversing
still fails to fit, contact your electrician
r obsolete outlet. To prevent electric shock,
polarized plug with an extension cord,
other outlet unless the blades can be fully
ut blade exposure. If you need an extension
with a polarized plug.
es-This video product should be operated
type of power source indicated on the
If you are not sure of the type of power
r home,
cons#~~qur
video dealer or local
ny. For
vid&
pr&ucts
intended to operate
or
other.sources,
refer to the operating
instructions
Overloadin
k
-Do
not overload
wall outlets or extension cords as
this can
resdlt
in
a risk of fire or
Overloaded AC
a shock-or re
ha&d.
Periodically
examine
th
cord, and if its
appearance indicates damage or deteriorated insulation,
have it
rep1
routed so
t
i
ted
by your service technician.
Power-Co d Protection-Power-supply cords should be
at they are not likely to be walked on or pinched
8.
9.
10.
11.
by items placed upon or against them, paying particular
attention to cords at plugs, convenience receptacles. and the
point where they exit from the video product.
Ventilation-Slots and openings in the video products are
provided for ventilation to ensure reliable operation of the
video product and to protect them from overheating. These
openings must not be blocked or covered. The openings
should never be blocked by placing the video product on a
bed, sofa, rug, or other similar surface. This video product
should never be placed near or over a radiator or heat
register. This video product should not be placed in a
built-
in installation such as a bookcase or rack unless proper
ventilation is provided or the video product manufacturer’s
instructions have been followed.
Attachments-Do not use attachments unless
recommended by the video product manufacturer as they
may cause hazards.
Caution: Maintain electrical safety. Powerline operated
equipment or accessories connected to this unit should
bear the
UL
listing mark or CSA certification mark on the
accessory itself and should not be modified so as to defeat
the safety features.
This
will help avoid any potential
hazard from electrical shock or fire. If in doubt, contact
qualified service personnel.
Water and Moisture-Do not use this video product near
water-for example, near a bath tub, wash bowl, kitchen
sink or laundry tub, in a wet basement, or near a swimming
pool and the like.
Accessories-Do not place this video product on an
unstable cart, stand, tripod. bracket, or table. The video
product may fall, causing serious injury to a child or adult as
well as serious damage to the video product. Use this video
product only with a cart, stand, tripod, bracket, or table
recommended by the manufacturer or sold with the video
product. Any mounting of the product should follow the
manufacturer’s instructions and use a mounting accessory
recommended by the manufacturer.
11A
A video product and cart
combination should be moved with
care. Quick stops, excessive force,
and uneven surfaces may cause the
video product and cart combination
to overturn.
(continued on next page)
ii

IMPO)
12. Outdoor A
cable syste
antenna or
protection
i
Section 8 I(
No. 70-198
Part 1)
pro’
grounding 1
of the
lead-
grounding I
connection
the
groundi
Example of An
ELECTRIC
SERVI
EOUIPMENT
13. Power
Linl
located in t
electric
ligt
power lines
system, ext
or approac
t
them might
hazardous
i
installer.
Use
14.
Cleaning-
before
cleal
cleaners.
L
15. Object
ani
into this vie
dangerous
1
result in a f
kind on the
IZTANT
SAFEGUARDS
(continued)
tenna
Grounding-If an outside antenna or
is connected to the video product, be sure the
able
system is grounded so as to provide some
ainst voltage surges and built-up static charges.
If
the National Electrical Code,
ANSVNFPA
(Section 54 of Canadian Electrical Code,
les
information with respect to proper
the mast and supporting structure, grounding
Iwire to an antenna-discharge unit, size of
Inductors, location of antenna-discharge unit,
)
grounding electrodes, and requirements for
5
electrode. See example below.
:nna
Grounding
16. Lightning-For added protection for this video product
during a lightning storm, or when it is left unattended and
unused for long periods of time, unplug it from the wall
outlet and disconnect the antenna or cable system. This
will
prevent damage to the video product due to lightning and
power line surges.
GROUNO CLAMP
OISCHAAGE
UNIT
(NEC SECTION
810-201
NOlNG CONOUCTORS
SECTION
SIG-21)
-
POWER SERVICE
GROUNOING
ELECTAOOE
SYSTEM
(NEC
ART
250.
PART
H)
-An outside antenna system should not be
: vicinity of overhead power lines, other
or power circuits, or where it can fall into such
lr
circuits. When installing an outside antenna
me care should be taken to keep
from,touching
lg
such power lines or circuits as contact with
‘e
fatal. Installing an outdoor antenna can be
d should be left to a professional antenna
Jnplug this video product from the wall outlet
ng. Do not use liquid cleaners or aerosol
:
a damp cloth for cleaning.
,iquid
Entry-Never push objects of any kind
o product through openings as they may touch
lltage points or “short-out” parts that could
:
or electric shock. Never spill liquid of any
ideo product.
Service
17. Servicing-Do not attempt to service this video product
yourself as opening or removing covers may expose you to
dangerqus
voltage or other hazards. Refer all servicing to
qualified service personnel.
18. Conditions Requiring Service-Unplug this video product
from the wall outlet and refer servicing to qualified service
personnel under the following conditions.
A. When the power-supply cord or plug is damaged.
B. If liquid has been spilled. or objects have fallen into the
video product.
C. If the video product has been exposed to rain or water.
D. If the video product does not operate normally by
following the operating instructions. Adjust only those
controls that are covered by the operating instructions.
Improper adjustment of other controls may result in
damage and will often require extensive work by a
qualified technician to restore the video product to its
normal operation.
E. If the video product has been dropped or the case has
been damaged.
F. When the video product exhibits a distinct change in
performance-this indicates a need for service.
19. Replacement Parts-When replacement parts are required,
have the service technician verify that the replacements he
uses have the same safety characteristics as the original
parts. Use of replacements specified by the video product
manufacturer can prevent fire, electric shock, or other
hazards.
20. Safety Check-Upon completion of any service or repairs
to this video product, ask the service technician to perform
safety checks recommended by the manufacturer to
determine that the video product is in safe operating
condition.
.
.
.
111

RCA
O@ner’s
Club
be enrolled in the next drawing, which
ceive
an RCA Owner’s Club Enrollment Card,
Attach Your Sales Receipt Here and File at Home For Future
Reference
l
To obtain warranty parts and service, you must show your sales
receipt (or other evidence of purchase) to your Authorized
RCA Compact Camcorder Servicenter.
l Tape or staple your sales receipt to this manual so you will have
it handy should service ever be needed.
Do not mail
your
sales receipt to us. File it at home with your owner’s manual
for future reference.
Record Vital Information Here
l No other camcorder has the same serial number as yours.
You will find the serial number and the model number on the
bottom of your camcorder (and pre-printed on your Enrollment
Card).
l Make sure both numbers are recorded below so you will have
them in case your camcorder is stolen or in case you need a
complete description for any other reason.
Model: CC
I80
Serial:
Purchase Date:
Dealer Name/Address/Phone:
Safety
I
Table of
IContents
Precautions..
e
....................................................................
.
Important Saf ty Instructions for AC Adapter/Charger .....
..i
Important Saf guards.. .....
................... .....................................
11-111
First-Time Op
4ration ............................................................
2-5
l Camcorder Operating Controls .............................................
4-5
Powering You Camcorder
rl
Camcorder......... ...6
to Power Your Camcorder....................... 6-7
Indicator
..............................................
7
DC Car Cord Adapter......................
8
l Electronic Viewfinder ............................................................
I4
l
Gain-Up Feature.. ...................................................................
I4
l Focusing Your Camcorder .....................................................
I5
l
Using Variable Shutter Speeds...............................................
I6
l
Fading In and
Out of Scenes .................................................
.I7
l Zooming .................................................................................
I7
l
Displays in Viewfinder .....................................................
18-19
l
Time-Remaining
Display
.......................................................
I9
l
Time Counter with Memory Stop Feature .............................
20
Included Accessories
l Using the VHS-C Cassette Adapter.......................................
21
l
Attaching the Shoulder Strap................................................. 22
Making Better Videos
l Camcorder Recording Tips ...................................................
.23
l Cassette Tips..........................................................................
23
l Traveling Tips ........................................................................
23
Piayback
l
Viewftnder Playback..............................................................
24
l Tracking ................................................................................
.24
l
Playback on a TV without
AUDIONIDEO
IN Jacks.. ..........
.25
l Playback on a TV Monitor (or VCR) with AUDIO IN and
VIDEO IN Jacks ...................................................................
26
Optional Accessories
l Optional Accessories .......................................................
.27-30
9
Accessory Order Form.....................................................
.29-30
l Using an Optional Tripod.......................................................
30
Care and Maintenance ...........................................................
31
Trouble Checks ..................................................................
32-33
Specifications ...........................................................................
34
Limited Warranty.. .................................................................
34
Index.. .......................................................................................
35
Tab
.......................
.9
Times.. ................................................
.9
...........................................
9
.................................................
9
..................................................
10-11
ead.. ................................................................ II
.........................................................................
l Edit Search.. ..................................
it
..........................................................................
11
l White Balan ........................................................
II
................................................................. II
...............................................................
.I
I
....................................................................
11
the
Viewfinder.........]
2
he Time or Date................................................
12
l
Setting
the’Age
Display
in
the Viewfinder.. ........................
I3
l Correcting
lthe
Age Display.................................................
13
l Recording
1he
Time, Date, and/or Age on Your Tape........
.13
I
1

Thank you
f
‘r
choosing an RCA camcorder.
9
You have selected a precision-engineered camcorder designed to
give you years o performance and enjoyment.
Although your c
mcorder
is very simple to use, it is important
that you read an
carefully follow the instructions in this manual
until you are co
:
pletely familiar with the proper operating
procedures. If y u should experience a problem, always refer
first to
“Trouble hecks”
on pages 32-33. Many times a simple
solution is all
th
t
is needed, and it could save you a costly
service call. If
y,
ur
camcorder should require service during the
warranty period,
~
refer
to
page 34
for a description of what we
will do and
inst&tions
on how to request service.
camcorder and ticcessories.
accessories and information
e packed with the camcorder.
materials and box in case you ever need to
l The items
sywn
below are packed with your camcorder. If
any of the
ityms
are missing or appear damaged, contact
your RCA dealer immediately.
AC Adapter/Charger
Stock No. CpSO16
WARNING: NIC L
CADMIUM BA RY
MUST BE DISPO ED
OF PROPERLY.
4
Rechargea
k
6-V&
Battery
Cassette Adapter
Stock No. F
096s
Stock No.
VCAll5
c
.y,
I
Shoulder Strap Cassette Adapter Battery
Stock No.
AC!391
(Size “AA” 1.5 Volt)
AudidVideo Output
Cabk
Stock No.
VAA016
1
8
Ckek
Battery:
3-V&
Mkra
Llthlum
Cell
Lithium battery. Must be disposed
handle punctured or leaking batteries.
ay cause burns or personal injury.
death or injury if swallowed.
hands of children.
2.
Install the clock battery.
3. Attach a power supply to the camcorder.
Attach a power supply to the camcorder-either the
adapter/charger or charged battery.
Adapter/Charger:
Connect the power
connector’s small plug into
the
DC OUT
jack on the
adapter/charger. Align the
reference mark on the
power connector with the
mark on the camcorder.
Hold the power connector
flush against the back of
the camcorder and slide it
in the direction of the arrow as shown. Plug the
adapter/charger’s plug in to an operating outlet.
Details are
on page 6.
Charged Battery:*
Attach the battery to the
camcorder. Hold the battery
flush against the camcorder
and slide it in the direction of
the arrow.
Details are on
pages 6-7.
*The battery
must
be charged
before it can be used the
first
time.
&ock Battery Compartment
(Press down on tab and pull
to open.)
Install the clock battery.
Details on setting the date, time, and
age are on pages 12 and 13.
l Open the battery compartment on the back of the camcorder.
l Insert the clock battery with the plus
(+)
side facing out
under the tabs in the battery compartment.
l Press the battery compartment cover shut until it locks into
place.
Notes: The battery should last for about one year. When the
waming’appears in the electronic viewfinder, this battery
needs to be replaced.
2

First-Ti
f
e”
Operation
(cotitinwxt)
Eyepiece Focus
Control Electronic Viewtinder
\
in Operating Position
\
POWER
Switch
and
POWER
tte Compartment Door
AUTO Button
4.
nrn
on t
+
e camcorder.
WER switch to turn on the camcorder. The
cator
lights when the camcorder’s power is on.
Important N
6
te:
If the
DEW
indicator appears in the electronic
viewfinder, tere is excessive moisture in the camcorder. The
camcorder
WI
not operate. Wait until the
DEW
indicator disappears
from the vie
“I
finder before operating the camcorder.
5. Make Su the
CAMERA/PLAY
MODE Control
Panel is i
the CAMERA position.
camcorder is both a camera and a VCR, it
groups of functions. The
control panel tells the
hether you want to record
.(
CAMERA)
or play
ERA/PLAY MODE control panel is in the PLAY
ition,
flip it to the CAMERA position.
6. Insert a
+ssette
in the camcorder.
by sliding the
EJECT
button to open the
Turn the tape wheel on the cassette to
the tape. Insert the cassette only one
facing up and the tape window
page
9fur
details. Close the cassette
t door by pressing on the area labeled PUSH until
it locks int
Pplace.
7. Adjust tqe hand strap to fit your hand.
on the hand strap and separate the Velcro strip.
hand into the strap, adjust the strap to fit your
CAMERA/PLAY MODE
Control Panel in PLAY
MODE position
\
/
STOP Button
, PLAY MODE
REW (Rewind) Button
Clock Battery
Compartment,
Power Supply
(Adapter/Charger
/
-
Hand Strap
or Charged
Battery)
Thumb
Trigge!
I
Viewfinder in’ carrying
(or storage) position.
8. Remove the lens cap and attach it to the handstrap.
9. Adjust the viewfinder and eyepiece focus control.
l Rotate the viewftnder into operating position.
l If the image in the viewfinder is blurry, adjust the eyepiece
focus control for your vision. Details are on page 14.
lO.Start and stop recording.
Start and stop recording by pressing and releasing the thumb
trigger. You do not have to hold the thumb trigger to record.
The electronic alarm will beep once to let you know the
camcorder is recording and twice to let you know you have
stopped recording (camcorder in record-pause mode).
Notes: If you do not record within
5
minutes, the camcorder will
automatically
shut off to prevent excessive tape wear.
Any material recorded on the tape will be automatically erased if you
record over it.
ll.Play
back what you have recorded.
l Press the thumb trigger to stop recording.
l Slide the PLAY MODE button to flip the CAMERA/PLAY
MODE control panel to the
PLAY
MODE position.
l Press the REW (rewind) button to rewind the tape.
l Then press the PLAY button to play back the tape in the
electronic viewfinder.
l Press the STOP button when you are finished playing back
the tape, and slide the POWER button to turn off the
camcorder. Details on viewfinder playback are on page 24.
12Slide the
POWER
switch to turn off the camcorder.

all of the camcorder’s operating
number(s) where detailed information on each
n be found are listed for your convenience.
CAMERA/PLAY MODE Control Panel
in PLAY MODE Position
STOP Button PLAY
Button
PAUSE Button
Electronic Viewfinder
(See
pages
3,14
24-26) (See pages 24-26)
(See pages 3, ZO, 11,
, PLAY
\
1
PAUSE_
I
Eyepiece Focus Control
-
J
I,)
PJ
IHl\oIizml
\
\
EDIT
REW (Rewind) Button
(See pages 3, II, 24-26) TRACKING
+
and
-
Buttons (See
pages 24-26)
FOCUS AUTO/MAN EDIT Button
FAR and NEAR Buttons
(See
page 26)
(See page 15) FF (Fast Forward) Button
GAIN UP Button
(See pages 14, 18)
SHUTTER Button
DISPLAY Button
(See pages 11, 24-26)
FADER Button/- (See pages 13, 19)
(See page 17) FULL AUTO Button
and Indicator
(Seepages 3,
IO-II,
14-16)

CAMERA/PLAY MODE Control
Panel in CAMERA Position
VIEW Button
DATE/TIME
SET Button
SELECT Button
Power Zoom Buttons
MODE Button BRIGHT and
CONTRAST Buttons
MEMORY Button
Attachment Ring
RESET Button
(See
pages 3, IO)
Attachment Ring
(See page 3,
IO)
(See pages
6-
7) AV OUT Connector
(See pages 25-26)

Caution:
M
+
e sure the camcorder’s power is turned off
when you attach or remove a power supply. Removing
the power supply during recording or playback may cause
damage to the
tape.
Using the
AfapterKharger
to Power Your
Camcorder I
AC Adapter/Charger
PO
WEd
Indicator
Power C+umecto2
-
\
BATTERY RELEASE Button
power connector attaches’ to the
power your camcorder directly from
Because the adapter/charger
operates on
lOOi
volts,
50160
Hz, it can be used virtually
anywhere in
the
world.
Note: A plug addpter may be required in some countries. Consult
traveling, as the adapter may be hard to find in
1.
Connect the wer connector’s small plug into the
on the adapter/charger.
the back of the
To Remove
then
Adapter/Charger
aptericharger
from the wall outlet.
RELEASE
button on the
ile sliding the power connector to the left
Using the Battery to Power Your Camcorder
The battery must be charged before it can be used the first
time. Initial charging will take approximately
1
-l/2
hours.
When fully charged, the battery should supply about 55
minutes of operating time (depending on how much you
use
zoom and pause).
Note: The small marker switch on the top
of the
battery is for
use
as a personal reminder to help you remember to recharge the battery.
It has no other function.
Charging the Battery
POWER
Reference
ToAC Outlet
CHARGE
Indicator
Caution:
When a battery is attached to the adapter/
charger, do not turn them upside down. The battery may
fall off and be damaged or cause injury.
If the power connector is attached to the adapter/charger,
remove its plug.
1. Align the reference marks on the battery with the mark on
the adapter/charger.
2.
Hotd
the battery flush against the adapter/charger and slide
it in the direction of the arrow.
3. Plug the adapter/charger into the nearest AC outlet
(
100-24OV.
50/6OHz).
4. If the battery is properly connected, the adapter/charger’s
CHARGE indicator will light. When the light turns green,
the battery is fully charged.
5. Remove the charged battery by sliding it off the
adapter/charger.
6. Attach the charged battery to the camcorder as
shown on
the next page.
6
I
(continued on next page)

Poweridg
Your Camcorder
(~~ti~~ed)
~
Using the B ttery to Power Your Camcorder
(continued)
a
Attaching the
c
harged Battery to the Camcorder
-POWER
Button
i
ELEASE
utton
If the power co
nectar
is attached to the camcorder, remove it
before
attachin dthe battery.
1. Hold the bat ery flush against the camcorder and slide it in the
t
direction of
Che
EUTOW.
2. Slide the ca
POWER
switch to turn on the
camcorder.
he POWER indicator will light.
Removing the
attery
From the Camcorder
Press and hold
B
he BATTERY RELEASE button on the camcorder
k
while sliding th
battery over and off the camcorder.
Storage of Your Battery
provide
bettel
s&@e
and longer performance if
room temperature.
The nickel cad ium battery will provide better service if it is
it reaches the empty level (camcorder
at a temperature of
50”F-9S’F
Do not operate ‘he battery at temperatures below 32°F
(OOC)
or
above
IO4’F
(4
1
“C).
The battery may be damaged if operated at
temperatures above
1
226F
(5O’C).
Operation time will decrease
at extremely lo
c
temperatures.
After repeated
‘hargings
and use, the operation time will
gradually
decre se. When operation time becomes too short to be
useful, it is tim
%
to replace the battery.
Battery Level Warning Indicator
The battery level warning indicator will appear in the
camcorder’s viewfinder when the battery needs to be
recharged.
Notes:
The battery level indicator will not be recorded on the tape
when it appears in the viewfinder.
BATTERY
Caution: When the battery level warning appears, the
camcorder will shut off. However, sliding the EJECT
button on the top of the camcorder should turn the power
on and eject the cassette. If the camcorder does not eject
the cassette when you slide the EJECT button, do not
attempt to force the cassette door open. This will damage
the camcorder. Power your camcorder with the adapter/
charger, or recharge the battery before attempting to eject
the cassette.
Battery Safety Precautions
Do not short the battery’s terminals.
Do not attempt to disassemble or modify the battery. There
are no user-serviceable parts inside.
Use the battery only with specified RCA adapter/chargers
and camcorders.
(continued on next page)
7

Using the
Optional
RCA DC Car Cord Adapter
The optional
RLA
DCCO7
DC car cord allows you to power
your
camcorde
truck, or RV.
I
:
from the cigarette lighter socket of a car,
converts
IZvolts
to a 6-volt output.
Notes:
Consult
the
installation and operating instructions enclosed
with the DCC07 for complete operating instructions.
CC07 to power the camcorder, your vehicle’s
Cautions: The DCC07 is designed to be used only with
vehicles having negative ground electrical systems.
Use only RCA car cord adapter DCC07 or car cord
adapter/charger
DCC71
with this camcorder. Use of any
other car cord adapter may damage the camcorder and void
your warranty.
Attaching
t$e
RCA
DCCO7
DC Car Cord Adapter
I
Cigarette Lighter Socket
IOptional DCC07 Car Cord Adapter
A DCC07 DC Car Cord Adapter to
I.
2.
3.
4.
5
-
.
8
If the batte
:
is attached to the camcorder, remove it.
Make sure t e camcorder’s power is turned off. Slide the
POWER SW tch to turn off the camcorder. The POWER
indicator wi I turn off.
Attach the p wer connector as shown above.
Take the ve icle’s cigarette lighter out of the socket.
Start the ve4icle’s engine.
Caution:
!I
prevent blowing the fuse in the car cord’s plug,
be sure to
s
rt the vehicle’s engine before inserting the plug
into the cig
rette
lighter socket. If it becomes necessary to
replace the
4
ar cord’s fuse, be sure to use a replacement fuse
with the exact current rating (amps).
6.
7.
Insert the car cord’s cigarette lighter plug into the vehicle’s
cigarette lighter’s socket. The POWER indicator on the car
cord adapter should light.
Slide the camcorder’s POWER switch to turn on the
camcorder. The POWER indicator will light.

RCA Viaeo Cassettes
considered nor
Record
(safety)
f3
A.
kemove
record- B. Cover hole with
protect (safety) tab vinyl tape
A. To prevent e
f
asing
a
tecording
you want to keep, break off the
cassette’s re ord-protect (safety) tab.
B. To record a
ain on the cassette, cover the hole with vinyl tape.
Recording peeds and Times
d
and plays back in standard speed (SP) or
Select the recording speed with the
SP/EP
P
is
selected with the
SP/EP
switch, the EP
the
view&r&&
No indicator appears when
I1
I
T-30
130 Min. 190 Min.
/
I
T-40
40 Min. 120 Min.*
1
I
III
*
Will
probbbly be available soon.
Inserting and Removing Cassettes
Compartment Door
Before inserting a cassette, turn the tape wheel on the side of the
cassette in the direction shown to remove any slack in the tape.
I. Attach a power supply to the camcorder, and slide the
EJECT
button to open the cassette compartment.
2. Insert or remove the cassette.
Caution:
Insert the cassette only one way with the tape
wheel facing up and the tape window facing out. The
cassette should slide easily into the compartment. Do
not force the cassette.
3. Close the cassette compartment door by pressing on the area
of the cassette compartment door labeled
PUSH
until it locks
into place.
Cassette Care and Storage
Follow these directions for continued high-quality performance
from your cassettes.
l When you are finished with a cassette, rewind it, and
remove it from the camcorder.
l
Label your cassettes before storing them.
l Store cassettes vertically in their protective boxes at normal
room temperatures. Excessive heat or cold may damage your
cassettes.
l
Do not use cassettes with damaged or spliced tape.
l Keep dust from entering the cassette compartment. All dust is
abrasive and’will cause excessive wear on the tape and the
camcorder’s recording/playback heads.
l Keep the cassette away from strong magnetic
fields
such as
electric motors and other devices.
l
Do not use a cassette if it has been damaged or exposed to
moisture. The tape may jam or damage your camcorder.
9

POWER
switch to turn on the camcorder. The
G.
Rotatethe
viewfinder into operating position.
H. If the picture in the viewfinder is blurry, adjust the
eyepiece focus control for your vision. Details are on
page 14.
@
Select a recording speed
Select a recording
speed-SP
(standard play) or EP (extended
play) with the
SP/EP
switch.
Tapes speeds are compared on
page 9.
0
4
Start Recording
Press and release the thumb trigger to start and stop
recording. You do not have to hold the thumb trigger to
record. An electronic alarm beeps once when you press the
thumb trigger to start recording. The alarm beeps twice
when you
pr?s
the thumb trigger again to pause recording.
The REC indicator appears in the viewfinder when the
camcorder is recording.
Important Note: Use
the thumb trigger for brief recording pauses.
If you plan to stop recording for a longer period, slide the
POWER
switch to turn off the camcorder’s power. If the camcorder remains
in
the record-pause mode for more than five minutes,
it will turn off.
To
resume recording, slide the
POWER
switch to turn the
camcorder
back on, and
press the thumb trigger to start recording.
@
Use the camcorder’s special recording features
A. Zoom in and out: Press the power zoom button
7”
to
zoom in on a subject, or press
“w”
to zoom away from a
subject. Details are on page
I7.
B. Fade in and out of scenes:
l
To fade into the scene you want to record, place the
camcorder in the record-pause mode. Press the FADER

Detailed; Recbrding Steps
(coutiati)
button’to
activate the fade feature (FADER indicator
appeais
’
. .
m
vrewfmder)
Press the thumb trigger to start
recording.
The camcorder will automatically fade into
dthe
SC
ne.
l
To fade out of a scene you are recording, press the
FADEk
button to activate the fade feature
(FADER
indica’or
appears in viewfinder). When you press the
T
.
thumb
trtgger
to stop recording, the camcorder will
autom
tically
fade out of the scene.
yse
the REVIEW button as described
W button when the camcorder is in the
record-
last few seconds of a recording.
the last few seconds of the
previous position, and return to
$i~
to use the EDIT SEARCH
44
and
b
F
button on the camcorder to precisely position the tape
rder
is in the record-pause mode.
the
E&T
SEARCH
44
button to visually
l Press and hold the
E@IT
SEARCH
FF
button to visually
search forwa d on the recorded tape.
When you rele se the buttons, the camcorder will return to the
record-pause
i
ode at that point on the tape.
Microphon
The built-in
mIcrophone
picks up the sound during recording. It
to sounds coming from the direction the lens is
built-in white balance system.
Play back what you have recorded
Place the camcorder in the record-pause mode.
Slide the PLAY MODE button to flip the CAMERA/PLAY
MODE control panel into the PLAY MODE position.
Press the REW (rewind) button to rewind the tape.
Press the
PLAY
button to play the tape.
When you are finished
Press the thumb trigger to pause recording or press the STOP
button to stop playback.
If you want to rewind the tape. make sure the CAMERA/PLAY
MODE control panel is in the PLAY MODE position, and then
press the REW (rewind) button.
Slide the
EJECT
button to open the cassette door, remove the
cassette, and push the cassette door shut.
Slide the POWER switch to turn off the camcorder. The
POWER indicator will turn off.
Tape Positioning
When the CAMERA/PLAY MODE control panel is in the PLAY
MODE position and the camcorder is stopped, you can quickly
fast-forward or rewind the tape.
l Press the FF (fast forward) button to fast-forward the tape.
Press the
STOP
button to stop fast forwarding the tape.
l Press the REW (rewind) button to rewind the tape. Press the
STOP
button to stop rewinding the tape.
Full-Auto Feature
When the
CAMERA/PL4Y
MODE control panel is in the
CAMERA position, press the FULL AUTO button to turn the
full-
auto feature on. The indicator above the FULL AUTO button
will light when the full-auto feature is on.
l Turn the full-auto feature on when you want the camcorder to
automatically control
the
focus, gain (light entering the
camcorder), and shutter speed.
l Turn the full-auto feature off when you want to focus manually,
add more light to the camcorder, or manually select a shutter
speed. The full-auto feature is automatically turned off when
you manually adjust the focus, gain, or shutter speed.
Electronic Alarm
The camcorder has an electronic alarm that beeps to alert
YOU
when the camcorder is recording or entering the record-pause
mode.
l The alarm beeps once when you press the thumb trigger to
begin recording.
l The alarm beepstwice when you press the thumb trigger to put
the camcorder in the record-pause mode.
11

Electronic Viewfinder
or
only
the date can be recorded on your tape.
Whenever one
f the displays appears in the viewfinder, it will
tape. You can choose to record only the date,
both the date a
d time, or neither.
has’an
AUTO DATE feature that will
isplay and record the date on the tape.
as described on page 2.
the camcorder. Slide the POWER
power. The POWER
MODE control panel is
SET CLOCK will appear in the
the display fou are setting.
I
SELECTButton
MODE
Button
V/l
-DISPLAY
Button
,GE
Button
5
Press one of the
DATlQTIME
SET
buttons repeatedly until the
correct month appears.
6. Press the SELECT button. The flashing cursor will move to
the next part of the display.
7. Repeat steps 5 and 6 until you have entered the correct
month, day, year, hour including AM or PM, and minutes.
8. Press the SELECT button again to remove the flashing cursor
from the display and start the camcorder’s internal clock.
The clock will not start until you remove the flashing cursor
from the viewfinder.
Correcting Date or Time
To correct the date or time, press the MODE button to display
the time and date in the viewfinder. Then press the SELECT
button until the incorrect digit is flashing. Press one of the
DATE/TtME
SET
buttons to enter the correct digit. Press the
SELECT button until the flashing cursor is removed from the
display. The internal clock will not start until you remove the
flashing cursor from the viewfinder.
Vjewfinder Display
12

Date, Time, and Age Displays
(c0ntinuex-l)
Setting
the1
Age Display in the Viewfinder
After the date, and time have been set, you can enter someone’s
birthday into
he camcorder’s memory. After you enter the
birthday. the derson’s age can be displayed and recorded.
1. Place the
CL
AMERAfPLAY
MODE control panel in the
CAMERA osition.
P
2. Install the lock battery
as
described on
pnge
2 and set the
time and d
B
te
as
dekribed
on the previous page.
3. Press the
?GE
butt+n.
SET BIRTHDAY will appear in the
viewfinder
Note: If yo
time. or birt
appear in th
i
press the
ACE
button
before you have set the date,
day,
the
SET
CLOCK and SET BIRTHDAY display will
e
viewfinder.
4. Press the SELECT button to display the birthday display with
the
flashin
cursor on the month in the viewfinder. The
i
flashing c
,rsor
lets you know which part of the display you
are setting!
I
I~IRTHDAY
)JOV~~
8 _63
Viewfinder Display
5
Press one of the
DATE/TIME
SET
buttons repeatedly until the
button. The tlashing cursor will move to
the correct month,
LECT
button again to remove the flashing cursor
days, months, or years.
for ages under one month.
in months
(7M)
for ages under one year.
in years
(27Y)
for ages between one and
of ninety-nine years.
the
AGE
button to display the age
Then press the
SELECT
button until the
one of the
DATE/TME
SET
Press the
SELECT
button until
the display.
The
age display
flashing cursor from the
Recording Date, Time, and/or Age on
Your
Tape
If you see the date. time, date and time. and/or age
display
in
the
viewfinder while you are recording, it will be recorded on your
tape. You can also select the auto-date feature and the
camcorder will automatically record the date for
approximately
five seconds
whenever
YOU
begin recording after inserting a
cassette or the date changes.
l If you do not want the date, time or date and time recorded,
press the
D/SPLAY
button to remove the displays from the
viewfinder.
l If you do not want the age recorded, press the AGE button to
remove the age display from the viewfinder.
To display and record the date, time, date and time, or select
the auto-date recording feature:
l
After, the date and time have been set, repeatedly press the
MODE button to display the date and time, date only, time only
or AUTO DATE in the viewfinder.
Notes:
Press the
D/SPLAY
button when
AUTO DATE
appears in the
viewfinder to remove the display from the viewfinder and turn off the
auto-date feature.
When the auto-date feature is turned on (AUTO DATE appears in the
viewfinder), the camcorder will automatically record the date for
approximately five seconds every time you start recording after
inserting a cassette or the date changes.
When the auto-date feature is turned on, AUTO DATE will appear in
the viewfinder until recording begins. When you begin recording, the
date will briefly appear while it is being recorded.
To record age only:
l After the date/time and age have been set, press the AGE
button to display and record the age. Press the AGE button
again to remove the display from the viewfinder.
To record age and date, age and time, or age with the
auto-
date feature:
l Press the AGE button to display the age. Repeatedly press the
MODE button to display the date, time or AUTO DATE display
above the age.
13

electronic viewfinder (EVF) is a miniature
monitor that displays the picture seen by the
camcorder
wHe
recording. The viewfinder can also be used
playback.
-Eyepiece
Electronic
(EVF) in
t
Position
counterclockwi
lets you set the focus of the
vision. If you wear eyeglasses,
camcorder without them.
It is easiest to se the focus by focusing on one of the
us control does not affect the focus of the
BRIGHT Control
viewfinder can be tilted up and
CaimUp Feature
CAMERA/PLAY MODE
Control Panel in
CAMERA Position
POWER Button
and Indicator
/GAIN
UP Button
FULL
AUTO
Button
The gain-up feature allows more light to enter the camcorder.
Some examples when you may want to add more light are:
l
When the subject is darker than the surrounding scene.
l
When the background is bright, but your subject appears too
dark. For example, a person standing in front of a window.
l
When the subject you are recording is in a shadowed area.
Note:
Recordings made using the gain-up feature may appear grainy.
To
use the gain-up feature:
1. Slide the POWER switch to turn on the camcorder. The
POWER indicator will light.
2. Make sure the CAMERA/PLAY MODE control panel is in the
CAMERA
position.
3. Press the
GAIN
UP button. The GAIN UP indicator will
appear in the electronic viewfinder.
Note:
Pressing the
GAIN UP
button turns
off
the
FULL AUTO
feature.
GAIN UP
I----
Display in Viewflnder
4. Press the GAIN UP button to turn off the gain-up feature
when lighting conditions return to normal.
Note:
Pressing the
FULL. AUTO
button also turns off the gain-up
feature.

Power Zoom Buttons
“IV’“’
and
“
CAME&A/PLAY MODE
Control
Panel in CAMERA Position FOCUS AUTO/MAN FAR and
NEAR Buttons
ULL AUTO Button
Auto Focus
Whenever y
ot.t
turn the camcorder on to record
(CAMERA/PLAY
MODE
contra
panel in CAMERA position), the full-auto feature
I
is automatically turned
,on.
The camcorder will focus for you
automatically. 1No display appears in the viewfinder.
Note: The cam
b
order uses a small zone around the center of the
viewfinder to d
tect
focus. Center the object that you want the
camcorder to f
4
us on in the viewfinder. This zone may vary depending
on the zooming and focusing conditions. No zone indicators appear in
the viewfinder.
The low-contr in the viewfinder
to-focus system may not operate correctly. This
or no contrast, repeated
distances overlapping. If the
subject and the auto-focus
focus, the camcorder will
may allow the focus system to
still cannot be achieved, adjust
not, leave the auto-focus feature turned on
corder is turned on and not being used. Light
will operate the auto-focus feature
Manual Fo
k
us
the camcorder:
wer zoom button labeled
“T”
to zoom in on your
3. Press the FOCUS AUTO/MAN FAR or NEAR button to display
a clear picture in the center of the viewfinder.
4. To turn off manual focus, simultaneously press the FOCUS
AUTO/MAN FAR
and
NEAR
buttons.
Note:
Pressing the
FULL A
UT0
button will also turn on the
camcorder’s auto-focus system.
Some conditions that may require the use of manual focusing
during recording are:
l
When recording a subject through a window.
l
When recording a subject having a close foreground and a
background that is far away.
l
When recording two subjects at different distances that overlap
in the same scene.
l
When recording a subject with distinct horizontal stripes.
l When the subject is not in the center of the electronic
viewfinder.
l
When recording subjects with shiny surfaces.
l
When recording a subject with sharp angles.
l
When recording flat subjects
such
as a white wall.
l
When recording in low-light situations.
l
When recording a scene with fast motions, like a tennis swing.
l
When recording a subject with small patterns that are repeated.
Macro Focus
To
use
the auto-focus system for recording subjects very close to
the camcorder:
1. Press the power zoom button labeled
“w”
until the lens is
completely zoomed out.
2. Position the subject or scene in the center of the viewfinder.
Note:
For best results, increase illumination when recording in the
macro mode.
15

ShutterSpeedIndicator
I
bow-contrast Indicator
fluorescent) is de second whenever flickering light (such as
I.
Slide the PO
while the camcorder is in the record-pause mode.
Display in Viewfinder
Repeatedly press the SHUTTER button to select one of the
higher shutter speeds
(l/100,
l/SOO,
or
l/4000
second). The
shutter speed indicators
(S60,
SIOO,
2500,
or
S4000)
will
appear in the electronic viewfinder when you press the
SHUTTER
button.
Note: Higher shutter speeds require more light. The low-contrast
indicator (AF) will flash in the electronic viewfinder when more light
is needed.
When you are finished recording the fast-action scene,
repeatedly press the SHUTTER button until the shutter
indicators disappear from the electronic viewfinder (or press
the FULL AUTO button).
---.-c_-
Notes: A tape recorded at the higher shutter speeds may not show
movement and change of scene as smoothly as recordings at the normal
l/60
second speed.
For indoor high-speed shutter recording. you may find that additional
halogen or tungsten lighting is required.
When recording at higher shutter speeds, use of fluorescent, mercury
vapor, or sodium lighting may cause a “flickering” effect.
16
Table of contents
Other RCA Camcorder manuals

RCA
RCA CC6254 User manual

RCA
RCA CC6151 - VHS-C Camcorder User manual

RCA
RCA CC6392 User manual

RCA
RCA CC432 User manual

RCA
RCA Small Wonder EZ2100 series User manual

RCA
RCA Small Wonder EZ3000 Series Operating manual

RCA
RCA Autoshot CC6383 User manual

RCA
RCA EZ207 - Small Wonder Camcorder Parts list manual

RCA
RCA CC6151 - VHS-C Camcorder User manual

RCA
RCA CC4392 User manual

RCA
RCA Pro884HB User manual

RCA
RCA EZ5000R Series User manual

RCA
RCA Small Wonder EZ1000 series User manual

RCA
RCA EZ5000 Series User manual

RCA
RCA Small Wonder EZ1000 series User manual

RCA
RCA EZ2120BK Instruction Manual

RCA
RCA CC4391 User manual

RCA
RCA CC6351 User manual

RCA
RCA EZ2120BK User manual

RCA
RCA CC4371 User manual