manuals.online logo
Brands
  1. Home
  2. •
  3. Brands
  4. •
  5. Sony
  6. •
  7. Camcorder
  8. •
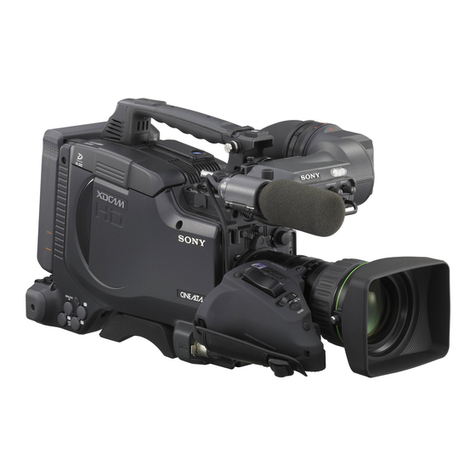
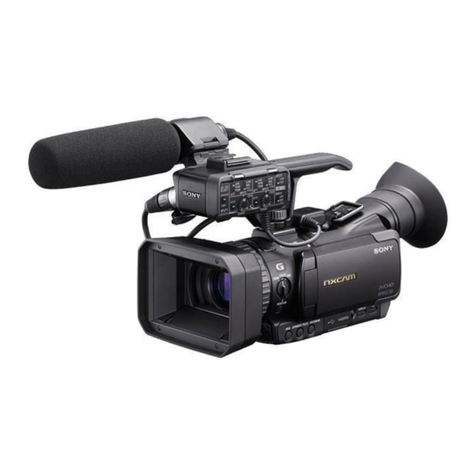
  9. Sony PXW-X400 Installation and operation manual

Sony PXW-X400 Installation and operation manual

PXW-X400 / X580
Introduction
This documentdescribes the procedurefor upgrading the
PXW-X400/X580 to the latest version (V3.02).
Firstsavetheupgradedata toanSDcard,and thenuse the
menu to perform the upgrade.
For details on using menus, refer to the operation
manual.
BeforeUpgrading
Note
If the camcorder is running V1.00 or V1.10, first
upgrade to V2.00 before proceeding further. You can
check the version number using Maintenance >Version
>Number in setup menu. For details about upgrading to
V2.00,refer to the V2.00 version upgrade guide (4-688-
215-11)in the “PXW-X400_X580_Ver-UpGuide(V2.00).
zip”folder.
About the upgrade procedure
The following steps are required in order to upgrade
firmware.
A
Upgrade the firmware of the camcorder.
B
Upgrade the proxy recording and wireless
LAN connection functions.
About the Required SD Cards
Prepare two SD cards, described in the following table.
Each SD card should only be used in the corresponding
procedureshown.
Notes
•
For details about supported SD cards, refer to the
Operation Manual.
•
Always use SD cards that are formatted using the
format function of the camcorder.
Getting Started
Notes on Performing Upgrade
•
For details about obtaining the upgrade files, contact
your Sony dealer.
•
Be sure to use the AC adaptor (AC-DN10 or AC-
DN2B)when performing the upgrade.If a batterypack
isattachedatthesametime,upgradingisstillsupported
if the AC power supply is interrupted.
•
If the Streaming function is enabled, you cannot
upgrade. Please disable the function before start
upgrading procedure. You can check the current
setting below;
–
Maintenance >Streaming >Setting
–
Maintenance >Network Client Mode >Setting
•
Do not do any of the following while performing the
upgrade. Doing so could interrupt the upgrade process,
and cause a malfunction.
–
Eject or insert the upgrade SD card
–
Turn the power off
•
Disconnect connected devices (such as USB wireless
LAN module (IFU-WLM3), SDI, HDMI, microphone,
viewfinder, and lens) and eject any media in the SxS
memory card slots before upgrading.
•
Check the operation of the camcorder before using the
camcorder after upgrading.
For details about using the camcorder, refer to the
operationmanual.
Checking the Current Version
Display Maintenance >Version >Number in the setup
menu.
© 20 17 Sony Corporation
SD card type
Procedure
Upgrade SD Card
A
PROXY SD Card
B
2
Performing the Upgrade
A UpgradingtheFirmware of the
Camdorder
Note
Always use the upgrade SD card.
Step1 Download the ZIP file containing the
upgrade
files from the upgrade file
download site, and
save it to a desired
location on the computer.
Note
Checkthemodelname and versionnumberofthe
ZIP file to ensure the correct file is downloaded.
Step 2
Format a UTILITY SD card using the format
function of the camcorder.
Note
Format the SD card on the camcorderthatis to be
upgraded.
Step 3
Expanding the ZIP file will display two upgrade
files (files with “.bin” file name extension).
Upgrade files contained in the ZIP file:
PXW-X400_X580_V302_6_2017-02-
03_15-49-46_firmware_SSB.bin
Copy file to the root directory on the SD card,
and then perform steps 4 to 9.
After the upgrade operation is completed, delete
file A from the SD card.
Note
Donotsave multiple versionsofthe upgradefiles
on the SD card. Do not save any data other than
the upgrade files above on the SD card. The
upgrade may fail if there are files other than the
upgrade file on the SD card.
Next, perform the upgrade.
Step 4
Attach an AC adaptor to the camcorder, and
connect it to an AC power supply.
Step 5
Turn the camcorder on to start the camcorder.
Step 6
Insert the SD card containing the firmware
updater program data file into the UTILITY SD
card slot on the right-hand side of the camcorder.
Step 7
SelectMaintenance >Version>VersionUpinthe
setup menu, and select [Execute].
A “Please use the AC adapter, Upgrade
Version?”
confirmation screen appears.
Step 8
Select[Execute].
The upgrade begins.
There are two phases to the upgrade, “Phase 1”
→
“Phase2.”
•
In Phase 1, the upgrade file on the SD card is
saved on the camcorder.
•
In Phase 2, the upgrade is performed using the
upgrade file saved on the camcorder.
During the upgrade, the REC lamp flashes, and
the message “Version Upgrade Elapsed Time
XX:YY:ZZ Executing... **%” appears in the
viewfinder and on the LCD monitor.
(XX:YY:ZZ: Elapsed time for each phase, **%:
Progress status for each phase)
Below are shown the approximate time each
phase takes.
Data to write
Phase
Approximate time
PXW-
X400_X580_V302_6_
2017-02-03_15-49-
46_firmware_SSB.bin
Phase 1
About 5 minutes
Phase 2
About 17 minutes
Notes
•
During the switchover between Phase 1 and 2,
the message disappears and the camcorder
restarts, but the upgrade process is still
ongoing. Do not turn off the power.
•
Do not perform any unnecessary actions while
performing the upgrade (such as removing the
SD card or turning the camcorder off). Doing
so could interrupt the upgrade process, and
cause a malfunction.
•
If an error occurs during the upgrade process,
the REC lamp flashes at 4 Hz (four times per
second). For details about handling errors, see
“Resolving Errors.”
•
If the upgrade process has not completed after
30 minutes have elapsed in Phase 1 or 60
minutes have elapsed in Phase 2, disconnect
and reconnect the AC adaptor. After the
camcorder restarts normally, perform the
procedure again from step 1.
•
The progress status displayed in the viewfinder
and on the LCD monitor,andthe flashing ofthe
REC lamp, may occasionallybe delayed during
the upgrade process.
Step 9
When the “Version Upgrade, Done” message
appears, restart the camcorder.
Step10 ChecktheversionnumberusingMaintenance
>Version >Number in the setup menu.
Make sure that the version is now the latest
version. If the displayed number is not the latest
version, check the preliminarysteps andupgrade
procedures, and perform the upgrade process
again.
SD card type
Procedure
Upgrade SD Card
A
PROXY SD Card
B
3
B Upgradingthe Proxy Recording
and Wireless LAN Connection
Functions
Notes
•Perform the upgrading of the proxy recording
and wireless LAN connection functions
separately from the firmware upgrade process.
•Use a dedicated PROXY SD card to upgrade the
proxy recording and wireless LAN connection
functions. Do not use the UTILITY SD card
used for upgrading the firmware or the SD card
for saving configuration data.
SD card type
Procedure
Upgrade SD Card
A
PROXY SD Card
B
•Do not perform any unnecessary actions while
performing the upgrade (such as removing the
SD card or turning the camcorder off). Doing so
could interrupt the upgrade process, and cause a
malfunction.
First, check the current version.
Step 1 Select Operation >Proxy Recording Mode
>Setting in the setup menu, and set to On.
The Net-Func Version Number is displayed
after approximately 45 seconds under
Maintenance >Version in the setup menu.
Step 2Check the current version.
If the Net-Func Version is not V2.44, No further steps
are required.
Step 3Format a PROXY SD card using the format
function of the camcorder.
Note
Format the SD card on the camcorder that is to
be upgraded.
Step 4Download the ZIP file containing the upgrade
data from the upgrade data download site, and
save it to a desired location on the computer.
Note
Check the model name and version number of
the ZIP file to ensure the correct file is
downloaded.
Step 5Expand the ZIP file, and copy the
WA_firmware_2.44_2431.f.bin for the proxy
recording/wireless LAN connection function
to the root directory of the SD card.
Note
Do not save any data other than the upgrade
file above on the SD card. The upgrade may
fail if there are files other than the upgrade file
on the SD card.
Next, perform the upgrade.
Step 6Attach an AC adaptor to the camcorder, and
connect it to an AC power supply.
Step 7Turn the camcorder on to start the camcorder.
Step 8Select Operation >Proxy Recording Mode >Setting
in the setup menu, and set to On.
Step 9Close the menu and wait until the Proxy status
indicator on the LCD monitor screen stops flashing
and stays on.
Step 10Insert the SD card containing the upgrade file into
the PROXY SD card slot on the left-hand side of
the camcorder.
The Proxy icon appears on the LCD monitor.
Step 11Select Maintenance >Version >Net-Func Ver.Up in
the setup menu, and select [Execute].
A “Please use the AC adapter, Upgrade Version?”
confirmation screen appears.
Step 12Select [Execute].
The upgrade begins.
During the upgrade, the REC lamp flashes, and the
message “Version Upgrade Elapsed Time
XX:YY:ZZ Executing... **%” appears in the
viewfinder and on the LCD monitor.
(XX:YY:ZZ: Elapsed time, **%: Progress status)
The upgrade process takes approximately five
minutes.
Step 13When the “Version Upgrade, OK Turn Power Off”
message appears, turn the camcorder off.
Step 14Eject the SD card from the PROXY SD card slot.
Note
Ejecting the PROXY SD card while the camcorder
is turned on may display a warning message (E91-
1C0) in rare cases. If this occurs, turn the
camcorder off or disconnect the AC adaptor. For
details about handling the PROXY SD card, refer
to the operation manual.
Step 15Turn the camcorder on.
Step 16Check the version number under Net-Func Version
Number using Maintenance >Version in the setup
menu.
Make sure that the version is now the latest version.
If the displayed number is not the latest version,
check the preliminary steps and upgrade procedures,
and perform the upgrade process again.
4
Resolving Errors
Use the following method to resolve errors if an
error
occurs.
Note
If the problem persists after attempting to resolve
the
error, contact your Sony dealer.
If the upgrade was interrupted
If there was an error in the upgrade data, the
“Version
Upgrade NG: Cannot Read the File. Turn
Power Off”
message appears. Restart the camcorder,
copythe correct
upgrade files to an SD card, then
restart the upgrade
procedure from step 1.
If the upgrade failed
The message “Version Upgrade Error!” appears.
Check
the upgrade procedure steps, then restart
the upgrade
procedure from step 1.
If the upgrade data is not found
The message “Version Upgrade No File” appears
in the
viewfinder and on the LCD monitor.
Resolve the issue by referring to the following table.
Possible cause
Action
The upgrade file has
not been saved in the
root directory of the
SD card.
If the relevant file is not present, copy
the upgrade file to the root directory
of the SD card again, then restart the
upgrade procedure from step 1.
The upgrade file is
not compatible with
the target camcorder.
If a compatible file is not present,
copy the compatible upgrade file to
the root directory of the SD card
again, then restart the upgrade
procedure from step 1.
The upgrade file was
not expanded
successfully.
If the file was not expanded
successfully, expand the ZIP file
again to extract the “.bin” upgrade
file, copy the file to the root directory
on the SD card, and then restart the
upgrade procedure from step 1.

Other manuals for PXW-X400

2

This manual suits for next models

1

Other Sony Camcorder manuals

Sony Handycam CCD-TR750 User manual

Sony

Sony Handycam CCD-TR750 User manual

Sony NXCAM NEX-FS700 Manual

Sony

Sony NXCAM NEX-FS700 Manual

Sony SRG-300SE User manual

Sony

Sony SRG-300SE User manual

Sony Handycam DCR-PC1 User manual

Sony

Sony Handycam DCR-PC1 User manual

Sony Digital Handycam DCR-TRV8 User manual

Sony

Sony Digital Handycam DCR-TRV8 User manual

Sony DCR-IP5 MovieShaker v3.1 User manual

Sony

Sony DCR-IP5 MovieShaker v3.1 User manual

Sony Handycam CCD-FX520 User manual

Sony

Sony Handycam CCD-FX520 User manual

Sony Handycam HDR-UX10 User manual

Sony

Sony Handycam HDR-UX10 User manual

Sony NEX-FS100E User manual

Sony

Sony NEX-FS100E User manual

Sony Handycam Vision CCD-TRV44 User manual

Sony

Sony Handycam Vision CCD-TRV44 User manual

Sony Handycam DCR-TRV75E User manual

Sony

Sony Handycam DCR-TRV75E User manual

Sony Handycam DCR-DVD100 User manual

Sony

Sony Handycam DCR-DVD100 User manual

Sony Handycam CCD-FX520 User manual

Sony

Sony Handycam CCD-FX520 User manual

Sony PMW-350K User manual

Sony

Sony PMW-350K User manual

Sony Power HAD FX HSC300R User manual

Sony

Sony Power HAD FX HSC300R User manual

Sony Handycam DCR-HC39E User manual

Sony

Sony Handycam DCR-HC39E User manual

Sony CCD-TRV338 Camera User manual

Sony

Sony CCD-TRV338 Camera User manual

Sony Handycam DCR-TRV38E User manual

Sony

Sony Handycam DCR-TRV38E User manual

Sony HANDYCAM DCR-HC51E User manual

Sony

Sony HANDYCAM DCR-HC51E User manual

Sony CCD-TR330E User manual

Sony

Sony CCD-TR330E User manual

Sony DCR-SR32E/SR33E/SR42/SR42A/SR42E/SR52E/SR62/SR62E/SR72E/SR82/SR82C/SR82E User manual

Sony

Sony DCR-SR32E/SR33E/SR42/SR42A/SR42E/SR52E/SR62/SR62E/SR72E/SR82/SR82C/SR82E User manual

Sony D8 Digital Handycam DCR-TRV210E User manual

Sony

Sony D8 Digital Handycam DCR-TRV210E User manual

Sony CX400E User manual

Sony

Sony CX400E User manual

Sony DCR-TRV12E User manual

Sony

Sony DCR-TRV12E User manual

Popular Camcorder manuals by other brands

Yashica Super-800 electro Instruction booklet

Yashica

Yashica Super-800 electro Instruction booklet

JVC Everio GZ-MS230 Basic user's guide

JVC

JVC Everio GZ-MS230 Basic user's guide

JVC GZ-E565 user manual

JVC

JVC GZ-E565 user manual

JVC GR-D51 instructions

JVC

JVC GR-D51 instructions

Samsung Hi8 SCL870 Owner's instruction book

Samsung

Samsung Hi8 SCL870 Owner's instruction book

JVC GR-D372U instructions

JVC

JVC GR-D372U instructions

Panasonic NV-GS500 operating instructions

Panasonic

Panasonic NV-GS500 operating instructions

Panasonic AG-DVX100B user guide

Panasonic

Panasonic AG-DVX100B user guide

Samsung VP-D23 Owner's instruction book

Samsung

Samsung VP-D23 Owner's instruction book

Panasonic DVD Palmcoder VDR-D250 operating instructions

Panasonic

Panasonic DVD Palmcoder VDR-D250 operating instructions

Panasonic Digital Palmcorder PV-GS69 operating instructions

Panasonic

Panasonic Digital Palmcorder PV-GS69 operating instructions

AIPTEK SportyCam Z3 manual

AIPTEK

AIPTEK SportyCam Z3 manual

Insignia NS-DV720PBL2 Quick installation guide

Insignia

Insignia NS-DV720PBL2 Quick installation guide

Panasonic SDR-S15 operating instructions

Panasonic

Panasonic SDR-S15 operating instructions

Canon ivy REC user manual

Canon

Canon ivy REC user manual

Everet EVZ405 user manual

Everet

Everet EVZ405 user manual

JVC Connected Cam GY-HC500U instructions

JVC

JVC Connected Cam GY-HC500U instructions

Panasonic AG-HPX300P Replacement parts list

Panasonic

Panasonic AG-HPX300P Replacement parts list

manuals.online logo
manuals.online logoBrands
  • About & Mission
  • Contact us
  • Privacy Policy
  • Terms and Conditions

Copyright 2025 Manuals.Online. All Rights Reserved.