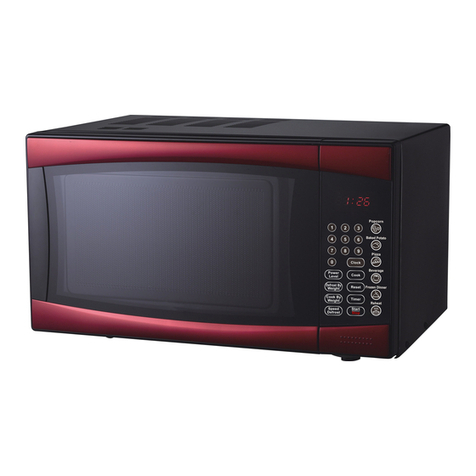
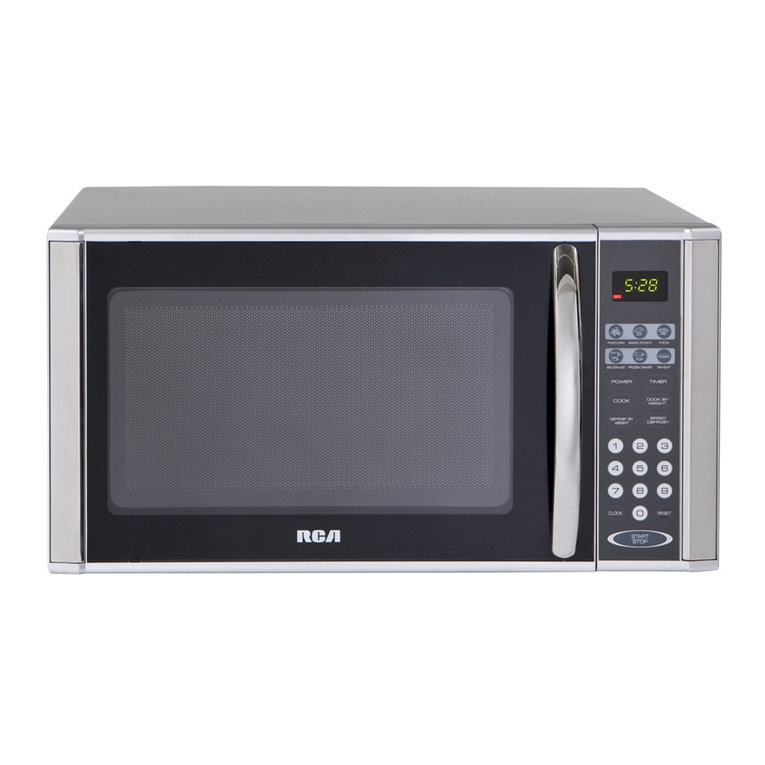
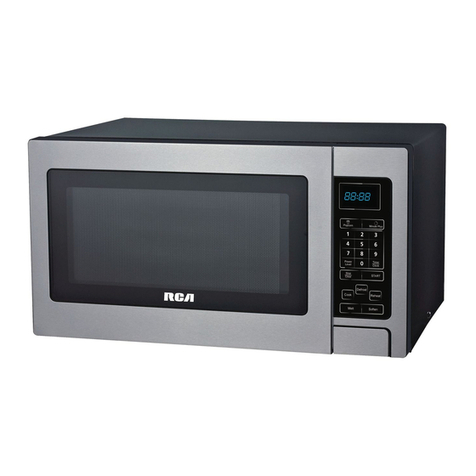
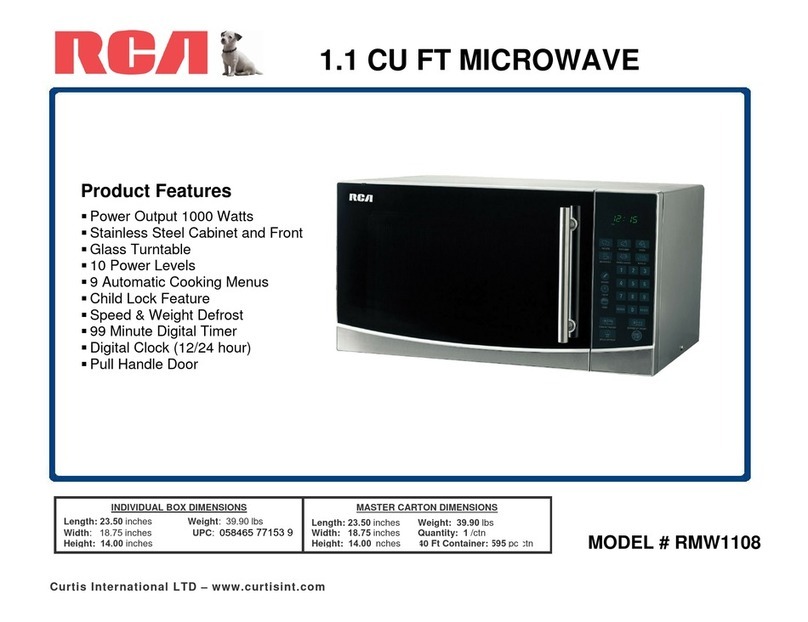
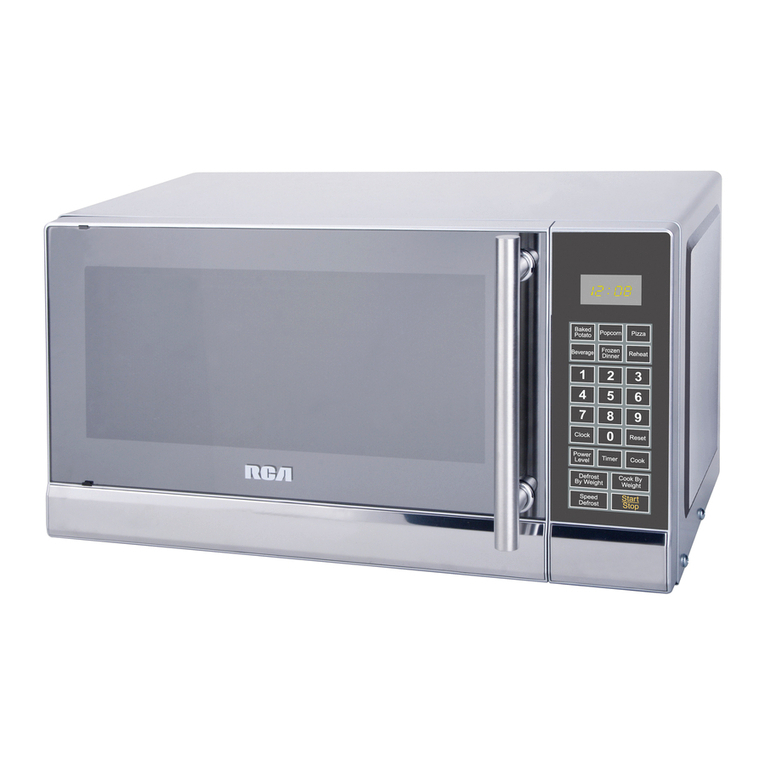
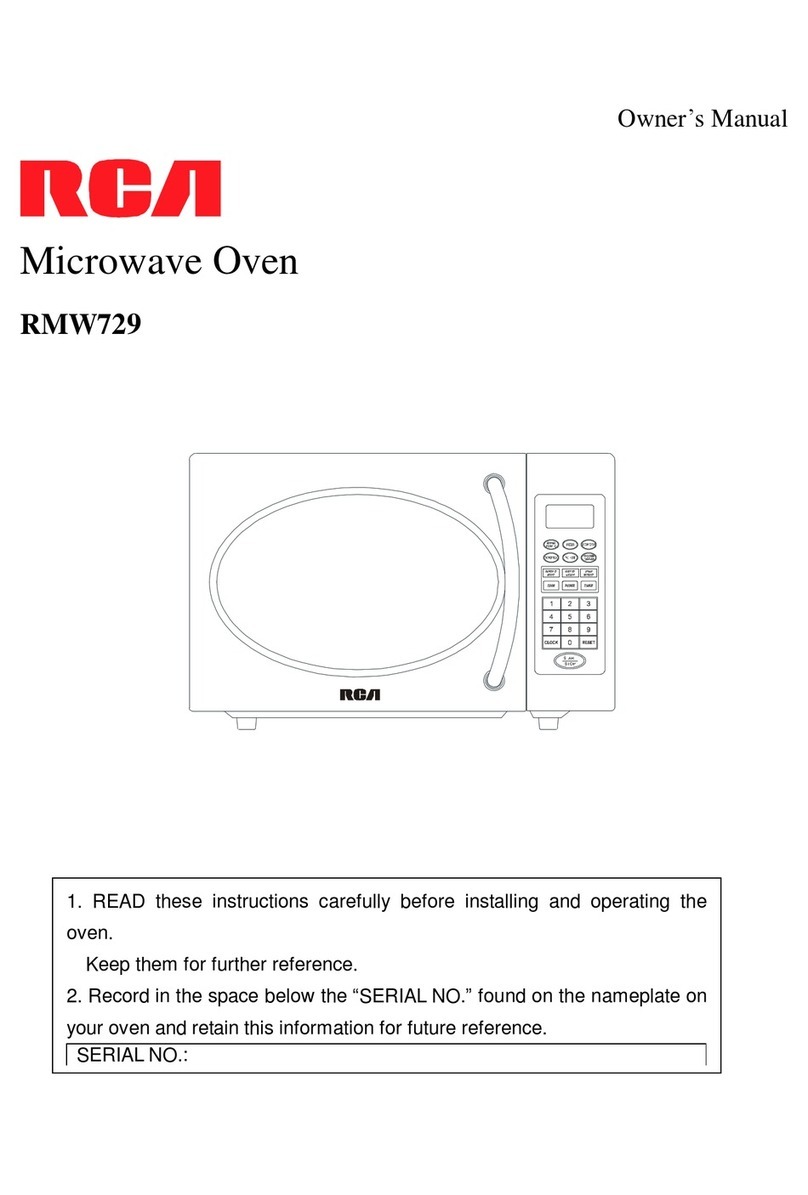
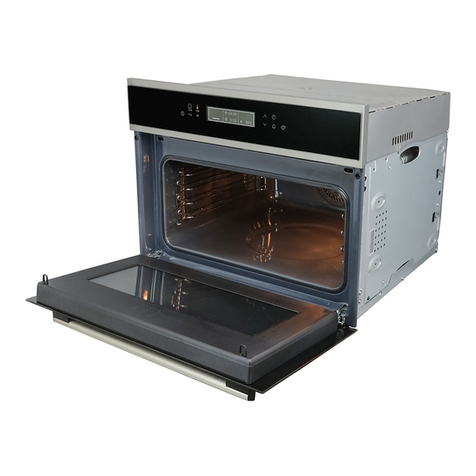
RCA RMW953-BLACK User manual

THISMICROWAVE OVEN SHOULD NOT BE
USED WITHOUTTHE GLASS TURNTABLE
Microwave Oven
RMW953-BLACK
RMW953-WHITE
RMW953-RED
Microwave Oven User's manual
Please read these instructions carefully before installing and operating the oven.
Record in the space below the SERIAL NO. found on the nameplate on your oven and
retain this information for future reference.
SERIAL NO.

1
PRECAUTIONS TO AVOID POSSIBLE
EXPOSURE TO EXCESSIVE
MICROWAVE ENERGY
1. Do not attempt to operate this oven with the door-open since open-door operation can
result in harmful exposure to microwave energy. It is important not to defeat or tamper
with the safety interlocks.
2. Do not place any object between the oven front face and the door or allow soil or
cleaner residue to accumulate on sealing surfaces.
3. Do not operate the oven if it is damaged. It is particularly important that the oven door
close properly and that there is no damage to the:
a) Door (bent),
b) Hinges and latches (broken or loosened),
c) Door seals and sealing surfaces.
4. The oven should not be adjusted or repaired by anyone except properly qualified
service personnel.
CONTENT
PRECAUTIONS TO AVOID POSSIBLE EXPOSURE TO EXCESSIVE MICROWAVE
ENERGY ...................................................................................................................................... 1
IMPORTANT SAFETY INSTRUCTIONS................................................................................ 2
INSTALLATION GUIDE ...........................................................................................................4
GROUNDING INSTRUCTIONS ............................................................................................... 5
UTENSILS GUIDE...................................................................................................................... 5
COOKING TECHNIQUES......................................................................................................... 6
BEFORE YOU CALL FOR SERVICE ..................................................................................... 7
SPECIFICATIONS...................................................................................................................... 7
PART NAMES ............................................................................................................................. 7
CONTROL PANEL..................................................................................................................... 8
OPERATION INSTRUCTIONS................................................................................................. 9
Setting the clock ...................................................................................................... 9
Setting the oven timer.............................................................................................. 9
Setting a cooking program....................................................................................... 9
Speed defrost ........................................................................................................ 10
Cook by weight....................................................................................................... 11
Defrost byweight .....................................................................................................12
Setting child lock .................................................................................................... 12
QUICK COOK SETTINGS .......................................................................................................12
CLEANING AND CARE .......................................................................................................... 14

2
IMPORTANT SAFETY INSTRUCTIONS
When using electrical appliances, basic
safety precautions should be followed,
including the following:
WARNING - To reduce the risk of burns,
electric shock, fire, and injury to persons
or exposure to excessive microwave
1. Read all instructions before using the
appliance.
2. Read and follow the specific "PRE-
CAUTIONS TO AVOID POSSIBLE
EXPOSURE TO EXCESSIVE
MICROWAVE ENERGY"
3. This appliance must be grounded.
Connect only to properly grounded
outlet. See "GROUNDING
INSTRUCTIONS”
4. Install or locate this appliance only in
accordance with the provided
installation instructions.
5. Some products such as whole eggs
and sealed containers -for example,
closed glass jars- are able to explode
and should not be heated in this oven.
6. Use this appliance only for its intended
use as described in this manual. Do
not use corrosive chemicals or vapors
in this appliance. This type of oven is
specifically designed to heat, cook, or
dry food. It is not designed for
industrial or laboratory use.
7. As with any appliance, close
supervision is necessary when used by
children.
energy:
8.To reduce the risk of fire in the
oven cavity:
Do not overcook food. Carefully
attend appliance when paper, plastic,
or other combustible materials are
placed inside the oven to facilitate
Remove wire twist-ties from paper
or plastic bags before placing bag in
oven.
If materials inside the oven should
ignite, keep oven door closed, turn
oven off, and disconnect the power
cord or shut off power at the fuse or
circuit breaker panel.
Do not use the cavity for storage
purposes. Do not leave paper products,
cooking utensils or food in the cavity
when not in use.
9. Liquids, such as water, coffee, or
tea can be overheated beyond the
boiling point without appearing to
be boiling due to surface tension of
the liquid. Visible bubbling or
boiling when the container is
removed from the microwave oven
is not always present. THEIS
COULD RESULT IN VERY HOT
LIQUIDS SUDDENLY BOILING
OVER WHEN A SPOON OR
OTHER UTENSIL IS INSERTED
INTO THE LIQUID. To reduce the
risk of injury to person:
cooking.
Do not overheat the liquid.
Stir the liquid both before and
halfway through heating it.
Do not use straight-sided containers
with narrow necks.
After heating, allow the container to
stand in the microwave oven for a short
SAVE THESE INSTRUCTIONS

3
time before removing the container.
Use extreme care when inserting a
spoon or other utensil into the container.
10. Do not heat oil or fat for deep-frying.
It is difficult to control the temperature
of oil in microwave oven.
11. Pierce foods with heavy skins such
as potatoes, whole squash, apples and
chestnuts before cooking.
12. The contents of feeding bottles and
baby jars should be stirred or shaken
and the temperature should be checked
before serving in order to avoid burns.
13. Cooking utensils may become hot
because of heat transferred from the
heated food. Potholders may be
needed to handle the utensil.
14. Do not cover or block any openings
on the appliance.
15. Do not store or use this appliance
outdoors. Do not use this product near
water, for example, near a kitchen sink,
in a wet basement, near a swimming
pool, or similar locations.
16. Do not operate this appliance if it
has a damaged cord or a plug,
if it is not working properly or if it
has been damaged or dropped.
17. Do not immerse cord or plug
in water. Keep cord away from
heated surface. Do not let cord
hang over edge of table or counter.
18. Use only thermometers,
which are specifically designed for
use in microwave ovens.
19. Do not operate any heating
or cooking appliance beneath this
appliance.
20. Be certain the glass tray and
roller rings are in place when you
operate the oven
21. This appliance should be
serviced only by qualified service
personnel, contact nearest
authorized service facility for
examination, repair, or adjustment.
SAVE THESE INSTRUCTIONS
22. When cleaning surfaces of door and
oven that comes together on closing the
door, use only mild, nonabrasive soaps,
or detergents applied with a sponge or
soft cloth.
23. This equipment generates, uses and
can radiate radio frequency energy and,
if not installed and used in accordance
with the instructions, may cause harmful
interference to radio communications.
However, there is no guarantee that
interference will not occur in a particular
installation. If this equipment does cause
harmful interference to radio or television
reception, which can be determined by
turning the equipment off and on, the
user is encouraged to try to correct the
interference by one or more of the
following measures:
Reorient or relocate the receiving
antenna.
Increase the separation between the
equipment and receiver.
Connect the equipment into an outlet
on a circuit different from that to which
the receiver is connected.
Consult the dealer or an experienced
radio/TV technician for help.

INSTALLATION GUIDE
4
1. Make sure that all the packing materials are removed from the inside of the door.
2. Check the oven for any damage, such as misaligned or bent door, damaged door
seals and sealing surface, broken or loose door hinges and latches and dents
inside the cavity or on the door. If there is any damage, do not operate the oven but
contact qualified service personnel.
3. This microwave oven must be placed on a flat, stable surface to hold its weight and
the heaviest food likely to be cooked in the oven.
4. Do not place the oven where heat, moisture, or high humidity are generated, or near
combustible materials.
5. For correct operation, the oven must have sufficient airflow. Allow 20cm of space above
the oven, 10cm at back and 5cm at both sides. Do not cover or block any openings on
the appliance. Do not remove feet on which oven stands.
6. Do not operate the oven without glass tray, roller support, and shaft in their proper
positions.
7. Make sure that the power supply cord is undamaged and does not run under the oven
or over any hot or sharp surface.
8. The socket must be readily accessible so that it can be easily unplugged in an emergency.

5
GROUNDING INSTRUCTIONS
This appliance must be grounded. In the
event of an electrical short circuit,
grounding reduces risk of electric shock by
providing an escape wire for the electric
current. The appliance is equipped with a
cord having a grounding wire with a
grounding plug. The plug must be plugged
into an outlet that is properly installed and
grounded.
WARNING :Improper use of the grounding
plug can result in a risk of electric shock.
Electrical Requirements
The electrical requirements are a 120 volt
60 Hz, AC only, 20 amp. It is recommended
that a separate circuit serving only the oven
be provided. The oven is equipped with a
3-prong grounding plug. It must be plugged
into a wall receptacle that is properly
installed and grounded.
Power Supply Cord
1. A short power supply cord is provided
to reduce the risks resulting from
becoming entangled in or tripping over
a longer cord.
2. Longer cord sets or extension cords
are available and may be used if care
is exercised in their use.
3. If long cord or extension cord is used :
a) The marked electrical rating of the
cord set or extension cord should be at
least as great as the electrical rating of
the appliance.
b) The extension cord must be a
grounding-type 3-wire cord, and The longer
cord should be arranged so that it will not
drape over the counter top or table top
where it can be pulled on by children or
tripped over unintentionally.
Notes:
1. If you have any questions about the
grounding or electrical instructions, consult
a qualified electrician or service person.
2. Neither RCA the dealer can accept any
liability for damage to the oven or personal
injury resulting from failure to observe the
electrical connection procedures.
Radio or TV Interference
Should there be any interference caused by
the microwave oven to your radio or TV,
check that the microwave oven is on a
different circuit, relocated the radio or TV as
far away from the oven as feasible or check
position and signal of receiving antenna.
UTENSILS GUIDE
This section lists which utensils can be
used in the microwave, which ones have
limited use for short periods, and which
ones should not be used in the microwave.
Recommended
·Microwave browning dish —Use to
brown the exterior of small items such as
steaks, chops, or pancakes. Follow
the directions provided with your
browning dish.
·Microwaveable plastic wrap —Use to
retain steam. Leave a small opening for
some steam to escape and avoid placing
it directly on the food.
·Paper towels and napkins —Use for
short-term heating and covering; These
absorb excess moisture and prevent
spattering. Do not use recycled paper
towels, which may contain metal and
could ignite.
·Glass and glass-ceramic bowls and
—
dishes Use for heating or cooking.
·Paper plates and cups —Use for
short-term heating at low temperatures.
Do not use recycled paper, which may
contain metal and could ignite.
·Wax paper —Use as a cover to prevent
spattering.
·Thermometers —Use only those labeled
“Microwave Safe” and follow all directions.
Check the food in several places.
Conventional thermometers may be used
on microwave food once the food has been
removed from the oven.

6
Limited Use
·Aluminum foil —Use narrow strips of foil
to prevent overcooking of exposed areas.
Using too much foil can damage your
oven, so be careful.
·Ceramic, porcelain, and stoneware —
Use these if they are labeled “Microwave
Safe”.
If they are not labeled, test them to make
sure they can be used safely.
·Plastic —Use only if labeled “Microwave
Safe”. Other plastics can melt.
·Straw, wicker, and wood —Use only for
short-term heating, such as warming
dinner rolls for a few seconds. Baskets
and bowls may be flammable.
Not Recommended
·Glass jars and bottles —Regular glass is
too thin to be used in a microwave. It can
shatter and cause damage and injury.
·Paper bags —These are a fire hazard,
except for popcorn bags that are
designed for microwave use.
·Styrofoam plates and cups —These can
melt and leave an unhealthy residue on
food.
·Plastic storage and food containers —
Containers such as margarine tubs can
melt in the microwave.
·Metal utensils —These can damage your
oven. Remove all metal before cooking.
Note: Should you wish to check if a dish is
safe for microwaving, place the empty dish
in the oven and microwave on HIGH for 30
seconds. A dish which becomes very hot
should not be used.
COOKING TECHNIQUES
Your microwave makes cooking easier than
conventional cooking, provided you keep
these considerations in mind:
Stirring
Stir foods such as casseroles and
vegetables while cooking to distribute heat
evenly. Food at the outside of the dish
absorbs more energy and heats more
quickly, so stir from the outside to the center.
The oven will turn off when you open the
door to stir your food.
Arrangement
Arrange unevenly shaped foods, such as
chicken pieces or chops, with the thicker,
meatier parts toward the outside of the
turntable where they receive more
microwave energy. To prevent overcooking,
place delicate areas, such as asparagus
tips, toward the center of the turntable.
Shielding
Shield food with narrow strips of aluminum
foil to prevent overcooking. Areas that need
shielding include poultry wing-tips, the ends
of poultry legs, and corners of square
baking dishes. Use only small amounts of
aluminum foil. Larger amounts can damage
your oven.
Turning
Turn foods over midway through cooking to
expose all parts to microwave energy. This
is especially important with large foods such
as roasts.
Standing
Foods cooked in the microwave build up
internal heat and continue to cook for a few
minutes after heating stops. Let foods stand
to complete cooking, especially foods such
as cakes and whole vegetables. Roasts
need this time to complete cooking in the
center without overcooking the outer areas.
All liquids, such as soup or hot chocolate,
should be shaken or stirred when cooking is
complete. Let liquids stand a moment
before serving. When heating baby food,
stir well at removal and test the temperature
before serving.
Adding moisture
Microwave energy is attracted to water
molecules. Food that is uneven in moisture
content should be covered or allowed to
stand so that the heat disperses evenly.
Add a small amount of water to dry food to
help it cook.

7
BEFORE YOU CALL FOR SERVICE
If the oven fails to operate:
A) Check to ensure that the oven is plugged
in securely. If it is not, remove the plug
from the outlet, wait 10 seconds and plug
it in again securely.
B) Check for a blown circuit fuse or a tripped
main circuit breaker. If these seem to be
operating properly, test the outlet with
another appliance.
C) Check to ensure that the control panel is
programmed correctly and the timer is
set.
D) Check to ensure that the door is securely
closed engaging the door safety lock
system. Otherwise, the microwave
energy will not flow into the oven.
IF NONE OF THE ABOVE RECTIFIES THE SITUATION, THEN CONTACT A QUALIFIED
TECHNICIAN. DO NOT TRY TO ADJUST OR REPAIR THE OVEN YOURSELF.
SPECIFICATIONS
PART NAMES
Power Consumption: 120V~60Hz, 1350W (MICROWAVE)
W009:tuptuO
Operation Frequency: 2450MHz
Outside Dimensions(H×W×D): 11 1/16×19×15 1/2 in.
Oven Cavity Dimensions(H×W×D): 8 11/16×13 3/8×12 5/8 in.
Oven Capacity: 0.9cu.ft
Cooking Uniformity: Turntable System
.bl03.xorppA:thgieWteN
1.
2.
3.
4.
5.
6.
Door Safety Lock System
Oven Window
Shaft
Roller Ring
Control Panel
Wave Guide
(Please do not remove the mica plate
covering the wave guide)
7. Glass Tray
DO NOT REMOVE THE CARDBOARD OVEN AIR
VENT COVER THAT IS INSIDE THE MICROWAVE!

8
CONTROL PANEL
MENU ACTION SCREEN
Cooking time, power, indicators and present time are
displayed.
QUICK COOK BUTTONS
Instant settings to cook popular foods
NUMBER PADS(0-9)
Touch to set time or amount.
POWER LEVEL
Use to set power levels other than high.
TIMER
Timer functions independently, even while a cooking
program is in process.
COOK
Use for multi-stage cooking. It enables cooking
at multiple power and time settings automatically.
RESET
Press to clear all previous settings.
CLOCK
Press to set current time.
COOK BY WEIGHT
Programmed cooking based on weight of foods
cooked.
DEFROST BY WEIGHT
Programmed defrosting based on the weight of the
foods to be defrosted.
SPEED DEFROST
Quick defrost function that alternates defrost and
stand times to quickly and effectively defrost foods.
START/STOP
Touch to start or stop cooking.

9
OPERATION INSTRUCTIONS
SIGNALS DURING OVEN SETTINGS
ONE SIGNAL: Oven accepts the entry.
TWO SIGNALS: Oven does not accept the entry, check and try again.
SETTING THE CLOCK
1. Touch CLOCK pad.
2. Use the number pads to enter the correct time.
3. Touch CLOCK pad again.
NOTE:
·This is a 12 hour clock. When the oven is first plugged in or when power
resumes after a power interruption, the display will show ENTER CLOCK TIME.
During cooking, you can press CLOCK to check the oven time.
SETTING THE OVER TIMER
1. Touch TIMER.
2. Enter the amount of time by touching the number pads.
3. Touch START/STOP.
NOTE:
·Time countdown can be seen in display before clock or cooking time is returned to display.
·Touch TIMER and then touch RESET to cancel TIMER during timing process.
·The longest cooking time you can set is 99 minutes and 99 seconds.
S
ETTING A COOKING PROGRAM
A. One-stage Cooking
1. Use the number pads to set a cooking time. You can set a cooking time from one
second to 99 minutes and 99 seconds.
2. If you want to set a power level other than 100% power, touch POWER LEVEL,
and then use the number pads to enter the power level.
3. Touch START/STOP to start cooking.
Use single digits to set a cooking power level:

10
Number pad Cooking power
1、0 100%
9 90%
8 80%
7 70%
6 60%
5 50%
4 40%
3 30%
2 20%
1 10%
0 0
NOTE:
During cooking, you can press POWER LEVEL to check the cooking power.
B. Two-stage Cooking
Some recipes require different stages of cooking at different temperatures.
1. SET STAGE 1:
Follow steps 1 and 2 in “One-stage Cooking”. DO NOT TOUCH START/STOP
2. SET STAGE 2:
Touch COOK then enter proper cooking time and (lower) power level. (Most 2-stage
recipes use lower power for second stage.)
3. Touch START/STOP.
NOTE:
·After total time has elapsed, signals sound and END appears in display. Touch any pad or
open oven door to clear END before starting another cooking function.
SPEED DEFROST
1. Touch SPEED DEFROST.
2. Enter desired defrosting time by touching correct number pads.
3. Touch START/STOP.
NOTE:
·The longest defrosting time is 99 min, 99 sec.
·After time has elapsed signals sound and END appears in display. Touch any pad or
open door to clear END before starting another cooking function.
·After setting Speed Defrost, oven can be programmed to automatically switch to one or
two-stage cooking.

11
·For Speed Defrost and one stage cooking, follow steps above. Before touching
START/STOP, touch COOK, enter time and power level. Then touch START/STOP.
·For Speed Defrost and two stage cooking, follow steps above. Before touching
START/STOP, enter
two-stage cooking programs.
·During defrosting program, the oven will pause to remind you to turn food over
then close the door and press START/STOP to resume.
COOK BY WEIGHT
1. Touch COOK BY WEIGHT.
2. Enter the one digit code by touching
the correct number pad (1~3).
3. Enter weight.
4. Touch START/STOP.
Cook By Weight Code Description
CODE TYPE MAX WEIGHT
1 Beef 5 lb. 16 oz.
2 Mutton 5 lb. 16 oz.
3 Pork 5 lb. 4 oz.
NOTE:
·Meat must be defrosted and at refrigerated
temperature.
·Weight must be in pounds and ounces.
·Ounce weights less than 10 must be
preceded by a 0. If label gives weight in
pounds only, change the fraction of a pound
to ounces using the following chart.
Converting Fractions of a Pound to Ounces
Fractions of a pound Ounces
Less than .03 0
.03 to .09 1
.10 to .15 2
.16 to .21 3
.22 to .27 4
.28 to .34 5
.35 to .40 6
.41 to .46 7
.47 to .53 8
.54 to 59 9
.60 to .65 10
.66 to .71 11
.72 to .78 12
.79 to .84 13
.85 to .90 14
.91 to .97 15
above .97 go to next
even

12
·During cooking, the system will pause automatically and sound to remind user to turn
food over, after that touch START/STOP to resume cooking.
·After total cooking time, signals sound and END appears in display. Touch any pad or
open oven door to clear END before starting another cooking function.
·Let meat stand a few minutes before carving.
DEFROST BY WEIGHT
1. Touch DEFROST BY WEIGHT pad.
2. Enter weight by touching number pads.
3. Touch START/STOP pad.
NOTE:
·Weight must be in pounds and ounces. Ounce weights less than 10 must be preceded
by a 0. If label gives weight in pounds only, change the fraction of a pound to ounces
using the chart given above. The maximum weight is 5lb.16oz.
·Turn over food when oven beeps. Touch START/STOP pad to resume defrosting.
·After total defrosting time, signals sound and END appears in display. Touch any pad or
open oven door to clear END before starting another cooking function.
SETTING CHILD LOCK
The safety lock prevents unsupervised operation by children.
To set, in standby mode, press and hold RESET for 3 seconds. LOCK is indicated on the
display.
To cancel, press and hold RESET for 3 seconds. LOCK indication disappears.
The QUICK COOK settings allow you to cook or reheat food automatically without
entering power level or time.
For smaller portions, simply touch the applicable pad and start. For larger portions, push
the pad twice.
FROZEN DINNER, BAKED POTATO and BEVERAGE allow you to cook multiple amounts
of the same food.Simply touch pad once, and ENTER AMT appears In the display. Enter
the amount of servings and start.
POPCORN
1. Touch POPCORN.
2. CODE and cooking time appears in the display. POPCORN automatically sets the
cooking time for a 3.5 oz. bag of microwave popcorn.
QUICK COOK SETTINGS

13
3. Touch START/STOP.
NOTE:
·To change the preset POPCORN time: Touch POPCORN twice. ENTER TIME appears
in display. Touch number pads to enter minutes and seconds. Touch START/STOP.
The longest cooking time is 99 min, 99 sec. This new cooking time will be set as the
default one until you change it or next power on.
BAKED POTATO
For 4 to 6 oz. potatoes:
1. Touch BAKED POTATO once.
2. Enter number of potatoes by touching number pads from 1 to 4.
3. Touch START/STOP.
For the large 8 to 10 oz. potatoes:
1. Touch BAKED POTATO twice.
2. Enter number of potatoes by touching number pads from 1 to 4.
3. Touch START/STOP.
PIZZA
Reheating a slice of pizza:
1. Touch PIZZA once. CODE and cooking time appears.
2. Touch START/STOP.
Heating a whole frozen pizza:
1. Touch PIZZA twice. CODE and cooking time appears.
2. Touch START/STOP.
BEVERAGE
For 5 to 7 oz. cups:
1. Touch BEVERAGE once.
2. Enter number of cups by touching number pads from 1 to 4.
3. Touch START/STOP.
For the larger 9 to 11 oz. cups:
1. Touch BEVERAGE twice.
2. Enter number of mugs by touching number pads from 1 to 4.
3. Touch START/STOP.
FROZEN DINNER
For one or two small (7~9 oz.) frozen dinners:
1. Touch FROZEN DINNER once.

14
CLEANING AND CARE
1. When cleaning surfaces of door and
oven that comes together on closing
the door, use only mild, nonabrasive
soups, or detergents applied with a
sponge or soft cloth.
2. Turn off the oven and remove the power
plug from the wall socket before cleaning.
3. Keep the inside of the oven clean. When
food splatters or spilled liquids adhere to
oven walls, wipe with a damp cloth. Mild
detergent may be used if the oven gets
very dirty. Avoid the use of spray and
other harsh cleaners as they may stain,
streak or dull the door surface.
4. The outside surfaces should be cleaned
with a damp cloth. To prevent damage to
the operating parts inside the oven, water
should not be allowed to seep into the
ventilation openings.
5. Wipe the window on both sides with a
damp cloth to remove any spills or
spatters.
6. Do not allow the control panel to become
wet. Clean with a soft, damp cloth. When
cleaning the control panel, leave oven
door open to prevent oven from
accidentally turning on.
7. If steam accumulates inside or around the
outside of the oven door, wipe with a soft
cloth. This may occur when the
microwave oven is operated under high
humidity conditions, this is normal.
8. It is occasionally necessary to remove the
glass tray for cleaning. Wash the tray in
warm sudsy water or in a dishwasher.
9. The roller ring and oven floor should be
cleaned regularly to avoid excessive
noise. Simply wipe the bottom surface of
the oven with mild detergent. The roller
ring may be washed in mild sudsy water
or dishwasher. When removing the roller
ring from cavity floor for cleaning, be
sure to replace in the proper position.
10. Remove odors from your oven by
combining a cup of water with the juice
and skin of one lemon in a deep bowl,
microwave for 5 minutes. Wipe
thoroughly and dry with a soft cloth.
11. When it becomes necessary to replace
the oven light, please consult a dealer to
have it replaced.
12. Please do not dispose this appliance
into the domestic rubbish bin; it should
be disposed to the particular disposal
center provided by the municipalities.
2. For 1 entree, touch the number pad “1”. For 2 entrees, touch the number pad “2”.
3. Touch START/STOP pad.
Microwaving one large (10~12 oz.) frozen dinner:
1. Touch FROZEN DINNER twice.
2. For 1 entree, touch the number pad “1”. For 2 entrees, touch the number pad “2”.
3. Touch START/STOP.
REHEAT
1. Touch REHEAT pad. CODE and cooking time appears.
2. Touch START/STOP.

“RCA”, “NIPPER & CHIPPER” ARE TRADEMARKS OF RCA TRADEMARK MANAGEMENT USED UNDER
LICENSE TO: CURTIS INTERNATIONAL LTD.
©Curtis International Ltd.
7045 BECKETT DRIVE, UNIT 15, MISSISSAUGA, ON, L5S 2A3 www.curtisint.com
LIMITED PRODUCT WARRANTY
APPLIANCES
This appliance product is warranted to be free from manufacturer’s defects in material and workman-ship,
provided that the unit is used under the normal operating conditions intended by the manufacturer.
Should you have any problem with this product, please and it is highly recommended to visit our website at
www.curtisint.com before you take any other steps as we have additional copies of instruction manuals,
operating manuals and trouble shooting tips on our website which gives you the answer on most of the
questions you could have in operating the unit.
TERMS OF WARRANTY
C.I. Service Dept. warrants this product to be free from defects in materials and workmanship for 1 year on
parts and 1 year on labor. If you originally purchased your product more than 1 year ago, a repair fee will
apply.
Nothing within this warranty shall imply that C.I. will be responsible or liable for any damage to any items
placed in this appliance, whether due to any defect of the appliance, or its use, whether proper or improper.
EXCLUSIONS
Save as herein provided, C.I. Service Dept. (Canada) or C.I. Service Dept. (USA), there are no other
warranties, conditions, representations or guarantees, express or implied, made or intended by C.I. or its
authorized distributors and all other warranties, conditions, representations or guarantees, including any
warranties, conditions, representations or guarantees under any Sale of Goods Act or like legislation or
statue is hereby expressly excluded. Save as herein provided, C.I. Service Dept. (Canada) or C.I. Service
Dept. (USA), shall not be responsible for any damages to persons or property, including the unit itself,
howsoever caused or any consequential damages arising from the malfunction of the unit and by the
purchase of the unit, the purchaser does hereby agree to indemnify and save harmless C.I. from any claim
for damages to persons or property caused by the unit.
TO OBTAIN REPAIRS UNDER THE TERMS OF THIS WARRANTY
1. The original purchaser must present a copy of the original bill of sale and the service warranty card.
2. Any alterations, abuse, misuse, battery corrosion or accidental damage voids the warranty.
3. The warranty does not cover cabinets and accessories.
4. No warranty or insurance contained or set out shall apply when damage or repair is caused by power
failure; damage in transit or when moving the unit; improper power supply; use for commercial or
industrial purposes; service calls resulting in customer education, etc.
5. The defective product should be taken or mailed to:
Canada U.S.A
Curs Internaonal Ltd.
C/O CNR Internaonal
2626 Vista Industria
Compton, CA 90221
U.S.A
C.I. Service Dept.
7045 Becke Drive, Unit 15
Mississauga, ON
L5S 2A3
For service assistance and product information, please call: 1-800-968-9853.
If mailing the product, the freight must be prepaid and a money order for $7.00 should be included
to cover the cost of insurance and the return of the product.
6. C.I. reserves the right to repair or replace the parts, which have become defective.
To begin the warranty repair process, please note that you MUST obtain a return authorization number
prior to returning your product for warranty based support. This can be placed under the 1-800-968-9853
contact line.
Model No. Date Purchased Serial No.

NE PAS UTILISEZ CE FOUR A MICRO-ONDES
SANS LA PLAQUE DE VERRE TOURNANTE
FOUR À MICRO ONDES
RMW953-BLACK
RMW953-WHITE
RMW953-RED
1. Veuillez LIRE ces instructions attentivement avant d’installer et de faire
fonctionner le four à micro-ondes.
2. Veuillez inscrire le NUMÉRO DE SÉRIE dans l’espace prévu à cet effet
ci-dessous. Vous trouverez le numéro de série sur la plaque signalétique
sur votre four et conservez ce numéro pour référence ultérieure.
NO. SÉRIE:

1
(a) Ne faites jamais fonctionner le four à micro-ondes lorsque la porte est ouverte
car vous pourriez être exposé (e) à des ondes néfastes. Il est important de ne pas
tenter d’altérer ni d’annuler le système de verrouillage du four.
(b) Ne laissez aucun objet ni de matières (résidus de nettoyeurs ou de graisse)
s’infiltrer entre la devanture du four et la porte elle-même et ne laissez pas de saletés
s’accumuler sur les surfaces scellant.
(c) Ne faites pas fonctionner le four s’il est endommagé. Portez ne attention
particulière à la porte qui doit se refermer parfaitement et vérifiez s’il y a des
dommages aux endroits suivants : (1) la porte (tordue), (2) les charnières et loquets
(lâches ou desserrés) et (3) les surfaces scellant de la porte (sales).
(d) Ne tentez pas d’ajuster ni de réparer le four à micro-ondes vous-même.
MESURES PRÉVENTIVES À SUIRE
POUR ÉVITER TOUTE
SUREXPOSITION AUX MICRO-ONDES
TABLE DES MATIÈRES
Mesures préventivesà suivre pour éviter toute
Surexposition aux micro-ondes....................................................................................1
Mesures préventivesimportantes.................................................................................2
Guide d'installation......................................................................................................4
Instructionsde mise à la terre......................................................................................4
Guidedesustensiles.....................................................................................................5
Techniques de cuisson..................................................................................................6
Avant deplacer un appel deservice ............................................................................7
Spécifications...............................................................................................................7
Nomenclaturedes pièces..............................................................................................7
Panneau des contrôle....................................................................................................8
Instructions de fonctionnement....................................................................................9
À Propos des réglages de cuisson rapide ....................................................................12
Nettoyage et entretien..................................................................................................14

Mesures préventives importantes
2
CONSERVEZ CES INSTRUCTIONS
Lorsque vous utilisez un appareil électrique,des consignes de sécurité
élémentaires doivent touljours êtreobservées, y compris les suivantes :
AVERTISSEMENT : Pour réduire les risques de brulure, de choc électrique,de
blessure et d'exposition à un excès d'énergie a micro-ondes:
1. Lire toutes les instructions avant d'utiliser l'appareil.
2. Lire et suivre les (( MESURES PRÉVENTIVES À SUIRE POUR ÉVITER TOUTE
SUREXPOSITION AUX MICRO-ONDES)) en page 1.
3. Cet appareiL doit être mis à la terre. Brancher uniquement sur une prise
électrique adéquatement mise à la terre. Voir ((Instructions de mise à la terre)) en
page 4
4. Installer ou placer cet appareil uniquement en conformité avec les instructions
d'installation fournies.
5. Certains produits tels que les æufs entiers et les contenants fermés, par exemple
un pot fermé, peuvent exploser et ne doivent pas être chauffés dans ce four à
6. Utiliser cet appareil uniquement pour la fonction pour laquelle il a été conçu,tel
que décrit dans ce manuel. Ne pas utiliser de pro duits ou de vapeurs chimiques
corrosifs dans cet appareil.Ce type d'appareil est spécifiquement conçu pour
chauffer, cuire ou déshydrater des aliments. Il n'est pas conçu pour uneutilisation
7. Comme pour tout appareil électrique,une surveillance étroite est nécessaire
par des enfants.
8. Pour réduire le risque d'incendie à l'intérieur du four à micro-ondes
a. Ne pas surcuire les aliments. Surveiller attentivement l'appareil lorsque du
papier,du plastique ou d'autres matériaux combustibLes sont pLacés à l'intérieur
du four à micro-ondes pour faciliter la cuisson.
b. Retirer les attaches de fil métallique des emballages de papier ou de plastique
avant de les placer à l'intérieur du four à micro-ondes.
c. Si les matériaux à l'intérieur du four à micro-ondes prennent feu,garder la porte
du four à micro-ondes fermée,éteindre le four et débrancher la fiche de la prise
du panneau électrique.
d. Ne pas utiLiser L'intérieur du four à micro-ondes comme rangement. Ne pas
Laisser des matériaux tels que du papier,des ustensiLes de cuisine ou des
aLiments à l'intérieur lorsqui' l n'est pas utilisé.
9. Les Liquides, tels que l'eau, le café ou le thé, peuvent surchauffer au-delà du
point débullition sans qu'ils ne paraissent bouilliren raison de la tension de surface
du liquide. Il n'y a pas toujours de bulles visibles ou d'évidence débuuition lorsque
lerécipient est retiré du four à micro-ondes. C'E5T POURQUOI IL EST POSSIBLE
QUE LE LIQUIDE BOUE SOUDAINEMENT ET DÉBORDE À LEXTÉRIEUR DU
RÉCIPIENT LORSQUE CE DERNIER EST DÉPLACÉ OU SI UN USTENSILE EST
micro-ondes.
industrielle ni de laboratoire.
électrique ou dsactiver l'alimentation électrique à l'aide du disjoncteur ou du fusible

3
CONSERVEZ CES INSTRUCTIONS
PLONGÉ DANSLE LIQUIDE Pour éviter Les risques de bLessure :
a.Ne pas surchauffer les liquides.
b.Mélanger le liquide avant de le chauffer et à la mi-temps également.
c.Ne pas utiliser des récipients droits ou à goulot étroit.
d.Après avoir chauffé un liquide, laisser le récipient reposer dans le four à
micro-ondes un petit moment avant de le retirer.
e.Faire preuve de beaucoup de prudence au moment de plonger une cuillère ou
un autre ustensile dans le récipient.
10. Ne pas chauffer de l'huile ou un autre corps gras pour la friture.il est très
difficile d'en contrôler la température dans un four à micro-ondes.
11. Percer les aliments pourvus d'une peau ou d'une pelure épaisse,comme les
pommes de terre, les courges entières, les pommes et les noix,avant de les cuire.
12. Le contenu des biberons et des pots de nourriture pour bébé doit être secoué
ou mélangé et leur température doit être vgrifiée avant de servir, pour éviter les brûlures.
13. Les articles de cuisine peuvent devenir chauds en raison de la chaleur
transférée par les aliments chauffés. Il est possible que des gants de cuisine ou
des poignées isolantes soient nécessaires pour manipuler les articles de cuisine.
14. Ne pas couvrir ni bloquer les ouvertures de l'appareil.
15. Ne pas ranger ni utiliser l'appareil à l'extérieur.Ne pas utiliser ceproduit à
proximité d'eau, par exemple près d'un évier de cuisine, dans un sous-sol mouillé
ou prés d'une piscine, ou dansdes endroits similaires.
16. Ne pas utiliser cet appareil si le cordon d'alimentation ou la prise est
endommagé, s'il ne fonctionne pas adéquatement ou si' l aété endommagé ou échappé.
17. Ne pas immerger le cordon ou la prise dans l'eau. Garder le cor don éloigné de
toute surface chaude. Ne pas laisser le cordon pendre d'une table ou d'un comptoir.
18. UtiLiser uniquement un thermomètre spécialement conçu pour être utilisé dans
un four à micro-ondes.
19. Ne pas utiliser d'appareil pour chauffer ou cuire sous cet appareil
20. S'assurer que le plateau en verre et l'anneau de roulement sont adéquatement
en place lorsque le four à micro-ondes est utilisé.
21. Cet appareil doit être réparé uniquement par un personnel qualifié. Communiquer
avec le centre de service agréé plu près afin qui'l soit examiné,ajusté ou réparé.
22. Pour nettoyer les surfaces de la porte et du four à micro-ondes qui entrent en
23.Ce matériel produit irradie, utilisations et l'énergie radioélectrique et, s'ils ne
sont pas installés et utilisés conformément aux instructions, peuvent provoquer des
interférences dommageables pour les communications radio. Toutefois, il n'y a
aucune garantie qu'il n'y aura pas d'interférences dans une installation particulière.
si cet équipement est de provoquer des interférences dommageables à la radio ou
à la télévision de réception, qui peut être déterminée en tournant le matériel et,
l'utilisateur est encouragé à tenter de corriger l'ingérence par une ou plusieurs des
mesures suivantes:
contact les unes avec les autres, utiliser uniquement du savon ou du détergent
doux et non abrasif et nettoyer àl'aide d'une éponge ou d'un linge doux.
This manual suits for next models
2
Table of contents
Languages:
Other RCA Microwave Oven manuals