RCA 20F650TECY User manual

Television
User's Guide
Changmg Entertainment.

mportant nformation
RISKOFELECTRICSHOCK
DONOTOPEN
This symbol indicates that this product incorporates double
insulation between hazardous mains voltage and user
accessible parts. When servicing use only identical
replacement parts.
Caution: To reduce the risk of electric shock, do not remove cover {or back], No user serviceable
parts inside, Refer servicing to qualified service personnel.
_. This symbol indicates important AThis symbol indicates "dangerous voltage" inside the
instructions accompanying the _. product that presents a risk of electric shock or
product, personal injury.
WARNING
To reduce the risk of fire or electric shock,
do not expose this product to rain or
moisture.
The apparatus shall not be exposed to
dripping or splashing and that no objects
filled with liquids, such as vases, shall be
placed on the apparatus.
Refer to the identification/rating label located on the
hack panel of your product for its proper operating
voltage.
FCC Regulations state that unauthorized changes or
modifications to this equipment may void the user's
authority to operate it.
Caution: Using video games or any external accessory
with fixed images for extended periods of time can
cause them to be permanently imprinted on the
picture tube (or projection ]_/picture tubes). ALSO,
some network/program Iogos, phone numbers, etc.
may cause similar damage. This damage is not covered
by your warranty.
Cable ]_/Installer: This reminder is provided to call your
attention to Article 820-40 of the National Electrical
Code (Section 54 of the Canadian Electrical Code, Part
1) which provides guidelines for proper grounding and,
in particular, specifies that the cable ground shall be
connected to the grounding system of the building as
dose to the point of cable entry as practical
Product Registration
Please fill out the product registration card (packed separately] and return it immediately. For US.
customers: Your RCA Consumer Electronics product may also be registered at www.rca.com/
productregistration. Registering this product allows us to contact you if needed.
Product Information
Keep your sales receipt to obtain warranty parts and service and for proof of purchase. Attach it here
and record the serial and mode[ numbers. These numbers are located on the product.
Model No. Serial No. Purchase Date:
Dealer/Address/Phone:

Tabte of Contents
Chapter 1: Connections & Setup
Things to Consider Before You Connect ....................................................................... 3
Protect Against Power Surges ........................................................................... 3
Protect Components from Overheating ........................................................... 3
Position Cables Properly to Avoid Audio Interference .................................... 3
Important Stand and Base Safety Information ................................................ 3
Use Indirect Light ............................................................................................... 3
Cables Needed to Connect Components to Your TV ....................................... 3
TV + DVD + VCR .............................................................................................................. 4
Explanation of Jacks ....................................................................................................... 5
The Front of Your TV ...................................................................................................... 5
Front Input Jacks ................................................................................................ 5
Front Panel Buttons ........................................................................................... 6
Plug in theTV .................................................................................................................. 6
Put batteries in the remote ........................................................................................... 6
How to Use the Remote Control to Complete the Initial Setup ................................ 6
Turn on the TV................................................................................................................. 7
Complete the Initial Setup ............................................................................................. 7
Complete Auto Channel Search ........................................................................ 7
Chapter 2: Using the Remote Control
Button Descriptions for TV Mode .................................................................................. 8
Button Descriptions for DVD and VCR Modes .............................................................. 8
Using the INPUT Button ..................................................................................... 9
Programming the Remote to Operate Other Components .......................................... 9
Find Out If You Need to Program the Remote ................................................. 9
Programming the Remote ................................................................................. 9
How to Use the Remote After You've Programmed It .................................. 11
Remote Control Codes .................................................................................................. 11
Chapter 3: Using the TV's Features
Channel Banner ............................................................................................................ 13
Why You Should Use the Auto Tuning Feature ........................................................ 13
How to Set Up the Auto Tuning Feature ........................................................ 13
Parental Controls and V-Chip ..................................................................................... 14
How V-Chip Works ........................................................................................... 15
USA V_Chip Rating System ............................................................................... 15
Canadian English V-Chip Rating System ......................................................... 16

Yable of Contents
Canadian French V-Chip Rating System .......................................................... 17
USA V-Chip TV Rating Limit ............................................................................. 17
Blocking Specific Content Themes .................................................................. 19
Viewing Specific Content Themes ................................................................... 19
Blocking Canadian V-Chip Ratings .................................................................. 20
V-Chip Movie Rating Limit ............................................................................... 20
V-Chip Exempt Program Block ......................................................................... 20
KidPass .............................................................................................................. 21
V-Chip Active .................................................................................................... 21
Front Panel Lock ............................................................................................... 21
Change Password ............................................................................................. 21
Chapter 4: Using the TV's Menu System
Sound Menu .................................................................................................................. 22
Picture Menu ................................................................................................................ 22
Setup Menu .................................................................................................................. 23
Parental Control Menu ................................................................................................ 24
Time Menu .................................................................................................................... 24
Chapter 5: Other Information
Troubleshooting ............................................................................................................ 25
Care and Cleaning ........................................................................................................ 27
Limited Warranty ......................................................................................................... 27
2

Things to Consider Before You Connect
Protect Against Power Surges
•Connect all components before you plug any of their power cords into the wall outlet,
• Turn off the I1/and/or component before you connect or disconnect any cables.
• Make sure aH antennas and cables are properly grounded, Refer to the Important Safety Instructions
packed separate]y.
Protect Components from Overheating
• Don't block ventilation holes on any of the components. Arrange the components so that air can
circulate freely.
• Don't stack components.
• If you place eompone_ts in a stand, make sure you allow adequate ventilation.
• If you connect an audio receiver or amplifier, place it on the top shelf so the heated air from it won't
flow around other components.
Position Cables Properly to Avoid Audio Interference
• Insert each cable firmly into the designated jack.
• If you place components above the I_, route all cables down the side of the back of the _/instead
of straight down the middle of the IX/.
• If your antenna uses 3OO-ohm twin lead cables, do not coil the cables. Also. keep the twin lead
cables away from audio/video cables.
Important Stand and Base Safety Information
Choose the location for your IV carefully. Place the _/on a stand or base that is of adequate size and
strength to prevent the ]V from being accidentally tipped over, pushed off. or pulled off. This could
cause personal injury and/or damage the _/. Refer to the Important Safety Instructions packed
separately.
Use Indirect Light
Don't place the 1V where sunlight or room lighting will be directed toward the screen. Use soft or
indirect lighting.
Cables Needed to Connect Components to Your TV
The pictures below show the cables needed for the connections represented in this book.
Coaxia_ came S Video cable Audio/Video cables
Chapter 1 Graphics contained within this publication are for representation onl}4 3

Connections Set p
VCR
fVIDEO gUDIO
o°,00
R
RL
or Ant_nfla
TV (back panel)
o
\
TV + DVD + VCR
1. Connect your DVD Player to your 1V.
A. Connect the audio (white and red) cables to the R and L/MONO AUDIO jacks on the back of the
TV and to the Audio Output jacks on the DVD player.
B, If your DVD player has an S-Video jack, connect an S-Video cable to the S-Video jack on the DVD
player and to the S-VIDEO [N jack on the back of the _/, If your DVD player doesn't have an
S-Video iack, go to C.
-OR-
C. Connect a video cane {yellow) to the Video Output Jack on the DVD player and to the VIDEO jack
on the back of the _I.
2. Connect your TV to your VCR
Connect a coaxial cable to the _I ANT jack on your _I and to the Output Jack on your VCR
(sometimes labeled OUTTOIV),
3. Make sure cable or antenna is connected to your VCR.
Connect the coaxial cable from your cable outlet or antenna to the antenna input on the VCR,
Go to page 6
4Graphics contoined within this publicotion ore for representotion onl_ Chapter 1

Connections Setup
Explanation of .lacks
Thissection describes the jacks you can use to make connections, Thereare several
ways to connect components to your IV,
IV ANT Letsyou connect acoaxial cable to receivethe signal from the antenna,
cable,cable box, or if using the example on page 4,a VCR,
B LiMONO
AUDIO VIDEOS-VIDEOIN
,=: VIDEO I
VIDEO, AUDIO R and L/MONO Lets you connect a
component such as a VCR, DVD player, or laserdisc player.
• R {RIGHI) AUDIO Provides right audio connection The
right audio connector is usually red.
• L/MONO AUDIO Provides left audio connection The
left audio connector is usually white,
• VIDEO Provides composite video connection, The video
connector is usually yellow.
S-VIDEO IN Provides better picture quality than the
video jacks because the color part of the signal is
separated from the black and white part of the picture,
When using S-VIDEO IN, make sure to connect left and
right audio cables to the L/MONO and R AUDIO Input
jacks.
The Front of Your IX/
Front Input Jacks
The IV has front input jacks for your convc_Rence: one set of
audio/video inputs and a headphone jack. To access the
compone_t you connected to the front of the IV, press the
INPUT button on your remote until FRNTappears on the
screen, The jacks are ideal for connecting a video game
console or a camcorder.
Note:Whenconnecling ocomponenl lhol hasonly one oudiojock,
suchassomecamcorders,usethe TV'sAUDIOL/MONOjack toheor
the audio
VIDEO Receives video from another component such as a
VCR, camcorder, or video game console,
L/MONO and RAUDIO Receivesaudio from another
component such asaVCR,camcorder,or video game console,
PHONES Allows you to connect headphones to listen to the
sound coming from the IV.
Chapter 1 Graphics contained within this publication are for representation onl R 5

Connections Setup
Front Panel Buttons
If you cannot locate your remote, you can use the front panel buttons of your TV
to operate many of the _/'s features.
MENU/OK Brings up the Main menu. In the menu system, it selects highlighted
items.
CH- Scans down through the current channel list. In the menu system, acts like
the down arrow button on the remote control and adjusts menu controls.
CH+ Scans up through the channel list. In the menu system, acts like the up
arrow button on the remote control and adjusts menu controls.
VOL- Decreases the volume. In the menu system, acts like the left arrow button
on the remote control and adjusts menu controls.
VOL+ Increases the volume. In the menu system, acts like the right arrow button
on the remote control and adjusts menu controls.
POWER Turns the I_ on and off
Plug in the TV
Plug the endof the power cord into a grounded wall outlet. Insert the plug
completely into the outlet.
Put batteries in the remote
• Remove the battery compartment cover from the back of the remote by
pushing down on and sliding off the cover.
• Insert 2 "AAA" fresh batteries, Make sure the polarities {+ and -) are aligned
correctly.
• Replace the cover.
/Arrows
OK
button
How to Use the Remote Control to Complete
the Initial Setup
The technical term is "Navigation"- how you move through
the on-screen menus, The method is the same throughout
the menu screens: highlight your choice and select it,
To highlight a menu item, press the arrow buttons on the
remote to highlight one of the items listed on the screen.
Use the up or down arrow button to move up or down. Use
the right or left arrow button to move right or left.
To select the item that you've highlighted, press OK.
Note H_ghlighledmeanslhat themenu _ternslands out from olher
menu itemson theI_sl¸_ppears darker,brighl_r, or _differenl¸color}¸
6Graphics contained within this pu61ication ere for representation only Chapter 1

Connections Setup
Turn on the TV
PressIV on the remote, or press POWER on the Ivs front panel.
Note:Pressinglhe TVbu_Lunhal only turnson lhe T_,bul pul_ Lhcrcmolc mto I1/mode "TV
mode"mcons that the'buttonson theremoteconltol operateLh_ TV'sfunclions
Complete the Initial Setup
The menu system in your 1V allows the ]V's features to work
properly. The first time you turn on your IV, the SETUPsereen
appears with Language highlighted. The default language is
English. To choose another language, press the right arrow
button on the remote.
Complete Auto Channel Search
This part of the setup allows the IV to search for all channels
viewable through your antenna or cable IV system. This is
sometimes called auto programming.
I, Highlight Auto Ch. Search and press OK.
2. The Signal Type option is set to Cable. To change the
option to Antenna, press the right arrow button and then
press OK.
3 Pressthe down arrow button to highlight StarL Press OK
to begin the auto channel search.
Once the search is complete, you can begin watching IV, For
information on customizing your channels or menu options,
go to Chapter 4.
Chapter 1 Graphics contained within this publication are for representation onl}4 7

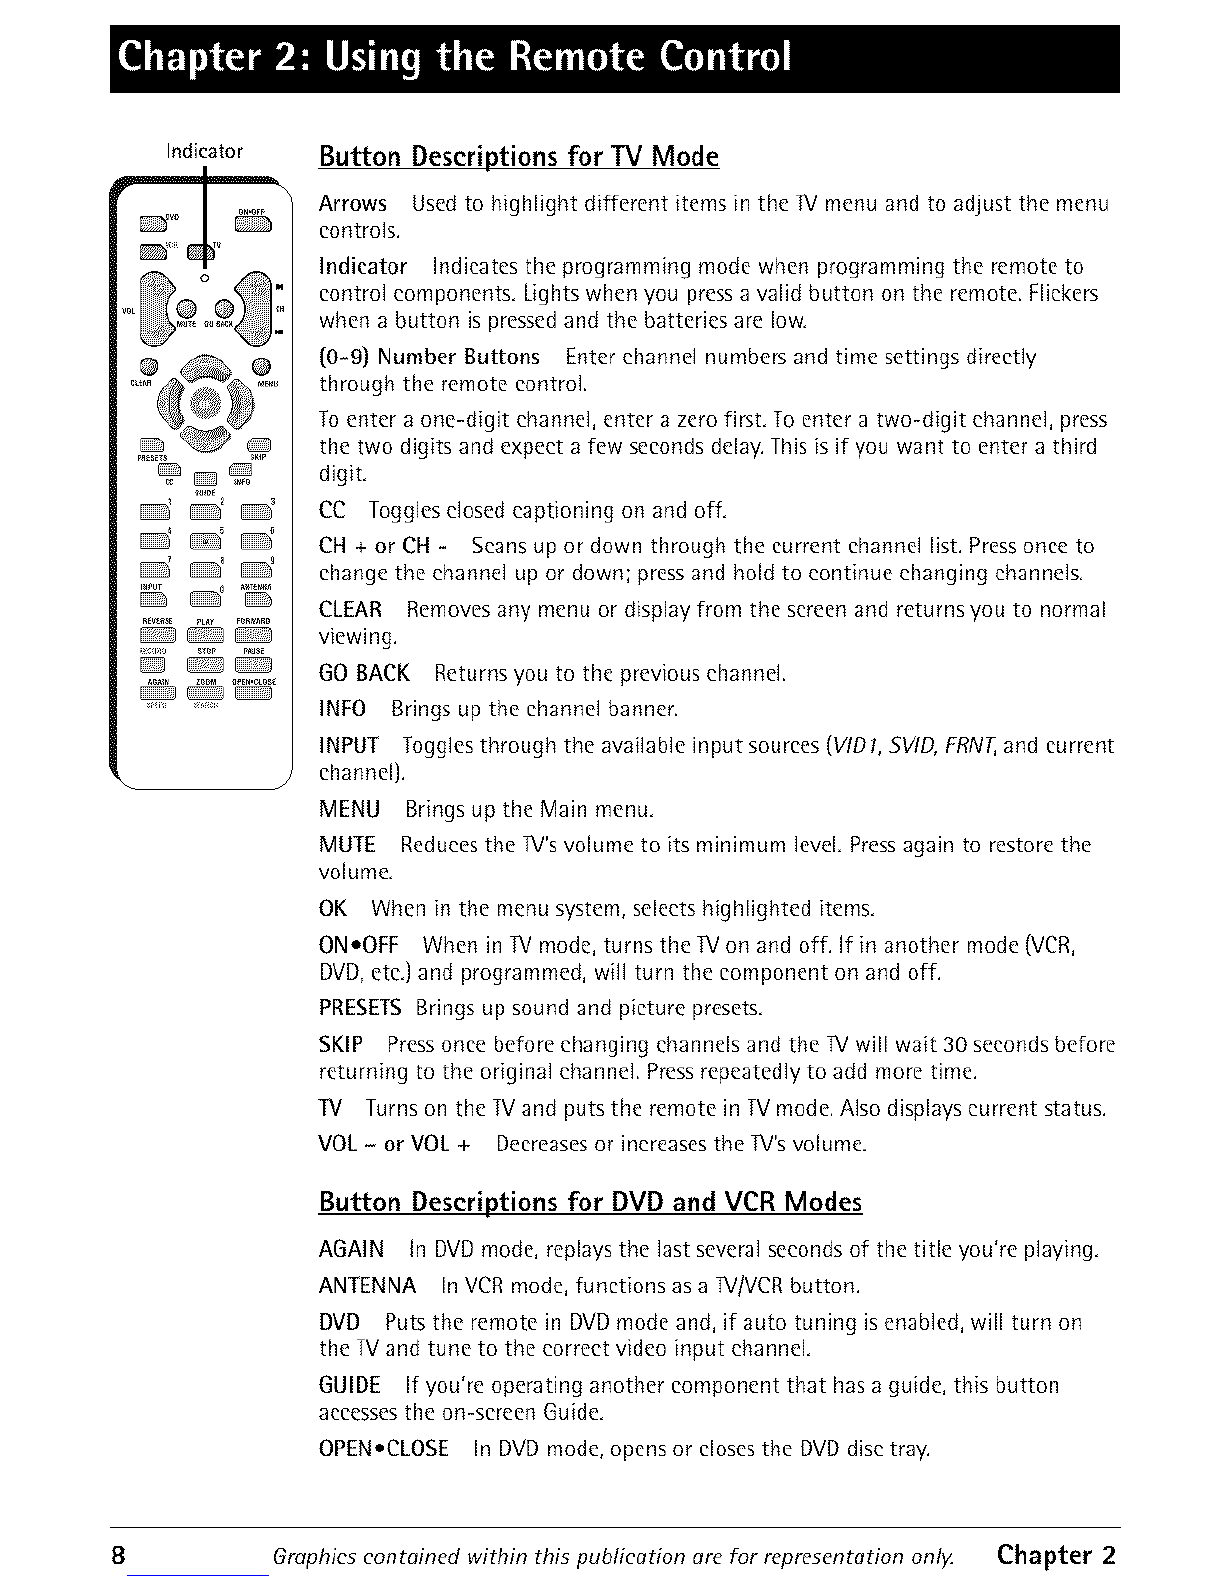
Indicator Button Descriptions for TV Mode
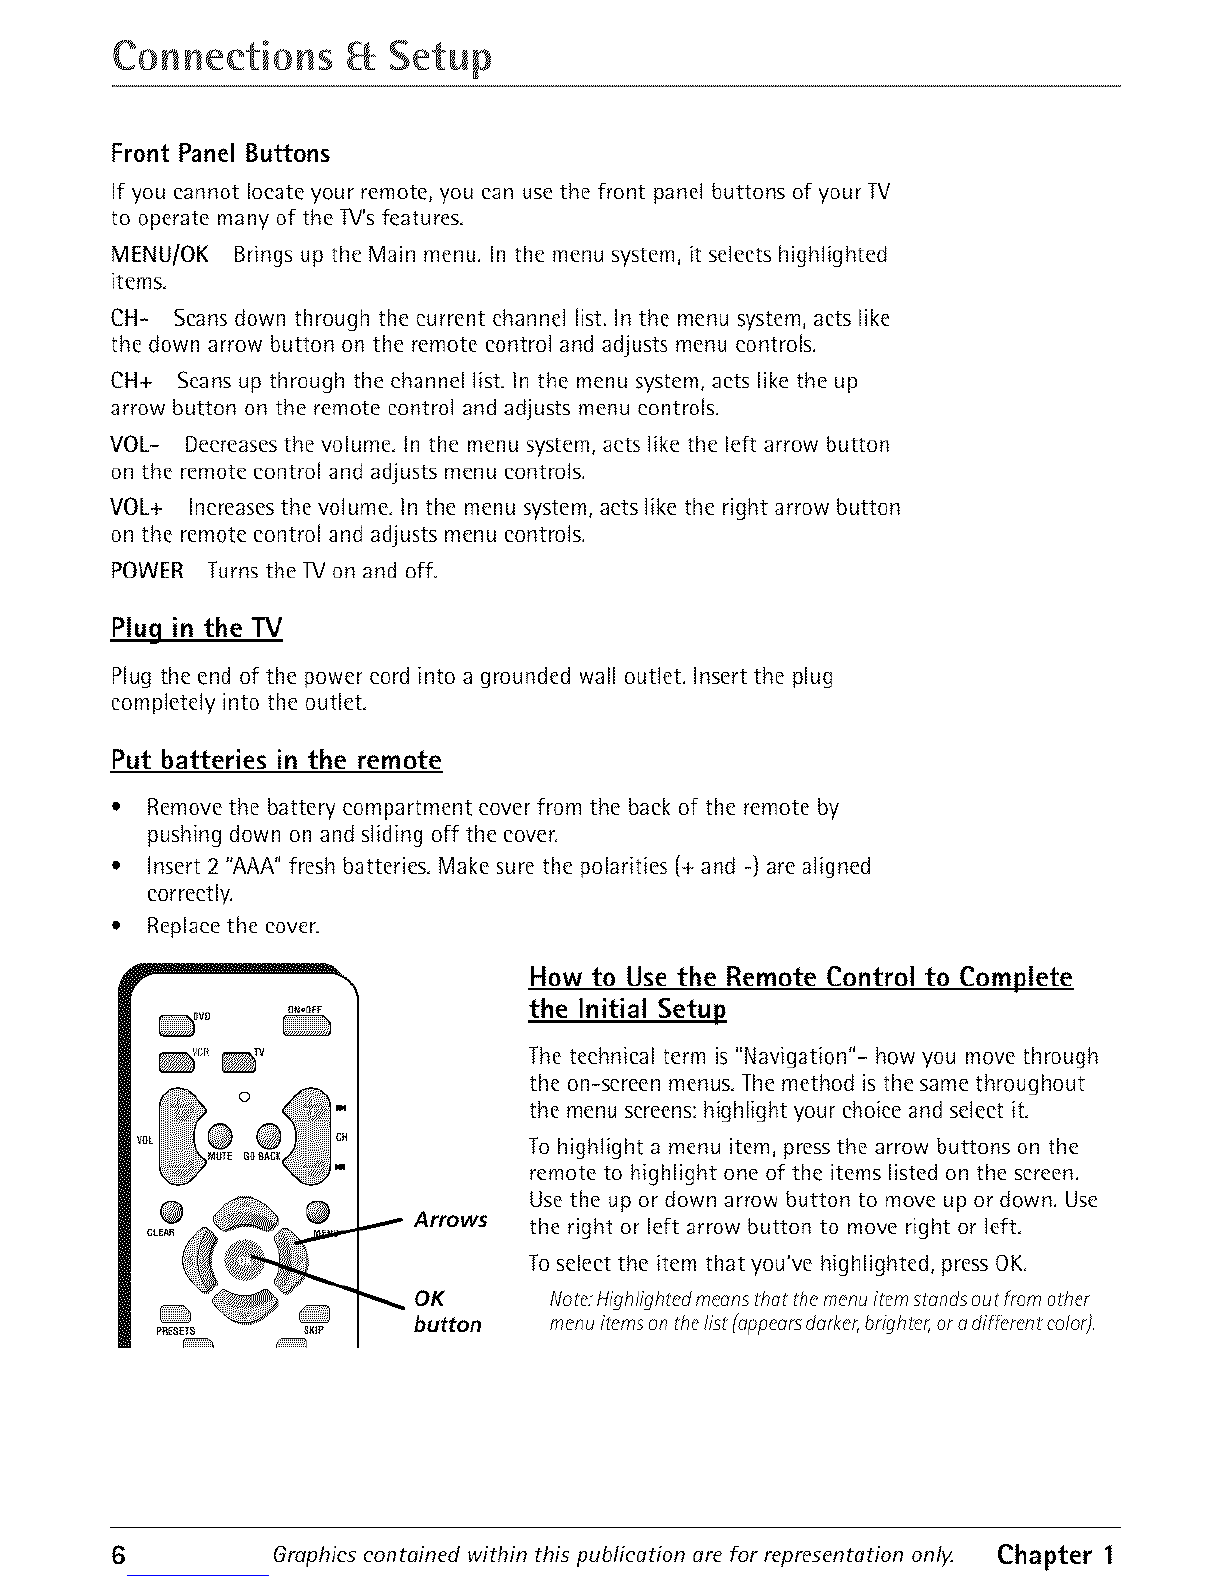
Arrows Usedto highlight different items in the _/menu and to adjust the menu
controls.
Indicator Indicates the programming mode when programming the remote to
control components. Lights when you press a valid button on the remote. Flickers
when a button is pressed and the batteries are low.
{0-9) Number Buttons Enter channel numbers and time settings directly
through the remote control.
To enter a one-digit ehannd, enter a zero first. To enter a two-digit ehannd, press
the two digits and expect a few seconds delay. This is if you want to enter a third
digit.
CC Toggles dosed captioning on and off.
CH + or CH - Scans up or down through the current channel list. Press once to
change the ehannd up or down; press and hold to continue changing ehannds.
CLEAR Removesany menu or display from the screenandreturns you to normal
viewing.
GO BACK Returns you to the previous channel.
INFO Brings up the channel banner.
INPUT Joggles through the available input sources (VtDI. SVID. FRN1,and current
channel}.
MENU Brings up the Main menu,
MUTE Reduces the W's volume to its minimum level Press again to restore the
volume,
OK When in the menu system, selects highlighted items,
ONoOFF When in JV mode, turns the JV on and off. If in another mode (VCR,
DVD, ete,] and programmed, will turn the component on and off.
PRESETS Brings up sound and picture presets,
SKIP Pressonce before changing channels and the ]!/will wait 30 seconds before
returning to the original ehannd. Press repeatedly to add more time.
TV Turns on the TVand puts the remote in TV mode. ADo displays current status.
VOL - or VOL + Decreases or increases the J!/'s volume.
Button Descriptions for DVD and VCR Modes
AGAIN In DVDmode, replaysthe last severalsecondsof the title you're playing.
ANTENNA InVCRmode,functions asa W/VCRbutton.
DVD Putsthe remote in DVDmode and, if auto tuning isenabled,will turn on
the TVandtune to the correct video input channel.
GUIDE If you're operating another component that hasa guide, this button
accessesthe on-screen Guide.
OPEN,CLOSE In DVDmode, opensor closesthe DVDdisc tray.
8Graphics contained within this puGlication are for representation only. Chapter 2

Usin 9 the Remote Control
REVERSE, PLAY, FORWARD, RECORD, STOP,PAUSE If programmed, provides
transport control for some remote-controllable VCRs or DVD players,
SEARCH In VCR mode, accesses Index Search feature.
SPEED In VCR mode, selects a recording speed.
VCR Puts the remote in VCR mode and, if auto tuning is enabled, will turn on the
TV and tune to the correct video input channel
ZOOM In DVD mode, zooms in on the picture.
Using the INPUT Button
Use the INPUT button to scroll through the available video input channels and
view components you have connected to the I!/.
1 Make sure the component you want to view is turned ON.
2. Press INPUT to tune to an available video input source and view the
component.
3 To return to the previous channel, continue pressing INPUT.
VCR buttons
REVERSE /
and PLAY
buttons
_ _ D _
ON,OFF
Programming the Remote to Operate Other
Components
The universal remote can be programmed to operate most
brands of remote controllable components. The remote is
already programmed to operate most RCA, GE, and Prosean
components.
Nole TheTVbutton con'l beprogrdrnmcdon ibis remolc
Find Out If You Need to Program the Remote
To determine whether the universal remote needs to be
programmed for your component, turn the component ON.
For example, to program the remote for a VCR, turn on the
VCR. Point the remote at the VCR, and press the VCR button.
Then press ONoOFF or CH t- {channel up) or CH - {channel
down) to see if the VCR responds to the remote commands. If
the component does not respond, the remote needs to be
programmed.
Programming the Remote
STOP
button There are two ways to program the remote eontroh
You'll use these butto_ls whell
programming file remote.
• automatic code search
• direct entry
Chapter 2Graphics contained within this publication are for representation onl}4 9

Using the Remote Controi
Using Automatic CodeSearch
The following instructions can be used to program the remote to operate each of
your components, if you want to stop the automatic code search without
programming any of your components, press CLEAR until the indicator on the
remote turns off.
1, Turn on the component you want to operate {VCR or DVD player}
2, Press and hold the component button you want to program (VCR or DVD}.
While holding the component button, press and hold ON.OFF until the
indicator on the remote turns on, then release both buttons,
3 Point the remote at the component. Press and release PLAY,then wait S
seconds or until the indicator on the remote stops flashing,
At this point the remote is searching for the correct code to program. If, after 5
seconds, the component you want to operate does not turn off, press PLAY
again to tell the remote to search the next set of codes,
Continue pressing PLAYuntil the component turns off or you have searched
through all of the codes, There arc 20 total sets of codes, If the component
does not turn off after pressing PLAY 20 times, then the remote can't be
programmed to operate that component,
If the component you want to operate does turn off:
1 Press and release REVERSE,then wait 2 seconds, Repeat this step until the
device turns back ON,
2, To finish, press and hold STOPuntil the indicator on the remote turns off
Using Direct Entry
1 Turn on the component to be programmed.
2, Look up the brand and code number(s} for the component on the code list in
this section,
3, Press and hold the component button you want to program on the remote.
4 Enter the code from the remote control code list on the following pages, If the
indicator flashes, you have either entered an invalid code or the button isn't
programmable.
5 Release the component button,
6, Point the remote at the component. Press ON.OFF to see if the component
responds to the command If it doesn't, try pressing the component button and
then ON.OFF again,
• If you get no response, repeat these steps using the next code listed for your
brand, until the component responds to the remote commands,
• If you try all the codes for your component brand and none work, trythe
automatic code search method, If automatic code search doesn't find the code,
the remote is not compatible with your component,
10 Graphics contained within this publication are for representation onl_ Chapter 2

Using the Remote Control
How to Use the Remote After You've Programmed It
Because this universal remote can operate several different components it uses
operational modes triggered by the component buttons, For example, if you want
the remote to operate the IV, you wouM press the IV button to put the remote
into IV mode before you could operate the TV.
1 Press the appropriate component button {DVD,IV, VCR} to set the remote to
operate the component.
2, Press ON,OFF to turn the component ON or OFF.
3 Use the remote buttons that apply to that component.
Nolo:
The ramble may not be compol/ble wi6_,_711brands end models of componenls It also
may no_ operoLe d/ functions of the remote Lhol come wi6_,your componr,nL
If you kc,¢,ppressing buttons end nolhing happens, lhe remozc is probably in lhc,
wrong mode You n?dst pr¢'ss lhe componenl butlon Lhgt ma{ches Lhecomponent
iou wont to operate {it,, if you won t lo operate LheVCR,press VCR on [),e ramble,
control to put the remoZe in VCR mode)
VCR Codes
Remote Control Codes
Programmable for VCR button,
Admila] .................................................................................... 2132 Fmelson ............................ 2012, 2014, 2015, 2021, 2024, 2026,
Adventma ................................................................................ 2026 .......... 2026, 2029, 2030, 2031, 2032, 2033, 2034,2035, 2036,
Aiko .......................................................................................... 2027 .......... 2037, 20_8, 2039, 2040, 2041, 2042,2044, 2045, 2046,
Aiwa ......................................................................................... 2026 ............................................ 2047, 2065, 2113, 2H6, 2117, 2130
Akai ................. 2003, 2004, 2005, 2007, 2008, 2111, 2112, 2113
American High ........................................................................ 2021
Asha ......................................................................................... 2013
Audio Dynamics ........................................................... 2009, 2(}1(}
Audiovox ................................................................................. 2014
Bell _ Howell ........................................................................... 2011
Beaumark ................................................................................. 201_
Bloks/mic ...................................................................... 2012, 2025
Ca}ix ......................................................................................... 2014
CandIe ..................................................... 2013, 2014, 2016, 2016,
............................................................................. 2017, 20U1, 2019
Canon .................................................................. 2021.2(}22, 2114
Capehart ......................................................................... 2020, 2110
CaJver ....................................................................................... 2062
CCE ................................................................................ 2027, 2061
Citizen ........................................................................... 2013, 2(}14,
............................................. 2015, 2016, 2017, 2018, 2019, 2027
Colortyme ................................................................................ 2009
Colt ........................................................................................... 2061
Fisher ............ 2011, 2023, 2048, 2049, 2050, 2051, 2062, 2118
F_i ................................................................................ 2021, 2119
Funai ....................................................................................... 2026
(] a_ la_ d .................................................................................... 2026
(]E ...................................................................... 20(}{}, 2001, 2013,
............................................ 2021. 2022, 2053, 2115, 2120, 2131
GoIdstar .................................................. 2009, 2014, 2018, 2054
Gradiente ................................................................................ 2026
Ha_ley Davidson .................................................................... 2026
Ha_ man Kardon ..................................................................... 2009
Halwood ................................................................................. 2061
Headqua_er ............................................................................. 2011
Hitathi ........................................................................ 2065, 2066,
........................................................ 2057, 21(}7, 2111, 2120, 2122
Hi Q ......................................................................................... 2023
Instant Replay ........................................................................ 2021
JCI ............................................................................................ 2021
JC Penney ............................................... 2009 2010, 2011, 2013,
..................................................... 2014, 2021, 2022, 2055, 2066,
Craig ......................................................... 2013, 2014, 2023, 2061 ....................................................... 2058, 2059, 2060, 2107, 2118
Cmtis Mathes .................................................... 2000, 2009, 2013,
................................... 2016, 2018, 2021, 2022, 2024, 2115, 2131
Cybernex ................................................................................. 2013
Daewo/i .......... 2015, 2017, 2019, 2025, 2026, 2027, 202[4, 2110
Dayrron ..................................................................................... 2110
DBX ................................................................................ 2009, 2010
Dimensia ........................................................................ 2000, 2131
Dynatech .................................................................................. 2026
Ele_m)home ................................................................. 2014, 2029
Jensen ................................................................ 2055, 2056, 2111
JVC ...................................... 2009, 2010, 2011, 2018, 2111, 2123
Kenw/l/id ................... 2009, 2010, 2011, 2016, 2018, 2111, 2123
KIH .......................................................................................... 2061
Kodak ............................................................................ 201,I, 2021
lloyd ....................................................................................... 2026
[ogik ....................................................................................... 2061
LXI ........................................................................................... 2014
Magnavox ....................................................... 2021, 2022, 2062,
Eie_rroph//nic .......................................................................... 2014 ....................................................... 2063, 2104, 2105, 2108, 2124
Chapter 2Graphics contained within this publication are for representation onl}4 11

Using the Remote Controi
VCR Codes continued
Magnin ................................................................................... 2013
Ma_antz........ 2{}{}9, 2010, 2{}11, 2016, 201B, 2021, 2062, 2{}64
Ma_ta ...................................................................................... 2{}14
MasushRa .............................................................................. 2{}21
Mei ......................................................................................... 2{}21
Memolex...... 2011, 2013, 2{}14, 2021, 2023, 2026. 21(}4, 2132
MGA .................................................................. 2029, 2{}65, 2113
MGN Technology .................................................................. 2{}13
Midland .................................................................................. 20S3
MinoJta ............................................................. 2055, 2(}56, 2107
Mitsubishi ............ 2{}29, 2{}55, 2056, 2{}65, 2{}66, 2067, 2{}68,
........... 2069 2070, 2071, 2072, 2{173, 2074, 2106, 2113, 2123
Montgomely Ward .................................................... 2075, 2132
Iatung ......................................................................................... 2111
]EAC ..................................................................... 2026, 2085. 2111
] ethnics .......................................................................... 2021, 2109
]eknika ........................................... 2014, 2021, 2026, 2100, 2129
IMK ...................................................................... 2013, 202& 2047
Ioshiba ....................... 2015. 2049, 2051, 2055, 2065, 2093, 2116
I otevsion ........................................................................ 2013, 2014
United_ ....................................................................................... 2013
Vector Research ........................................ 2009, 2010, 2015, 201(_
Victor ......................................................................................... 2010
Video Concepts ............................... 2009, 2010, 2015, 2016, 2113
Videosonic ................................................................................. 2013
Wards ........................................................ 2013, 2014, 2015, 2021,
MotomJa ..................................................................... 2021, 2132 ........................................... 2023, 2026, 2029 2055, 2056, 2061,
M'[C ............................................................................. 2013, 2126 .................................... 2096, 2101, 2102, 2103, 2107, 2116, 2132
Multitech .................................... 2013, 2016, 2026, 2053, 2061
NEff ............................................... 2009. 2010, 2011,2016, 2018,
............................................ 2064, 2076, 2078, 2079, 2111, 2123
Nikko ...................................................................................... 2014
NobleR .................................................................................... 2013
(Rympus ................................................................................. 2021
Opfimus ....................................................................... 2014, 2132
Optonica ................................................................................ 2096
Panasonic ......................... 2021, 2022, 2109, 2125, 2126, 2127
Pentax .......................................... 2016, 2{}55, 2056, 2 iO7, 212{}
Pentex Resem ch .................................................................... 2018
Philco ..................................................... 2021, 2022, 2062, 2063
Philips .................................................... 2021. 2062, 2096, 2124
PiIot ........................................................................................ 2014
Pkmeel ........................................ 2010, 2055, 2080, 2081, 2123
Portland .................................................. 2016, 2017, 2019, 2110
Prosean ............................................................. 2000, 2001, 2131
Pro*co ..................................................................................... 2061
PuIsal ..................................................................................... 2104
0uarrer .................................................................................... 2011
0uarIz ..................................................................................... 2011
Ouasar ............................................................... 2021, 2022, 2125
RCA ...................... 2000, 2{}{}1,2003, 2{}1L 2021, 2{}55, 2056,
.................. 2082, 2{}83, 20{_4, 2085, 2086, 2087, 2088, 2{}89,
....................... 2090, 2091, 2107, 2115, 2120, 2125, 2131, 2133
Radioshack/Realislie ............................ 2011, 2013, 2014. 2021,
.................... 2022. 2023, 2026, 2{}29, 2{}49, 2050, 2096, 2132
Radix ...................................................................................... 2014
Randex ................................................................................... 2014
Rieoh ...................................................................................... 212B
Runco ..................................................................................... 2104
Samsung ........................... 2005, 2013, 2{}15. 2033, 2{}53, 2112
Sanky ........................................................................... 2104, 2132
Sansui ..................................................... 2010, 2092, 2111, 2123
Sany{} ................................................................ 2{}11, 2{}13, 2023
Scott ............ 2{}12,2015, 2025, 2{}J2, 2038, 20{}5, 2093, 2116
Sems ............................................ 2011, 2014, 2021, 2023, 2048,
............................... 2049, 2050, 2051, 2055, 2056, 2107, 2118
Sharp ..................... 2017, 2029, 2094, 2095, 2096, 2097, 2132
Shintom ................................................. 2004, 2056, 2061, 2098
Shogun ................................................................................... 2013
Signature ............................................................................... 2132
Singm ................................................................ 2021, 2(}61,212B
Sony ....................................................... 2004, 2098, 2099, 2119
SIS ............................................................................... 2021, 2107
Sylvania ................ 2021, 2022, 2026, 2062, 2063, 2065, 2124
Symphonic ............................................................................ 2026
Tandy ...................................................................................... 2011
Tashiko ................................................................................... 2014
XR 1000 .............................................................. 2021, 2026, 2061
Yamaha ............................................. 2009, 2010, 2011, 2018, 2111
Zenith ............................................... 2004, 2098, 2104, 2119, 2128
DVDcodes
Programmable for DVD button,
Aiwa ........................................................................................... 3009
Apex ................................................................................ 3023, J024
GE ............................................................................................... 3000
Hitachi ....................................................................................... J008
3VC. ................................................................................. 3002, 301(}
Konka ............................................................................... 3()11, Jo12
Magnavox ................................................................................. 1003
Mitsubishi .................................................................................. 1004
Panasonk .................................................................................. t013
Philips ....................................................... 3003, 3019, 3021, 3022
Pkmeer ....................................................................................... 3005
Pmscan ...................................................................................... 1000
RCA ................................................................................. 3000, 3001
Samsung .................................................................................... 3{}25
Sanyo ......................................................................................... t014
Sony ..................................................................... 300b, 3015, 301b
Ioshiba ................................................................. 3{)(/7, 3{/17, 3020
Zenith ......................................................................................... 30111
12 Graphics contained within this publication are for representation onl_ Chapter 2

Channel Banner
There are several items that might appear on-screen when
you press the I!/or INFO button on the remote, This display is
called the Channd Bannen The following list describes the
items on the Channel Banner screen (left to right and top to
bottom),
SAP
KidPass: 2:24
CC
Stereo or Mono
Skip: 0:30
07:18em
06 ABCDEF
Displayed when the current channel
is broadcasting SAP {Second Audio
Program) information,
Displayedwhen V-Chip hasbeen
activated.
Displayedwhen KidPassis set and the
length of time remaining.
Displayedwhen ClosedCaptioning is
available on the current channel.
Stereo displayed when the current
channel is broadcasting in stereo,
Mono displayed when the current
channel is broadcasting in mono.
Corresponds to the SKIP button.
Shows the amount of time left before
the ]V switches back to the previous
channel,
Displays the current time.
Displays the current channel and
label assigned to the channel.
Displayed when you mute the sound
Why You Should Use the Auto Tuning Feature
The auto tuning feature tunes the ]V to the correct channel for different
components you have connected to your _/{like a VCR, DVD Player, etc.}. When
you set up auto tuning in the menu system you don't have to remember to change
your R/to channel 3, for example, when you want to watch the tape in your VCR,
How to Set Up the Auto Tuning Feature
The way you set up the auto tuning feature in the ]!!'s menu corresponds to the
component buttons on the remote and the way you have each component
connected to your _/. When you set up auto tuning, you're telling the I1/what
channel to tune to when you press the VCR or DVD button on the remote control.
1, Press MENU (the MAIN MENUappears},
2, Highlight Setup and press OK on your remote control.
3 Highlight Auto Tuning and press OK.
Chapter 3 Graphics contained within this publication are for representation onl}4 13

Usin 9 the TV s Features
4 Choose which channel you want to set:
Set VCR1 Lets you set up the channel the TV tunes to when you press the VCR
button.
Set VCR2 Not available with your remote control.
Set SAT/CABLE Not available with your remote control.
Set DVD Lets you set up the channel the _/tunes to when you press the DVD
button.
5. Press the right arrow button to select the choice that matches the way you
have the component connected to this IV,
The choices and a brief explanation foJ]ow:
N/A Choose this if you don't have this particular component
connected to the TV, or if you don't want the W to
automatically tune to the correct channel when you're using
this component,
CH02 (SAT/CABLE only- Not available with your remote
control).
CH03 or 04 Component is connected to the _/ANT jack on
the back of the TV, and you want the 1!/to tune to channel 3
or 4 when you press the corresponding button on the
remote. Reminder: make sure the component's Channel 3/4
switch is set to the appropriate channel.
WD1 Component is connected to the VIDEO 1VIDEO jack on
the back of the TV and you want the R/to tune to a video
input channel when you press the corresponding button.
FRNT(Front Video Input) Component is connected to the
VIDEO jack on the front of the IX/and you want the R/to
tune to the front video input channel when you press the
corresponding button.
Parental Controls and V-Chip
The choices in the USA V-CHIP menu involve software inside your TV (referred to as
V-Chip) which allows you to block R/programs and movies based on violence, sex,
or other content you may believe children should not view.
Once you block programs, you can unWock programs by entering a password.
By default, the software inside your _/is turned "off" For instructions to turn on
V-Chip, go to page 21
14 Graphics contained within this publication are for representation onl_ Chapter 3

Usin 9 the Features
How V-Chip Works
V-Chip reads the program's age-based rating (W-MA, TV-14, etc.) and content
themes [(Violence (V), Adult Language {L), ere.l). If you have blocked the rating
and/or content themes that the program contains, you will receive the message
This channel has not been approved for viewing. Change channel or press OK to
enter password and temporarily deactivate the Parental Control
Broadcasters are not required to provide content themes, so programs received
with no content themes will only be blocked if you block their age-based rating.
You can also block out programs that have been given a rating of Not Bated, and
programs that are considered unrated. The ]V age-based ratings and content
themes you ean block follow:
USA V-Chip Rating System
TWMA (Mature Audience Only) Specifically designed to be viewed by adults and
may be unsuitable for children under 17, It contains one or more of the following
content themes: crude indecent language (L), explicit sexual activity (S), or
graphie violenee (V).
W-14 [Parents Strongly Cautioned) Contains some material that many parents
would find unsuitable for children under 14. Parents are strongly urged to exercise
greater care in monitoring this program and are cautioned against letting ehildren
under the age of 14 watch unattended. This program contains one or more of the
following content themes: intensely suggestive dialogue (D], strong eoarse
language (L), intense sexual situations (S], or intense violence (V).
W-PI3 {Parental Guidance Suggested) Contains material that parents may find
unsuitable for younger ehildren. Many parents may want to watch it with their
younger ehildren. The program contains one or more of the following content
themes: some suggestive dialogue (D], infrequent coarse language (L),some sexual
situations {S], or moderate violence (V].
W-6 (6eneral Audience) Most parents would find this program suitable for all
ages. It contains little or no sexual dialogue (D) or situations (S), no strong
language (L), and little or no violence (V).
W-Y7 {Directed to Children 7 years and older) Designed for children ages 7 and
above. It may be more appropriate for children who have acquired the
developmental skills needed to distinguish between make-believe and reality.
Themes and elements in this program may include mild fantasy violence (iV] or
eomedie violence, or may frighten children under the age of 7.
W-Y (All Children) Themes and elements in this program are designed for a young
audience, including children from ages 2-6. It is not expected to frighten younger
children
Chapter 3Graphics contained within this publication are for representation onl_ 15

Usin 9 the TV% Features
Canadian English V-Chip Rating System
18+ {Adults) Programming intended for adults I8 and older. It may contain
elements of violence, language, and sexual content which could make it unsuitable
for viewers under 18, Violence Guidelines: May contain violence integral to the
development of the plot, character or theme, intended for adult audiences, Other
Content Guidelines: May contain graphic language and explicit portrayals of
nudity and/or sex.
14+ IViewers 14 and over) Programming contains themes or content which may
not be suitable for viewers under the age of 14. Parents are strongly cautioned to
exercise discretion in permitting viewing by pre-teens and early teens. Violence
Guidelines: May contain intense scenes of violence. Could deal with mature themes
and societal issues in a realistic fashion. Other Content Guidelines: May contain
scenes of nudity and/or sexual activity. There could be frequent use of profanity.
PG {Parental Guidance) Programming intended for a general audience but which
may not be suitable for younger children (under the age of 8). Parents may
consider some content inappropriate for unsupervised viewing by children aged 8-
13. Violence Guidelines: Depictions of conflict and/or aggression will be limited
and moderate; may include physical, fantasy, or supernatural violence. Other
Content Guidelines: May contain infrequent mild profanity, or mildly suggestive
language. Could also contain brief scenes of nudity.
G {General Audience) Programming considered acceptable for all ages groups.
While not designed specifically for children, it is understood younger viewers may
be part of the audience. Violence Guidelines: Will contain very little violence,
either physical or verbal or emotional. Will be sensitive to themes which could
frighten a younger child, will not depict realistic scenes of violence which
minimize or gloss over the effects of violent acts. Other Content Guidelines: There
may be some inoffensive slang, no profanity and no nudity.
C8+ {Children 8 and Older) Programming generally considered acceptable for
children 8 years and over to watch on their own. Violence Guidelines: Violence will
not be portrayed as the preferred, acceptable, or only way to resolve conflict or
encourage children to imitate dangerous acts which they may see on television.
Any realistic depictions of violence will be infrequent, discreet, of low intensity and
will show the consequences of the acts. Other Content Guidelines: There will be no
profanity, nudity or sexual content.
C {Children) Programming intended for children under age 8. Violence Guidelines:
Careful attention is paid to themes which could threaten children's sense of
security and well being. There will be no realistic scenes of violence. Depictions of
aggressive behaviour will be infrequent and limited to portrayals that are clearly
imaginary, comedie or unrealistic in nature. Other Content Guidelines: There will be
no offensive language, nudity or sexual content.
16 Graphics contained within this publication are for representation onl_ Chapter 3

Using the Td's Features
Canadian French V-Chip Rating System
18+ {Adults) Programming is for adults only.This program contains sustained
violence or extremely violent scenes,
16+ (Viewers 16 and over) Programming is not suitable for those under age 16.
This program contains frequent scenes of violence or intensely violent scenes.
13+ (Viewers 13 and over) Programming may not be suitable for children under
the age of 13. This program either contains several violent scenes or one or more
scenes that are violent enough to affect them. Viewing in the company of an adult
is therefore strongly recommended for children under the age of 13.
8+ (Viewers 8 and over) Not recommended for young children. This program is
suitable for most audiences, but it contains mild or occasional violence that could
upset young children. Viewing in the company of an adult is therefore
recommended for young children {under the age of 8} who do not distinguish
between reality and imagination.
G (General Audience) This program is suitable for audiences of all ages. It contains
no violence, or any violence that it does contain is either minimal or is presented
in a humorous manner, as a caricature, or in an unrealistic way.
USA V-Chip IV Rating Limit
The V-Chip 1V Rating Limit lets you decide which TV
programs can and cannot be viewed.
To set R/programming limits:
I. Choose Parental Control from the MAIN MENU (the
PASSWORD screen appears the first time you enter the
Parental Control menu). Create your password using
the number buttons on the remote.
2,
3.
Highlight and select USA V-Chip. Then select /1/
Ratings.
Once you get to the TVRATING LIMITscreen, use the
arrow buttons and OK on your remote to change the
status of a _/program rating or content theme from
View to Block.
4 For IV rating limits to take effect, turn on V-Chip
active in the PARENTALCONTROLmenu (box has check
mark}.
The following sections give you more details about how to
change the status of _/program limits.
Note: If you larger )lout pdssword you con reset iL Make sure [he
TV_soil 3_mu/laneous/FprcssondholdVOL on[hc, TV'sHont
panel and CLEARon the remote/or approximatc'/y 5seconds
Enter a new password next time you access lhe PARENTAL
CONTROLmenu
Chapter 3 Graphics contained within this publication are for representation onl}4 17

Usin 9 the TV's Features
The V-Chip Rating Screen
The following is an example of where items are located within the TVRATING LIMIT
sereeR
Rating Status Field
Letsyou select whether the statusof the age-based rating limit to the
lefl is View or Block.
Rating Field
Lets you select from a
list of age-based
ratings you can block
Or VieW.
Content Themes
Dsts the content themes you
can block or view.
Content Status Fields
Lets you select which content
themes to view for the
selected rating, and whether
the status of the content
theme is currently View (V} or
Block {B).
Rating Settings Area
Lets you see the current block/view state of age based ratings and associated
content.
Hierarchy of Age-Rased Ratings
I_/ MA Meture Audience Only
11/14 Porents Strongly Ceutioned
TV PG PorentM Ouidence Suggested
11/6 Geneml Audience
TV Y7 Directed to Children 7 yeers end
older
TV Y All Children
Blocking Age-Based Ratings
You can automatically block all program ratings above a
specified age-based rating level.
To block programs with higher ratings:
1. Pressthe up or down arrow button to scroll to the rating
corresponding with the lowest rating you do not want
the child to watch,
2. Pressthe OK button to toggle between Viewand Block.
The status for the rating listed to the left and all higher
ratings automatically changes to Block.
3. Pressthe up or down arrow button to highlight Go back
and press OK,
4. Turn on V-Chip active in the PARENTALCONTROL menu
(box has check mark} for rating limits to take effect,
Viewing Age-Based Ratings
After you block age-based ratings, you can change some of
the ratings back to View.
1. Pressthe up or down arrow button to select the rating
with a status of Block.
2. Press OK to select View.
18 Graphics contained within this publication are for representation onl_ Chapter 3
This manual suits for next models
3
Table of contents
Other RCA TV manuals