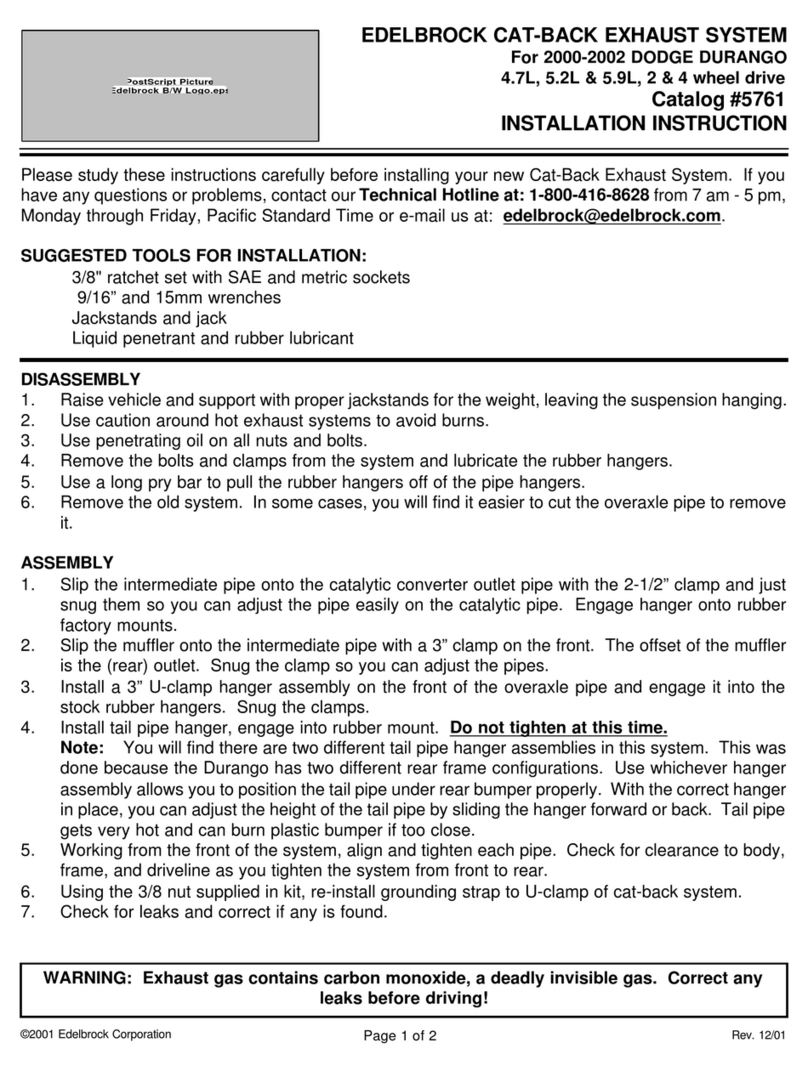
ReadyLift 69-2070 User manual

www.ReadyLIFT.com - Phone: (877) 759-9991
69-2070-IM-AA
(877) 759-9991
MON-FRI 7AM-4PM PST
OR
WEBSITE: ReadyLIFT.COM
**Please retain this document in your vehicle at all times.**
IF your ReadyLIFT®product has a damaged or missing
part, please contact customer service directly and
a new replacement part will be sent to you immediately.
For warranty issues, please return to the place of
installation and contact ReadyLIFT.
Limited Lifetime Warranty
This unique product warranty proves our commitment to the quality and reliability of every product that
ReadyLIFT manufactures. The ReadyLIFT product warranty only extends to the original purchaser of
any ReadyLIFT product, if it breaks, we will give you a new part. Warranty does not apply to discontin-
ued parts.
Our Limited Lifetime Warranty excludes the following ReadyLIFT items; bushings, bump stops, ball
joints, tie rod ends, heim joints and shock absorbers. These parts are subject to wear and are not con-
sidered defective when worn. They are warranted for 12 months from the date of purchase for defects
in workmanship.
This product warranty is voided if the vehicle is not aligned after kit installation and proper maintenance
is routinely done.
Product purchased directly from ReadyLIFT has a 90 day return policy on uninstalled products from the
date of purchase (may be subject to restocking fee). Uninstalled product returns must be in the original
ReadyLIFT packaging. Please call (877) 759-9991 to get an RGA# for any return. Customer is respon-
sible for shipping costs back to ReadyLIFT. Returns without RGA# will be refused. Contact Ready-
LIFT directly about any potentially defective parts prior to removal from vehicle.
ReadyLIFT products are NOT intended for off-road abuse. Any damage or failure as a result from off-
road abuse voids the warranty of the ReadyLIFT product. ReadyLIFT is NOT responsible for any subse-
69-2070 Ford Expedition

www.ReadyLIFT.com - Phone: (877) 759-9991
269-2070-IM-AA
READ INSTRUCTIONS THOROUGHLY AND COMPLETELY BEFORE BEGINNING INSTALLATION.
INSTALLATION BY ACERTIFIED PROFESSIONAL MECHANIC IS HIGHLY RECOMMENDED.
READYLIFT® IS NOT RESPONSIBLE FOR ANY DAMAGE OR FAILURE RESULTING FROM IMPROPER INSTALLATION.
Safety Warning
MISUSE OF THIS PRODUCT COULD LEAD TO INJURY OR DEATH.
Suspension systems or components that enhance the on and off-road performance of your vehicle may cause
it to handle differently than it did from the factory. Extreme care must be used to prevent loss of control or
vehicle rollover during abrupt maneuvers.
Always operate your vehicle at reduced speeds to ensure your ability to control your vehicle under all driving
conditions. Failure to drive safely may result in serious injury or death to driver and passengers.
Driver and passengers must ALWAYS wear your seat belts, avoid quick sharp turns and other sudden maneu-
vers. ReadyLIFT Suspension does not recommend the combined use of suspension lifts, body lifts, or other
lifting devices.
You should never operate your vehicle under the influence of alcohol or drugs.
Constant maintenance is required to keep your vehicle safe. Thoroughly inspect your vehicle before and after
every off-road use.
It is the responsibility of the retailer and/or the installer to review all state and local laws, with the end user
of this product, related to bumper height laws and the lifting of their vehicle before the purchase and installa-
tion of any ReadyLIFT products.
It is the responsibility of the driver/s to check their surrounding area for obstructions, people, and animals
before moving the vehicle.
All raised vehicles have increased blind spots; damage, injury and/or death can occur if these instructions are
not followed. Installation Warning
All steps and procedures described in these instructions were performed while the vehicle was properly sup-
ported on a two post vehicle lift with safety jacks.
Use caution during all disassembly and assembly steps to insure suspension components are not over extend-
ed causing damage to any vehicle components and parts included in this kit.
Included instructions are guidelines only for recommended procedures and are not meant to be definitive.
Installer is responsible to insure a safe and controllable vehicle after performing modifications.
ReadyLIFT Suspension recommends the use of an OE Service Manual for model/year of vehicle when disas-
sembly and assembly of factory and related components.
Unless otherwise specified, tighten all bolts and fasteners to standard torque specifications listed within the
OE Service Manual.
Suspension components that use rubber or urethane bushings should be tightened with the vehicle at normal
ride height. This will prevent premature wear or failure of the bushing and maintain ride comfort.
Larger tire and wheel combinations may increase leverage on suspension, steering, and related components.
Due to payload options and initial ride height variances, the amount of lift is a base figure. Final ride height
dimensions may vary in accordance to original vehicle ride height. Always measure the vehicle ride height
prior to beginning installation.
www.ReadyLIFT.com - Phone: (877) 759-9991
369-2070-IM-AA
VEHICLE HEIGHT MEASURMENTS
Driver
Before Driver
After Passenger
Before Passenger
After
Front
Rear
This suspension system was developed using a 285-75R18 tire with 18” x 9” wheel
and a offset of +44.If wider tires are used, offset wheels may be necessary and
trimming may be required. Factory wheels can be used but are not recommended
with tires over 11.5” wide.
The stock spare rim can be run in an emergency - exercise extreme caution under
stock spare tire operating conditions. Please note that, if running the spare factory
tire, it is done for short distances and a speed not to exceed 45mph or damage to dif-
ferentials may occur.
IMPORTANT NOTE:
This kit was developed using a truck with standard running boards.
Power deployable running boards may interfere with the max tire
size and require trimming or a smaller tire size in a 33” diameter.
Use of a more negative offset wheel than the factory will require a
smaller diameter tire size for clearance.

www.ReadyLIFT.com - Phone: (877) 759-9991
469-2070-IM-AA
BILL OF MATERIALS
Before starting installation:
ReadyLIFT Suspension highly recommends that the installation of this
product be performed by a professional mechanic with experience working on and installing suspension
products. Professional knowledge and skill will typically yield the best installation results. If you need an
installer in your area, please contact ReadyLIFT Suspension Customer Service to find one of our “Pro-
Grade” Dealers. INSTALLATION BY A PROFESSIONAL IS HIGHLY RECOMMENDED.
A Factory Service Manual for your specific Year / Make / Model is highly recommended for reference
during installation.
All lifted vehicles may require additional driveline modifications and / or balancing.
A vehicle alignment is REQUIRED after installation of this product.
Speedometer / Computer recalibration is required if changing +/- 10% from factory tire diameter.
A vehicle lift or hoist greatly reduces installation time. Installation time estimates are based on an avail-
able vehicle hoist.
Front Strut Extension 2
Rear Strut Extension 2
M10 - 1.25 Flange Nut 12
M10 - 1.5 Flange Nut 6
PART/HARDWARE QTY

www.ReadyLIFT.com - Phone: (877) 759-9991
569-2070-IM-AA
ReadyLIFT recommends all steps and procedures described in these instructions be
performed while the vehicle is properly supported on a two post vehicle lift with safety
jacks.
Otherwise, park vehicle on a clean flat surface and block the rear wheels for safety.
Engage the parking brake.
Disconnect the vehicle power source at the ground terminal on the battery.
Lock the steering wheel in the straight forward position with the column lock or steer-
ing wheel locking device.
Raise the front of the vehicle and support with safety jack stands at each frame rail
behind the lower control arms.
Remove the front wheels.
2003-2013:
Remove the brake line /ABS bracket at the
frame rail. Loosen but do not remove the
upper ball joint nut. Remove the lower
sway bar end link from the lower control
arm.

www.ReadyLIFT.com - Phone: (877) 759-9991
669-2070-IM-AA
Strike the upper ball joint boss with a
dead blow hammer to dislodge the taper.
Remove the upper ball join nut hardware
and separate the upper control arm from
the knuckle. Loosen but do not remove
the upper control arm hardware.
Support the lower control arm with a suit-
able jack. Loosen but do not remove the
LCA hardware at the frame. Remove the
lower strut hardware from the LCA.
Remove the upper strut mount from the
frame. Lower the LCA down while taking
care to not over extend the brake lines
and ABS wires. Adjust as necessary. Re-
move the strut from the vehicle.
Install the ReadyLIFT strut extension to
the strut using the factory hardware.
Torque to 30 ft-lbs.

www.ReadyLIFT.com - Phone: (877) 759-9991
769-2070-IM-AA
Install the strut to the frame using the
provided M10 flange nuts. Do not tighten
at this time.
Raise the lower control arm up. Install the
lower strut using the factory hardware. Do
not tighten at this time.
Connect the UCA to the knuckle using the
factory ball joint hardware. Torque to 65 ft
-lbs. Install the sway bar end link to the
LCA using the factory hardware. Torque to
35 ft-lbs.
Attach the brake line/ABS bracket to the frame rail using the factory hardware. Do not
over tighten as this is a self tapped hole and is easily stripped. Install the wheels and
lower the vehicle to the ground. Torque the lug nuts to the wheel manufacturers
specs. Jounce the vehicle to settle the suspension to the new ride height.
Torque the upper control arm hardware to 125 ft-lbs. Center the lower control arm
bolts in their slots and torque to 125 ft-lbs (final torque to be done by the alignment
technician).

www.ReadyLIFT.com - Phone: (877) 759-9991
869-2070-IM-AA
2014 - 2017:
Remove the ABS harness clips on the
brake line bracket, frame rail and rubber
brake line. Let hang out of the way.
Remove the brake line bracket at the
frame rail.
Remove the brake line bracket and ABS
harness on the knuckle.
Remove the axle nut cover.

www.ReadyLIFT.com - Phone: (877) 759-9991
969-2070-IM-AA
Remove the axle nut.
Locate the vacuum line at the hub actuator
and remove.
Remove the tie rod end at the knuckle. Use
a dead blow hammer, strike the tie rod end
boss to dislodge the taper.
Remove upper ball joint from the knuckle.
Strike the ball joint boss with a dead blow
hammer to dislodge the taper.

www.ReadyLIFT.com - Phone: (877) 759-9991
1069-2070-IM-AA
Loosen but do not remove the upper con-
trol arm hardware. Raise the upper control
arm up and tilt the knuckle away from the
frame. Carefully disengage the CV axle
from the hub and actuator. Be careful not
to damage the Vacuum actuator. The in-
ternals are made of plastic and easily
damaged.
Support the lower control arm with a suit-
able jack. Loosen but do not remove the
lower control arm to frame mounting
hardware. Remove the lower strut from
the lower control arm. Remove the sway
bar end link from the lower control arm.
Carefully lower the control arm and knuck-
le assembly down until the strut clears the
control arm. Make sure to not over extend
the brake lines and ABS harness. Adjust
as necessary. To aid in removal, push
knuckle towards the frame as you lower
the control arm. Remove the strut from
the vehicle by undoing the upper strut
hardware.
Install the ReadyLIFT front strut spacer
using the factory hardware. Torque to 30
ft-lbs.

www.ReadyLIFT.com - Phone: (877) 759-9991
1169-2070-IM-AA
Install the completed strut assembly to
the frame using the provided M10 -1.25
Flange nuts. Do not tighten at this time.
Raise the lower control arm up while guid-
ing the lower strut into place. Install using
the factory hardware. Install the sway bar
end link using the factory hardware.
Torque all to 45 ft-lbs.
Carefully guide the CV axle back into the hub assembly. Rotate the hub by the lugs
while holding the CV axle from rotating, continue rotating the hub until the CV axle
splines and vacuum hub splines lock. You will be able to tell if these are meshed
properly if both the hub and CV axle spin together as the hub is rotated. If the CV ax-
le is not rotating with the hub, continue to rotate the hub until full engagement oc-
curs. If this is not done properly, you may damage the vacuum assembly as the inter-
nals are made of plastic and easily broken. Once you are sure of the full engagement
of the spines, install the factory CV hardware. Torque to 18 ft-lbs.
Install the upper ball joint to the knuckle
using the factory hardware. To get to seat
properly, you will need to raise the lower
control arm upwards with a suitable jack
to “load” the suspension. Once the sus-
pension is loaded, torque the upper ball
joint to 65 ft-lbs. Install the tie rod end to
the knuckle using the factory hardware.
Torque to 45 ft-lbs.

www.ReadyLIFT.com - Phone: (877) 759-9991
1269-2070-IM-AA
Install the vacuum line to the vacuum ac-
tuator by pressing into place.
Install the brake line bracket and ABS har-
ness to the knuckle using the factory
hardware. Torque all to 5 ft-lbs.
Install the brake line bracket to the frame
rail using the factory hardware. Torque to
5 ft-lbs. Install the ABS harness to the
frame rail, brake line bracket, and rubber
brake line using the factory clips.
Install the wheels and lower the vehicle to the ground. Torque the lug nuts to the
wheel manufacturers specs. Jounce the vehicle to settle the suspension to the new
ride height.
Torque the upper control arm hardware to 125 ft-lbs. Center the lower control arm
bolts in their slots and torque to 125 ft-lbs (final torque to be done by the alignment
technician).

www.ReadyLIFT.com - Phone: (877) 759-9991
1369-2070-IM-AA
Rear Install
2003 - 2007:
Block the front wheels for safety, raise the
rear of the vehicle and place jack stands
under the frame rail in front of the lower
control arms. Remove the rear wheels.
Loosen but do not remove the upper and
lower control arm hardware at the frame
and knuckle. Remove the tie rod end from
the knuckle. Strike the tie rod boss with a
dead blow hammer to dislodge the taper.
Separate the tie rod from the knuckle.
Remove the lower strut from the LCA.
Remove the strut top hardware from the
frame rail. Remove the strut from the ve-
hicle.

www.ReadyLIFT.com - Phone: (877) 759-9991
1469-2070-IM-AA
Install the ReadyLIFT strut extension to
the strut using the provided M10 flange
nuts. Torque to 30 ft-lbs.
Install the completed strut assembly to
the frame using the provided M10 flange
nuts. Do not tighten at this time.
Raise the lower control arm and install the
lower strut using the factory hardware. Do
not tighten at this time. Install the tie rod
end to the knuckle using the factory hard-
ware. Torque to 45 ft-lbs.
Install the wheels and lower the vehicle to the ground. Torque the lug nuts to the
wheel manufacturers specs.
Reconnect the vehicle power source at the ground terminal. Jounce the vehicle a few
times to get the suspension to settle to the new ride height.
Torque the upper and lower control arms to 125 ft-lbs, the lower strut hardware to
145 ft-lbs, and the upper strut hardware to 30 ft-lbs. Move to the rear install.

www.ReadyLIFT.com - Phone: (877) 759-9991
1569-2070-IM-AA
2008 - 2017:
Locate the ABS wire harness on the rear
lower control arm.
Remove the plastic clips from the control
arm and frame rail. Let the ABS harness
hang out of the way. Place a suitable jack
under the lower strut mount.
Loosen but do not remove all the trailing arm hardware at the frame and knuckle.
Loosen but do not remove upper control arm hardware at the frame.
Loosen but do not remove the tie rod end hardware at the frame.
Remove the lower strut hardware. Re-
move the lower control arm hardware at
the frame. Lower the control arm from the
frame. Remove the strut from the fame
and vehicle.

www.ReadyLIFT.com - Phone: (877) 759-9991
1669-2070-IM-AA
Locate the ReadyLIFT strut spacer. Install
using the provided M10 - 1.5 flange nuts.
Torque to 30 ft-lbs. Install the completed
strut assembly into the frame using the
provided M10 - 1.25 flange nuts. Do not
tighten at this time.
Raise the lower control up to the strut. In-
stall the strut hardware. Do not tighten at
this time. Raise the lower control arm up
to the frame and install the control arm
hardware. Do not tighten at this time. In-
stall the ABS harness clips to the lower
control arm.
Install the rear wheels and lower the vehicle to the ground. Torque the lug nuts to the
wheel manufacturer specs.
Jounce the vehicle to get the suspension to settle to the new ride height. Torque the
upper/rear lower control arm and trailing arms hardware to 125 ft-lbs, the tie rod arm
at the frame to 100 ft-lbs (final torque to be done by alignment technician), the upper
strut mount to 30 ft-lbs, and the lower strut mount to 145 ft-lbs.
Reconnect the battery ground terminal. Start the vehicle and turn the steering wheel
lock to lock and verify all clearances between tire, body and suspension components.
Adjust as necessary.
Have the vehicle alignment set to the recommended specs on the last page of this in-
struction booklet.

www.ReadyLIFT.com - Phone: (877) 759-9991
1769-2070-IM-AA
FAILURE TO PERFORM THE POST INSPECTION CHECKS MAY RESULT IN VEHICLE
COMPONENT DAMAGE AND/OR PERSONAL INJURY OR DEATH TO THE DRIVER
AND/OR OTHERS. Final Checks & Adjustments
Once the vehicle is lowered to the ground, check all parts which have rubber or urethane components to en-
sure proper torque. Torque lug nuts to the wheel manufacturer specs. Move vehicle backwards and forwards
a short distance to allow suspension components to adjust. Turn the front wheels completely left then right
and verify adequate tire, wheel, brake line, and ABS wire clearance. Test and inspect steering, brake and sus-
pension components for tightness and proper operation. Inspect brakes hoses and ABS lines for adequate
slack at full extension, adjust as necessary.
RECHECK ALL HARDWARE FOR PROPER TORQUE VALUES AFTER 500 MILES, AND THEN PERIOD-
ICALLY AT EACH SERVICE INTERVAL THERAFTER.
Vehicle Handling Warning
Increasing the height of your vehicle raises the center of gravity and can affect stability and control. Use
caution on turns and when making steering corrections.
Vehicles with larger tires and wheels will handle differently than stock vehicles. Take time to familiarize your-
self with the handling of your vehicle.
Wheel Alignment/Headlamp Adjustment
It is necessary to have a proper and professional wheel alignment performed by a certified alignment techni-
cian. Align the vehicle to factory specifications. It is recommended that your vehicle alignment be checked
after any off-road driving.
In addition to your vehicle alignment, for your safety and others, it is necessary to check and adjust your ve-
hicle headlamps for proper aim and alignment. If the vehicle is equipped with active or passive safety/
collision monitoring and/or avoidance systems including, but not limited to, camera- or radar-based systems,
check and adjust your vehicle’s systems for proper aim and function.
RECOMMENDED ALIGNMENT SPECS
Front Driver Passenger Tolerance Total / Split
Camber -0.3 -0.3 +/- 0.5 +0.0
Caster +3.0 +3.0 +/- 0.5 +0.0
Toe +.07 +.07 +/-0.05 +.14
Rear Driver Passenger Tolerance Total / Split
Camber -0.5 -0.5 +/- 0.5 +0.0
Toe +.05 +.05 +/-0.05 +.10
Table of contents
Popular Automobile Part manuals by other brands

BBK
BBK 1759 installation instructions

Edelbrock
Edelbrock 71850 owner's manual

Atmel
Atmel Car Access and Tire Pressure Monitoring... brochure

Edelbrock
Edelbrock 3886 installation instructions

Edelbrock
Edelbrock 3628 installation instructions

SAF
SAF SKRS 9042 SK 500 plus System maintenance and repair manual

Ridewell Suspensions
Ridewell Suspensions RSS-233T-20K Installation and service manual

Witter
Witter HN71U Fitting instructions

Edelbrock
Edelbrock 71001 installation manual

Whelen Engineering Company
Whelen Engineering Company Howler installation guide

Stealth International
Stealth International WSMG1 Service manual

Mini Mania
Mini Mania NMB4000 instruction manual