Orion Street Lantern
Product Codes: ORN20/T3/N3/740, ORN40/T3/N3/740, ORN60/T3/N3/740, ORN80/T3/N3/740,
ORN100/T3/N3/740,
Box Contents -
1 x Orion Street Lantern, 1 x IP Rated Connector, 1 x Low Prole NEMA3 Blanking Plug
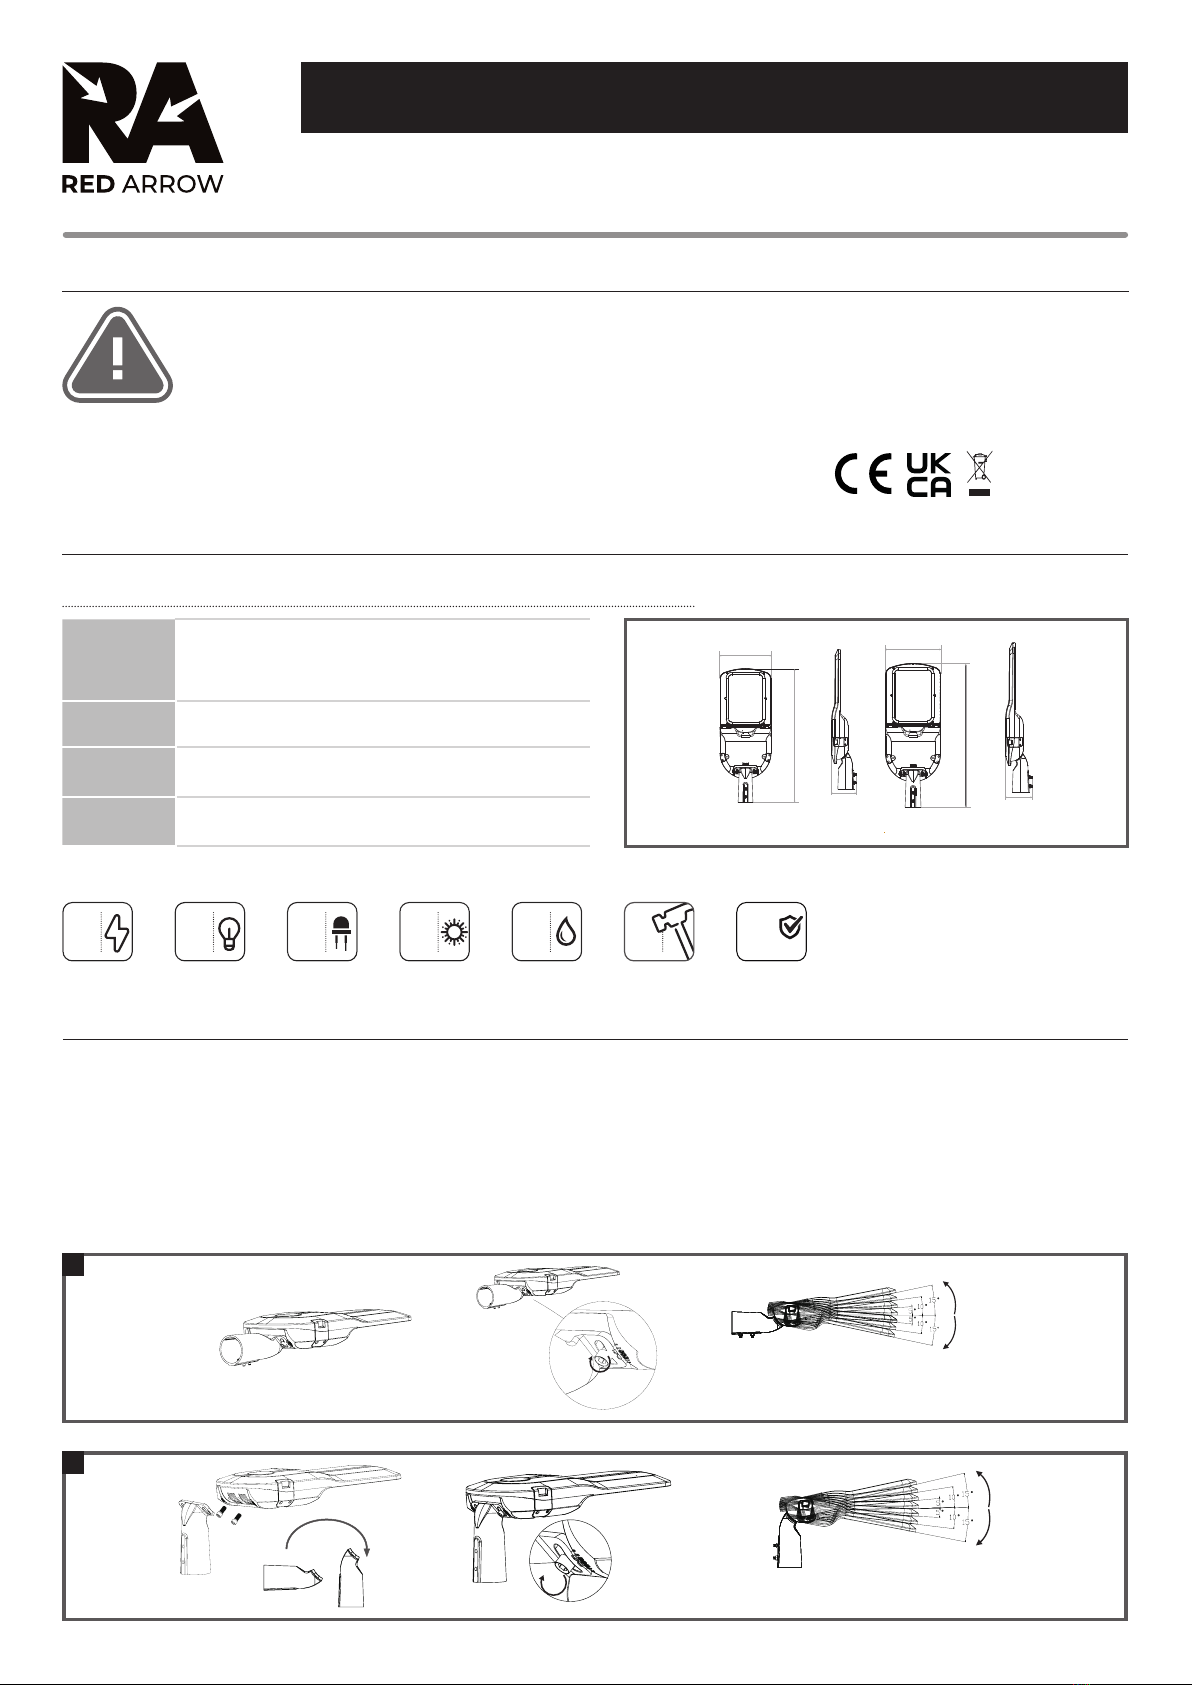
Dimensions:
ORN20/T3/N3/740, ORN40/T3/N3/740 & ORN60/T3/N3/740
- W: 200 x H: 568 X D: 109mm
ORN80/T3/N3/740 & ORN100/T3/N3/740
- W: 240 x H: 613 D: 109mm
Material: Body: Die-Cast Aluminium
Lens: Polycarbonate
Working
Temperature: -40°C - 50°C
Included: IP Rated Connector
Low Prole NEMA3 Blanking Plug
Safety Warning
• The installation should be carried out
by a qualied electrician in compliance
with the current edition of the IEE
Wiring Regulations.
• Prior to installation, carry out the
necessary risk assessment considering
the people who could be at risk,
the level of risk and the precautions
required to control the risk
• Ensure that the circuit supply is
isolated either by the circuit supply
fuse being removed or the applicable
circuit breaker being turned o before
installation or any maintenance.
• Check the total load on the circuit
ensuring the luminaire does not exceed
the rating of the circuit cable, fuse or
circuit breaker.
• Long-term use and voltage uctuations
can reduce the life span of the tting.
• If the tting incorporates control gear,
ensure careful sizing to avoid instances
of nuisance tripping of the protective
device used in the installation.
• Follow the provided installation
instructions, using the xings supplied
or recommended.
• Keep out of reach of children.
INSTALLATION INSTRUCTIONS
PAGE 1 (FRONT PAGE)
Specication
230V IP66 5
YRS
GUARANTEE
IK08
20-100
WATT LED 4000K
Note: This is a Class I Luminaire - Earth connection is required
1. Isolate the mains supply before commencing the installation.
2. The Orion can be mounted in both horizontal and vertical post applications. Depending on mounting orientation follow the following steps to set the
collar to the correct angle.
3. For horizontal installation loosen the screws on the collar, adjust the angle (if required) and then tighten to secure into position (follow the required
torque).
4. For vertical installation fully remove the screws and the collar, rotate the mounting head and rex to the lantern head. Adjust the angle and then tighten to
secure into position (follow the required torque).
Installation Instructions
200mm
109mm
568mm
20W/40W/60W
109mm
613mm
80W/100W
3
Mounting Angle: - 15deg~+15 deg adjustable
M8/22Nm
4
Mounting Angle: - 15deg~+15 deg adjustable
M8/22Nm


