Quesons? Call 1.800.542.7553 1
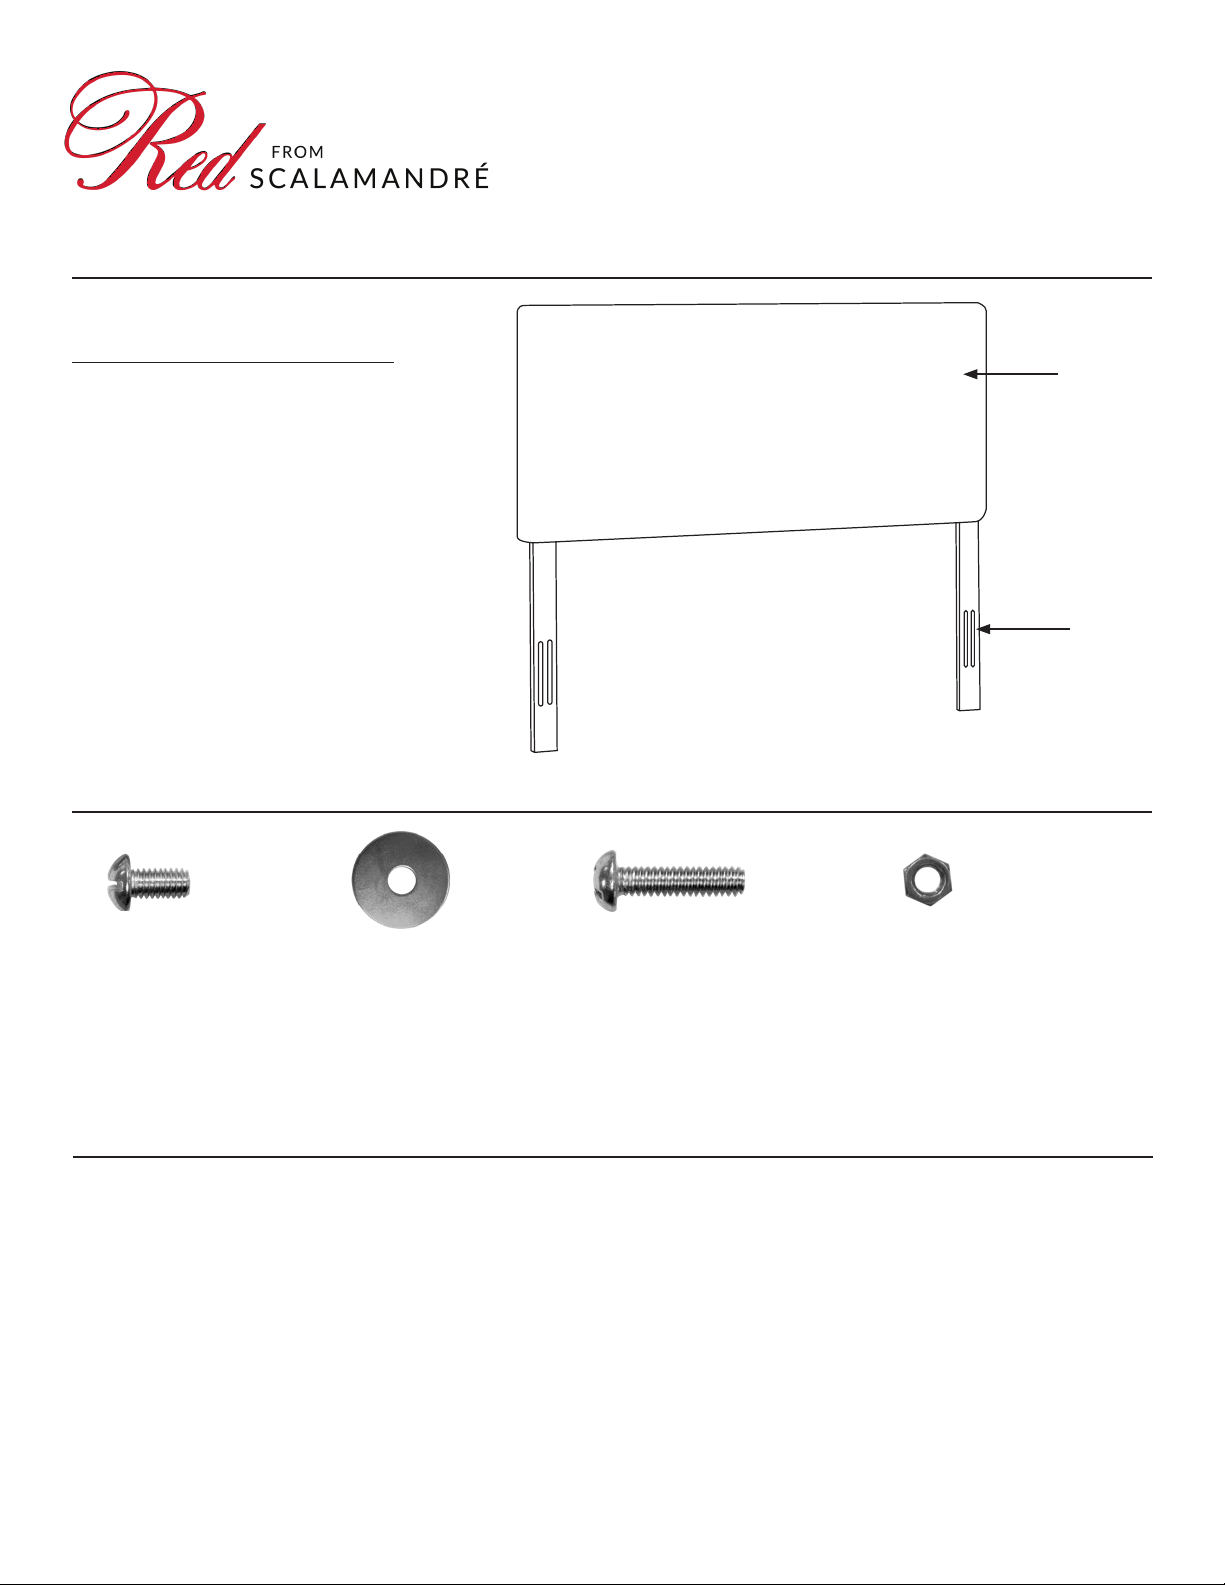
Components:
Geneva Headboard
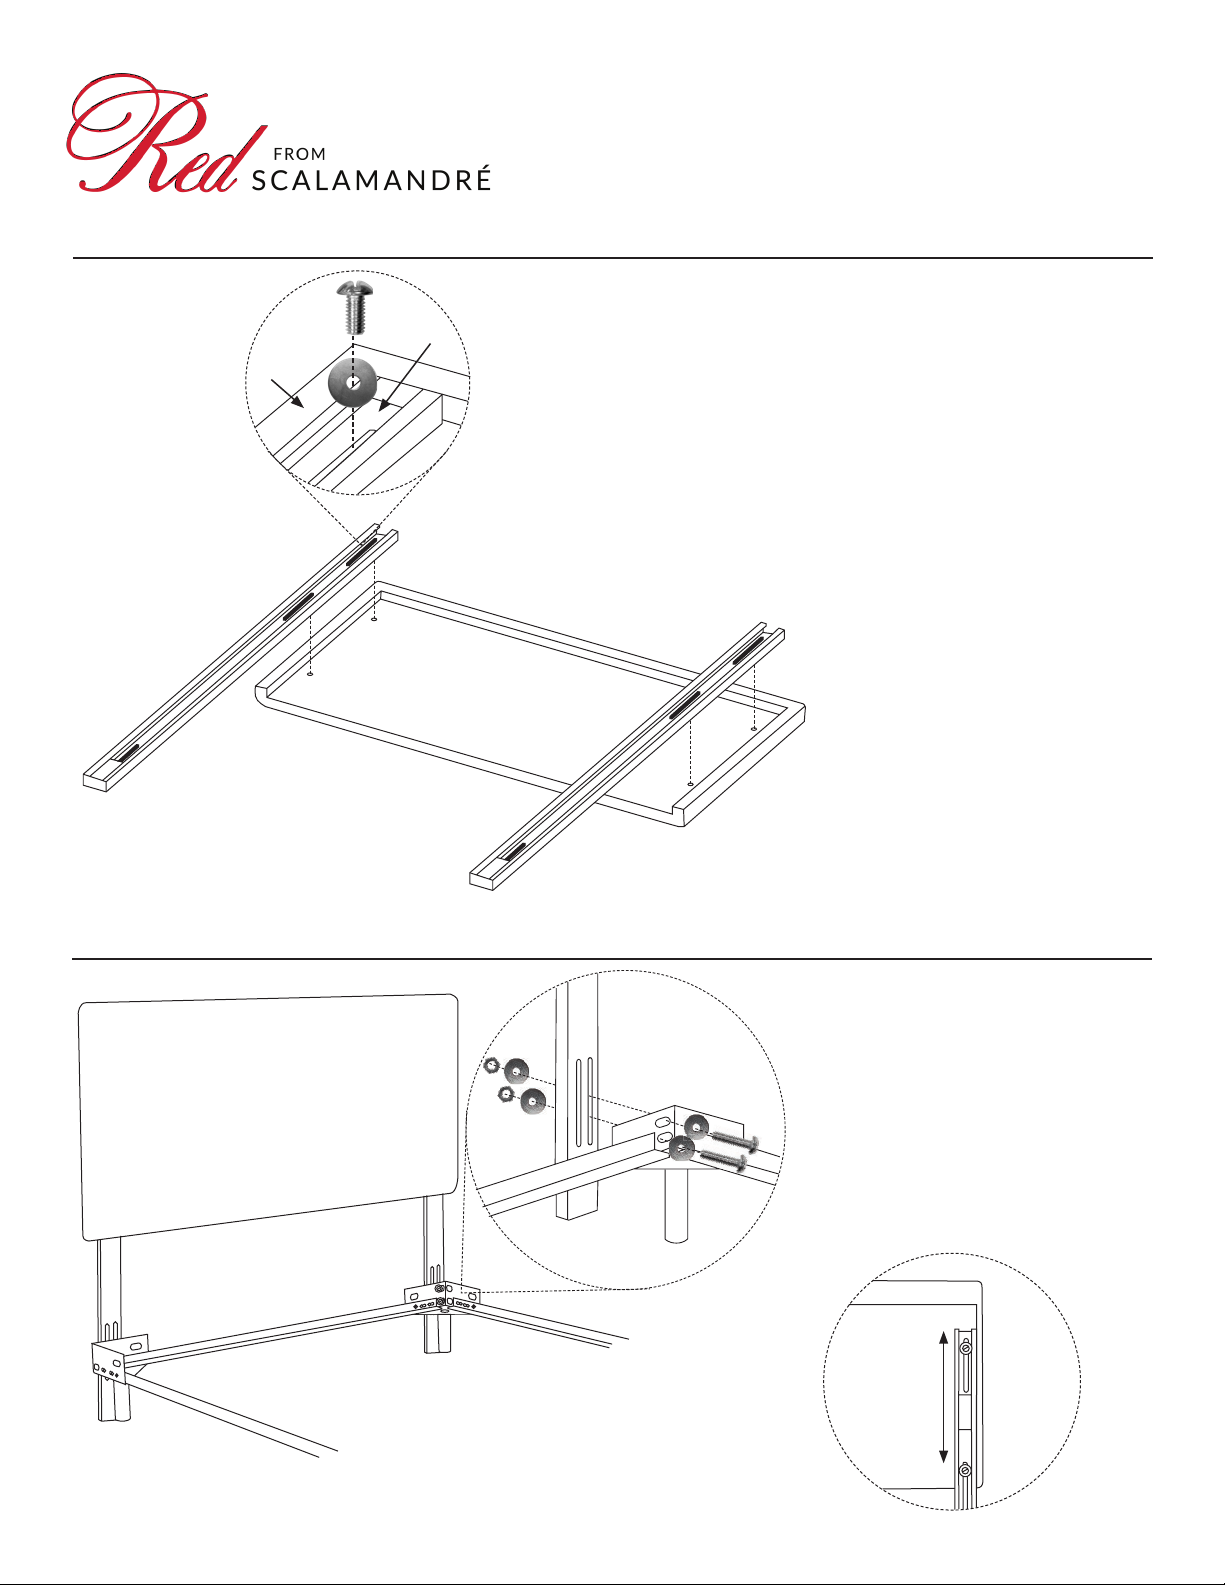
Assembly
Item Descripon Qty
AHeadboard 1
BHeadboard Leg 2
Limited Warranty
Skyline Furniture Inc. guarantees its
upholstered furniture against defects in
for upholstered furniture is not covered by the
warranty. Vacuum for regular cleaning.
Limite de Garana
-
aspirar.
Garane Limitée
Skyline Furniture Inc.
-
-
avec un aspirateur.
(H1) x 4
(H2) x 12
(H3) x 4
(H4) x 4
Please note: you will need a at head screwdriver and a wrench to assemble your headboard.
A
B
Headboard Hardware:
Please note: actual headboard may
look dierent than illustraon.
Twin - 620