red lion IAMS 0001 User manual

US/UK
FR
DE
Page 1
Page 27
Seite 53
Models No. 0001 /
0011 / 0010
Drawing No. LP0767
Version No. 102
Revision Date 08/08
IAMS
Red Lion Controls Worldwide
Headquarters
20 Willow Springs Circle
York, PA 17406
USA
Phone: +1 (717) 767-6511
Fax: +1 (717) 764-0839
Red Lion Controls AP
Unit 101, XinAn Plaza
Building 13
No.99 Tianzhou Road
ShangHai, P.R. China 200223
Phone: +86 21 6113-3688
Fax: +86 21 6113-3683
Red Lion Controls BV
Printerweg 10
3821 AD Amersfoort
The Netherlands
Phone: +31 (0) 33-4723-225
Fax: +31 (0) 33-4893-793
europe@redlion.net
Toll Free from UK and France:
00800 REDLIONS
(00800 733 54667)
Red Lion Controls AP
India Sales Office
54, Vishvas Tenement,
Near Railway Crossing
GST Road, New Ranip,
Ahmedabad-382480
Gujarat, India
Phone: +91 98795 40503
Fax: +91 79 27531350

1
IAMS 0001 / 0011 / 0010
CONTENTS
Warnings ............................................................................ 2
Safety instructions.............................................................. 3
How to dismantle the IAMS devices.................................. 5
When front LED lights red / display shows AO.ER............ 5
Advanced features ............................................................. 6
Application ......................................................................... 6
Technical characteristics .................................................... 6
PGMMOD00 Display / programming front......................... 7
Applications........................................................................ 8
Order codes ....................................................................... 9
Electrical specifications...................................................... 9
Visualisation of sensor error detection and
input signal outside range.................................................. 13
Sensor error detection limits.............................................. 14
Error indications ................................................................. 14
Connections ....................................................................... 15
Block diagram .................................................................... 16
Setup / operating the function keys................................... 17
Routing diagram................................................................. 20
Routing diagram, advanced settings (ADV.SET)................ 24
Scrolling help text in display line 3 .................................... 25
Graphic depiction of relay action Setpoint ........................ 26
Graphic depiction of relay action Window......................... 26
1

2 3
SYMBOL IDENTIFICATION
Triangle with an exclamation mark: Warning / demand.
Potentially lethal situations.
The CE mark proves the compliance of the devices with
the essential requirements of the directives.
The double insulation symbol shows that the devices
are protected by double or reinforced insulation.
SAFETY INSTRUCTIONS
DEFINITIONS:
Hazardous voltages have been defined as the ranges: 75 to 1500 Volt DC, and
50 to 1000 Volt AC.
Technicians are qualified persons educated or trained to mount, operate, and
also troubleshoot technically correct and in accordance with safety regulations.
Operators, being familiar with the contents of this manual, adjust and operate
the knobs or potentiometers during normal operation.
RECEIPT AND UNPACKING:
Unpack the device without damaging it and make sure that the manual always
follows the device and is always available. The packing should always follow
the device until this has been permanently mounted.
Check at the receipt of the device whether the type corresponds to the one
ordered.
ENVIRONMENT:
Avoid direct sunlight, dust, high temperatures, mechanical vibrations and shock,
as well as rain and heavy moisture. If necessary, heating in excess of the stated
limits for ambient temperatures should be avoided by way of ventilation.
All devices fall under Installation Category II, Pollution Degree 1, and Insulation
Class II.
MOUNTING:
Only technicians who are familiar with the technical terms, warnings, and instruc-
tions in the manual and who are able to follow these should connect the devices.
Should there be any doubt as to the correct handling of the devices, please
contact your local distributor or, alternatively, Red Lion Controls Worldwide
Headquarters, 20 Willow Springs Circle, York, PA 17406 USA, Phone: +1 (717)
767-6511, Fax: +1 (717) 764-0839
32
WARNING!
The IAMS devices are designed for connection to hazardous
electric voltages.
Ignoring this warning can result in severe personal injury or
mechanical damage.
To avoid the risk of electric shock and fire, the safety instruc-
tions of this manual must be observed and the guidelines
followed. The specifications must not be exceeded, and the
devices must only be applied as described in the following.
Prior to the commissioning of the devices, this manual must be
examined carefully.
Only qualified personnel (technicians) should install these
devices. If the equipment is used in a manner not specified by
the manufacturer, the protection provided by the equipment
may be impaired.
WARNING
To keep the safety distances, the relay contacts on the devices
must not be connected to both hazardous and non-hazardous
voltages at the same time.
The IAMS devices must be mounted on a DIN rail according to
DIN 46277.
WARNING!
Until the devices are fixed, do not connect hazardous voltages
to the devices.
The following operations should only be carried out on discon-
nected devices and under ESD safe conditions:
General mounting, connection and disconnection of wires.
Troubleshooting the devices.
Repair of the devices and replacement of circuit breakers
must be done by Red Lion Controls only.
HAZARD-
OUS
VOLTAGE
INSTAL-
LATION
GENERAL
WARNING
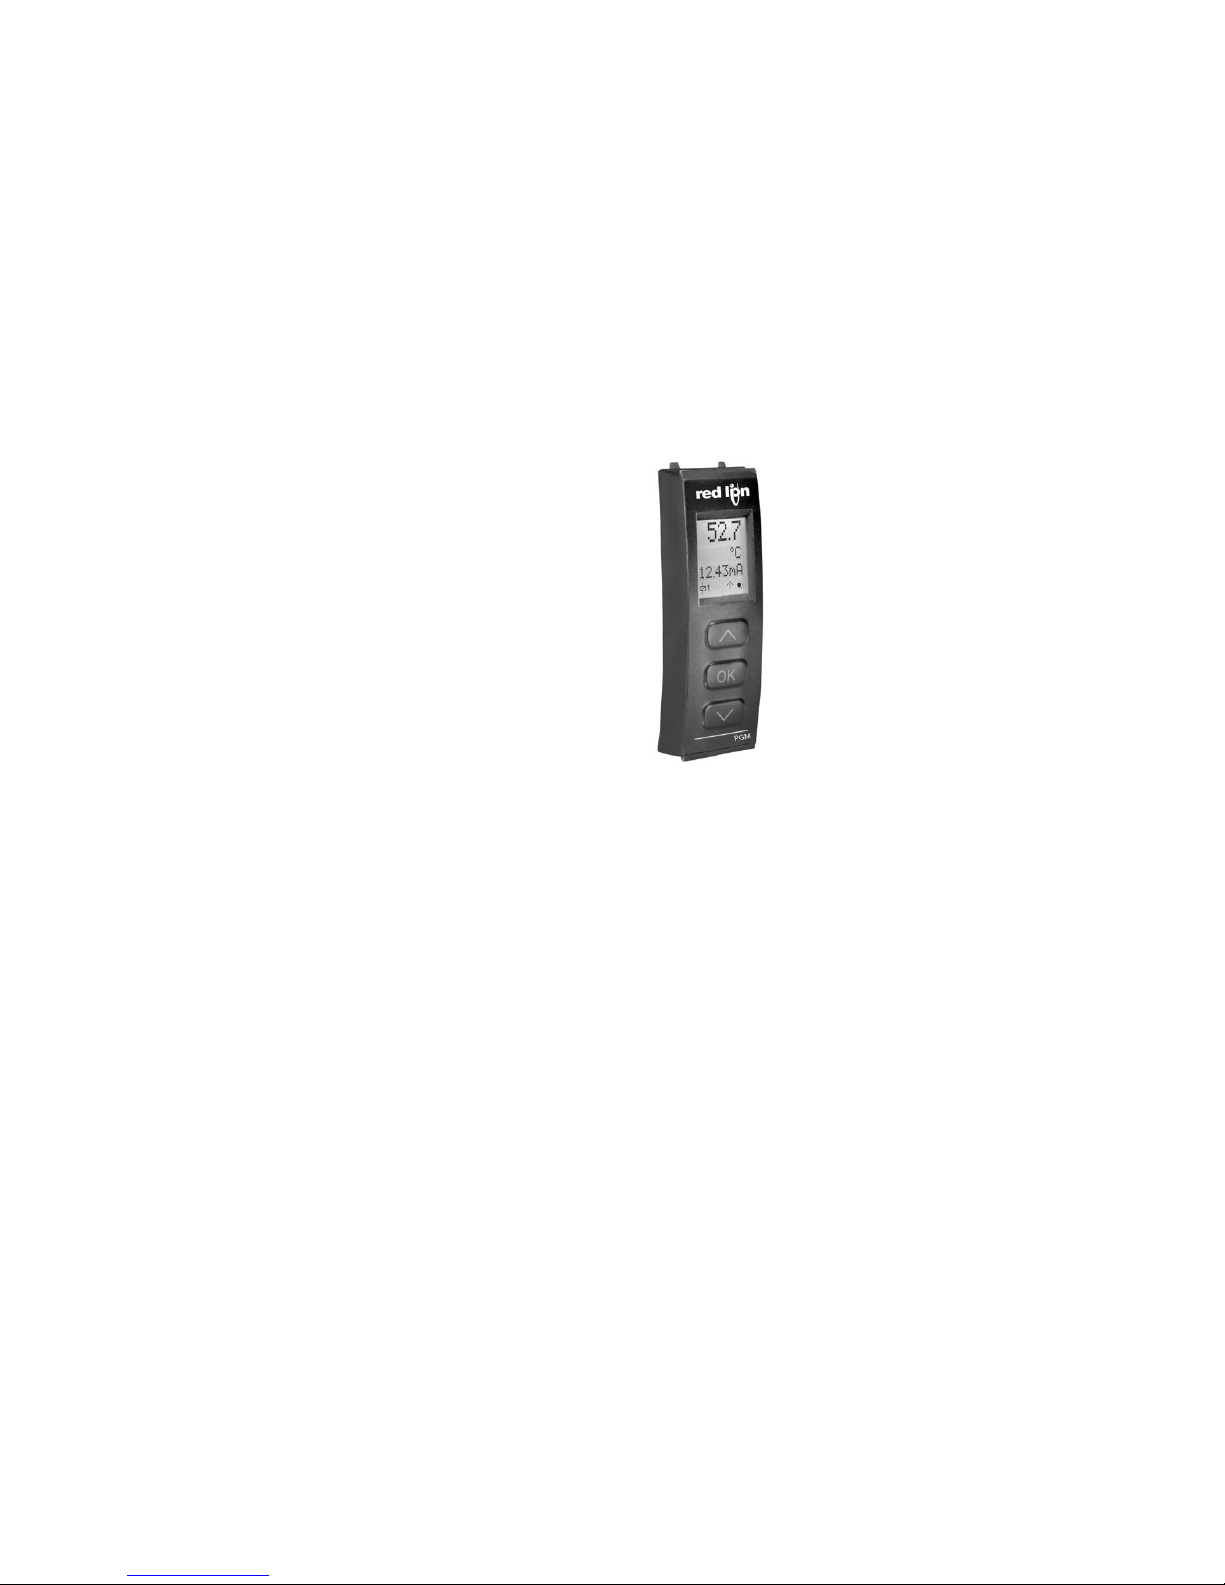
Do not open the front plate of the devices as this will cause
damage to the connector for the display / programming module
PGMMOD00. The devices contain no DIP-switches or jumpers.

4 5
HOW TO DISMANTLE THE IAMS DEVICES
First, remember to demount the connectors with hazardous voltages.
Picture 1:
Detach the device from the DIN rail
by lifting the bottom lock.
When front LED lights red / display shows AO.ER:
IAMS0001 and IAMS0011 are designed with a high safety level. Therefore, a
continuous measurement of the outgoing current is carried out on a 4...20 mA
output signal. If the current is 0, a fatal error mode switches on the red front
LED and disables the relays. If the analogue output is not used, pins 11 and
12 must be short-circuited in order for the device to function. The fatal error
mode can only be reset by switching off and then switching on the supply
voltage to the device.
5
Mounting and connection of the devices should comply with national legislation
for mounting of electric materials, i.a. wire cross section, protective fuse, and
location. Descriptions of input / output and supply connections are shown in the
block diagram and side label.
The following apply to fixed hazardous voltages-connected devices:
The max. size of the protective fuse is 10 A and, together with a power
switch, it should be easily accessible and close to the device. The power
switch should be marked with a label indicating that it will switch off the
voltage to the device.
Year of manufacture can be taken from the first two digits in the serial number.
UL INSTALLATION REQUIREMENTS:
Use 60/75°C copper conducters only
For use only in pollution degree 2 or better
Max. ambient temperature..................... 60°C
Max. wire size......................................... AWG 26-14
UL file number........................................ E324843
CALIBRATION AND ADJUSTMENT:
During calibration and adjustment, the measuring and connection of external
voltages must be carried out according to the specifications of this manual. The
technician must use tools and instruments that are safe to use.
NORMAL OPERATION:
Operators are only allowed to adjust and operate devices that are safely fixed
in panels, etc., thus avoiding the danger of personal injury and damage. This
means there is no electrical shock hazard, and the device is easily accessible.
CLEANING:
When disconnected, the devices may be cleaned with a cloth moistened with
distilled water.
LIABILITY:
To the extent that the instructions in this manual are not strictly observed, the
customer cannot advance a demand against Red Lion that would otherwise
exist according to the concluded sales agreement.
4

6 7
PGMMOD00 DISPLAY/PROGRAMMING FRONT
Functionality:
The simple and easily understandable menu structure
and the explanatory help texts guide you effortlessly and
automatically through the setup steps, thus making the
product very easy to use. Functions and setup options are
described in the section ”Setup / operating the function
keys”.
Application:
• Communications interface for modification of operational parameters in the
IAMS devices.
• Can be moved from one device to another of the same type and download
the setup of the first device to subsequent devices.
• Fixed display for readout of process data and status.
Technical characteristics:
• LCD display with 4 lines; Line 1 (H=.2 inch/5.57 mm) shows input signal,
line 2 (H=.2 inch/3.33 mm) shows units, line 3 (H=.13 inch/3.33 mm) shows
analogue output or tag no. and line 4 shows communication and relay status.
• Programming access can be blocked by assigning a password. The password
is saved in the device in order to ensure a high degree of protection against
unauthorised modifications to the setup.
Mounting / installation:
• Click PGMMOD00 onto the front of the device.
7
IAMS 0001 / 0011 / 0010
• Input for RTD, TC, Ohm, potentiometer, mA and V
• 2-wire supply > 16 V
• FM-approved for installation in Div. 2
• Output for current, voltage and 2 relays
• Universal AC or DC supply
Advanced features:
• Programmable via detachable display front (PRMMOD00), process calibra-
tion, signal and relay simulation, password protection, error diagnostics and
selection of help text in several languages.
Application:
• Linearised, electronic temperature measurement with RTD or TC sensor.
• Conversion of linear resistance variation to a standard analogue current / volt-
age signal, i.e. from solenoids and butterfly valves or linear movements with
attached potentiometer.
• Power supply and signal isolator for 2-wire transmitters.
• Process control with 2 pairs of potential-free relay contacts and analogue
output.
• Galvanic separation of analogue signals and measurement of floating signals.
• The IAMS0001 and IAMS0011 have been designed according to strict safety
requirements and are thus suitable for application in SIL 2 installations.
Technical characteristics:
• When the devices are used in combination with the PRMMOD00 display /
programming front, all operational parameters can be modified to suit any
application. As the devices are designed with electronic hardware switches, it
is not necessary to open them for setting of DIP-switches.
• A green / red front LED indicates normal operation and malfunction. A yellow
LED is ON for each active output relay.
• Continuous check of vital stored data for safety reasons.
• 4-port 2.3 kVAC galvanic isolation.
6

4 3 2
+
+
44
43
42
41
+
-
12
14
13
11
10 V
1 V
+
-
10 V
1 V
24
23
22
21
33
32
31
8 99
Applications
Input signals:
Current
Volt-
age
Potenti-
ometer RTD and lin.R TC
Connect., wires
Output signals:
Relays
Supply:
21.6...253 VAC
or
19.2...300 VDC
Analogue, 0/4...20 mA and voltage
Order codes:
IAMS0001 Universal transmitter mA out
IAMS0011 Universal transmitter mA / 2 relays
IAMS0010 Universal limit switch with 2 relays
PGMMOD00 Display / programming module
Electrical specifications:
Specifications range:
-20°C to +60°C
Common specifications:
Supply voltage, universal ............................ 21.6...253 VAC,
or 19.2...300 VDC
Max. consumption ...................................... ≤2.5 W
Fuse............................................................. 400 mA SB / 250 VAC
Isolation voltage, test / operation ............... 2.3 kVAC / 250 VAC
Communications interface .......................... Programming front PGMMOD00
Signal / noise ratio ...................................... Min. 60 dB (0...100 kHz)
Response time (0...90%, 100...10%):
Temperature input................................... ≤ 1 s
mA / V input............................................ ≤ 400 ms
Calibration temperature .............................. 20...28°C
Accuracy, the greater of the general and basic values:
8
General values
Input
type Absolute
accuracy Temperature
coefficient
All ≤±0.1% of span ≤±0.01% of span / °C
Basic values
Input
type Basic
accuracy Temperature
coefficient
mA ≤±4 µA ≤±0.4 µA / °C
Volt ≤±20 µV ≤±2 µV / °C
Pt100 ≤±0.2°C ≤±0.01°C / °C
Lin. R ≤±0.1 Ω≤±0.01 Ω/ °C
Potentiometer ≤±0.1 Ω≤±0.01 Ω/ °C
TC type: E, J, K, L, N, T, U ≤±1°C ≤±0.05°C / °C
TC type: B, R, S, W3, W5, LR ≤±2°C ≤±0.2°C / °C

10 11
TC input:
Cold junction compensation (CJC)
via internally mounted sensor................. < ±1,0 °C
Sensor error detection, all TC types ........... Yes
Sensor error current:
when detecting ....................................... Nom. 2 µA
else.......................................................... 0 µA
Current input:
Measurement range .................................... -1...25 mA
Programmable measurement ranges.......... 0...20 and 4...20 mA
Input resistance........................................... Nom. 20 Ω+ PTC 50 Ω
Sensor error detection:
Loop break 4...20 mA ............................. Yes
Voltage input:
Measurement range .................................... -20 mV...12 VDC
Programmable measurement ranges.......... 0...1 / 0.2...1 / 0...5 / 1...5 /
0...10 and 2...10 VDC
Input resistance........................................... Nom. 10 MΩ
Current output:
Signal range (span)...................................... 0...20 mA
Programmable signal ranges ...................... 0...20 / 4...20 /
20...0 and 20...4 mA
Load (max.).................................................. 20 mA / 800 Ω/ 16 VDC
Load stability............................................... ≤0.01% of span / 100 Ω
Sensor error detection ................................ 0 / 3.5 / 23 mA / none
NAMUR NE 43 Upscale / Downscale ......... 23 mA / 3.5 mA
11
Auxiliary supplies:
2-wire supply (terminal 44...43)................... 25...16 VDC / 0...20 mA
Max. wire size.............................................. 1 x 2.5 mm2stranded wire
Screw terminal torque ................................. 0.5 Nm
Relative humidity......................................... < 95% RH (non-cond.)
Dimensions, without display front (HxBxD).. 109 x 23.5 x 104 mm
Dimensions, with display front (HxBxD)...... 109 x 23.5 x 116 mm
Protection degree (enclosure / terminals) ... IP50 / IP20
Weight ......................................................... 170 g / 185 g with PGMMOD00
RTD, linear resistance and potentiometer input:
Input for RTD types:
Pt10, Pt20, Pt50, Pt100, Pt200, PT250, Pt300, Pt400, Pt500, Pt1000
Ni50, Ni100, Ni120, Ni1000
Cable resistance per wire (max.), RTD........ 50 Ω
Sensor current, RTD.................................... Nom. 0.2 mA
Effect of sensor cable resistance
(3- / 4-wire), RTD......................................... < 0.002 Ω/ Ω
Sensor error detection, RTD ....................... Yes
Short circuit detection, RTD........................ < 15 Ω
10
EMC immunity influence ..................................... < ±0.5% of span
Extended EMC immunity:
NAMUR NE 21, A criterion, burst ....................... < ±1% of span
Input
type Min.
value Max.
value Standard
Pt100
Ni100
Lin. R
Potentiometer
-200°C
-60°C
0 Ω
10 Ω
+850°C
+250°C
10000 Ω
100 kΩ
IEC60751
DIN 43760
-
-
Type Min.
value Max.
value Standard
B
E
J
K
L
N
R
S
T
U
W3
W5
LR
+400°C
-100°C
-100°C
-180°C
-200°C
-180°C
-50°C
-50°C
-200°C
-200°C
0°C
0°C
-200°C
+1820°C
+1000°C
+1200°C
+1372°C
+900°C
+1300°C
+1760°C
+1760°C
+400°C
+600°C
+2300°C
+2300°C
+800°C
IEC 60584-1
IEC 60584-1
IEC 60584-1
IEC 60584-1
DIN 43710
IEC 60584-1
IEC 60584-1
IEC 60584-1
IEC 60584-1
DIN 43710
ASTM E988-90
ASTM E988-90
GOST 3044-84

12 13
Visualisation of sensor error detection and
input signal outside range
13
Sensor error check:
Setup Sensor error detection:
R1, ERR.ACT=NONE - R2, ERR.ACT=NONE,
OUT.ERR=NONE OFF
Else: ON
Output limitation:
on 4...20 and 20...4 mA signals .............. 3.8...20.5 mA
on 0...20 and 20...0 mA signals .............. 0...20.5 mA
Current limit................................................. ≤28 mA
Voltage output:
Signal range ................................................ 0...10 VDC
Programmable signal ranges ...................... 0...1 / 0.2...1 / 0...10 / 0...5 /
1...5 / 2...10 / 1...0 / 1...0.2 / 5...0 /
5...1 / 10...0 og 10...2 V
Load (min.)................................................... 500 kΩ
Relay outputs:
Relay functions............................................ Setpoint, Window, Sensor error,
Power and Off
Hysteresis, in % / display counts ............... 0,1...25% / 1...2999
On and Off delay......................................... 0...3600 s
Sensor error detection ................................ Break / Make / Hold
Max. voltage................................................ 250 VRMS
Max. current ................................................ 2 A / AC or 1 A / DC
Max. AC power ........................................... 500 VA
Ex / I.S. approval:
FM, applicable in......................................... Class I, Div. 2, Group A, B, C, D
Class I, Div. 2, Group IIC
Zone 2
Max. ambient temperature for T5 ............... 60°C
Observed authority requirements: Standard:
EMC 2004/108/EC
Emission and immunity...................... EN 61326-1
LVD 2006/95/EC.......................................... EN 61010-1
FM ............................................................... 3600, 3611, 3810 and ISA 82.02.01
UL, Standard for Safety .............................. UL 508
of span = of the currently selected measurement range
12
Outside range readout (IN.LO, IN.HI):
If the valid range of the A/D converter or the polynomial is exceeded
Input Range Readout Limit
VOLT
0...1 V / 0.2...1 V IN.LO < -25 mV
IN.HI > 1.2 V
0...10 V / 2...10 V IN.LO < -25 mV
IN.HI > 12 V
CURR 0...20 mA / 4...20 mA IN.LO < -1.05 mA
IN.HI > 25.05 mA
LIN.R
0...800 ΩIN.LO < 0 Ω
IN.HI > 1075 Ω
0...10 kΩIN.LO < 0 Ω
IN.HI < 110 kΩ
POTM - IN.LO < -0.5 %
IN.HI > 100.5 %
TEMP TC / RTD IN.LO < temperature range -2°C
IN.HI > temperature range +2°C

21 22 24
23
R1 R2
11 12 14
13
+
-mA
11 12 14
13
+
-V
11 12 14
13
+
-V
+
-
41 42 44
43
41 42 44
43 41 42 44
43
+
-
41 42 44
43
+
-Tx
41 42 44
43
31 32 33
41 42 44
43
41 42 44
43
42 44
43
41 41 42 44
43
+
-
14 15
CONNECTIONS
Inputs:
Outputs:
Supply:
Voltage, 1 V Voltage, 10 V
Current Relays
RTD, 3- / 4-wire
Resistance,
3- / 4-wire
Voltage
Potentiometer Current2-wire transmitter
RTD, 2-wire Resistance, 2-wireTC
Sensor error detection limits:
Error indications:
Sensor error detection (SE.BR, SE.SH):
Input Range Readout Limit
CURR Loop break (4..20 mA) SE.BR <= 3.6 mA; > = 21 mA
POTM All, SE.BR on all 3-wire SE.BR > ca. 126 kΩ
LIN.R 0...800 ΩSE.BR > ca. 875 Ω
0...10 kΩSE.BR > ca. 11 kΩ
TEMP
TC SE.BR > ca. 750 kΩ/ (1.25 V)
RTD, 2-, 3-, and 4-wire
No SE.SH for Pt10, Pt20 and Pt50
SE.BR > ca. 15 kΩ
SE.SH < ca. 15 Ω
Display readout below min.- / above max. (-1999, 9999):
Input Range Readout Limit
All All -1999 Display readout <-1999
9999 Display readout >9999
Readout at hardware error
Error search Readout Error cause
Test of internal CJC sensor CJ.ER CJC sensor defect or tem-
perature outside range
Checksum test of the setup in FLASH FL.ER Error in FLASH
Check measurement of analogue output current AO.ER 1) No load on the current
output (only 4...20 mA)
Communications test PGMMOD00 / device NO.CO Connection error
Check that input signal matches input setup IN.ER 1) Error levels on input
Check that saved setup in PGMMOD00 matches device TY.ER Setup mismatch
! Error indications in the display flash once per second. The help text explains the error.
1) The error is reset by switching off and then switching on the supply voltage to the device.

500Ω
CPU
CPU
EEPROM
D / A
Safety
11
24
23
22
21
13
14
50Ω
33
31
12
A / D
PTC
CJC
0.2 mA
43
44
42
41
10 Ω
MUX
432
+
-
+
-
+
-
12
4 *4#
HIEJ
VV
mA
mA
I+
10 V
1 V
PGM
16 17
SETUP /
OPERATING THE FUNCTION KEYS
Documentation for routing diagram.
In general:
When setting up the IAMS devices, you will be guided through all parameters
and you can choose the settings which fit the application. For each menu
there is a scrolling help text which is automatically shown in line 3 on the
display.
Setup is carried out by use of the 3 function keys:
will increase the numerical value or choose the next parameter
will decrease the numerical value or choose the previous parameter
will save the chosen value and proceed to the next menu
When setup is completed, the display will return to the default state 1.0.
Pressing and holding will return to the previous menu or return to the default
state (1.0) without saving the changed values or parameters.
If no key is activated for 1 minute, the display will return to the default state
(1.0) without saving the changed values or parameters.
Further explanations:
Fast setpoint adjustment and relay test: These menus allow you to make a
quick setpoint change and relay test when the FastSet menu is activated.
This function can only be activated when the relays are set for setpoint
function and are controlled by a setpoint.
Pressing and simultaneously will activate a relay test and change the
state of the relay.
Pressing will save the setpoint change.
Holding down for more than 1 second will return the unit to the default state
without saving the setpoint change.
Password protection: Programming access can be blocked by assigning a
password. The password is saved in the device in order to ensure a high
degree of protection against unauthorised modifications to the setup. Default
password 2008 allows access to all setup modules.
17
BLOCK DIAGRAM
16
Potentiometer
2-wire transmitter
Voltage
Current
RTD og lin.R,
connection,
wires
Supply
Supply
21.6...253 VAC or
19.2...300 VDC
Gnd.
I + V
Out.
I
Out.
V
Out.
TC
Relay 2
Relay 2
Relay 1
Relay 1
Green
Red
Yellow
Yellow

18 19
Setup of TAG numbers with 6 alphanumerics. Selection of functional readout
in line 3 of the display - choose between readout of analogue output or tag no.
Two-point process calibration: The unit can be process-calibrated in 2 points
to fit a given input signal . A low input signal (not necessarily 0%) is applied
and the actual value is entered. Then a high signal (not necessarily 100%) is
applied and the actual value is entered. If you accept to use the calibration,
the unit will work according to this new adjustment. If you later reject this
menu point or choose another type of input signal the unit will return to fac-
tory calibration.
Process simulation function: If you agree to the point “EN.SIM” it is possible
to simulate an input signal by means of the arrow keys and thus control the
output signal up or down. When you finalise the point with , the unit returns
to normal mode. The following point allows you to activate relay 1 and relay
2 by means of the arrow-keys up/down. You must exit the menu by pressing
(no time-out).
Password: Here you can choose a password between 0000 and 9999 in order
to protect the unit against unauthorised modifications to the setup. The unit
is delivered default without password. If you have locked the unit with a
password by mistake, you can always open the menu by using the master
password 2008.
Language: In the menu ”lang.setup” you can choose between 7 different
language versions of help texts that will appear in the menu. You can choose
between UK, DE, FR, IT, ES, SE and DK.
Auto diagnosis
The unit performs an advanced auto diagnosis of the internal circuits.
The following possible errors can by displayed in the front unit PGMMOD00.
CJ.ER - CJC sensor defect or CJC temperature outside range
FL.ER - Flash error
AO.ER - No load on the current output (only for 4...20 mA)
NO.CO - Connection error
IN.ER - Error levels on input
TY.ER - Setup in PGMMOD00 does not match this product type
Selection of units
After choosing the input signal type you can choose which process units should
be displayed in text line 2 (see table). By selection of temperature input the
process value is always displayed in Celsius or Fahrenheit. This is selected in
the menu point after selection of temperature input.
Signal and sensor error info via PGMMOD00
Sensor error (see limits in the table) is displayed as SE.BR (sensor break) or
SE.SH (sensor short). Signals outside the selected range (not sensor error,
see table for limits) are displayed as IN.LO indicating low input signal or IN.HI
indicating high input signal. The error indication is displayed in line 3 as text
and at the same time the backlight flashes. Line 4 of the display is a status
line which displays status of relay 1 and relay 2, COM (flashing bullet) indica-
ting correct functioning of PGMMOD00 and arrow up/down which indicates
tendency readout of the input signal. If the figure 1 or figure 2 flashes, the
unit has detected that the setpoint has been exceeded and that the relay is in
“delay” mode. When the delay time has passed and the relay makes/breakes,
the relay sign either displays or disappears.
Signal and sensor error indication without display front
Status of the unit can also be read from the red/green LED in the front of the device.
Green flashing LED 13 Hz indicates normal operation.
Green flashing LED 1 Hz indicates sensor error.
Steady green LED indicates internal error.
Steady red LED indicates fatal error.
Relay functions
5 different settings of relay function can be selected.
Setpoint: The unit works as a single trip amplifier
Window: The relay has a window that is defined by a low and a high
setpoint. On both sides of the window the relay has the
same status.
Error function: The relay is activated by sensor error.
Power: The relay is activated as long as the power is on.
Off: The relay is deactivated.
Increasing/decreasing: The relays can be set to activate at increasing or
decreasing input signal.
Delay: An ON and an OFF delay can be set on both relays in the range
0...3600 s.
Hysteresis: A hysteresis can be set at 0.1...25% of the span or between 1 and
2999 counts.
Advanced functions
The unit gives access to a number of advanced functions which can be reached
by answering “Yes” to the point “adv.set”.
Display setup: Here you can adjust the brightness contrast and the backlight.

j"
3,'2
2SP
j"
j$
j"
j$
>=N
?I
BP
BPD
BPIEJ
BPO
=HD
=HIEJ
%5
DL
D.=
&U
EJ
EJD
EJIEJ
EJO
ELO
)
G
G
G(
G.=
G4
G5
G5D
H
HD
HIEJ
HO
I
ID
IIEJ
IO
IO
I
ID
IIEJ
I
I>=N
IEHO
IEJ
II
IIO
IKH
+.=
I4
+5
+5D
,
-DI
.=
L&
NLI
O
1
P
PD
Q
QI
Q1
4
5
5D
T@
Power up
. 115
2SP
',.
1#23.
2SP
!4
,
1.2
',.
,-
2#+.
',27.#
2SP
4-*2
"300
*',0
.-2+
2#+.
0#* 7
2SP]
]
0#* 7
2SP]
40 ,%#
2SP
'0 ,%#
2SP
5
"-,,#"
2SP
5
5
5
0
2SP]
0
2SP
.P
1#,1-0
2SP
.P
,'
2"
.P27.#
2SP
5
"-,,#"
2SP
5
5
5
,E27.#
2SP]
5
"-,,#"
2SP
5
5
5
2")
2"27.#
2SP
2"Z2"#2"(2")
2"*2",2"02"1
2"22"32"52"5
2"*N
1.2
1.1
(LIN.R)
!'1.*-
2SP
!#".
2SP
3,'2
2SP
j"
I
NLI
QJEPO
!'1.&'
2SP
(Ni)
(Pt)
(TC)
(TEMP)
(POTM)
(CURR)
(VOLT)
9.ADV
6.SPT
8.ANA
1.2
1.0
20 2121
ROUTING DIAGRAM
If no key is activated for 1 minute, the display will return to the default
state 1.0 without saving setup changes (except ',.1'+ and 0#*1'+).
Increase value / choose next parameter
Decrease value / choose previous parameter
Save the chosen value and proceed to the next menu
Hold Back to previous menu / return to menu 1.0 without saving
Selectable3,'21
20
Fast setpoint adjustment
and relay test
Increase setpoint
Decrease setpoint
Save and exit the menu
and simultaneously = change relay state
1.1 = Only if password-
protected.
1.2 = Only if FastSet is
activated and the
relay function is
setpoint.
1.3 = Only if input type
supports sensor
error check.
Not valid for these
input signals:
0...20 mA and
voltage.
1.4 = Only if input signal
is temperaure.
1.5 = Any changes made
to the setup must
be stored in the
device before
Simulation,
Calibration and
Memory (save)
functions are used.
1.6 = Only if input signal
is NOT
temperature. Continued on the page
Routing diagram ADV.SET
Continued on
the next page
Continued on
the next page
1APQL
1APQL

!'1.
0#*3,
2SP
!'1.
.#0"
1#2.
0$3,"
2SP
1#2.
5',!
#00
.-5
-$$
6.SPT
1.6
-'5
0"-,2
2SP]
-'5
"'5
1#2.*-
2SP
]
1#2.&'
2SP
0&712
2SP
-.#,
#00 "2
2SP
"*-1
-.#,
-,!#*
2SP
,-,#
#00 "2
2SP
&-*!
"*-1
-.#,
,-,#
-$$!#*
2SP
(OFF)
(ERR)
(WIND)
(POW)
1.3
1.3
1.3
-,!#*
2SP
,-,#
#00 "2
2SP
&-*!
"*-1
-.#,
,-,#
-$$!#*
2SP
,-
0"-,2
2SP
,-
,"
01#2.
2SP
',"0
"2!'0
2SP
',"0
!#"0
0&712
2SP
1.3
-'5
0"-,2
2SP]
-'5
"'5
1#2.*-
2SP
]
1#2.&'
2SP
0&712
2SP
-.#,
#00 "2
2SP
"*-1
-.#,
-,!#*
2SP
,-,#
#00 "2
2SP
&-*!
"*-1
-.#,
,-,#
-$$!#*
2SP
(OFF)
(ERR)
(WIND)
(POW)
1.3
1.3
1.3
-,!#*
2SP
,-,#
#00 "2
2SP
&-*!
"*-1
-.#,
,-,#
-$$!#*
2SP
,-
0"-,2
2SP
,-
,"
01#2.
2SP
',"0
"2!'0
2SP
',"0
!#"0
0&712
2SP
1.3
"300
, -32
2SP
4-*2
"300
-0 ,%#
2SP]
-0 ,%#
2SP
I
-32#00
2SP
I
I
,-,#
-32*-
2SP
-32&'
2SP
1.3 1.4 1.4
8.ANA
(VOLT)
(CURR)
(SETP)
22 23
1APQL
1APQL

1 4#
+#+-07
2SP
1 4#
*- !
+#+
1#23.
2SP
+#+
!'1.
" *
1'+
. 11
* ,%
"-,20
2SP
*'%&2
2SP
4 *4#
2SP]
-32
*',#
2SP
2 %
-32
7#1
" **-
2SP
7#1
,-
2SP
,-
7#1
" *&'
2SP
7#1
,-
2SP
,-
7#1
31#" *
2SP
7#1
,-
7#1
#,1'+
2SP
7#1
,-
2SP
,-
0#*1'+
2SP
3)
* ,%3
2SP
!#!)
#1$0
'21#
3)
7#1
#,. 11
2SP
7#1
,-
,#5. 1
2SP
7#1
#,$ 12
2SP
7#1
,-
,-
1.5
1.5
1.5
LANG
DISP
SIM
CAL
PASS
9.ADV
24 25
[01]
[02]
[03]
[04]
[05]
[06]
[07]
[08]
[09]
[10]
[11]
[12]
[13]
[14]
[15]
[16]
[17]
[18]
[19]
[20]
[21]
[22]
[23]
[24]
[25]
[26]
[27]
[28]
[29]
[30]
[34]
[36]
[37]
[38]
[39]
[41]
[42]
[43]
[44]
[45]
[46]
[47]
[48]
[49]
[50]
[51]
[52]
[53]
[54]
[55]
[56]
[57]
[58]
[59]
[60]
[61]
[62]
Set correct password
Select setup module or NO to store and exit
Select temperature input
Select potentiometer input
Select linear resistance input
Select current input
Select voltage input
Select 0.0-1 V input range
Select 0.2-1 V input range
Select 0-5 V input range
Select 1-5 V input range
Select 0-10 V input range
Select 2-10 V input range
Select 0-20 mA input range
Select 4-20 mA input range
Select 2-wire sensor connection
Select 3-wire sensor connection
Select 4-wire sensor connection
Set resistance value low
Set resistance value high
Select Celsius as temperature unit
Select Fahrenheit as temperature unit
Select TC sensor type
Select Ni sensor type
Select Pt sensor type
Select display unit
Select decimal point position
Set display range low
Set display range high
Set relays in % of input range
Set relays in display units
Select Pt10 as sensor type
Select Pt20 as sensor type
Select Pt50 as sensor type
Select Pt100 as sensor type
Select Pt200 as sensor type
Select Pt250 as sensor type
Select Pt300 as sensor type
Select Pt400 as sensor type
Select Pt500 as sensor type
Select Pt1000 as sensor type
Select Ni50 as sensor type
Select Ni100 as sensor type
Select Ni120 as sensor type
Select Ni1000 as sensor type
Select TC-B as sensor type
Select TC-E as sensor type
Select TC-J as sensor type
Select TC-K as sensor type
Select TC-L as sensor type
Select TC-N as sensor type
Select TC-R as sensor type
Select TC-S as sensor type
Select TC-T as sensor type
Select TC-U as sensor type
Select TC-W3 as sensor type
Select TC-W5 as sensor type
Select TC-Lr as sensor type
Select OFF function - relay is permanently off
Select POWER function - relay indicates power status OK
Select ERROR function - relay indicates sensor error only
Select WINDOW function - relay is controlled by 2 setpoints
Select SETPOINT function - relay is controlled by 1 setpoint
Select Normally Closed contact
Select Normally Open contact
Set relay setpoint
Activate relay on decreasing signal
Activate relay on increasing signal
Set relay hysteresis
SCROLLING HELP TEXT IN DISPLAY LINE 3
No error action - undefined status at error
Open relay contact at error
Close relay contact at error
Hold relay status at error
Set relay ON delay in seconds
Set relay OFF delay in seconds
Relay contact is Open Inside Window
Relay contact is Closed Inside Window
Set relay window setpoint low
Set relay window setpoint high
Set relay window hysteresis
Open relay contact at error
Close relay contact at erro
Select current as analogue output type
Select voltage as analogue output type
Select 0-20 mA output range
Select 4-20 mA output range
Select 20-0 mA output range
Select 20-4 mA output range
Select no error action - output undefined at error
Select downscale at error
Select NAMUR NE43 downscale at error
Select NAMUR NE43 upscale at error
Select 0.0-1 V output range
Select 0.2-1 V output range
Select 0-5 V output range
Select 1-5 V output range
Select 0-10 V output range
Select 2-10 V output range
Select 1-0.0 V output range
Select 1-0.2 V output range
Select 5-0 V output range
Select 5-1 V output range
Select 10-0 V output range
Select 10-2 V output range
Set temperature for analogue output low
Set temperature for analogue output high
Enter Language setup
Enter Password setup
Enter simulation mode
Perform process calibration
Enter display setup
Perform memory operations
Load saved setup into device
Save setup in display front
Adjust LCD contrast
Adjust LCD backlight
Write a 6-character device TAG
Analogue output value is shown in display line 3
Device TAG is shown in display line 3
Calibrate Input low to process value?
Calibrate Input high to process value?
Enable simulation mode?
Set the input simulation value
Relay simulation - use ^ and v to toggle relay 1
and 2
Enable password protection?
Set new password
Enable Fastset functionality?
Relay setpoint - press OK to save
Relay setpoint - Read only
Select language
Use process calibration values?
Set value for low calibration point
Set value for high calibration poin
ROUTING DIAGRAM
Advanced settings (ADV.SET)
1APQL
To default state 1.0

26 27
Graphic depiction of relay action Setpoint:
Graphic depiction of relay action Window:
t
Off N.C.
On N.C. On N.C.
10
10
20
20
30
30
40
40
50
50
60
60
70
70
80
80
90
90
100
100
0
Off N.O. Off N.O.
On N.O.
t
10
10
20
20
30
30
40
40
50
50
60
60
70
70
80
80
90
90
100
100
0
Off N.O. Off N.O.On N.O.
Off N.C.On N.C. On N.C.
Relay unitsRelay units
Setpoint = 50
Hysteresis = 10
Hysteresis = 10
Setpoint = 50
Relay action: Increasing Relay action: Decreasing
1
2
On On On
Off OffOff Off Off Off
On On On
1
2
t
10
10
20
20
30
30
40
40
50
50
60
60
70
70
80
80
90
90
100
100
0
t
10
10
20
20
30
30
40
40
50
50
60
60
70
70
80
80
90
90
100
100
0
222
2
1 1 11
Relay units
Setpoint High = 60
Hysteresis = 5
Hysteresis = 5
Setpoint Low = 40
Relay function: Window (shown for increasing signal)
Contact: Closed inside window =
Contact: Open inside window =
Relay units
Setpoint High = 60
Hysteresis = 5
Hysteresis = 5
Setpoint Low = 40
Relay function: Window (shown for decreasing signal)
Contact: Closed inside window =
Contact: Open inside window =
IAMS 0001 / 0011 / 0010
SOMMAIRE
Avertissements................................................................... 28
Consignes de sécurité ....................................................... 29
Démontage des dispositifs IAMS....................................... 31
Quand la LED rouge s’allume / l’indicateur affiche AO.ER .. 31
Options avancées .............................................................. 32
Applications........................................................................ 32
Caractéristiques techniques .............................................. 32
PGMMOD00 Indicateur / façade de programmation......... 33
Applications........................................................................ 34
Références de commande................................................. 35
Spécifications électriques .................................................. 35
Indication de la détection erreur capteur
et du signal d’entrée hors d’échelle............................... 39
Limites de la détection erreur capteur............................... 40
Indications erreur matériel.................................................. 40
Connexions ........................................................................ 41
Schéma de principe ........................................................... 42
Configuration / utilisation des touches de fonction........... 43
Diagramme de programmation .......................................... 46
Diagramme de programmation,
réglage avancé (ADV.SET).............................................. 50
Menu déroulant en ligne 3 de l’indicateur ......................... 51
Illustration graphique de l’action de relais consigne ......... 52
Illustration graphique de l’action de relais fenêtre............. 52
27

28 29
SIGNIFICATION DES SYMBOLES
Triangle avec point d’exclamation : Attention ! Si vous ne
respectez pas les instructions, la situation pourrait être fatale.
Le signe CE indique que les dispositifs sont conformes aux exigences
des directives.
Ce symbole indique que les dispositifs sont protégés par une isolation
double ou renforcée.
CONSIGNES DE SECURITE
DEFINITIONS
Les gammes de tensions dangereuses sont les suivantes : de 75 à 1500 Vcc et de
50 à 1000 Vca. Les techniciens sont des personnes qualifiées qui sont capables
de monter et de faire fonctionner un appareil, et d’y rechercher les pannes, tout
en respectant les règles de sécurité. Les opérateurs, connaissant le contenu de
ce guide, règlent et actionnent les boutons ou les potentiomètres au cours des
manipulations ordinaires.
RECEPTION ET DEBALLAGE
Déballez le dispositif sans l’endommager. Le guide doit toujours être disponible
et se trouver à proximité du dispositif. De même, il est recommandé de conserver
l’emballage du dispositif tant que ce dernier n’est pas définitivement monté. A la
réception du dispositif, vérifiez que le type de dispositif reçu correspond à celui
que vous avez commandé.
ENVIRONNEMENT
N’exposez pas votre dispositif aux rayons directs du soleil et choisissez un
endroit à humidité modérée et à l’abri de la poussière, des températures
élevées, des chocs et des vibrations mécaniques et de la pluie. Le cas
échéant, des systèmes de ventilation permettent d’éviter qu’une pièce soit
chauffée au-delà des limites prescrites pour les températures ambiantes.
Tous les dispositifs appartiennent à la catégorie d’installation Il, au degré de
pollution I et à la classe d’isolation Il.
MONTAGE
Il est conseillé de réserver le raccordement du dispositif aux techniciens qui
connaissent les termes techniques, les avertissements et les instructions de ce
guide et qui sont capables d’appliquer ces dernières.
Si vous avez un doute quelconque quant à la manipulation du dispositif, veuillez
contacter votre distributeur local. Vous pouvez également vous adresser à :
2928
AVERTISSEMENT!
Les dispositifs IAMS sont conçus pour supporter une connexion
à des tensions électriques dangereuses. Si vous ne tenez pas
compte de cet avertissement, cela peut causer des dommages
corporels ou des dégâts mécaniques.
Pour éviter les risques d’électrocution et d’incendie, conformez-
vous aux consignes de sécurité et suivez les instructions
mentionnées dans ce guide. Vous devez vous limiter aux
spécifications indiquées et respecter les instructions d’utilisation
de ces dispositifs, telles qu’elles sont décrites dans ce guide.
Il est nécessaire de lire ce guide attentivement avant de mettre
ces dispositifs en marche. L’installation de ces dispositifs est
réservée à un personnel qualifié (techniciens). Si la méthode
d’utilisation de l’équipement diffère de celle décrite par le fabricant,
la protection assurée par l’équipement risque d’être altérée.
AVERTISSEMENT!
Afin de conserver les distances de sécurité, les contacts de relais
des dispositifs ne doivent pas être mis sous tensions dangereuse
et non-dangereuse en même temps.
Il convient de monter les dispositifs IAMS sur un rail DIN en se
conformant à la norme DIN 46277.
AVERTISSEMENT!
Tant que les dispositifs ne sont pas fixés, ne les mettez par
sous tensions dangereuses. Les opérations suivantes doivent
être effectuées avec les dispositifs débranchés et dans un
environnement exempt de décharges électrostatiques (ESD) :
montage général, raccordement et débranchement de fils et
recherche de pannes sur les dispositifs.
Seule Red Lion Control est autorisée à réparer les dispositifs
et à remplacer les disjoncteurs.
TENSION
DANGE-
REUSE
INSTAL-
LATION
INFORMA-
TIONS
GENERALES
AVERTISSEMENT!
Ne pas ouvrir la plaque avant des dispositifs vu que cela peut
endommager le connecteur de l’indicateur / la façade de pro-
grammation PGMMOD00. Ces dispositifs ne contiennent ni de
commutateurs DIP ni de cavaliers.

30 31
DEMONTAGE DES DISPOSITIFS IAMS
Tout d’abord, n’oubliez pas de démonter les connecteurs où règnent des
tensions dangereuses.
Figure 1 :
Débloquez le verrou inférieur pour
dégager le dispositif du rail DIN.
Quand la LED rouge s’allume / l’indicateur affiche AO.ER:
Les IAMS0001 et IAMS 0011 ont été construits avec un niveau de sécurité élevé.
Pour cette raison une mesure continue est effectuée de la courant sortant
du dispositif pour un signal de sortie de 4...20 mA. Si la courant est zéro, un
mode d’erreur fatale se produit et la LED rouge en face avant s’allume en
même temps que les relais sont désactivés. Si la sortie analogique n’est pas
utilisée, les bornes 11 et 12 doivent être court-circuitées pour que le dispositif
fonctionne. Le mode d’erreur fatale peut uniquement être remise à l’état initial
en déconnectant et puis reconnectant l’alimentation du dispositif.
31
Red Lion Controls BV, Printerweg 103821, AD Amersfoort, The Netherlands.
Phone: +31 (0) 33-4723-225, fax: +31 (0) 33-4893-793. Toll Free from UK and
France: 00800 REDLIONS (00800 733 54667 ou à Red Lion Controls Worldwide
Headquarters, 20 Willow Springs Circle, York, PA 17406 USA, Phone: +1 (717)
767-6511, Fax: +1 (717) 764-0839.
Le montage et le raccordement du dispositif doivent être conformes à la
législation nationale en vigueur pour le montage de matériaux électriques, par
exemple, diamètres des fils, fusibles de protection et implantation des dispositifs.
Les connexions des alimentations et des entrées / sorties sont décrites dans
le schéma de principe et sur l’étiquette de la face latérale du dispositif. Les
instructions suivantes s’appliquent aux dispositifs fixes connectés en tensions
dangereuses:
Le fusible de protection doit être de 10 A au maximum. Ce dernier, ainsi que
l’interrupteur général, doivent être facilement accessibles et à proximité du
dispositif. Il est recommandé de placer sur l’interupteur général une
étiquette indiquant que ce dernier mettra le dispositif hors tension.
CONDITIONS D’INSTALLATION UL:
N’utilisez que de conducteurs de cuivre 60/75°C
Uniquement pour utilisation en degré de pollution 2 ou meilleur
Température ambiente max. .................................. 60°C
Taille max. des fils, borne 41...46 .......................... AWG 26-14
No du fichier UL ..................................................... E324843
ETALONNAGE ET REGLAGE
Lors des opérations d’étalonnage et de réglage, il convient d’effectuer les
mesures et les connexions des tensions externes en respectant les spécifications
mentionnées dans ce guide. Les techniciens doivent utiliser des outils et des
instruments pouvant être manipulés en toute sécurité.
MANIPULATIONS ORDINAIRES
Les opérateurs sont uniquement autorisés à régler et faire fonctionner des
dispositifs qui sont solidement fixés sur des platines des tableaux, ect., afin
d’écarter les risques de dommages corporels. Autrement dit, il ne doit exister
aucun danger d’électrocution et le dispositif doit être facilement accessible.
MAINTENANCE ET ENTRETIEN
Une fois le dispositif hors tension, prenez un chiffon humecté d’eau distillée pour
le nettoyer.
LIMITATION DE RESPONSABILITE
Dans la mesure où les instructions de ce guide ne sont pas strictement respectées
par le client, ce dernier n’est pas en droit de faire une réclamation auprès de Red
Lion, même si cette dernière figure dans l’accord de vente conclu.
30

32 33
PGMMOD00 INDICATEUR /
FAÇADE DE PROGRAMMATION
Fonctionnalité:
Le menu simple, structuré à l’aide de questions pour la
configuration, guide automatiquement l’utilisateur par un
menu déroulant et rend ainsi aisé l’utilisation du produit.
Voir la description des fonctions et options de configuration
dans la section «Configuration / utilisation des touches de
fonction».
Application:
• Interface de communication pour la modification des paramètres de
fonctionnement des dispositifs IAMS.
• Peut être transféré d’un dispositif à un autre du même type et charger la
configuration du premier dispositif vers les dispositifs suivants.
• Comme indicateur fixe pour visualisation des données de process et de l’état.
Caractéristiques techniques:
• Affichage LCD en quatre lignes; Ligne 1 (0,2 inch/5,57 mm de haut) affiche le
signal d’entrée, ligne 2 (0,13 inch/3,33 mm de haut) affiche les unités, ligne 3
(0,13 inch/3,33 mm de haut) affiche la sortie analogique ou le numéro de repère
et ligne 4 affiche l’etat de communication et des relais.
• L’accès à la programmation peut être bloqué par un mot de passe. Ce mot
de passe est sauvegardé dans le dispositif afin d’assurer un haut niveau de
protection contre les modifications non autorisées.
Montage / installation:
• Cliquer le PGMMOD00 sur la face avant du dispositif.
33
IAMS 0001 / 0011 / 0010
• Entrées : RTD, TC, Ohm, potentiomètre, mA et V
• Alimentation 2-fils > 16 V
• Approbation FM pour installation en Div. 2
• Sorties : courant, tension et 2 relais
• Alimentation multi-tension ca ou cc
Options avancées:
• Programmable à l’aide de la façade de programmation (PGMMOD00),
calibration de process, simulation de signaux et de relais, protection par
mot de passe, diagnostic d’erreurs et textes d’aide disponibles en plusieurs
langues.
Applications:
• Mesure électronique linéarisée de la température avec un capteur RTD ou un
thermocouple.
• Conversion d’une variation de la résistance linéaire en un signal courant ou
tension analogique. Signal potentiométrique en provenance de vannes, vannes
papillons ou mouvement linéaire.
• Alimentation et isolateur de signaux pour transmetteurs 2-fils.
• Contrôle de procédés avec 2 paires de contacts de relais libre de potentiel qui
peuvent être configurés pour quelque fonction que ce soit.
• Isolataion galvanique de signaux analogiques et mesure de signaux flottants.
• Les IAMS0001 et IAMS0011 ont été construits avec un niveau de sécurité élevé
permettant de les utiliser dans les installations classées SIL 2.
Caractéristiques techniques:
• Quand l’indicateur / façade de programmation PGMMOD00 est monté, tous les
paramètres de fonctionnement peuvent être réglés quelle que soit l’application.
Le dispositif est équipé de commutateurs électroniques et ne nécessite donc
aucun réglage de commutateurs DIP.
• La LED verte / rouge en face avant indique un fonctionnement normal ou incorrect
du dispositif. Une LED jaune s’allume pour chaque relais de sortie actif.
• Vérification continue des données sauvegardées.
• Isolation galvanique 4-port de 2,3 kVca.
32

+
+
44
43
42
41
+
-
12
14
13
11
10 V
1 V
+
-
10 V
1 V
24
23
22
21
33
32
31
34 3535
Applications
Signaux d’entrée:
Courant
Ten-
sion
Potenti-
omètre RTD et R lin. TC
Connection, fils
Signaux de sortie:
Relais
Alimentation:
21,6...253 Vca
ou
19,2...300 Vcc
Analogique, 0/4...20 mA et tension
References de commande:
IAMS0001 Transmetteur universel, sortie mA
IAMS0011 Transmetteur universel, mA / 2 relais
IAMS0010 Relais à seuils avec 2 relais
PGMMOD00 Afficheur / façade de programmation
Spécifications électriques:
Plage des spécifications:
-20°C à +60°C
Spécifications communes:
Tension d’alimentation universelle .............. 21,6...253 Vca, 50...60 Hz
ou 19,2...300 Vcc
Consommation max.................................... ≤2,5 W
Fusible......................................................... 400 mA SB / 250 Vca
Tension d’isolation, test / opération............ 2,3 kVca / 250 Vca
Interface de communication ....................... Façade de program. PGMMOD00
Rapport signal / bruit .................................. Min. 60 dB (0...100 kHz)
Temps de réponse (0...90%, 100...10%):
Entrée température ................................. ≤ 1 s
Entrée mA / V.......................................... ≤ 400 ms
Température d’étalonnage .......................... 20...28°C
Précision, la plus grande des valeurs générales et de base:
34
Valeurs générales
Type
d’entrée Précision
absolue Coefficient
de température
Toutes ≤±0,1% de l’EC ≤±0,01% de l’EC / °C
Valeurs de base
Type
d’entrée Précision
de base Coefficient
de température
mA ≤±4 µA ≤±0,4 µA / °C
Volt ≤±20 µV ≤±2 µV / °C
Pt100 ≤±0,2°C ≤±0,01°C / °C
R lin. ≤±0,1 Ω≤±0,01 Ω/ °C
Potentiomètre ≤±0,1 Ω≤±0,01 Ω/ °C
Type TC: E, J, K, L, N, T, U ≤±1°C ≤±0,05°C / °C
Type TC: B, R, S, W3, W5, LR ≤±2°C ≤±0,2°C / °C

36 37
Entrée TC:
Compensation de soudure froide (CSF)
par capteur interne ................................. < ±1,0 °C
Détection de rupture capteur,
tous types de TC .................................... Oui
Courant de capteur:
pendant la détection............................... Nom. 2 µA
si non ...................................................... 0 µA
Entrée courant:
Gamme de mesure...................................... -1...25 mA
Gammes de mesure programmables ......... 0...20 et 4...20 mA
Résistance d’entrée .................................... Nom. 20 Ω+ PTC 50 Ω
Détection d'erreur capteur:
interruption de la boucle 4...20 mA ........ Oui
Entrée tension:
Gamme de mesure...................................... -20 mV...12 Vcc
Gammes de mesure programmables ......... 0...1 / 0,2...1 / 0...5 / 1...5 /
0...10 et 2...10 Vcc
Résistance d’entrée .................................... Nom. 10 MΩ
Sortie courant:
Gamme de signal (EC) ................................ 0...20 mA
Gammes de signal programmables............ 0...20 / 4...20 /
20...0 et 20...4 mA
Charge (max.).............................................. 20 mA / 800 Ω/ 16 Vcc
Stabilité de charge ...................................... ≤0,01% de l’EC / 100 Ω
Détection erreur capteur ............................. 0 / 3,5 / 23 mA / aucune
NAMUR NE 43 haut / bas d’échelle ........... 23 mA / 3,5 mA
37
Immunité CEM..................................................... < ±0,5% de l’EC
Immunité CEM améliorée:
NAMUR NE 21, critère A, burst .......................... < ±1% de l’EC
Tensions auxiliaires:
Alimentation 2-fils (borne 44...43) ............... 25...16 Vcc / 0...20 mA
Taille max. des fils ....................................... 1 x 2,5 mm2fil multibrins
Pression max. avant
déformation de la vis................................... 0,5 Nm
Humidité relative ......................................... < 95% HR (sans cond.)
Dimensions, sans façade 4501 (HxLxP) ..... 109 x 23,5 x 104 mm
Dimensions, avec façade 4501 (HxLxP) ..... 109 x 23,5 x 116 mm
Degré de protection (boîtier / bornier) ........ IP50 / IP20
Poids ........................................................... 170 g / 185 g avec 4501
Entrée RTD, résistance linéaire et potentiomètre:
Entrée pour types RTD:
Pt10, Pt20, Pt50, Pt100, Pt200, Pt250, Pt300, Pt400, Pt500, Pt1000
Ni50, Ni100, Ni120, Ni1000
Résistance de ligne max. par fil, RTD......... 50 Ω
Courant de capteur, RTD ............................ Nom. 0,2 mA
Effet de la résistance de ligne
3- / 4-fils, RTD............................................. < 0,002 Ω/ Ω
Détection de rupture capteur, RTD ............. Oui
Détection de court circuit, RTD................... < 15 Ω
36
Type
d’entrée Valeur
min. Valeur
max. Standard
Pt100
Ni100
R lin.
Potentiomètre
-200°C
-60°C
0 Ω
10 Ω
+850°C
+250°C
10000 Ω
100 kΩ
IEC60751
DIN 43760
-
-
Type Valeur
min. Valeur
max. Standard
B
E
J
K
L
N
R
S
T
U
W3
W5
LR
+400°C
-100°C
-100°C
-180°C
-200°C
-180°C
-50°C
-50°C
-200°C
-200°C
0°C
0°C
-200°C
+1820°C
+1000°C
+1200°C
+1372°C
+900°C
+1300°C
+1760°C
+1760°C
+400°C
+600°C
+2300°C
+2300°C
+800°C
IEC 60584-1
IEC 60584-1
IEC 60584-1
IEC 60584-1
DIN 43710
IEC 60584-1
IEC 60584-1
IEC 60584-1
IEC 60584-1
DIN 43710
ASTM E988-90
ASTM E988-90
GOST 3044-84
Other manuals for IAMS 0001
1
This manual suits for next models
2
Table of contents
Languages:
Other red lion Test Equipment manuals