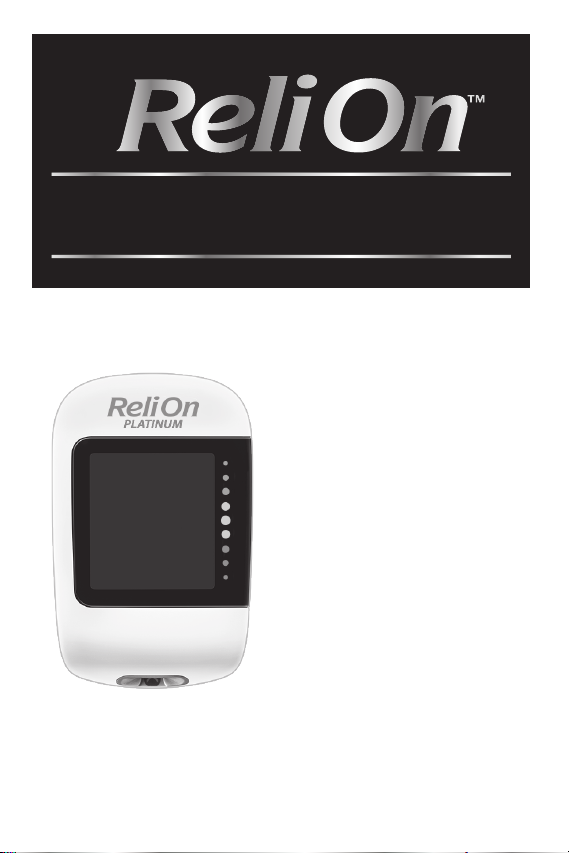
ReliOn PLATINUM User manual

PLATINUM
This file may not print or view at 100%.
Die lines and color breaks do not print.
“Holding Area” text, box and rules do
not print.
83561
V1/1 – 09410155001A – Black
ENGLISH
User’s Manual for
Single Patient Use
Only
Wireless Blood Glucose Meter
Wireless Blood Glucose Monitoring System
83561_09410155001A EN ReliON.indd 183561_09410155001A EN ReliON.indd 1 3/23/2022 11:23:34 AM3/23/2022 11:23:34 AM

1
Contents
Important Safety Information........................................................................................... 2
Chapter 1: Your New System.......................................................................................... 6
Chapter 2: Blood Glucose Tests.................................................................................... 11
Chapter 3: Control Tests............................................................................................... 17
Chapter 4: Review Your Data........................................................................................ 21
Chapter 5: Wireless Communication and Meter Pairing ................................................ 23
Chapter 6: Connecting to a PC ..................................................................................... 25
Chapter 7: Meter Cleaning and Disinfecting ................................................................. 26
Chapter 8: Meter Maintenance and Troubleshooting..................................................... 29
Chapter 9: Technical Information.................................................................................. 35
Chapter 10: License and Warranty ............................................................................... 39
Index ............................................................................................................................ 41
83561_09410155001A EN ReliON.indd 183561_09410155001A EN ReliON.indd 1 3/23/2022 11:23:34 AM3/23/2022 11:23:34 AM

2
Important Safety Information
The ReliOn Platinum System
The ReliOn Platinum Blood Glucose
Monitoring System is comprised of the
ReliOn Platinum meter and ReliOn
Platinum test strips.
The ReliOn Platinum Blood Glucose
Monitoring System is intended to
quantitatively measure glucose in fresh
capillary whole blood from the fingertip as
an aid in monitoring the eectiveness of
glucose control.
The ReliOn Platinum Blood Glucose
Monitoring System is intended for in vitro
diagnostic single patient use by people
with diabetes at home.
The ReliOn Platinum Blood Glucose
Monitoring System is intended to be used
by a single person and should not be
shared.
This system is not for use in diagnosis or
screening of diabetes mellitus, nor for
neonatal use.
ReliOn Platinum control solutions are for
use with the ReliOn Platinum Blood
Glucose Monitoring System to check that
the meters and test strips are working
together properly and that the test is
performing correctly.
The system includes:
ReliOn Platinum meter with batteries,
ReliOn Platinum test strips*, and control
solutions*.
Alternative Site Testing
Limitations
The ReliOn Platinum Blood Glucose
Monitoring System is not indicated for
Alternative Site Testing (AST).
*Some items may not be included in the
kit. They are a separate purchase.
WARNING
• Choking hazard. Small
parts. Keep away from
children under the age
of 3 years.
• Keep new and used batteries away
from children. Ingestion or insertion
into the body may cause chemical
burns, perforation of soft tissues, and
death. Severe burns may occur
within 2 hours of swallowing. If you
think a battery might have been
swallowed or placed inside any part
of the body, seek medical attention
immediately.
• If the battery compartment does not
close securely, stop using the
product and keep it away from
children. Contact Customer Service
at 1-800-819-1097.
NOTE
• The term “blood glucose” is used
when referring to blood sugar.
• Sample data screens are shown
throughout the manual. Your data will
dier.
Limitations
• Do not use the meter at high hematocrit
levels above 65 % or low hematocrit
levels below 10 %.
• Not for use in diagnosis or screening of
diabetes mellitus.
• Not for neonatal use.
83561_09410155001A EN ReliON.indd 283561_09410155001A EN ReliON.indd 2 3/23/2022 11:23:35 AM3/23/2022 11:23:35 AM

3
Important Safety Information
• Abnormally high concentrations (greater
than 5 mg/dL) of ascorbic acid (vitamin C
)
may cause inaccurate results. High-dose
vitamin C therapy that would result in
abnormally high concentrations is
typically prescribed by your healthcare
professional. If you are not sure if this
applies to you, please check with your
healthcare professional.
• Do not use the meter system to measure
blood glucose in people who are
experiencing cardiovascular collapse
(severe shock) or decreased peripheral
blood flow.
• Do not use during or soon after xylose
absorption testing since xylose may
cause inaccurate results. Xylose
absorption testing is performed under
the supervision of a doctor. Ask your
doctor how long to wait after xylose
testing before performing a blood
glucose test.
• Not for use on critically ill patients,
patients in shock, dehydrated patients,
or hyperosmolar patients with or without
ketosis.
• This system has not been tested at
altitudes higher than 10,150 feet. Do not
use the system at altitudes above
10,150 feet.
Need Help?
For questions, contact Customer Service
at 1-800-819-1097. Phone support is
available from 8:00 AM - 8:00 PM ET,
Monday - Friday. For questions at all other
times, or in case of emergency, contact
your healthcare professional or emergency
medical response.
About Testing Yourself or Others
WARNING
• DO NOT CHANGE YOUR THERAPY
BASED ON A TEST RESULT THAT
DOES NOT MATCH HOW YOU FEEL
OR IF YOU BELIEVE THAT YOUR TEST
RESULT COULD BE INCORRECT.
• It is strongly recommended to have a
back-up testing method available.
Failure to test could cause a delay in
therapy decisions and lead to a
serious medical condition. Examples
of back-up testing methods include a
back-up meter and test strips. Ask
your healthcare professional or
pharmacist about other possible
back-up methods.
• If your blood glucose result does not
match how you feel and you have
followed the instructions in this
User’s Manual, follow your healthcare
professional’s instructions, or contact
your healthcare professional.
WARNING
• During normal testing, any blood
glucose meter may come in contact
with blood. All parts of the kit are
considered biohazardous and can
potentially transmit infectious
diseases from bloodborne
pathogens, even after you have
performed cleaning and disinfecting.
1,2
• The meter should never be used by
more than one person. Do not share
the meter with anyone, including
family members, due to the risk of
infection from bloodborne
83561_09410155001A EN ReliON.indd 383561_09410155001A EN ReliON.indd 3 3/23/2022 11:23:35 AM3/23/2022 11:23:35 AM

4
Important Safety Information
pathogens.1,2 Do not use on multiple
patients!
• Use of this device on multiple
patients may lead to transmission of
Human Immunodeficiency Virus (HIV),
Hepatitis C Virus (HCV), Hepatitis B
Virus (HBV), or other bloodborne
pathogens.
• Cleaning and disinfecting the meter
destroys most, but not necessarily
all, bloodborne pathogens.3
• If the meter is being operated by a
second person who is providing
testing assistance to the user, the
meter should be cleaned and
disinfected prior to use by the
second person.
• Disinfect the meter before allowing
anyone else to handle it. Do not allow
anyone else to test with the meter.
• It is important to keep the meter
clean and disinfected. For
instructions on how to clean and
disinfect the meter, see the chapter
Meter Cleaning and Disinfecting.
• Wash hands and dry thoroughly
before and after handling the meter
or test strips.
NOTE
• Perform a control test when you
open a new test strip box or if you
think that a test result is incorrect.
Performing a control test lets you
know that the meter and test strips
are working properly.
• Refer to the test strip and control
solution package inserts for
additional health-related information.
• Blood glucose and BG are
interchangeable and mean the same
thing.
Special Information for
Caregivers
• Consult your healthcare professional to
determine if it is appropriate for your
child to be taught how to use the meter
system or any other medical products.
• Some people with diabetes do not
experience symptoms of low blood
glucose (hypoglycemia). Others, such as
children or people who are unconscious
or have certain disabilities, may not be
able to communicate their symptoms to
caregivers. For these reasons, do not
change any therapy without first talking
to a healthcare professional.
Before You Start Testing
WARNING
• Carefully read and follow the
instructions in the User’s Manual and
package inserts for the test strips
and control solutions. It is very
important to follow the instructions in
order to avoid an incorrect test result
that may lead to improper therapy.
• The meter, test strips, and control
solution are only for use outside the
body (in vitro). Do not eat the test
83561_09410155001A EN ReliON.indd 483561_09410155001A EN ReliON.indd 4 3/23/2022 11:23:35 AM3/23/2022 11:23:35 AM

5
Important Safety Information
strips. Do not swallow or inject the
control solution or use the control
solution for any purpose other than
testing the ReliOn Platinum system.
NOTE
Set the time and date on the meter
before you begin testing.
83561_09410155001A EN ReliON.indd 583561_09410155001A EN ReliON.indd 5 3/23/2022 11:23:35 AM3/23/2022 11:23:35 AM

6
1
The ReliOn Platinum Meter
Right Side View Front View Left Side View
4
23
1
Your New System
1. Up Button and Down Button
Press to turn the meter on and o,
adjust settings, and scroll through test
results.
2. Display
Shows results, messages, and test
results stored in memory.
3. Target Range Indicator
Indicates whether your blood glucose
result falls above, within, or below a
pre-set range of values.
4. Micro USB Port
Transfers data from the meter to a
computer (PC).
5. Test Strip Ejector
Press to remove test strip.
5
83561_09410155001A EN ReliON.indd 683561_09410155001A EN ReliON.indd 6 3/23/2022 11:23:38 AM3/23/2022 11:23:38 AM

7
Your New System
1
7
6
Back View Underside View
6. Battery Door
Open to replace batteries.
7. Test Strip Slot
Insert test strip here.
8
9
A
B
C
8. Test Strip Container*
(for example)
9. Test Strip – Metallic End
Insert this end into the meter.
10. Test Strip – Yellow Edge
Touch blood drop or control solution
here.
11. Control Solution Bottle*
12. Batteries
*Some items may not be included in the
kit. They are a separate purchase.
83561_09410155001A EN ReliON.indd 783561_09410155001A EN ReliON.indd 7 3/23/2022 11:23:41 AM3/23/2022 11:23:41 AM

8
Your New System
1
Using the Meter Buttons
When instructed to press a meter button, press it briefly and release it.
When instructed to press and hold a meter button, press and hold it for 3 or more
seconds.
Button Functions
Here are the functions of the Up button and Down button on the meter. These functions
are used throughout this manual.
Button
Function
Action
[Up button]
Turn the meter on.
Increase an option.
Move forward through test results in memory.
Press and release.
Set time and date selections.
Turn meter o.
Press and hold.
[Down button]
Decrease an option.
Move back through test results in memory.
Press and release.
Enter set-up mode.
Enter Bluetooth wireless technology pairing
mode.
Press and hold.
Target Range
WARNING
This function is no substitute for
hypoglycemia training by your
healthcare professional.
Consult your healthcare professional for
the blood glucose range appropriate for
you. It is very important to stay within your
target range.
The target range is set by default at
70–180 mg/dL. The target range can be
set from a lower limit of 60–140 mg/dL to
an upper limit of 90–300 mg/dL. Consult
your healthcare professional before
changing the target range.
To change the target range, pair the meter
to a mobile device, or connect it to a PC
with diabetes management software
installed. Then follow the diabetes
management software or mobile app
instructions. Functionality may vary by
software or mobile app. For questions,
contact Customer Service at
1-800-819-1097.
83561_09410155001A EN ReliON.indd 883561_09410155001A EN ReliON.indd 8 3/23/2022 11:23:41 AM3/23/2022 11:23:41 AM

9
Your New System
1
Symbols
Symbol Description
7-day average symbol. This indicates that you are viewing the 7-day
average of your blood glucose results.
14-day average symbol. This indicates that you are viewing the 14-day
average of your blood glucose results.
30-day average symbol. This indicates that you are viewing the 30-day
average of your blood glucose results.
90-day average symbol. This indicates that you are viewing the 90-day
average of your blood glucose results.
Bluetooth symbol
Control bottle symbol
Drop symbol
Hourglass symbol
Low battery symbol
No data to display
Pairing symbol. A flashing symbol indicates the meter is attempting to pair
with a device. A solid symbol indicates the meter pairing was successful.
Target range indicator arrow. When flashing, your blood glucose result is
outside the target range.
Temperature warning symbol
Test strip symbol. A flashing symbol indicates the meter is ready for you to
insert a test strip.
Wireless symbol. A flashing symbol indicates the meter is attempting to
connect to the paired device. A solid symbol indicates the meter is
connected to a paired device.
83561_09410155001A EN ReliON.indd 983561_09410155001A EN ReliON.indd 9 3/23/2022 11:23:53 AM3/23/2022 11:23:53 AM

10
Your New System
1
Setting the Time and Date
1
Press to turn the
meter on.
The flashing test strip
symbol appears on the
display.
2
Press and hold until
set‑up appears on the
display. The hour
flashes.
Press to increase
the hour or press to decrease the
hour.
3
Press and hold to
set the hour and move
to the next field. The
minutes flash.
Press to increase
the minutes or press to decrease the
minutes.
4
Repeat step 3 to adjust
each field. After setting
the year, press and
hold until the
flashing test strip
symbol appears to save your settings.
NOTE
• The meter prompts you to set the
time and date the first time you turn
the meter on or if an error occurs.
• Press and hold at any time until
the flashing test strip symbol
appears to perform a test.
• The time and date on the meter may
synchronize to the time and date on
the paired device each time the
meter sends data to the paired
device. See the chapter Wireless
Communication and Meter Pairing.
83561_09410155001A EN ReliON.indd 1083561_09410155001A EN ReliON.indd 10 3/23/2022 11:23:56 AM3/23/2022 11:23:56 AM

11
2Blood Glucose Tests
WARNING
• The meter should never be used
by more than one person. Do not
share the meter with anyone,
including family members, due to
the risk of infection from
bloodborne pathogens.1,2 Do not
use on multiple patients!
• Blood glucose results can be
displayed in either mg/dL or
mmol/L. The back label of the
meter shows the unit of
measurement. This meter is set to
mg/dL. If the meter shows the
wrong unit, contact Customer
Service at 1-800-819-1097. The
correct unit of measurement in the
US is mg/dL. If you do not know
which unit of measurement is
correct for you, contact your
healthcare professional. Using the
wrong unit of measurement may
cause misinterpretation of your
actual blood glucose level and
may lead to improper therapy.
mg/dL is printed here
Using the ReliOn Platinum System
WARNING
To prevent inaccurate results:
• If you drop the meter or drop the meter
with a test strip inserted, the meter and/
or test strip could be damaged. Discard
the test strip and perform a control test
with control solution and a new, unused
test strip to ensure the meter and test
strips are both working properly. Then
repeat the blood glucose test with a new
test strip.
• DO NOT remove test strips from the test
strip container and put them into another
container, such as a plastic bag, pocket,
purse, wallet, etc. Storing test strips
outside of the test strip container can
damage the test strips and lead to
inaccurate results. It is important that
the test strips remain in their original
container until the time of use.
• DO NOT expose test strips to heat,
moisture, or humidity. Temperatures
outside the required range, as well as
moisture and humidity, can damage the
test strips and lead to inaccurate results.
• DO NOT bend, cut, or alter the test strips.
• DO NOT get dirt, food, or other material
on the test strip.
• When performing a blood glucose test,
remove your finger from the test strip
after the test strip is dosed and the
flashing hourglass symbol appears on
the meter. Failure to move your finger
away from the test strip during
measurement could give inaccurate
results.
83561_09410155001A EN ReliON.indd 1183561_09410155001A EN ReliON.indd 11 3/23/2022 11:23:56 AM3/23/2022 11:23:56 AM

12
Blood Glucose Tests
2
• Inspect the test strip container before
using the test strips for the first time. If
you see any damage to the container, or
if anything prevents the cap from
closing properly, do not use the test
strips. Do not perform a control test.
Contact Customer Support at
1-800-819-1097.
• The ReliOn Platinum test strips are for
testing fresh capillary whole blood.
• Use only ReliOn Platinum test strips.
• Use the test strip immediately after
removing it from the test strip container.
• Do not apply blood or control solution to
the test strip before inserting it into the
meter. If you applied blood or control
solution before inserting the test strip
into the meter, retest with a new test
strip. If a result appears before applying
blood or control solution, do not act on
that result.
• Close the test strip container tightly
immediately after removing a test strip.
Moisture can damage the test strips and
produce incorrect results.
• Store the unused test strips in their
original test strip container with the cap
tightly closed.
• Discard the test strips if they are past
the Use By date printed on the test strip
container. If the Use By date is missing
or cannot be read, do not use the test
strips. Contact Customer Service at
1-800-819-1097.
• Refer to the test strip package insert for
test strip storage and system operating
conditions.
• Do not reuse test strips. Once control
solution or blood has been applied to a
test strip, discard it. If a retest is
necessary, use a new test strip.
• Perform a control test every time you
open a new test strip box.
Performing a Blood Glucose Test
with Blood from Your Fingertip
Refer to the Important Safety Information
section at the beginning of this manual.
NOTE
• You need the meter, a test strip, and
a lancing device with a lancet
inserted to perform a blood glucose
test.
• A blood glucose test cannot be
performed while the meter is
connected to a PC with a USB cable.
1
Wash your hands with
warm soapy water and
dry thoroughly. Dirty or
wet hands could aect
test results.
Prepare the lancing device.
2
Check the Use By date
on the test strip
container.
Do not use test strips
past the Use By date.
83561_09410155001A EN ReliON.indd 1283561_09410155001A EN ReliON.indd 12 3/23/2022 11:23:58 AM3/23/2022 11:23:58 AM

13
Blood Glucose Tests
2
3
Remove a test strip
from the test strip
container.
Close the cap tightly.
4
Insert the metallic end
of the test strip into
the meter. The meter
turns on.
5
When a flashing drop
symbol appears,
perform a fingerstick
with the lancing
device.
6
Press the lancing
device firmly against
the side of your
fingertip to prick your
finger.
7
Gently squeeze your
finger to assist the
blood flow. This helps
you get a blood drop.
8
Touch the yellow
edge of the test strip
to the blood drop.
Do not put blood on
top of the test strip.
9
Remove your finger from the test strip
when the flashing hourglass symbol
appears. Failure to move your finger
away from the test strip could give
inaccurate test results.
83561_09410155001A EN ReliON.indd 1383561_09410155001A EN ReliON.indd 13 3/23/2022 11:24:02 AM3/23/2022 11:24:02 AM

14
Blood Glucose Tests
2
Blue
Test result is above the
target range.
Green
Test result is within the
target range.
Red
Test result is below the
target range.
Press here to eject test strip.
10
*The target range is set by default at 70–180 mg/dL. Consult your healthcare professional
before changing the target range. To change the target range, pair the meter to a mobile
device or connect it to a PC with diabetes management software installed. Then follow the
diabetes management software or mobile app instructions. Functionality may vary by
software or mobile app. For questions, contact Customer Service at 1-800-819-1097.
NOTE
When performing a blood glucose test: If the control bottle symbol and the flashing L1
or L2 appear on the display with your blood glucose result, an error has occurred.
• Do not act on the blood glucose result.
• Discard the test strip and repeat the blood glucose test with a new test strip.
Your test result appears with an arrow. This arrow shows if your test result falls above,
within, or below the target range.* The target range is represented by the green region
of the target range indicator. The arrow will flash if your test result falls above or below
this range.
83561_09410155001A EN ReliON.indd 1483561_09410155001A EN ReliON.indd 14 3/23/2022 11:24:03 AM3/23/2022 11:24:03 AM

15
Blood Glucose Tests
2
11
Remove and discard the used test strip
by pulling the test strip out of the meter
or by pressing the test strip ejector on
the side of the meter.
12
Wash your hands with
warm soapy water and
dry thoroughly.
Unusual Blood Glucose Results
If your blood glucose result does not match
how you feel, follow these steps:
1. Perform a control test. See the chapter
Control Tests.
2. Repeat the blood glucose test.
If your blood glucose result still does not
match how you feel, follow your healthcare
professional’s instructions or contact your
healthcare professional immediately.
NOTE
Always follow your healthcare
professional’s instructions. For example,
if your healthcare professional has
advised you to immediately treat a low
blood glucose result (such as by eating
something), then do that first.
WARNING
• Do not change your treatment
because of one blood glucose result.
• NEVER ignore symptoms of low or
high blood glucose.
Symptoms of Low or High Blood
Glucose
WARNING
• The meter is designed to provide a
numerical value for blood glucose in
the range of 20–600 mg/dL.
• Being aware of the symptoms of low
or high blood glucose can help you
understand your test results and
decide what to do if they seem
unusual.
• Low blood glucose (hypoglycemia):
Symptoms of hypoglycemia may
include, but are not limited to,
anxiety, shakiness, sweating,
headache, increased hunger,
dizziness, pale skin color, sudden
change in mood or irritability, fatigue,
diculty concentrating, clumsiness,
palpitations, and/or confusion.
• High blood glucose (hyperglycemia):
Symptoms of hyperglycemia may
include, but are not limited to,
increased thirst, frequent urination,
blurred vision, drowsiness, and/or
unexplained weight loss.
• If you are experiencing any of these
symptoms, or other unusual
symptoms, test your blood glucose
from the fingertip. If your blood
glucose result is displayed as LO or
HI, follow your healthcare
professional’s instructions or contact
your healthcare professional
immediately. If your blood glucose
result does not match how you feel,
follow the steps in the Unusual Blood
Glucose Results section of this
chapter.
83561_09410155001A EN ReliON.indd 1583561_09410155001A EN ReliON.indd 15 3/23/2022 11:24:03 AM3/23/2022 11:24:03 AM

16
Blood Glucose Tests
2
Comparing Your Meter Result to
a Laboratory Result
A common question is how the blood
glucose results on the meter compare to
the laboratory results. Your blood glucose
can change quickly, especially after
eating, taking medication, or physical
activity. If you test yourself in the morning,
then go to your healthcare professional’s
oce for a blood glucose test, your test
results will probably not match, even if you
are fasting. This is typically not a problem
with the meter, it just means that time has
elapsed and your blood glucose level has
changed.
Although you always apply fresh capillary
whole blood to the test strip, the system
has been calibrated to deliver plasma-like
values for easier comparison to laboratory
results.
If you want to compare your meter result
to the laboratory result, you must be
fasting. Take the meter to your healthcare
professional’s oce and test yourself by
fingerstick within 5 minutes of having
blood drawn from your arm by a
healthcare professional. Keep in mind that
the laboratory uses dierent technology
than the meter.
83561_09410155001A EN ReliON.indd 1683561_09410155001A EN ReliON.indd 16 3/23/2022 11:24:03 AM3/23/2022 11:24:03 AM

17
3Control Tests
When to Perform a Control Test
Performing a control test lets you know
the meter and test strips are working
properly. You should perform a control test
when:
• you open a new test strip box.
• you left the test strip container open.
• you think the test strips are damaged.
• you want to check the meter and test
strips.
• the test strips were stored in extreme
temperatures, humidity, or both.
• you dropped the meter.
• your test result does not match how you
feel.
• you want to check if you are performing
the test correctly.
About the Control Solutions
• Refer to the control solution package
insert for detailed use instructions and
control solution storage conditions.
• Use only control solutions compatible
with the ReliOn Platinum system.
• Close the control solution bottle tightly
after use.
• Write the date you open the control
solution bottle on the bottle label. The
control solution must be discarded 3
months from the date the control
solution bottle was opened (discard
date) or on the Use By date on the bottle
label, whichever comes first.
• Do not use control solution that is past
the Use By or discard date.
• The meter automatically recognizes the
dierence between the control solution
and blood.
• The control solution can stain fabric.
Remove stains by washing with soap
and water.
• The control results are not displayed in
memory.
• Control solution can be ordered
separately by contacting Customer
Service at 1-800-819-1097.
Performing a Control Test
NOTE
• The ranges for Level 1 and Level 2
controls are printed on the test strip
container label.
• The meter turns o 90 seconds after
a successful test or 15 seconds after
the test strip is removed, provided no
other action is taken.
You need the meter, a test strip, and
control solution Level 1 or Level 2.
1
Check the Use By
date on the test strip
container. Do not use
test strips past the
Use By date.
2
Remove a test strip
from the test strip
container.
Close the cap tightly.
83561_09410155001A EN ReliON.indd 1783561_09410155001A EN ReliON.indd 17 3/23/2022 11:24:03 AM3/23/2022 11:24:03 AM

18
Control Tests
3
3
Insert the metallic end of the test strip
into the meter. Place the meter on a flat
surface. The meter turns on.
A flashing drop symbol appears.
4
Select the control
solution to test. You
will confirm the level
later in the test.
5
Remove the bottle
cap. Wipe the tip of
the bottle with a
tissue. Squeeze the
bottle until a tiny drop
forms at the tip.
6
Touch the drop to the yellow edge of
the test strip. Do not put control solution
on top of the test strip.
A flashing hourglass symbol appears
when there is enough control solution in
the test strip.
7
or
(example) (example)
The control result, the bottle symbol,
and the flashing L1 or L2 appear on the
display. Press and hold to confirm
the control level you tested.
Press or to alternate between L1
and L2.
NOTE
When performing a control test: If the
control bottle symbol and the flashing
L1 or L2 DO NOT appear on the display
with your control result, an error has
occurred.
• Do not act on the control result.
• Discard the test strip and repeat the
control test with a new test strip.
83561_09410155001A EN ReliON.indd 1883561_09410155001A EN ReliON.indd 18 3/23/2022 11:24:06 AM3/23/2022 11:24:06 AM

19
Control Tests
3
8
or
OK appears if the control result is within
range.
Err appears if the control result is out of
range.
9
Wipe the tip of the
bottle with a tissue.
Cap the bottle tightly.
Remove and discard
the used test strip.
Understanding Out‑of‑Range Control Results
WARNING
• The control range applies only to a control result. It only indicates that the test strips
and meter are working properly. Do not use a control result to interpret blood
glucose results.
• If the control result is out of range, do not use the meter until you solve the problem.
Check the following list to help solve the problem.
Troubleshooting Checks Action
Were the test strips or control
solutions expired?
Discard the test strips or control solution if
either is past the Use By date. If the control
solution was opened more than 3 months ago,
discard it. Repeat the control test with an
unexpired test strip and an unexpired control
solution.
83561_09410155001A EN ReliON.indd 1983561_09410155001A EN ReliON.indd 19 3/23/2022 11:24:07 AM3/23/2022 11:24:07 AM
Table of contents
Other ReliOn Blood Glucose Meter manuals

ReliOn
ReliOn Micro Operator's manual

ReliOn
ReliOn Prime Operator's manual

ReliOn
ReliOn Micro Operator's manual

ReliOn
ReliOn Micro Installation instructions

ReliOn
ReliOn Prime Operator's manual

ReliOn
ReliOn Premier VOICE User manual

ReliOn
ReliOn Confirm Operator's manual

ReliOn
ReliOn Relion ultima User manual

ReliOn
ReliOn Premier BLU User manual

ReliOn
ReliOn PREMIER CLASSIC User manual