manuals.online logo
Brands
  1. Home
  2. •
  3. Brands
  4. •
  5. resideo
  6. •
  7. Burner
  8. •
  9. resideo SmartValve Q3450 User manual

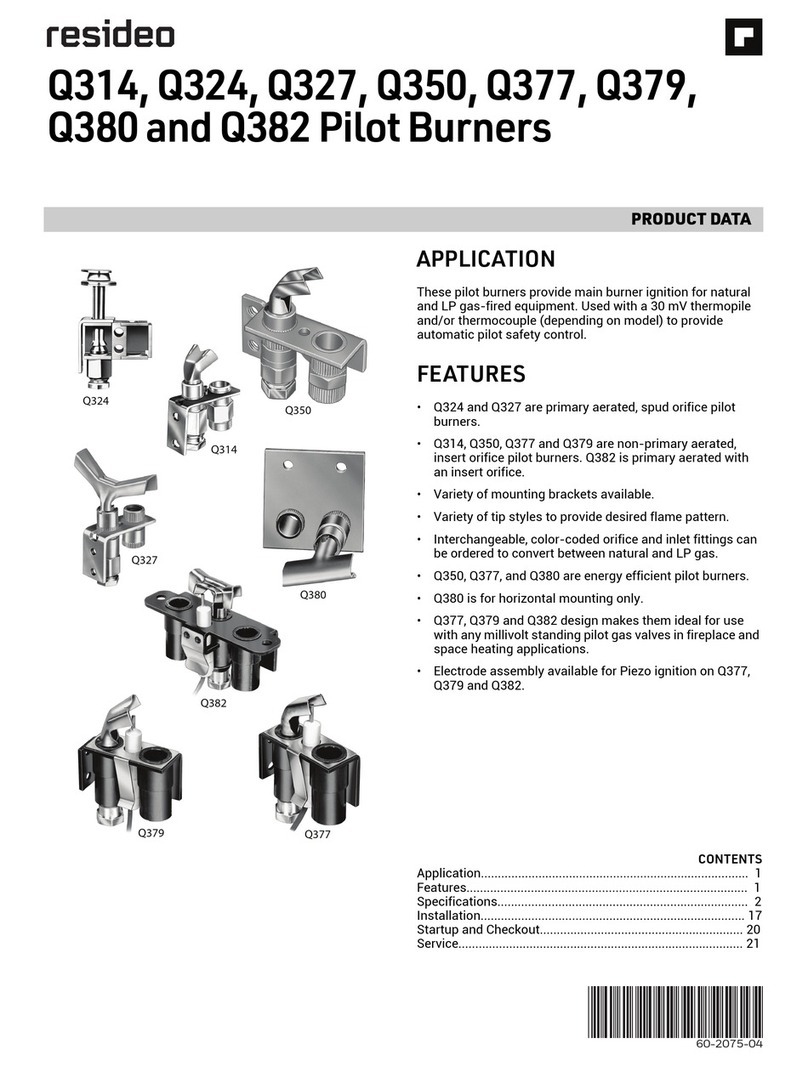
resideo SmartValve Q3450 User manual

INSTALLATION INSTRUCTIONS
69-0708-05
Q3450, Q3453 and Q3480
SmartValve™ System
Pilot Burners
APPLICATION
These SmartValve™ System pilot burners provide pilot
flame ignition and sensing for the
SV94/SV95/SV96/SV98XX Systems. They consist of a
replaceable igniter-flame rod assembly, bracket
assembly, pilot target, ground electrode, orifice
assembly, compression fitting and spring clip. The
igniter lights the pilot burner. The flame rod proves the
pilot flame and the pilot flame lights the main burner.
INSTALLATION
When Installing This Product…
1. Read these instructions carefully. Failure to follow
instructions can damage product or cause a
hazardous condition.
2. Check ratings given in instructions and on product
to make sure product is suitable for your
application.
3. Make sure installer is a trained, experienced
service technician.
4. After installation is complete, check out product
operation as provided in these instructions.
WARNING
Fire or Explosion Hazard.
Can cause severe injury, death or property
damage.
Follow these warnings exactly:
1. Disconnect power supply before wiring to
prevent electrical shock or equipment
damage.
2. To avoid dangerous accumulation of fuel gas,
turn off gas supply at appliance service valve
before starting installation and perform Gas
Leak Test after completion of installation.
3. Do not bend pilot tubing at the control or pilot
after compression nut is tightened. Gas
leakage at the connection can result.
Follow appliance manufacturer instructions if available;
otherwise, use the following instructions.
Location
1. Position pilot burner for easy access and
observation. In replacement applications, replace
pilot burner with an identical unit and position new
pilot burner in the same location and orientation
as the original one.
2. Mount pilot burner on main burner. Mounting
surfaces other than the main burner can shift,
bend, or warp as furnace expands and contracts
while operating. See Fig. 1.
Fig. 1. Mount pilot burner on main burner.
3. Mount pilot burner so the pilot flame remains
properly positioned with respect to the main
burner flame. See Fig. 2.
Fig. 2. Location of pilot burner.
4. Supply pilot flame with ample air which is free of
combustion products.
5. Do not impinge pilot flame on adjacent parts. Do
not impinge main burner flame on pilot burner.
PILOT BURNER MUST
BE RIGIDLY POSITIONED
RELATIVE TO MAIN BURNER
M2688A
PILOT BURNER
JUST RIGHT
PILOT BURNER
TOO LOW
PILOT BURNER
TOO HIGH
MAIN BURNER
FLAME WILL
IMPINGE ON
IGNITION-
SENSOR
IGNITION
FLAME WILL
IMPINGE ON
MAIN BURNER
IGNITION FLAME
JUST MISSES
MAIN BURNER
M9537
Q3450, Q3453 AND Q3480 SMARTVALVE™ SYSTEM PILOT BURNERS
69-0708—05 2
6. Do not expose pilot flame to falling scale that could
impair main burner ignition.
7. Do not expose pilot burner to main burner rollout
while igniting or extinguishing.
8. Do not expose pilot flame to drafts that push or pull
pilot flame away from the igniter-flame rod.
Connect Pilot Gas Tubing
1. Cut tubing to desired length and bend as necessary
for routing to pilot burner. Do not make sharp
bends or deform tubing. Do not bend tubing at
control after compression nut is tightened because
this can result in gas leakage at connection.
2. Square off and remove burrs from end of tubing.
3. Push tubing into compression nut clearance hole
until tubing bottoms.
NOTE: When replacing an ignition system control, cut
off old compression fitting and replace with new
compression fitting provided with new pilot
burner. Never use old compression fitting
because it might not provide a gas-tight seal.
See Fig. 3.
Fig. 3. Always use new compression fitting.
4. While holding tubing all the way in, engage threads
and turn until finger tight.
5. Using a wrench, turn compression nut one turn
beyond finger tight. DO NOT OVERTIGHTEN.
6. Connect the other end of the tubing to ignition sys-
tem control according to ignition system control
manufacturer instructions.
Wire Pilot Burner to Ignition System
Control
1. Mount the igniter-flame rod assembly on the pilot
burner.
2. Connect the igniter-flame rod assembly keyed plug
connector to its mating terminal block, labeled
IGNITER, on the SV94/SV95/SV96/SV98XX.
3. Use ceramic or plastic standoff insulators as
necessary to prevent cable from contacting metal
surfaces.
STARTUP AND CHECKOUT
Perform Gas Leak Test
WARNING
Fire or Explosion Hazard.
Can cause severe injury, death or property
damage.
Check for gas leaks with soap and water solution
any time work is done on a gas system.
Gas Leak Test:
1. Make sure that gas supply is turned on at the
appliance service valve.
2. Paint pipe connections upstream of pilot burner
with rich soap and water solution. Bubbles indicate
gas leak.
3. If leak is detected, tighten pipe connections.
4. Set thermostat to call for heat to light main burner.
5. With main burner in operation, paint pipe joints
(including adapters) and ignition system control
inlet and outlet with rich soap and water solution.
6. If another leak is detected, tighten adapter screws,
joints, and pipe connections.
7. Replace part if leak can not be stopped.
Adjust Pilot Flame
The pilot flame should envelop approximately 3/8 in.
(10 mm) of the sensor tip. See Fig. 4.
To adjust pilot flame:
1. Turn off system by setting thermostat below the
temperature to call for heat.
2. Disconnect lead to MV terminal on the
SV94/SV95/SV96/SV98XX.
3. Light pilot by setting the thermostat to call for heat.
4. Remove the pilot adjustment cover screw from the
gas control.
5. Turn inner pilot adjustment screw clockwise to
decrease or counterclockwise to increase pilot
flame.
6. Always replace pilot adjustment cover screw and
tighten firmly after completing adjustment to
assure proper operation.
Fig. 4. Sensor tip must be in pilot flame.
PILOT BURNER BODY ON
BRACKET OF PILOT BURNER
TIGHTEN NUT ONE TURN
BEYOND FINGER TIGHT
COMPRESSION FITTING
BREAKS OFF AND CLINCHES
TUBING AS NUT IS TIGHTENED
TO IGNITION
SYSTEM CONTROL
M2687
A
3/8 INCH
(10 mm)
PROPER FLAME
ADJUSTMENT
IGNITER
M9049
SENSOR
Q3450, Q3453 AND Q3480 SMARTVALVE™ SYSTEM PILOT BURNERS
369-0708—05
SERVICE
WARNING
Fire or Explosion Hazard.
Can cause severe injury, death or property
damage.
Perform Gas Leak Test anytime work is done to
the system.
Pilot Outage
1. If pilot flame goes out during ignition, but is
properly adjusted, recheck mounting and location
instructions in Location section.
2. If all mounting and location instructions are
followed but pilot continues to go out, construct a
shield to protect pilot flame from main burner
ignition, extinction and drafts. See Fig. 5.
Fig. 5. Proper shielding of pilot flame.
3. Check pilot and main burner lightoff.
a. Set the thermostat to call for heat.
b. Watch the pilot burner during the ignition
sequence to determine if:
(1) Igniter continues to glow red after the pilot
is lit.
(2) The pilot lights and the igniter stops glow-
ing red, but main burner does not light.
c. If pilot burner is functioning correctly, ensure
adequate flame current as follows:
(1) Turn off furnace at circuit breaker or fuse
box.
(2) Clean the flame rod with emery cloth.
(3) Make sure electrical connections are clean
and tight.
(4) Check for cracked ceramic insulator, which
can cause short to ground, and replace
igniter-flame rod assembly if necessary.
(5) Turn on power and set thermostat to call for
heat. The pilot should light and then the
main burner should light.
Replace Igniter-Flame Rod
Assembly
1. Turn off furnace at circuit breaker or fuse box.
2. Remove spring clip, then igniter-flame rod
assembly from the pilot burner.
3. Disconnect the igniter-flame rod assembly keyed
plug from the igniter connection on the
SV94/SV95/SV96/SV98XX.
4. Remove the igniter-flame rod assembly from the
furnace.
5. Install replacement igniter-flame rod assembly in
the pilot burner and secure with spring clip.
6. Connect igniter-flame rod assembly keyed plug to
igniter connection on the
SV94/SV95/SV96/SV98XX.
7. Turn on power and set thermostat to call for heat.
The pilot should light and then the main burner
should light.
Check Ignition Cable
1. Make sure that ignition cable is not in contact with
metal surfaces.
2. Make sure that ignition cable is not more than 3 ft
(1m) long.
3. Check electrical continuity of ignition cable.
Check Grounding
1. If ground is poor or erratic, safety shutdown will
occur. Therefore, if frequent shutdowns are
reported, check that ground is made through the
pilot tubing.
2. Excessive temperature at the ceramic flame rod
insulator will permit electrical leakage to ground.
Check for the following:
(a)If bracket is bent, bend it back to correct
position.
(b)If insulator is cracked, replace igniter-
flame rod assembly (Q3400A or Q3405
for SV9580/SV9581 System).
TYPICAL
SHIELD
M2686
Q3450, Q3453 AND Q3480 SMARTVALVE™ SYSTEM PILOT BURNERS
© 2020 Resideo Technologies, Inc. All rights reserved.
This product is manufactured by Resideo Technologies, Inc. and its affiliates.
www.resideo.com
Resideo Technologies, Inc.
1985 Douglas Drive North, Golden Valley, MN 55422
1-800-468-1502
69-0708—05 M.S. Rev. 06-20 | Printed in United States

This manual suits for next models

2

Other resideo Burner manuals

resideo Q314 User manual

resideo

resideo Q314 User manual

resideo Q314 User manual

resideo

resideo Q314 User manual

Popular Burner manuals by other brands

baltur BGN 60 LX Startup guide

baltur

baltur BGN 60 LX Startup guide

Riello GS5 Installation, use and maintenance instructions

Riello

Riello GS5 Installation, use and maintenance instructions

Riello RLS 130/EV Installation, use and maintenance instructions

Riello

Riello RLS 130/EV Installation, use and maintenance instructions

ACV BG 2000-S Series Installation, operating and servicing instructions

ACV

ACV BG 2000-S Series Installation, operating and servicing instructions

Jackson Grills GSBSEAR-LP owner's manual

Jackson Grills

Jackson Grills GSBSEAR-LP owner's manual

Riello 40 FS20 CV Installation, use and maintenance instructions

Riello

Riello 40 FS20 CV Installation, use and maintenance instructions

Unigas RX92R-FGR Service manual

Unigas

Unigas RX92R-FGR Service manual

Riello RS 310/EV ULX Installation, use and maintenance instructions

Riello

Riello RS 310/EV ULX Installation, use and maintenance instructions

Riello 46662X Installation, use and maintenance instructions

Riello

Riello 46662X Installation, use and maintenance instructions

Ecoflam MAIOR P 300.1 AB manual

Ecoflam

Ecoflam MAIOR P 300.1 AB manual

Webster JBE Series Operation, maintenance & installation manual

Webster

Webster JBE Series Operation, maintenance & installation manual

Cuenod NC12 operating instructions

Cuenod

Cuenod NC12 operating instructions

elco VECTRON L 04.410 DUO operating instructions

elco

elco VECTRON L 04.410 DUO operating instructions

Cuenod NC9 GX207 Technical data

Cuenod

Cuenod NC9 GX207 Technical data

Riello GS10 Installation, use and maintenance instructions

Riello

Riello GS10 Installation, use and maintenance instructions

KoolMore KM-OKS-SBC installation manual

KoolMore

KoolMore KM-OKS-SBC installation manual

Riello RS 650/M TC Installation, use and maintenance instructions

Riello

Riello RS 650/M TC Installation, use and maintenance instructions

Riello Gulliver RG1RK Installation, use and maintenance instructions

Riello

Riello Gulliver RG1RK Installation, use and maintenance instructions

manuals.online logo
manuals.online logoBrands
  • About & Mission
  • Contact us
  • Privacy Policy
  • Terms and Conditions

Copyright 2025 Manuals.Online. All Rights Reserved.