manuals.online logo
Brands
  1. Home
  2. •
  3. Brands
  4. •
  5. result objects
  6. •
  7. Indoor Furnishing
  8. •
  9. result objects ORBIT User manual

result objects ORBIT User manual

Popular Indoor Furnishing manuals by other brands

Regency LWMS3015 Assembly instructions

Regency

Regency LWMS3015 Assembly instructions

Furniture of America CM7751C Assembly instructions

Furniture of America

Furniture of America CM7751C Assembly instructions

Safavieh Furniture Estella CNS5731 manual

Safavieh Furniture

Safavieh Furniture Estella CNS5731 manual

PLACES OF STYLE Ovalfuss Assembly instruction

PLACES OF STYLE

PLACES OF STYLE Ovalfuss Assembly instruction

Trasman 1138 Bo1 Assembly manual

Trasman

Trasman 1138 Bo1 Assembly manual

Costway JV10856 manual

Costway

Costway JV10856 manual

moss DESIGN Caisson Credenza Assembly instructions

moss DESIGN

moss DESIGN Caisson Credenza Assembly instructions

Aquaglide FULL DECK 15.0 owner's manual

Aquaglide

Aquaglide FULL DECK 15.0 owner's manual

AREBOS AR-HE-SW30 user manual

AREBOS

AREBOS AR-HE-SW30 user manual

Till-Hilft Fulda 87005.330 Assembly instructions

Till-Hilft

Till-Hilft Fulda 87005.330 Assembly instructions

Twoey Outside 2010 quick start guide

Twoey Outside

Twoey Outside 2010 quick start guide

Hettich Easys 200 operating instructions

Hettich

Hettich Easys 200 operating instructions

The bedboss RELAX 404 Series owner's manual

The bedboss

The bedboss RELAX 404 Series owner's manual

Oeseder Möbelindustrie Bern 991 720 Assembly instructions

Oeseder Möbelindustrie

Oeseder Möbelindustrie Bern 991 720 Assembly instructions

Costway HW68469 user manual

Costway

Costway HW68469 user manual

Next ALIX A27743 Assembly instructions

Next

Next ALIX A27743 Assembly instructions

BROSA Hans Assembly guide

BROSA

BROSA Hans Assembly guide

Prodigg MINIKA PBA015T-FUR installation manual

Prodigg

Prodigg MINIKA PBA015T-FUR installation manual

manuals.online logo
manuals.online logoBrands
  • About & Mission
  • Contact us
  • Privacy Policy
  • Terms and Conditions

Copyright 2025 Manuals.Online. All Rights Reserved.

www.resultobjects.com
ORBIT plant hanger
Mounting instructions
Montageanleitung
result objects
result objects ORBIT plant hanger
1
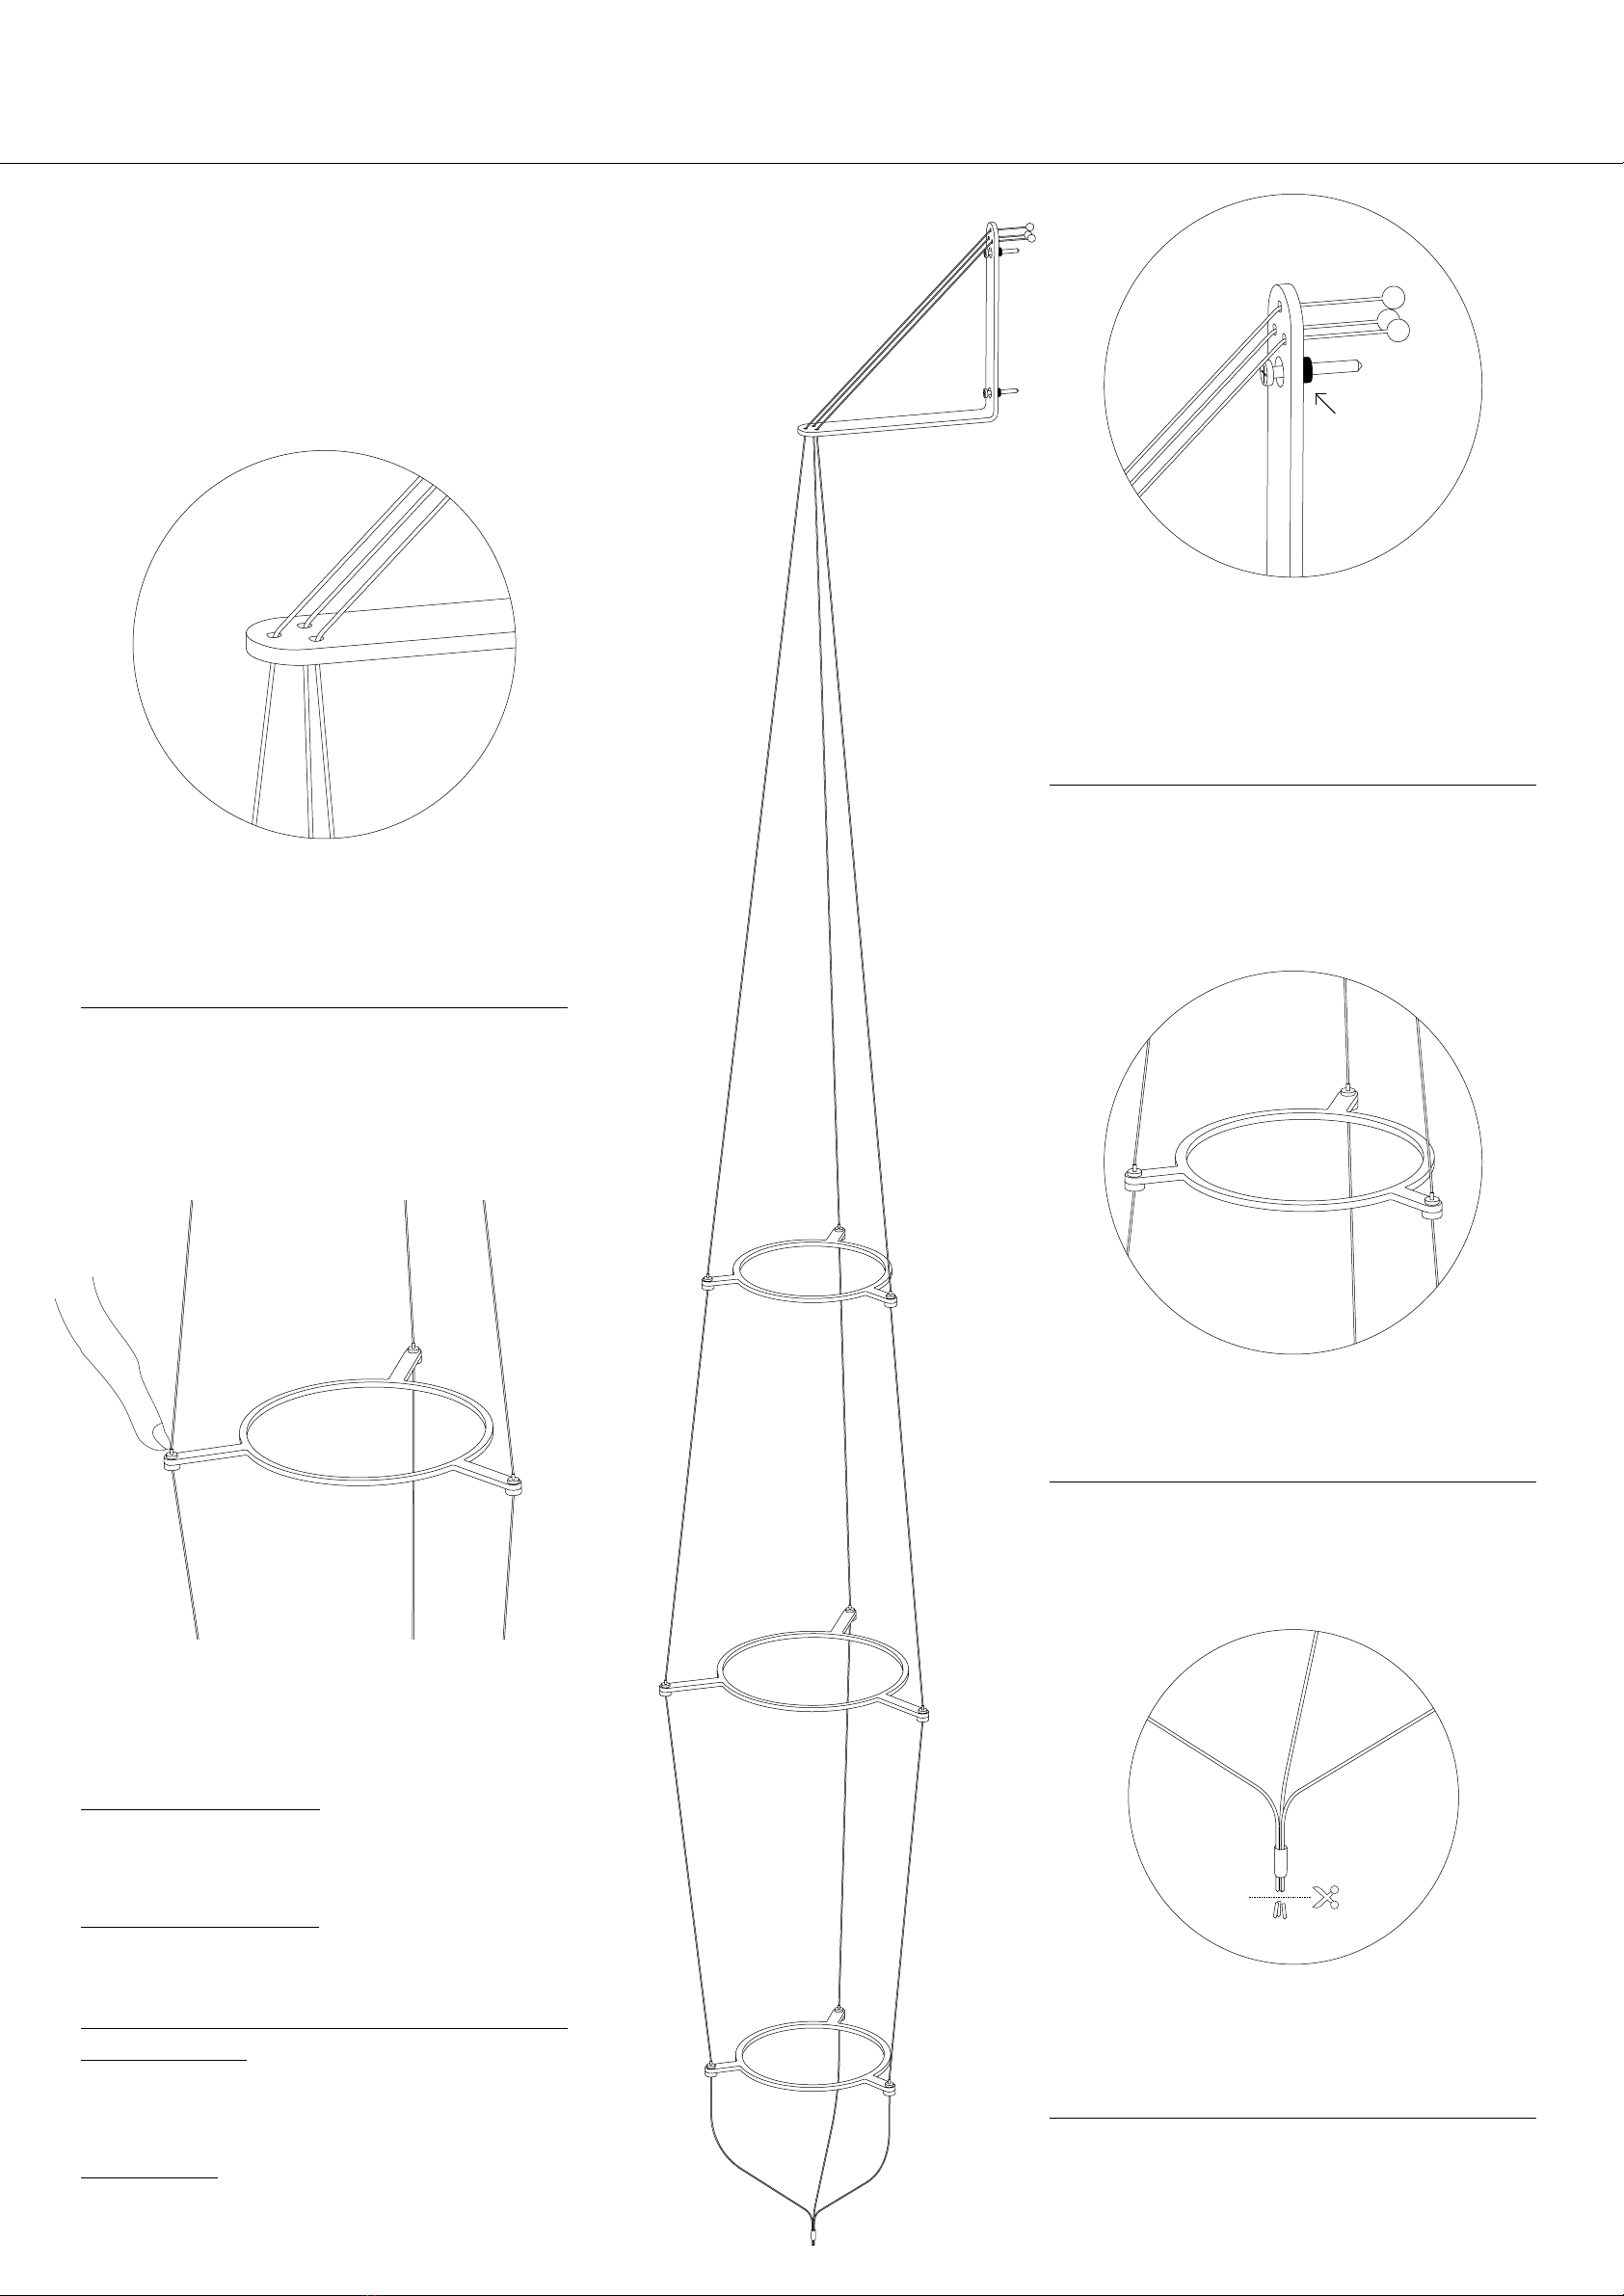
Die 3 Drahtseile werden von hinten durch die Löcher des
L-Winkels oder der Deckenhalterung gesteckt. Die Ku-
geln verhindern das durchrutschen des Seils. Nun kann die
Wandhalterung mit Hilfe der beiden Schrauben an der Wand
befestigt werden. Bitte darauf achten, die Abstandshalter
vor der Befestigung von hinten auf die Schrauben zu setzen.
The 3 wire ropes are inserted from behind through the holes
of the L-bracket or the ceiling bracket. The balls prevent the
rope from slipping. The wall bracket can now be attached to
the wall by using the two screws. Please make sure to place
the spacers from behind on the screws before fastening.
3
Die Drahtseile werden durch die Löcher der Drahtseilhalter
gesteckt bis sie an der unteren Seite heraus treten.
The wire ropes are pushed through the holes in the wire rope
holders until they come out on the underside.
4
Abschließend werden alle drei Seilenden durch das Schlauch-
stück gezogen. Wenn alles fertig installiert und die Ringe
positioniert wurden, können die Seilenden mit einer Sche-
re oder Beißzange abgeschnitten werden.
Finally, all three ends of the rope are pulled through the
piece of tubing. When everything has been installed and the
rings positioned, the ends of the rope can be cut o with
scissors or pliers.
Den Ring in der Höhe verstellen
Adjust the ring in height
Ring nach unten verschieben: Mit einem Finger die Spitze des
Drahtseilhalters nach unten drücken (siehe Abbildung). Damit
kann der Ring an dieser einen Stelle nach unten geschoben
werden. Dies an allen drei Drahtseilhaltern des Ringes wie-
derholen bis der Ring auf der gewünschten Höhe ist.
Ring nach oben verschieben: Mit einer Hand die Drahtseile
unter dem Ring etwas festhalten und mit der anderen Hand
den Ring an dieser Stelle nach oben ziehen. Dies an allen
drei Drahtseilhaltern des Ringes wiederholen bis der Ring
auf der gewünschten Höhe ist.
Move the ring down: Use your finger to press down on the
tip of the wire rope holder (see illustration). This allows
the ring to be pushed down at this one point. Repeat this
on all three wire rope holders of the ring until the ring is at
the desired height.
Move the ring up: Hold the wire ropes under the ring with one
hand and pull the ring up at this point with the other hand.
Repeat this on all three wire rope holders of the ring until
the ring is at the desired height.
2
Wenn sie den L-Winkel benutzen, werden die Enden der drei
Drahtseile durch die drei Löcher im unteren Teil des Winkels
geführt.
When using the LBracket, the ends of the three wire ropes
are fed through the three holes in the lower part of the
bracket.
Abstandshalter
spacers
enjoy your object.
Größen/sizes
ORBIT plant hanger
n
n
Kleiner Ring
Small ring
Großer Ring
Big ring
Töpfe sollten oben größer als 13,3cm
im Durchmesser sein.
Pots should be larger than 5.3"
in diameter at the top.
Töpfe sollten oben größer als 15,7cm
im Durchmesser sein.
Pots should be larger than 6.25"
in diameter at the top.
Töpfe sollten unten kleiner als 13,3cm
im Durchmesser sein.
Pots should be smaller than 5.3”
in diameter at the bottom.
Töpfe sollten unten kleiner als 15,7cm
im Durchmesser sein.
Pots should be smaller than 6.25”
in diameter at the bottom.
13,3cm
5.3”
15,7cm
6.25”