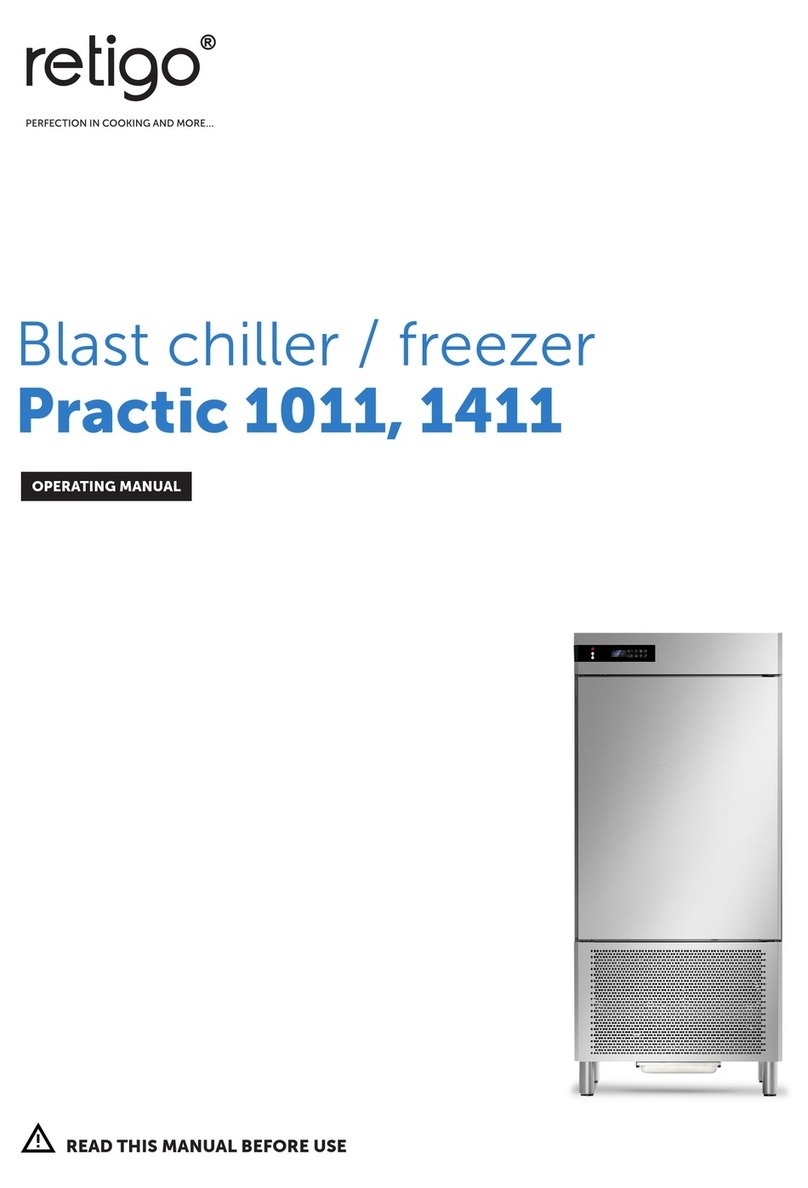
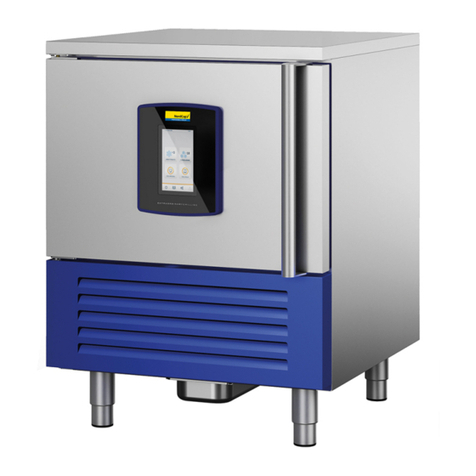
Retigo Combi-chill 1011 User manual

Blast chiller / freezer
Combi-chill 1011, 1411
OPERATING MANUAL
READ THIS MANUAL BEFORE USE

1
ENGLISH
GB
1. INDEX
1.INDEX................................................................................................................................................. 1
2.ANALYTICAL INDEX.......................................................................................................................... 2
3.SAFETY.............................................................................................................................................. 3
4.REGULATIONS AND GENERAL INSTRUCTIONS........................................................................... 4
4.1.General information.................................................................................................................. 4
4.2.Warranty................................................................................................................................... 4
4.3.Replacement of Parts............................................................................................................... 4
4.4.Description of the Appliance .................................................................................................... 5
4.5.Features Plate.......................................................................................................................... 6
4.6.Safety Devices ......................................................................................................................... 7
5.USE AND FUNCTIONING.................................................................................................................. 8
5.1.First Switching.......................................................................................................................... 8
5.2.Blast chiller mode..................................................................................................................... 8
5.3.Special Cycles Mode.............................................................................................................. 20
5.4.Recipes Mode ........................................................................................................................ 31
5.5.Pre-cooling............................................................................................................................. 34
5.6.Settings .................................................................................................................................. 35
5.7.Use of the USB port ............................................................................................................... 36
5.8.Recommendations for Use..................................................................................................... 37
6.CLEANING AND MAINTENANCE................................................................................................... 38
6.1.Recommendations for Cleaning and Maintenance................................................................ 38
6.2.Routine Maintenance ............................................................................................................. 38
6.3.Extraordinary Maintenance 10T and 14T............................................................................... 38
6.4.Extraordinary Maintenance 10TR .......................................................................................... 40
6.5.Extraordinary Maintenance 6T 2/1......................................................................................... 42
6.6.Extraordinary Maintenance 10T 2/1....................................................................................... 44
7.TROUBLESHOOTING ..................................................................................................................... 47
7.1.Faults Display......................................................................................................................... 48
8.INSTALLATION................................................................................................................................ 50
8.1.Packaging And Unpacking..................................................................................................... 50
8.2.Installation.............................................................................................................................. 50
8.3.Electric Power Supply Connection......................................................................................... 51
8.4.Condensing unit water connection......................................................................................... 51
8.5.Remote condensing unit ........................................................................................................ 52
8.6.Inspection............................................................................................................................... 53
9.DISPOSAL OF THE APPLIANCE.................................................................................................... 54
10.REFRIGERANT TECHNICAL CARD............................................................................................... 54
ATTACHMENTS.......................................................................................................................................I

2
ENGLISH
GB
2. ANALYTICAL INDEX
B
Blast chiller mode; 8
Blast Chilling Recipes; 32
C
Cleaning the condenser; 39; 41; 43; 45
Cleaning the evaporator; 39; 41; 43; 45
Condensing unit water connection; 51
Continuous Temperature Cycle; 18
Continuous Timed Cycle; 17
Custom Cycle; 19
D
Defrosting Cycle; 22
Description of the Appliance; 5
Disposal of the Appliance; 54
Door micro switch; 7
Download and Upload of recipes; 36
Download and Upload Parameters; 36
Download HACCP records; 36
Drying Cycle; 22
E
Electric Power Supply Connection; 51
Evaporator Fan Micro switch; 8
F
Faults Display; 48
Features Plate; 6
First Switching; 8
Fish Sanitization Cycle; 21
Frosting recipes; 33
Fuse replacement and thermal relay rearm; 40;
42; 44; 46
G
General information; 4
H
Heating Cycle Product Probe; 24
I
Ice Cream Hardening Cycle; 23
Inspection; 53
Installation; 50
L
Language Selection; 35
P
Packaging; 50
Positive Temperature Blast Chilling; 9
Pre-cooling; 34
Prolonged Inactivity; 37
Protective Fuses; 7
Proving Cycle (Optional); 25
R
Recipes Mode; 31
Recommendations for Cleaning and Maintenance;
38
Recommendations for normal use; 37
Recommendations for Use; 37
REFRIGERANT TECHNICAL CARD; 54
Remote condensing unit; 52
Replacement of Parts; 4
Routine Maintenance; 38
S
SAFETY; 3
Safety Devices; 7
Service; 35
Settings; 35
Setup; 35
Special Cycles Mode; 20
Sterilization Cycle; 23
Store a recipe; 33
T
Temperature Frosting Cycle; 13
Temperature Slow Cooking Cycle; 27
Thawing Cycle (Optional); 24
Time Positive Blast Chilling Cycle; 11
Timed Frosting Cycle; 15
Timed Slow Cooking Cycle; 29
U
U.V. Lamp Replacement; 40; 42; 44; 46
Unpacking; 50
Use of the USB port; 36
W
Warranty; 4

3
ENGLISH
GB
3. SAFETY
!It is recommended to carefully
read the instructions and warnings
contained in this manual before using the
appliance. The information contained in
the manual is fundamental for the safety
of use and for machine maintenance.
!Keep this manual carefully so that it can be
consulted when necessary.
The electric plant has been designed in
compliance with the IEC EN 60335-2-89
Standard.
!Maintain ventilation openings in the
appliance casing or in the built-in structure free
from all obstructions.
!Do not use mechanical devices or other
means to accelerate the defrosting process, other
than those recommended by the manufacturer.
!Do not damage the coolant circuit.
!Do not use electrical appliances inside the
appliance compartments for storage of frozen
food.
!Do not store explosives, such as pressurised
containers with flammable propellant, in this unit.
!Do not place anything on the bottom of the
device. Use the appropriate racks to store the
product.
!The maximum permissible load for the racks
is 45kg evenly distributed.
if the supply cord is damaged, it must be
replaced by the manufacturer, its service agent or
similarly qualified persons in order to avoid
hazard.
,Specific adhesives highlight the presence of
mains voltage in the proximity of areas (however
protected) with risks of an electrical nature.
!If a stationary appliance is not fitted with a
supply cord and a plug, the means for
disconnection must be incorporated in the fixed
wiring in accordance with the wiring rules.
In the design and construction phase, the
manufacturer has paid particular attention to the
aspects that can cause risks to safety and health
of persons that interact with the appliance.
Carefully read the instructions stated in the
manual and those applied directly to the machine,
and particularly respect those regarding safety.
Do not tamper with, evade, eliminate or by-pass
the installed safety devices. Failure to comply with
this requisite can lead to serious risks for personal
health and safety.
It is recommended to simulate some test
manoeuvres to identify the controls, in particular
those relative to switch-on and switch-off and their
main functions.
The appliance is only destined for the use for
which it has been designed; any other use must
be considered improper.
The manufacturer declines all liability for any
damage to objects or injury to persons owing to
improper or incorrect use.
All maintenance interventions that require
precise technical skill or particular ability must be
performed exclusively by qualified staff.
!When using the appliance, never obstruct
the air inlet when the appliance is on, so as not to
compromise its performance and safety.
!Never stretch the power cable.
4
ENGLISH
GB
In order to guarantee hygiene and protect the
foodstuffs from contamination, the elements that
come into direct or indirect contact with the
foodstuffs must be cleaned very well along with
the surrounding areas. These operations must
only be performed using detergents that can be
used with foodstuffs, avoiding inflammable
products or those that contain substances that are
harmful to personal health.
In the case of prolonged inactivity, as well as
disconnecting all the supply lines, it is necessary
to accurately clean all internal and external parts
of the appliance.
4. REGULATIONS AND GENERAL INSTRUCTIONS
4.1. General information
This manual has been designed by the
manufacturer to provide the necessary information
to those who are authorised to interact with the
appliance.
The persons receiving the information must read it
carefully and apply it strictly.
Reading the information contained in this
document will allow the user to prevent risks to
personal health and safety.
Keep this manual for the entire operating life of
the equipment in a place which is well-known and
easily accessible, so that it is always available
when its consultation becomes necessary.
Particular symbols have been used to highlight
some parts of the text that are very important or to
indicate some important specifications. Their
meanings are given below: Caution - Warning
!Indicates important information
regarding safety. Behave appropriately so as
not to risk the health and safety of persons or
cause damage.
Important
Indicates particularly important technical
information that must not be ignored.
4.2. Warranty
The warranty of the equipment and the
components we produce has duration of 2 years
from the date of delivery and translates into the
supply, free of charge, of parts that we consider to
be faulty.
These faults must, however, be independent from
incorrect use of the product in compliance with the
indications stated in the manual.
Fees deriving from labour, journeys and transport
are excluded from the warranty.
The materials replaced under warranty are our
property and must therefore be returned under the
responsibility and expense of the customer.
4.3. Replacement of Parts
!Activate all envisioned safety devices before
carrying out any replacement intervention.
In particular, deactivate the electrical power
supply using the differential isolating switch.
Only use original spare parts to replace worn
components.
All responsibility is declined for injury to
persons or damage to components deriving from
the use of non-original spare parts and
interventions which could modify the safety
requisites, without authorisation of the
manufacturer.

5
ENGLISH
GB
4.4. Description of the Appliance
The Blast chiller-Shock freezer, from now on
defined as appliance, has been designed and built
to cool and/or freeze foodstuffs in the professional
catering ambit.
1) condensation area: it is positioned in the
lower part and is characterised by the
presence of the condensing unit.
2) electric area: it is positioned in the upper
part of the appliance and contains the
control and power supply appliance as
well as electric wiring.
3) evaporation area: it is situated inside the
refrigerated compartment in the rear and
is characterised by the evaporating unit.
4) storage area: it is situated inside the
refrigerated compartment and is destined
for the cooling and/or freezing of
foodstuffs.
The lower part is also distinguished by a control
panel (A) that allows access to the electric parts;
there is a vertically-opening door in the front,
which closes the refrigerated compartment
hermetically.
Depending on requirements, the appliance is
produced in several versions.
10 TRAY BLAST CHILLER and SHOCK
FREEZER
Model suitable to contain 10 trays with
blast chilling capacity of 40 and 25 in
shock freezing.
10 T "R" BLAST CHILLER and SHOCK
FREEZER
Model suitable to contain 10 “insertion
325” trays with blast chilling capacity of 40
and 25 in shock freezing.
14 TRAY BLAST CHILLER and SHOCK
FREEZER
Model suitable to contain 14 trays with
blast chilling capacity of 55 and 35 in
shock freezing.
6T 2/1 BLAST CHILLER and SHOCK FREEZER
Model suitable to contain 6
GASTRONORM 2/1trays with blast
chilling capacity of 50 and 30 in shock
freezing.
10T 2/1 BLAST CHILLER and SHOCK
FREEZER
Model suitable to contain 10
GASTRONORM 2/1trays with blast
chilling capacity of 75 and 50 in shock
freezing.
1
3 - 4
A 2

6
ENGLISH
GB
4.5. Features Plate
The identification plate shown is applied directly
onto the appliance. It states the references and all
indications indispensable for working in safety.
1) Appliance code
2) Description of the appliance
3) Serial number
4) Power supply voltage and frequency
5) Rated output
6) Defrosting output
7) Total light output
8) Climatic class
9) Type and Amount of refrigerant gas
10) WEEE symbol
The appliances are equipped with climatic class
that indicates the room temperature within which
the refrigerator is operating correctly.
The following climatic classes exist:
Climatic
Class
Room
Temperature
°C
Related
Humidity
%
0 20 50
1 16 80
2 22 65
3 25 60
4 30 55
6 27 70
5 40 40
7 35 75
CODE /KODE
CODICE
MODEL / MODELL
MODELLO
SERIAL No/SERIEN NR.
MATRICOLA
TENSION/SPANNUNG
TENSIONE
INPUT
LEISTUNGSAUFNHAME
POTENZA
CLIMATIC CLASS
KLIMAKLASSE
CLASSE CLIMATICA
REFRIGERANT
KUEHLMITTEL
REFRIGERANTE
1
2
3
4
5
6
9
10
7
8

7
ENGLISH
GB
4.6. Safety Devices
During the running of appliance, some control
devices may activate and govern the correct
running of the machine. In other cases, they may
deactivate parts or the whole machine, to put the
appliance in safe conditions. The main controls
are listed.
Door micro switch
If the door is opened, the magnetic switch placed
on the control board opens and, during blast-
chilling or shock-freezing, evaporator fans go off
and a warning message appears on the display at
the same time. This condition may also be
determined when the door is not perfectly aligned
to or near the control board: in this case with the
machine in the STOP phase, no cycle may be
started.
If a U.V. sterilisation cycle is active, the
functioning of the U.V. lamp is interrupted. The
cycle continues when the door is closed.
Protective Fuses
Some protection fuses in the general power
supply line are activated in case of overload.
Other fuses are prepared for the evaporator fans.
Thermal relay
In the case of faulty operation that results in
exceeding the current absorption limits of the
electric system, the thermal relay will operate to
stop the machine. This intervention is shown on
the display by means of the wording “HA”. If the
circuit breaker relay has intervened, it must be
restored manually (see specific chapter).
High and low pressure switches
If, due to environmental conditions or faulty
operation, the minimum/maximum pressure
values in the refrigerating circuit should become
excessive, the maximum/minimum safety
pressure switch (in the 5 Pans version, only the
maximum safety pressure switch) will operate to
stop the appliance. The machine can be switched
on again only after the pressure has returned to
an acceptable value. If a high pressure alarm
should occur, the wording “HP” will appear on the
display. The wording “LP” will appear if there is a
low pressure alarm.

8
ENGLISH
GB
Evaporator Fan Micro switch
If the deflector is opened to inspect the evaporator
or fans, this micro switch positioned on the
evaporator deflector, deactivates machine
functioning. Closure of the deflector with the
successive disappearance of the alarm on the
display, restores normal machine functioning.
5. USE AND FUNCTIONING
5.1. First Switching
At the first switching of the machine, the device
displays the ON / Standby screen.
To turn the device on, from the ON/Stand-by
screen, press the central area to show the Home
screen.
From the Home screen it is possible to enter the
functioning mode of the machine simply selecting
the area.
To switch the device off, press the area on top
of the Home screen.
5.2. Blast chiller mode
By selecting the area you will enter the
BLAST CHILLER menu.
Proceed by selecting one of the available areas at
choice:
Blast chilling
Shock freezing
Continuous cycle
Custom cycle.

9
ENGLISH
GB
Positive Temperature Blast Chilling
This cycle lowers the temperature at the
core of the product from + 90 ° C to + 3 ° C in the
shortest time possible and within a maximum time
of 90 minutes. The end of the cycle is determined
by the achievement of the value + 3 ° C read by
the core probe.
Selecting the positive blast chilling cycle, the
system displays following screenshot :
By default the system suggests the temperature
cycle.
Pressing the area it is
possible to change the operating cell temperature.
Following screenshot appears :
By pressing the and area the
temperature value can be changed.
To confirm the new value, press the area;
To cancel the change press the area .
To exit without saving press the area .
Pressing the area it is
possible to change the product temperature at the
end of the cycle.
Pressing the area it is
possible to change the fan speed during the blast
chilling.
Pressing the area it is possible to change
the cell temperature and the speed of the fans
during the conservation phase :
Press the area to enable the intensive
phase: the relative area will be enlightened
.
In this case the positive chilling cycle will be
divided into three stages :
Intensive blast chilling (HARD)
standard blast chilling
conservation
Pressing the area, the controller displays
the “advanced setting” screen :
Within this mode, following values can be
changed :
cell temperature
during the intensive phase ;
product
temperature at the end of intensive cycle ;
cell temperature
during the conservation phase ;

10
ENGLISH
GB
fun speed during the
intensive phase ;
fun speed during the
conservation.
To exit the “advanced settings” screen press
on the upper left display area.
To confirm the blast chilling cycle settings press
the right lower area .
If a standard chilling cycle has been selected,
following screenshot will appear:
If an intensive chilling cycle (HARD) has been
selected, following screenshot will appear:
To change the values within the single phases,
press in the area involved.
E.g. to change the temperature of the cell during
the intensive phase, press in correspondence of
phase 1; the screen of the first phase will be
showed.
To save and store the set cycle press in
correspondence of the area . To start the
cycle press in correspondence of the area .
During a current cycle, following screenshot will
be displayed :
Pressing on the area the display show the
temperatures detected by the various probes, the
state of inputs / outputs and the alarms stored by
the system. To abort the current cycle, press for at
least three seconds the area .
Number of the current phase
Time lef
t
Positive blast chilling symbol
Intensive blast chilling symbol
Temperature cycle symbol

11
ENGLISH
GB
Time Positive Blast Chilling Cycle
This cycle lowers the temperature at the
core of the product from + 90 ° C to + 3 ° C in the
time set by the user. We recommend performing
some test cycles to determine the needed time to
properly chill the product. We remind you that
acquired and eventually saved times are to be
considered valid for the exclusive use of the same
product type and at the same amount per cycle.
To switch to a timed cycle, press inside the blast
chilling screen, the area : the system will
shut down the temperature cycle area and
illuminate the timed cycle area .
Pressing the area it is
possible to change the operating cell temperature.
Pressing the area it is
possible to change the duration of the blast
chilling cycle.
Pressing the area it is
possible to change the fan speed during the blast
chilling.
Pressing the area it is possible to change
the cell temperature and the speed of the
fans during the conservation phase
Press the area to enable the intensive
phase: the relative area will be enlightened
.
In this case the positive chilling cycle will be
divided into three stages :
Intensive blast chilling (HARD)
standard blast chilling
conservation
Pressing the area, the controller displays
the “advanced setting” screen :
Within this mode, following values can be
changed :
cell temperature
during the intensive phase ;
duration of the
intensive phase ;
cell temperature
during the conservation phase ;
fan speed during the
intensive phase ;
fan speed during the
conservation.
To exit the “advanced settings” screen press
on the upper left display area.
To confirm the blast chilling cycle settings press
the right lower area .

12
ENGLISH
GB
If a standard chilling cycle has been selected,
following screenshot will appear :
If an intensive chilling cycle (HARD) has been
selected, following screenshot will appear :
To change the values within the single phases,
press in the area involved.
To save and store the set cycle press in
correspondence of the area .
To start the cycle press in correspondence of the
area .
During a current cycle, following screenshot will
be displayed :
Pressing on the area the display show the
temperatures detected by the various probes, the
state of inputs / outputs and the alarms stored by
the system. To abort the current cycle press for at
least three seconds the area .
Number of the current phase
Time from cycle begin
Positive blast chilling symbol
Intensive blast chilling symbol
Timed cycle symbol

13
ENGLISH
GB
Temperature Frosting Cycle
This cycle lowers the temperature at the
core of the product from + 90 ° C to - 18 ° C in the
shortest time possible and within a maximum time
of 270 minutes. The end of the cycle is
determined by the achievement of the value - 18 °
Cread by the core probe.
Selecting the freezing cycle, the system displays
following screenshot :
By default the system suggests the temperature
cycle.
By pressing the area it is
possible to change the operating cell temperature.
By pressing the area it is
possible to change the product temperature at the
end of the cycle.
By pressing the area it is
possible to change the fan speed during frosting.
Pressing the area it is possible to change
the cell temperature and the speed of the
fans during the conservation phase.
Press the area to enable the SOFT phase:
the relative area will be enlightened .
In this case the frosting cycle will be divided into
three stages :
SOFT frosting
standard frosting
conservation
Pressing the area, the controller displays
the “advanced setting” screen :
Within this mode, following values can be
changed :
cell temperature
during the SOFT phase ;
product
temperature at the end of the SOFT cycle;
cell temperature
during the conservation phase ;
fan speed during the SOFT
phase ;
fan speed during the
conservation.
To exit the “advanced settings” screen press
on the upper left display area.
To confirm the frosting cycle settings press the
right lower area .

14
ENGLISH
GB
If a standard frosting cycle has been selected,
following screenshot will appear :
If a SOFT frosting cycle has been selected,
following screenshot will appear :
To change the values within the single phases,
press in the area involved.
To save and store the set cycle press in
correspondence of the area .
To start the cycle press in correspondence of the
area .
Following screenshot will be displayed :
Pressing on the area the display show the
temperatures detected by the various probes, the
state of inputs / outputs and the alarms stored by
the system. To abort the current cycle press for at
least three seconds the area .
Number of the current phase
Time lef
t
Frosting symbol
Intensive cycle symbol
Temperature cycle symbol

15
ENGLISH
GB
Timed Frosting Cycle
This cycle lowers the temperature at the
core of the product from + 90 ° C to - 18 ° C in the
time set by the user. We recommend performing
some test cycles to determine the needed time to
properly chill the product. We remind you that
acquired and eventually saved times are to be
considered valid for the exclusive use of the same
product type and at the same amount per cycle.
To switch to a timed cycle, press inside the
frosting screen, the area : the system will
shut down the temperature cycle area and
illuminate the timed cycle area .
By pressing the area it is
possible to change the operating cell temperature.
By pressing the area it is
possible to change the duration of the frosting
cycle.
By pressing the area it is
possible to change the fan speed during freezing.
Pressing the area it is possible to change
the cell temperature and the speed of the
fans during the conservation phase.
Press the area to enable the SOFT phase:
the relative area will be enlightened .
In this case the frosting cycle will be divided into
three stages :
SOFT frosting
standard frosting
conservation
Pressing the area, the controller displays
the “advanced setting” screen :
Within this mode, following values can be
changed :
cell temperature
during the SOFT phase ;
duration of the
SOFT phase ;
cell temperature
during the conservation phase ;
fan speed during the SOFT
phase ;
fan speed during the
conservation.
To exit the “advanced blast chilling” screen press
on the upper left display area.
To confirm the frosting cycle settings press the
right lower area .

16
ENGLISH
GB
If a standard frosting cycle has been selected,
following screenshot will appear :
If a SOFT frosting cycle has been selected,
following screenshot will appear :
To change the values within the single phases,
press in the area involved.
To save and store the set cycle press in
correspondence of the area .
To start the cycle press in correspondence of the
area .
During a current cycle, following screenshot will
be displayed :
Pressing on the area the display show the
temperatures detected by the various probes, the
state of inputs / outputs and the alarms stored by
the system. To abort the current cycle press for at
least three seconds the area .
Number of the current phase
Time from cycle begin
Frosting symbol
Intensive cycle symbol
Timed cycle symbol

17
ENGLISH
GB
Continuous Timed Cycle
This cycle can be used when large
quantities of food are to be chilled and the specific
chilling time of each product is known. Just set the
cell temperature, the fan speed and start the
machine. The appliance maintains the set
temperature, the defrosting is automatically
managed. The cell temperature can be changed
during the normal operation.
By selecting the continuous timed cycle the
system will propose following screenshot :
By pressing the area it is
possible to change the operating cell temperature.
By pressing the area it is
possible to change the fan speed.
To confirm the new settings press the area
on the right bottom : the cycle will start.
During a current cycle, following screenshot will
be displayed :
The cycle starts only by activating the first timer; it
is possible to set up to three different timers.
Timers can be set by pressing the pencil area and
setting the time while the cycle is running.
When setting the time, once the timer is
confirmed, its count starts directly.
Each timer is independent and can be reset at its
completion.
The cycle ends when all set timers have expired.
At the end of a timer count, the buzzer sounds,
the display shows a message and the value “0
min “of the corresponding timer is displayed in
green.
Pressing on the area the display show the
temperatures detected by the various probes, the
state of inputs / outputs and the alarms stored by
the system. To abort the current cycle press for at
least three seconds the area .
Number of the current phase
Time from cycle begin

18
ENGLISH
GB
Continuous Temperature Cycle
The continuous temperature cycle is available on
condition that there are two or three product
probes.
By selecting the continuous temperature cycle the
system will propose following screenshot :
By pressing the area it is
possible to change the operating cell temperature.
By pressing the area it is
possible to change the product temperature at the
end of the cycle.
By pressing the area it is
possible to change the fan speed.
To confirm the new settings press the area
on the right bottom : the cycle will start .
During a current cycle, following screenshot will
be displayed :
While executing the cycle, each time the door is
closed, the system checks the proper insertion of
the various probes and the cycle ends only when
all inserted probes reach the desired temperature.
After reaching the temperature set for each probe,
the buzzer sounds, the display shows a message
and the temperature value of the related probe is
displayed in green. Below an example of a screen
where only one probe is at temperature.
Pressing on the area the display show the
temperatures detected by the various probes, the
state of inputs / outputs and the alarms stored by
the system. To abort the current cycle press for at
least three seconds the area .
Number of the current phase
Time from cycle begin

19
ENGLISH
GB
Custom Cycle
The function “custom” allows setting a cycle
composed of a maximum of 4 phases (3 for the
blast chilling and a conservation one) and can be
composed of temperature phases and/or timed
phases.
By selecting the custom cycle the system will
propose following screenshot :
It is possible to switch the phase from core probe
to timed and set the related set points.
To add a phase, press in correspondence of this
area .
The phase will be added and proposed during
editing.
To delete a phase press on the area .
Once all desired phases are inserted and all
settings are done, press the below area on the
right .
Before running a cycle it is possible to change the
cell temperature and the
speed of the fans during the
conservation phase.
To confirm the new settings press the below area
on the right : following screenshot will be
displayed.
To change the values within the single phases,
press in the area involved.
To save and store the set cycle press in
correspondence of the area .
To run the cycle press in correspondence of the
area .
During a current cycle, following screenshot will
be displayed :
Pressing on the area the display show the
temperatures detected by the various probes, the
state of inputs / outputs and the alarms stored by
the system. To abort the current cycle press for at
least three seconds the area .
Number of the current phase
Time Lef
t
Blast chilling symbol
Temperature cycle symbol
Timed cycle symbol
This manual suits for next models
1
Table of contents
Other Retigo Chiller manuals
Popular Chiller manuals by other brands

Mueller
Mueller PMC 40/50 Installation and operation manual

Daikin
Daikin HYDROCUBE EWWQ014KBW1N installation manual

Elkay
Elkay ERW32 installation instructions

York
York YK-EP B operation & maintenance

omi
omi CHW Series Operating and maintenance manual

Carrier
Carrier HERMETIC ABSORPTION LIQUID CHILLER 16JB installation instructions