4
Copyright 2016 Retro Manufacturing, LLC
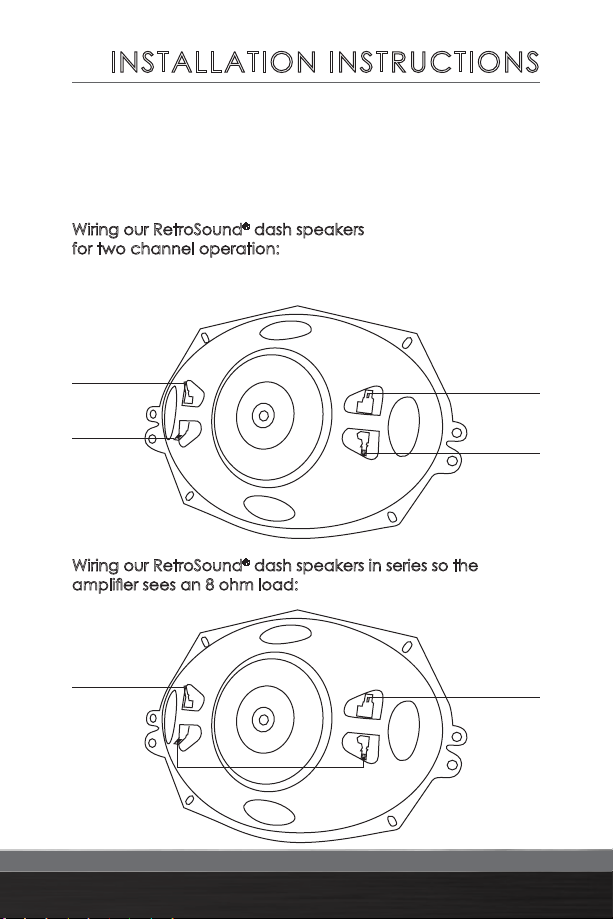
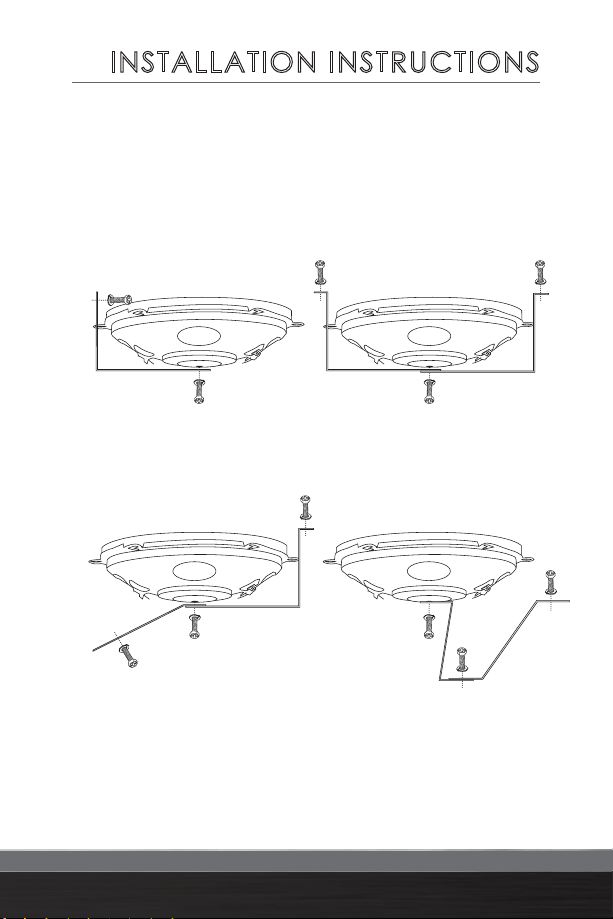
INSTALLATION INSTRUCTIONS
The following tools may be needed for installation
of your RetroSound®speakers
• #2 Phillips screwdriver
• Battery post wrench
• Hand held drill with assorted bits
• Wire strippers
• Wire crimpers
• Wire cutters
Included in your box are speaker wires, mounting screws,
and one speaker.
Before installation, disconnect the negative (-) battery
terminal to prevent damage to your system.
Mounting
1. Run speaker wires before installing your speakers.
Avoid sharp edges that could fray or cut the wiring.
Use rubber grommets to protect any wires that need to
be routed through metal. Use high quality connectors to
minimize signal loss. Never run wires outside the vehicle.
2. Determine the area where the speakers are to be
mounted. Ensure that the area is large enough to
accommodate the entire speaker diameter and
that there is enough mounting depth for the speaker
magnet. If you are mounting your speakers in the
doors, check all door functions (windows, door
locks, etc) through their entire range of motion
to ensure the speaker will not obstruct them.