(6) External Speaker/Microphone Rubber - For external
microphone and speaker or programming the transceiver,
user has to take the rubber out.
(7) Microphone - Your voice is detected by the microphone
located in this place.
(8) PTT Button - Push to talk button, transceiver switches to
transmit from receive when key is pressed.
(9) Side Button (A KEY)- This button is programmable by
programmer device.
(10) Side Button (B KEY)- This button is programmable by
programmer device.
(11) Battery Pack - This Li-polymer battery pack supplies
energy to the transceiver.
2. Attachment
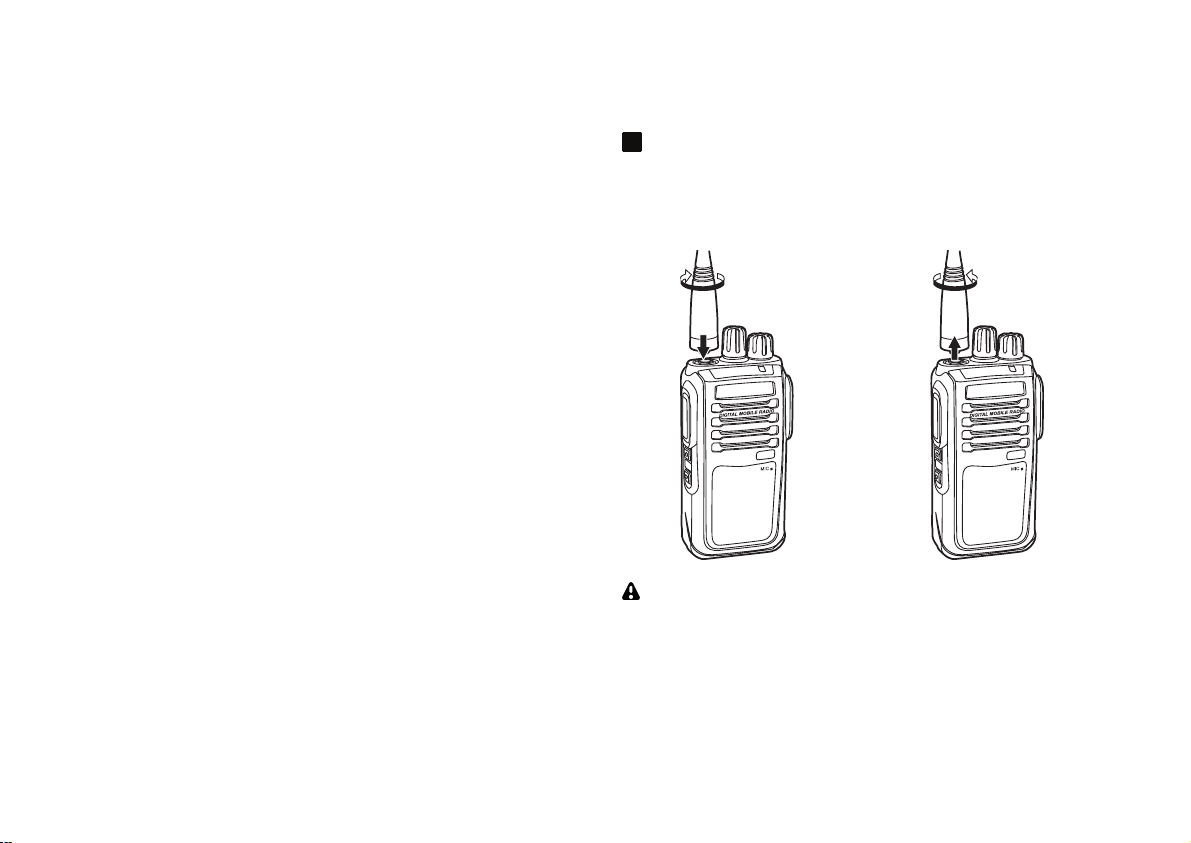
Antenna
Insert the antenna we supplied into the antenna
connector then rotate it clockwise to lock antenna.
The transceiver may be damaged while transmitting
without antenna.
!
Page 2
(1) Power button (A KEY)- Keep pressing the
button for 2 seconds to turn the transceiver ON or
OFF
(2) PTT button (B KEY) - Push to talk button
transceiver switches to transmit from when key
is pressed
(3) button (C KEY)- This button is
programmable by programmer device press
default to toggle backlit on or off ; long press
default to toggle On or Off
(4) button (D KEY)- This button is
programmable by programmer device press
default to return previous frequency or channelIf
this transceiver is embedded Bluetooth module
press will toggle Bluetooth on or offlong press
default to toggle monitor on or off
(1) Release Buckle - The release buckle let user to
detach the battery pack
(2) External Speaker/ Rubber - For external
speaker or programming the
transceiveruser have to take the rubber out
(3) battery Pack - This NiMH or Li-ion battery pack
supplies energy to the transceiver