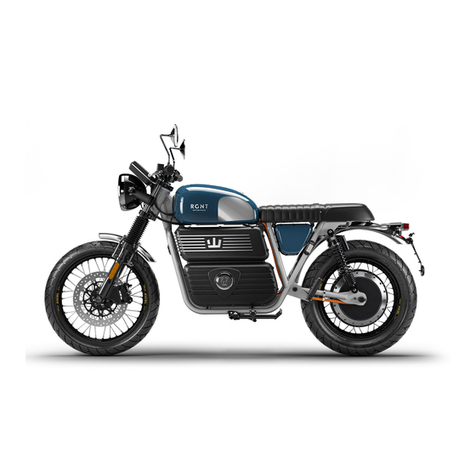
RGNT Motorcycles No. 1 Classic SE User manual

User Manual | rgnt-motorcycles.com 1
User Manual
Built in Sweden
No. 1 Classic SE / SEL
No. 1 Scrambler SE / SEL

User Manual | rgnt-motorcycles.com 2
Table of Contents
1. Introduction 1
2. General safety Information 2
3. Vehicle Identification Number ( VIN ) 5
4. Keys 7
5. Specifications 8
7. High Voltage Information 13
8. Motorcycle Controls 14
9. Brake system 15
10. HMI / Display 16
11. Safety check 30
12. How to Operate the Motorcycle 31
13. How to Charge 38
14. Troubleshooting 41
15. Cleaning and Storing 42
16. Wheels and Tires 43
17. Removing the Back Wheel / Engine 45
18. Adjusting the Suspension 46
19. Safety Check Brake System 47
20. Service Recommendations 50
21. Customer Support Information 51
22. Report a Warranty Claim 51
23. Warranty Terms and Conditions 52

User Manual | rgnt-motorcycles.com 1
1. Introduction
Congratulations on your purchase of a RGNT No.1! You are now
the owner of an exceptional electric motorcycle. We hope that
riding electric will bring you great enjoyment. Please read
these instructions on how to operate your RGNT motorcycle and
safely take care of it.
All RGNT motorcycles are internet connected vehicles.
RGNT sends and receives motorcycle data via wireless
communications over-the-air (OTA).This data is used to
monitor the internal electric system of the motorcycle.
RGNT performs real-time OTA diagnostics of the motorcycle to
ensure the vehicle is performing optimally. Sharing “personal
data” to the motorcycle may be opted out of at any time via
the display. This is to protect the owner’s personal
integrity in accordance with the European Union’s General
Data Protection Regulations (GDPR).
All data and information contained in this User Manual are
non-binding. RGNT Electric AB reserves the right to change
technical specifications, prices, colors, types, materials,
services, designs, equipment and any other related aspects
(material or otherwise), as well as accommodate for local
conditions or stop production of a particular model, at any
time without notice and without explanation.
If you have any questions, please refer to the FAQ section on
our website for commonly asked questions. If you can’t find
the answer you are looking for or have encountered any tech-
nical issues with your RGNT vehicle, please contact the ne-
arest RGNT dealer. You can find all our partnership dealers
and FAQ on rgnt-motorcycles.com. If there isn’t a RGNT dea-
ler in your country, please send an email to RGNT Support at
to Support from our website. If you wish to report a problem
with your RGNT motorcycle, please be sure the email includes
the vehicle information number (VIN). The VIN is located on
the frame’s steering neck and looks like this:
VIN -YSHALKR-.

User Manual | rgnt-motorcycles.com 2
2. General safety Information
2.1. Follow the User Manual
RGNT motorcycles are designed and homologated/certified to
the highest standards for street and road traffic. The motor-
cycle is NOT designed for Off-Road use or Racing. The RGNT is
an electric motorcycle. Please pay attention to the warning
labels when touching or disconnecting elements! WARNING LA-
BELS may appear on the battery charger, battery box and other
high voltage areas.
This manual contains 3 extra important words, which require
extra attention
NOTICE: Take extra notice to this important Information
CAUTION: Indicates things that could damage your motorcycle
WARNING: Indicates something that could injure you or others.
2.2. General Safety Information
• Proper safety gear, including a regionally approved hel-
met, eye protection, riding boots, gloves, and protecti-
ve clothing should be worn while riding to reduce the risk
of potential injury. We highly recommend you ride with the
correct protective clothing including full height riding
boots. This recommendation applies even for short journeys
and every season of the year.
• Persons unwilling or unable to take responsibility for
their actions should not use this motorcycle.
• Never permit another individual to ride your electric
motorcycle without proper instruction
• Always perform the safety check before each ride with the
motorcycle ( Chapter 10 )
• Do not operate the RGNT motorcycle under the influence of
alcohol, drugs or medication
• Do not operate the RGNT motorcycle if you are physically
or emotionally unable to drive optimally.

User Manual | rgnt-motorcycles.com 3
• Always follow the traffic laws and regulations of the coun-
try you are driving in.
• The RGNT motorcycle is designed to carry you and one pas-
senger. If you carry a passenger or other load, be aware
that the stability and handling of the motorcycle may be
affected.
• Always maintain a safe speed appropriate to the conditions
when driving
2.3. Changes to RGNT No.1 design
Only use RGNT Motorcycles approved parts and accessories for
your RGNT Motorcycle. Parts and accessories for your RGNT Mo-
torcycle have been checked and tested for safety and suitabi-
lity. RGNT Motorcycle accessories are designed to complement
and function with other systems on your motorcycle. Contact
your local RGNT Authorized dealer for help or visit RGNT ho-
mepage for more information about spare parts.
Modifications to the motorcycle may render the vehicle unsa-
fe and may cause severe personal injury or to others. RGNT
Motorcycles cannot be held liable for non-approved modifica-
tions.
ITS FORBIDDEN TO:
• Remove or modify any equipment or parts on the RGNT No.1.
• Manipulate or modify the wiring of the RGNT No.1.
• Replace parts of the RGNT No.1 with parts not approved by
the manufacturer.
• Work with the high voltage system without proper training
approved tools.
2.4. Service And Maintenance
Regular maintenance at an authorized RGNT Service Center is
required. If RGNT service recommendations are not followed,
the warranty can be affected. To survive a RGNT vehicle
requires specialized training and tools.The RGNT electric
motorcycle contains a HIGH-VOLTAGE SYSTEM which can be deadly
if not handled properly, with care.

User Manual | rgnt-motorcycles.com 4
2.5. Operating The Motorcycle
Before you operate the RGNT motorcycle read the “User Manual”
carefully. This to make sure to avoid any damages on the mo-
torcycle or any accidents that will cause personal injuries.
The “User Manual” will tell you how to operate the RGNT No.1
correctly and introduce you to its special features. The in-
structions also contain tips for adjusting your RGNT No.1 for
an even better riding experience.
2.6. Spare Parts
Use only RGNT OEM spare parts when service or replacing any
parts ( Original Equipment Manufacturer ). Any damage arising
from the use of third-party products shall not be the respon-
sibility of RGNT. Be aware that removing spare parts or modi-
fying the RGNT motorcycle may also make it illegal to drive
in your country. RGNT original spare parts can be bought at
authorized RGNT dealers or at RGNT website:
rgnt-motorcycles.com
2.7. High Voltage Information
This electric vehicle has a high-voltage battery system and
if not handled with care it can lead to injuries or even
death. If you perform changes or replace items on your RGNT
vehicle, the guarantee terms may be affected or invalidated.

User Manual | rgnt-motorcycles.com 5
3. Vehicle Identication Number ( VIN )
The Vehicle Identification Number (VIN) is located on the
right side of the steering stem neck. The VIN is the unique
international identification code which provides information
about a vehicle, e.g. country, model, year, description,
number, owner.
There is also a statutory plate with manufacture information
located at the same position but on the left side of the ste-
ering stem neck.
IMPORTANT NOTE: DO NOT REMOVE or alter the VIN!
It is against the law! The Police use the VIN to find the ow-
ner in case of theft. The Service Center uses the VIN to know
which specific parts to order and which service manual to
use.

User Manual | rgnt-motorcycles.com 6
3.1. Statutory plate
The Manufacturer’s Statutory Plate is located on the left
side of the steering stem.
1. Name of manufacturer
2. Vehicle category - license category
3. EU Type approval ID
4. VIN ( Vehicle Identification Number )
5. Homologated max sound level
6. Engine power / Max load kg
7. Manufacturer Logotype

User Manual | rgnt-motorcycles.com 7
4. Keys
The motorcycle comes equipped with two sets of keys: (1) main
key (active) and (2) spare key (passive).
Main Key (Active): The main key should be used as your every-
day primary key. It is equipped with electronic recognition
capabilities, allowing it to recognize the motorcycle when in
close range.
Spare Key (Passive): The spare key can be used to start the
motorcycle, however, it does not have the electronic recogni-
tion capability of the main key. Instructions on how to start
the motorcycle with the spare key can be found inside the
storage compartment. Additionally, a plastic appendix con-
taining the four-digit code to order new keys is attached to
the spare key. We recommend securely storing the spare key at
home.
If you need to use the spare key, remove the plastic appendix
first and store it in a secure place.

User Manual | rgnt-motorcycles.com 8
GENERAL
Total Weight: 161,3 kg
Weight Battery: 60 kg
(unmounted)
Frame: Swedish quality Steel
Frame, welded and powder
coated
License requirements: EU: A
Vehicle class: Le-A
MEASUREMENTS
Length: 2125 mm
Width: 840 mm
Height: 1070 mm
(without mirrors)
Wheelbase: 1410 mm
Seat Height: 810 mm
CHARGING
Battery cells: Li-On
Energy in battery: 9,5 kWh
Type 2 Charging Stations and
standard 110/2V wall out-
lets.
Maximum Charging Power: 1,8kW
Charging time: 20 – 80%: 3h
DRIVE-TRAIN
Peak Power: 21 kW
Continuous Power: 9 kW
Charging time: 0-100%: 6h
Type: Hub motor / rear
Peak Torque: 390 Nm
CBS BRAKES
Hand levers for both front
and rear brake
(Combined Brake System)
5. Specications
5.1. The No.1 Classic SE / SEL
Front:
J.Juan CBS Brake System
Disc Brake:300 mm floating
disc 4,5 mm thickness
stainless steel
Brake pads: Sintered
Rear:
J.Juan CBS Brake System
Disc Brake: 220 mm disc 4 mm
thickness stainless steel
Brake pads: Sintered
HMI / DISPLAY
7″ LCD touch display Cloud
connectivity G GPS
WHEELS
Front:
Hub: Aluminum
Rim: 18*1,85” chromed steel
Tire: Avon Roadrider tires
90/90-18”
Rear:
Hub: Aluminum
Rim: 17×2.50” chromed steel
rim
Tire: Avon Roadrider 120/80-
17”
SUSPENSION
Rear: 340 mm adjustable spring
preload
Front: 35 mm Paioli, Ceriani
replica

User Manual | rgnt-motorcycles.com 9
GENERAL
Total Weight: 161,3 kg
Weight Battery: 60 kg
(unmounted)
Frame: Swedish quality Steel
Frame, welded and powder
coated
License requirements: EU: A
Vehicle class: Le-A
MEASUREMENTS
Length: 2110 mm
Width: 840 mm
Height: 1080 mm
(without mirrors)
Wheelbase: 1410 mm
Seat Height: 810 mm
CHARGING
Battery cells: Li-On
Energy in battery: 9,5 kWh
Type 2 Charging Stations and
standard 110/2V wall outlets
Maximum Charging Power: 1,8kW
Charging time: 20 – 80%: 3h
DRIVE-TRAIN
Peak Power: 21 kW
Continuous Power: 9 kW
Charging time: 0-100%: 6h
Type: Hub motor / rear
Peak Torque: 390 Nm
CBS BRAKES
(Combined Brake System)
Hand levers for both
front and rear brakes
Front:
J.Juan CBS Brake System
Disc: 300 mm diameter disc 4,5
mm thickness stainless steel
Brake pads: Sintered
Rear:
J.Juan CBS Brake System
Disc: 220 mm disc
4 mm thickness stainless steel
Brake pads: Sintered
HMI / DISPLAY
7″ LCD touch display Cloud
connectivity G GPS
WHEELS
Front:
Hub: Aluminum
Rim: 18*2.5” Excel, Black
Painted Alu
Tire: Avon Trailrider
110/R”
Rear:
Hub: Aluminum
Rim: 17×3.0” Excel, Black
Painted Alu
Tire: Avon Trailrider
130/R”
SUSPENSION
Rear: 340 mm adjustable spring
preload
Front: 35 mm Paioli, Ceriani
replica
4.2. The No.1 Scrambler SE / SEL

User Manual | rgnt-motorcycles.com 10
6. Motorcycle description
6.1. Pictured from right side
1. Rear reflector
2. License Plate light
3. Tail light
4. Saddle
5. Saddle strap
6. Rear shock absorber
7. Glove compartment / USB C Charge port (A V)
8. Side stand ( left side of motorcycle )
9. Main battery
10. Charging port
11. Rear view mirror
12. HMI Display
13. Headlight
14. Front fork shock absorber
15. Hazard warning Horn
16. Fork Reflectors

User Manual | rgnt-motorcycles.com 11
6.2. Motorcycle pictured from above
1. Rear turn indicator
2. License Plate reflector
3. Tail light
4. Saddle passenger strap
5. Charging port (Type 2 )
6. Headlight
7. Front turn indicator
8. Driver footrest
9. Passenger footrest

User Manual | rgnt-motorcycles.com 12
6.3. Motorcycle pictured from Rear & Front
Pictured from Rear
REAR
1. Tail light
2. License Plate holder
3. Rear turn indicator
4. Rear reflector
5. HMI Display
6. Rear view mirror
7. Rear wheel
Pictured from Front
FRONT
1. Rear view mirror
2. HMI Display
3. Headlight
4. Turn indicator
5. Front fork
6. Front wheel

User Manual | rgnt-motorcycles.com 13
7. High Voltage Information
7.1. Electric systems information
RGNT No.1 has two electrical sub-systems: high-voltage (V)
and low-voltage (V).
High-Voltage System
The high-voltage system includes the traction battery, in-
verter and the vehicle’s motor. NEVER attempt repairs or any
other work on the high-voltage system. Any service on the
high-voltage system must be performed by a RGNT authorized
Service Center with high-voltage experience. High-voltage
warning stickers and orange cables indicate areas with high
voltage. The warning stickers must never be removed. The co-
lor of the orange power cables must never be changed.
Low-Voltage System
The V low-voltage system ensures the operation of all ac-
cessories on your RGNT vehicle, such as the lights and turn
signals. Read the instructions carefully before each step you
perform. If you are unsure of how to proceed, contact your
RGNT dealer for advice.
NOTICE !
The Warranty may be affected by changing any parts that were
not supplied by RGNT. Always check with an authorized RGNT
dealer before changing parts.
! WARNING !
This vehicle has a high-voltage battery system and if not
handled with care it can lead to injuries or even death. It
is strictly forbidden to tamper with or modify the high-vol-
tage system in any way. A High-Voltage Warning symbol indica-
tes where on the vehicle there is danger from high voltage.
A yellow, triangular WARNING symbol like the one below indi-
cates danger from high voltage.
WARNING HIGH VOLTAGE

User Manual | rgnt-motorcycles.com 14
8. Motorcycle Controls
8.1. Controls & Components
1. HMI Display
2. Left rear view mirror
3. Left brake lever ( Front & Rear brakes )
4. Light switch control ( headlight, indicators, hazard/war
ning light & horn )
5. Charging port ( Type 2 )
6. Right control & Joystick
7. Speed control Throttle
8. Right brake lever ( Front brake only )
9. Right rear view

User Manual | rgnt-motorcycles.com 15
9. Brake system
9.1. CBS brakes ( Combined Brake System )
1. Left brake lever
When using the left brake lever - BOTH the Front and Rear
brakes are activated.
2. Right brake lever
When using the right brake lever - ONLY the Front brakes are
activated.
The RGNT No.1 Classic & Scrambler are equipped with CBS bra-
kes (Combined Brake System). This system is NOT an anti-lock
braking system (ABS). The motorcycle’s brake system is con-
trolled only from the handlebars by using the left & right
brake levers. The left brake lever (1) activates both the
front & rear brakes. The Right brake lever (2) activates the
front brakes.
! WARNING !
The CBS brake system is NOT an anti-lock brake system (ABS).
Pushing too hard on the brake levers may cause the wheels to
lock. This may result in longer braking distances.
If the brakes lock, this may cause the motorbike to crash if
the road surface is slippery.
To achieve the best possible braking power squeeze both the
left and right brake levers in combination.

User Manual | rgnt-motorcycles.com 16
10. HMI / Display
10.1. HMI / Display ( Human Machine Interface )
This is the standard view of the HMI / Display when the
motorcycle is turned on.
1. Turn-signal Direction indicators ( R / L )
2. Drive mode
3. Battery level ( % )
4. Battery temperature
5. Regenerative Braking
6. Date & Time
7. Odometer & Trip Meter
8. Power mode
9. Speedometer
10. Power being used ( kW )
11. Settings menu
12. Headlight mode
13. Boost bar & Boost ( % )
14. Max Power available ( kW )
15. Environment Temperature

User Manual | rgnt-motorcycles.com 17
10.2. HMI / Display icons
1. Turn-Signal Direction indicators Left & right icons will
flash on the display panel when using the “turn-signal
control buttons” located on the left side of the handle
bar. When pushing the “turn-signal control button” to the
left or right, the turn-signal lights will flash both in
the front and back to indicate that the motorcycle is
turning left or right.
2. Driving Modes: There are 4 different icons to indicate
which driving status the vehicle has. P is for “Park
mode”. N for “Neutral mode”. D for “Drive mode”. R for
“Reverse mode”.
3. Battery Power indicators: The battery power of the vehic
le is shown in percent from 0-100%, as well as with a bar
icon to help visualize the current level of battery
power. When power is 100%, the bar will be fully colored
or high. As power is used, the bar will become less fil
led with color or lower and lower.
4. Battery Temperature: The icon can show 3 different co
lors. BLUE indicates a cold battery temperature. GREY in
dicates normal, RED indicates a HOT battery temperature.
5. Regenerative Braking: This indicator shows how much power
is regenerated.
6. Date and Time indicators: These indicators show today’s
date, weekday and current time.
7. ODO & TRIP : ODO, Odometer is the total distance of the
vehicle since production.The ODO can NOT be reseted.
TRIP, Is a distance that can be reseted and used for me
asuring a single trip. You can choose in thetings menu”
if you want the ODO or TRIP to show on display.
8. Power Modes: The motorcycle has 3 different Power Modes.
This can be switched when driving. All 3 power modes have
different driving characters.
Normal Mode: Max power 9kW,
Dynamic Mode: Max power 13kW
Power Mode: Max power 21kW

User Manual | rgnt-motorcycles.com 18
9. Speedometer: The digital speedometer shows the current
speed of the vehicle. It can show the vehicle speed in
kilometers per hour ( KM/H ) or miles per hour ( MPH ).
10. Present Power Usage: The Power Usage indicator shows how
much Power ( kW ) is being used at any given time during
your ride.
11. Settings Menu: Press the Settings Menu icon to access and
select your preferred display settings. The menu has 4
categories of settings - Vehicle, Privacy, Mobile Phone
app and
12. System:The Settings Menu can only be accessed when the
motorcycle is in Park Mode ( P ).
13. Headlight Modes: This motorcycle has 3 headlight modes -
Parking lights, Low beam & High beam.
14. Boost Power Mode: When driving in Boost Mode, the Boost
bar shows you the amount of Boost power currently availa
ble to you.
15. Max Power Available kW indicator: This indicator tells
you the Maximum available Power kW in the selected Power
Mode.
This manual suits for next models
3
Table of contents
Other RGNT Motorcycles Motorcycle manuals