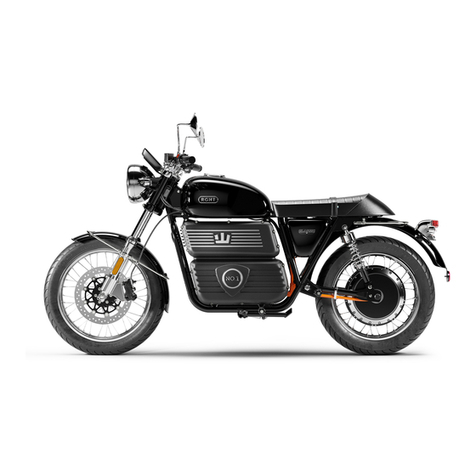
RGNT Motorcycles No.1 Classic 1.0 User manual

User Manual
RGNT No.1 Classic & The Scrambler
version 1.0 & 1.5

RGNT Motorcycles
Älvsåkersvägen 22
434 96 Kungsbacka, Sweden
support@rgnt-motorcycles.com

Table of Contents
1. Introduction 4
2. Safety Warnings 7
3. RGNT No.1 description 9
4. Electrical System 10
5. Anti Theft & Locking 11
6. List of included Tools and Accessories 13
7. Handlebar Controls 14
8.Handlebar Brake Controls 15
9. HMI / Display 16
10. Error Codes 20
11. Safety Checkpoints 21
12. First Steps to Operation 22
13. Charger 24
14. Cleaning and Storing 27
15. Charging 12V System with a seperate charger 28
16. Wheels and Tyres 29
17. Tuning Suspension 31
18. Safety Control Brake System 32
19. Maintenance and Service 35
20. Troubleshooting 36
21. Warranty 37
Contact Us 40

4User Manual | rgnt-motorcycles.com
1. Introduction
Congratulations on your purchase of a RGNT No.1! You are now the owner of an exceptional electrical
motorcycle. We hope that it will bring you much joy and wonderful experiences riding electric
motorcycles. Please read these instructions to learn more about your RGNT motorcycle, how to ride it
safely and maintain it.
These operating instructions correspond to the date of printing in the footer of each page and are the
latest version of the series. It is not possible to exclude minor deviations that arise from further design
developments.
All data contained in this “User Manual” are non-binding. RGNT Electric AB reserves the rights to
change technical specications, prices, colors, types, materials, services and design, equipment and
other. This without notice and without giving any reason is free to remove, replace the local conditions
as well as stop the production of a particular model without prior notice. It does not guarantee delivery,
dierences in illustrations and descriptions, or misprints and mistakes.
If you have any questions please read our FAQ section on the homepage. If you can’t nd the answer
you are looking for or have encountered any technical issues with your RGNT vehicle please contact
your closest RGNT dealer. You can nd all our partnership dealers and FAQ on the webpage
www.rgnt-motorcycles.com. If you don’t have a RGNT dealer in your country please email to RGNT
After Sales Center at support@rgnt-motorcycles.com. It’s also possible to contact our headquarter in
Sweden via phone. Open daily between 8:00-17:00 Monday-Friday on +46 (0) 702 161 810.
Please be prepared with the Vehicle Identication Number (VIN) This is located on the frame’s
steering neck or on the Statutory Plate with the format -YSH0100A0LKR00000- of your RGNT
Motorcycle.
NOTE! For those early customers that received a RGNT No.1 Classic or The Scrambler model in 2021:
Some dierences from the User Manual can occur. This is because running changes through the
production process were made. Tire, Brakes, mirrors m.m is an example of dierent changes from the
1.0, 1.5 and 1.6 motorcycle.

45
User Manual | rgnt-motorcycles.com
1.1. IdenticationNumbers
1.1.1. Statutory Plate
The Statutory plate is mounted to the frame tube on the left hand side of your vehicle,
with 2 rivets.

6User Manual | rgnt-motorcycles.com
1.1.2. VINNumber
The Vehicle Identication Number (“VIN”) is located on the right side of the steering
stem.

67
User Manual | rgnt-motorcycles.com
2. Safety Warnings
2.1. Usage
Denition of use RGNT motorcycles are designed and homologated to the highest standards for road
trac. The motorcycle is not designed for eld use or racing. It is an electric motorcycle, therefore,
please pay attention to the warning labels when touching or disconnecting elements. They can be
appear on the battery charger, battery box, other high voltage areas, etc.
2.2. Safety
Safety instructions for the safe handling of the RGNT No.1, observe several safety instructions in the
operating instructions (see chapter 11). Carefully read this manual.
2.3. Changes in RGNT No.1 design
• It is forbidden to remove any equipment or parts of the RGNT No.1.
• Any manipulation of the wiring of the RGNT No.1 outside an authorized Service Center is
prohibited.
WARNING! High voltage battery system! Always read manual before usage.
• It is forbidden to use the RGNT No.1 in an unattended condition.
• It is forbidden to replace parts of the RGNT No.1 with parts not approved by the manufacturer.
2.4. Secure operation
• Do not operate the RGNT No.1 under the inuence of alcohol, drugs or medication.
• Do not operate the RGNT No.1 when you are not physically t and able.
• Follow the road rules.
• The RGNT No.1 is designed to carry you and one passenger. When you carry a load or passenger
it can aect the stability and handling. Always ride at reduced speeds and observe the limits when
carrying loads.

8User Manual | rgnt-motorcycles.com
2.5. Protective Clothing
• Always wear CE approved Motorcycle gear when riding your RGNT Motorcycle. Helmet, jacket,
back protector, gloves, trousers and boots that are made for motorcycle use shall always be worn
while driving this vehicle.
• Use protective clothing that is in good condition and complies with legal regulations.
2.6. Limitations&RuleswhilstworkingyourRGNTNo.1
Services are recommended to be performed by an authorized RGNT Service Center. Maintenance on
your RGNT vehicle requires special tools and training.
WARNING! This vehicle has a high-voltage battery system and if not handled with care it can lead to
injuries or even death. If you perfermore changes or replace items on your RGNT vehicle the guarantee
terms can be aected. always consult with your local RGNT dealer if working on your vehicle on your
own.
2.7. Operating Instructions
Read the operating instructions (see chapter §12) before your rst ride. It will help you nd out how
to operate the RGNT No.1 correctly and make it easy for you to get to know its special features. It also
contains tips for adjusting your RGNT No.1 for an even better riding experience.
2.8. Warranty&Guarantee
The standard warranty guarantee is covered by the attached terms and conditions. It will be voided by
damage caused by actions contrary to these operating instructions.
2.9. Spare Parts
For your safety, only use OEM parts supplied by RGNT Electric AB. Damage arising from the use of
third-party products is not a responsibility of RGNT. Removing or modifying your lights or other
equipment can also make your RGNT illegal to drive in your country. RGNT original spare parts can
be bought at your local dealer. Find a list of all our dealers at our homepage
www.rgnt-motorcycles.com.

89
User Manual | rgnt-motorcycles.com
3. RGNT No.1 description
1. HMI/Display
2. Headlight
3. Front Indicators
4. Front caliper/CBS
5. Charge port (right side)
6. Electric Motor
7. Rear Indicators
8. Registration light
9. Rear light
10. Seat
11. Rearshockabsorber
12. Trianglebox/12V-System
13. Tank
14. Mirrors

10User Manual | rgnt-motorcycles.com
4.Electricalsystem
4.1. Systems
RGNT No.1 has two electrical sub-systems:
• The 88V high-voltage system includes the main battery, inverter and the vehicle’s motor. Never
attempt any repairs or other work on the high-voltage system without an authorized service
provider. High voltage warning stickers and orange cables indicate high voltage areas, proceed
with caution.
Glove Compartment Battery Pack Engine
• The 12V low-voltage system ensures the operation of all accessories on the Vehicle such as lights
and turn signals. The parts on the bike that the 12V low-Voltage system is operating are ne to
make service on without any contact to RGNT certied service Center. Read the instructions
carefully for each step you perform. If you are unsure of how to proceed, contact your RGNT dealer
for advice.
4.2. Warning
It’s strictly forbidden to modify the 88V system due to the High Voltage. Tampering or modifying the
system could result in short circuits and shocks which can result in injury or death!
NOTE! The warranty can also be aected if changing any parts that not is supplied by RGNT. Always
check with authorized RGNT dealer before changing parts.

10 11
User Manual | rgnt-motorcycles.com
5.AntiTheft&Locking
5.1 SteeringLock
The steering lock is located on the right side of the steering column. To engage the lock, the front
wheel must be turning to the left. Then insert the key, push the lock piston into the lock and twist it
clockwise until it hatches. then gently slide out the key and then check that the steering lock works by
turning to the right.
WARNING! Be aware that the key is fragile and twisting of the steering while having the key in the
lock can damage the mechanism and/or key.

12User Manual | rgnt-motorcycles.com
5.2. NFCTag-Immobilizer
The ignition is controlled through the NFC key tags.To begin the starting procedure do a quick press
on the left or right brake handle. This is to wake the bike up from an eventual “sleep mode” to conserve
battery. Then hold the tag on the left side of the triangular box underneath the seat. The place is
marked by a “key” sticker.
NOTE! Read about how to start riding your RGNT Motorcycle on chapter 9 “First steps to operation”.
5.3. ProvidedKeys&NFCtag
1. NFCkeyTag
2. Tanklidkey
3. Steeringlockkey
4. RGNT Key chain

13
User Manual | rgnt-motorcycles.com
6. List of included tools and accessories
6.1. Keys
RGNT No.1 comes with:
• 3pcs, NFC ignition tags
• 2pcs, Steering lock keys
• 2pcs, Tank lid keys
6.2. Charger
One standard charger is provided with the motorcycle.

14User Manual | rgnt-motorcycles.com
7. Handlebar Controls
Left side handlebar controls Right side handlebar controls
Left Control
1. Warning Signal
2. High Beam
3. Dipped Beam
4. Position Light
5. Signal Horn
6. Turn Signal L / R
Right Control
1. Kill Switch
2. CBS Brake Handle (Combined brake System)
3. Start Button

14 15
User Manual | rgnt-motorcycles.com
8.HandlebarBrakeControls
8.1. CBSBrakesSystem
The RGNT No.1 Classic & Scrambler is equipped with a CBS Brakes (Combined Brake System).
The left brake handle (1) is a combined brake. When you apply pressure on the Left lever (1) It
automatically brakes with both front and rear wheel. When you apply pressure on the right brake
handle (2) its brakes only with front wheel.
NOTE! To achieve best possible brake stopping power, use both left and right brake lever
Brakes
1. Front & rear brake lever CBS (Combined Brake System)
2. Front Brake lever

16User Manual | rgnt-motorcycles.com
9. HMI / Display
9.1. Tell Tails
9.2. Settings
NOTE! The settings menu is only accessible when the vehicle is unlocked and in “Parked” or
“Neutral”. When the vehicle is set to “Drive” the icon will disappear and the function will no longer be
accessible for your safety.

16 17
User Manual | rgnt-motorcycles.com
9.3. GPS
The map & position is visible at the home screen, however its functionality is reduced until RGNT
releases a new software update. When the update is ready it will be “Over-the-Air” changed on the
RGNT Vehicle automatically. Troubleshooting on software can be checked at your service partner.
9.4. TurtleMode-PowerReduction
There is a built in Power Reduction feature in the vehicle to prevent the powertrain from overheating
and draining the battery to a state where you might not make it home. The Symbol of a Turtle with a
lightning on the shell will occur on the screen until the reduction is heaved. The turtle mode will also
appear if the battery is too cold. Below 5°C the powertrain is reduced. When the battery & engine
heats up above 5°C the reduction will be heaved.
WARNING! The turtle mode does not guarantee that you make it all the way home.

18User Manual | rgnt-motorcycles.com
9.5. Drivemode
The RGNT No:1 Classic and Scrambler have 2 dierent driving modes.
This is to customize the riders’ needs. Sometimes you want to have the full power experience, other
times the range is more important. You can easily switch from the dierent settings by pressing the
“ignition” button when standing still in D “Drive”.
Push for 1-2 seconds to switch between the dierent modes. You can see the mode highlighted on the
display.
POWER: The motorcycle is in full power mode (11 Kw peak power)
RANGE: The motorcycle has 80% of full power ( 8,5Kw Peak Power )
9.6. SoftwareReset
If the software in the HMI is malfunctioning or frozen, try to do a “Hard-Reset”:
1. Pull up the stand
2. Align the light switch into High-Beam
3. Turn the indicator switch left
4. Press and hold hazard sign button and signalhorn button simultaneusly as pressing brake lever.
press and hold 2-3 seconds. System will restart itself.
5. Turn on with key tag.
This takes about 2-3 seconds.

18 19
User Manual | rgnt-motorcycles.com
9.7. Software
The Dashboard/HMI system features OTA (Over-the-Air) updates. The system will be updated
whenever a new update is published from RGNT. The Dashboard will inform you when an update
installs via a message.
To check the software version, IP, or GPS position. Enter the settings menu and push the green arrow
in the lower right corner. The “4G Connectivity bar” has 4 white dots to show internet connection
status. If all 4 dots are gray you have no internet connection and GPS will not work until internet
connection is found again.

20User Manual | rgnt-motorcycles.com
10. Error codes
10.1. CheckEngine
There is one tell-tale visible on the HMI that indicates that there is a malfunction in the powertrain
(motor, battery, wiring, etc.). If the lamp is turned on, please contact RGNT or an authorized service
partner to have an OBD reading.
The Error Code can be read and serviced with an OBD reader at any RGNT Service Partner.
This manual suits for next models
3
Table of contents
Other RGNT Motorcycles Motorcycle manuals