Ricatech RMC200 User manual

RMC200
MANUAL DE USO
USER MANUAL GEBRUIKERSHANDLEIDING MODE D’EMPLOI
BEDIENUNGSANLEITUNG MANUAL DE USUARIO

IMPORTANT SAFEGUARDS FOR AUDIO PRODUCTS
PLEASE READ CAREFULLY THE FOLLOWING IMPORTANT SAFEGUARDS THAT ARE APPLICABLE
TO YOUR EQUIPMENT.
1. Read Instructions - All the safety and operating instructions should be read before the appliance is
operated.
2. Retain Instructions - The safety and operating instructions should be retained for future
reference.
3. Heed Warnings - All warnings on the appliance and in the operating instructions should be adhered
to.
4. Follow Instructions - All operating and use instructions should be
followed.
5. Water and Moisture - The appliance should not be used
near water-for example, near a bathtub,washbowl, kitchen
sink,laundry tub, in a wet basement, or near a swimming
pooland the like.
6. Carts and Stands - The appliance should be used only with a
cart or stan that is recommendedby the manufacturer.
6A.An appliance and cart combination should be moved with care. Quick stops, excessive force, and
uneven surfaces may cause the appliance and cart combination to overturn.
7. Wall or Ceiling Mounting - The appliance should be mounted to a wall or ceiling only as
recommended by the manufacturer.
8. Ventilation - The appliance should be situated so that its location or position does not interfere
with-its proper ventilation.For example, the appliance should not be situated on a bed, sofa,
rug,or similar surface that may block the ventilation penings; or, placed in a built-in installation, such
as a bookcase or cabinet that may impede the flow of air through the ventilation openings.
9. Heat - The appliance should be situated away from heat sources such as radiators, heat
registers, stoves,or other appliances (including amplifiers) that produce heat.
10.Power Sources - The appliance should be connected to a power supply only of the type described in
the operating instructions or as marked on the appliance.
11.Grounding or Polarization - Precautions should be taken so that the grounding or
polarization means of an appliance is not impeded.
12.Power - Cord Protection - Power-supply cords should be routed so that they are not likely to be walked
on or pinched by items placed upon or against them, paying particular attention to cords at plugs, and the
point where they exit from the appliance.
13.Cleaning - The appliance should be cleaned only as recommended by the manufacturer.
14.This product is designed for use with the antenna attached and should not be connected to any other
external antennas.
15.Non-use Periods - The power cord of the appliance should be unplugged from the outlet when left
unused for a long period of time.
16.Object and Liquid Entry - Care should be taken so objects do not fall and liquids are not spilled into
the enclosure through openings
17.Damage Requiring Service - The appliance should be serviced by qualified service personnel when:
A. The power-supply cord of the plug has been damaged;or
B. Objects have fallen, or liquid has been spilled into the appliance;or
C. The appliance has been exposed to rain;or
D. The appliance does not appear to operate normally or exhibits a marked change inperformance; or
E.The appliance has been dropped, or the enclosure damaged.
18.Servicing - The user should not attempt to service the appliance beyond that described in
the operating instructions. All other servicing should be referred to qualified service personnel.

WARNING:
To reduce the risk of fire or electric shock, do not expose this appliance to rain or moisture.
CAUTION:
Use of controls or adjustments or performance of procedures other than those specified may result in hazardous
radiation exposure..
The lighting flash with arrowhead
symbol, within an equilateral
triangle, is intended to alert user to
the presence of uninsulated
"dangerous voltage" within the
product's enclosure that may be of
sufficient magnitude to constitute
risk of electric shock to persons.
CAUTION: TO REDUCE THE RISK OF
ELECTRIC SHOCK, DO NOT REMOVE
COVER (OR BACK). NO USER –
SERVICEABLE PARTS INSIDE. REFER
SERVICING TO QUALIFIED SERVICE
PERSONNEL.
CAUTION
RISK OF ELECTRIC SHOCK DO
NOT OPEN
The exclamation point within an
equilateral triangle is intended to
alert user to the presence of
important operating and
maintenance (servicing) instruction
in the literature accompanying the
appliance.
CAUTION
For Compact Disc Units Only:
INVISBLE LASER RADIATION WHEN OPEN AND INTERLOCK FAILED
OR DEFEATED. AVOID DIRECT EXPORSURE TO LASER BEAM.
•Marking plate was located on bottom enclosure
Specification
Frequency Range : AM 530 - 1600 KHz
: FM 88 - 108 MHz
Power Supply : SWITCHING ADAPTOR 230Vac/50Hz(DC 12V 1.2A )
Power Consumption : 18W
Antennas : External antenna for FM
: Built-in ferrite bar for AM
Speaker : 4‖ Dynamic type x 2
* DESIGN AND SPECIFICATIONS SUBJECT TO CHANGE WITHOUT NOTICE.
* Check that there are MP3 songs stored on the MP3/USB Device/Flash Drive/SD Card.
Getting Started
Unpacking
1 Remove packing materials from unit.
Note: Save all packing materials.
2 Remove plastic bag covering radio.
3 Remove plastic safety cover from A/C plug.
4 Remove tie from A/C cord and untie antenna wire on back of radio.
5 Open lid and remove styrofoam shipping material from turntable.
6 Remove black tie-wrap from under the tone arm.
7 Remove white protective needle cover by gently pulling towards the front of the unit.
8 Untie the FM antenna and allow it to hang down in a straight line for optimum FM reception. If
you have trouble tuning in an FM station, move the external FM antenna for best reception. Do
no connect FM antenna to outside antenna.

Power Source
1. Plug the small end of the supplied ADAPTOR into the 12V DC INPUT JACK on the back of the unit.
2. Insert the 2-pin plug of the AC ADAPTOR into an appropriate 230V AC Mains wall outlet socket.
Headphones Jack Operation
1 Connect headphones to the HEADPHONE JACK.
2 Adjust volume to the desired listening level.
NOTE: When using headphones, the sound to the unit speakers will be cut off.
Headphone Jack
The sound from all speakers is cut off.
NOTE: Headphones not included with unit.
Turntable Operation
Turn the unit on by rotating the ON/OFF-VOLUME ROTARY KNOB located on the front panel to the ON position.
1 Set the FUNCTION SWITCH to PH. for PHONO mode.
2 Set the SPEED CONTROL SWITCH to desire speed (33 1/3,45 or 78 rpm). Place the record on the turntable.
3 Use the CUE LEVER to raise the tone arm off its rest. Pull the TONE ARM slightly to the right side until hear
the "click" sound to activate the turntable.
4 Move the tone arm over the record and use the cue lever to lower it to the point you want the record to start.
Adjust the ON/OFF-VOLUME ROTARY KNOB to the desired listening level.
5 At the end of the record, the TONE ARM will stop automatically. You must return it to the TONE ARM REST
by hand.
Accessory:ADAPTER FOR 45 RPM
This adaptor allows you to play 45 RPM records.
1 Place the 45 RPM adaptor over the spindle.
2 Gently place your 45 RPM record onto the turntable.
3 Follow the steps under turntable operation to play your record.
Cassette Operation
1 Set the FUNCTION SWITCH to TA. for CASSETTE mode.
2 Insert a prerecorded tape through
the
CASSETTE
DOOR. Tape will slide into the cassette
mechanism and start playing.
3 Adjust the volume level by turning the VOLUME KNOB .
4 For fast forwarding, press the CASSETTE EJECT/F.F half way in. Pressing again,
will stop the fast forwarding and return the cassette to the playing mode.
5 To stop and eject the cassette, press the CASSETTE EJECT/F.F in completely.
6 When one side of the tape finishes playing, the cassette will automatically stop.
NOTE: Remove the tape from the unit when it is not in use or stopped.
Radio Operation
1 Set the FUNCTION SWITCH to RA. for RADIO mode.
2 Set the AM/FM BAND SWITCH to the desired band (AM or FM).
3 Select the desired radio station by rotating TUNING KNOB.
4 Adjust the ON/OFF-VOLUME ROTARY KNOB to the desired sound level.
Antenna
Antenna: for FM reception, the unit is provided with a FM WIRE ANTENNA , move the wire until the reception is
clear and with no interferences. For AM reception, the unit is provided with a directional build-in ferrite antenna.
Rotate the set to find the position in which the best reception is obtained. Do not connect the EXTERNAL FM
ANTENNA to any outside antenna
CD Operation
Playing A CD
1 Set the FUNCTION SWITCH to CD. for CD mode.
2 Press the OPEN/CLOSE BUTTON to open the CD DOOR . Place a disc in the tray with the labeled
side of the disc facing up.
3 Press the OPEN/CLOSE BUTTON again close the CD DOOR. The display will show ―— —― for a few
seconds, then the total number of tracks on the disc will be displayed.―00‖ will be shown when there is
no disc inside the unit.
4 Press the PLAY BUTTON to start playback. The PLAY INDICATOR will light up.

5 Adjust the VOLUME ROTARY KNOB to the desired volume level.
6 To pause playback, press the PLAY/PAUSE BUTTON. The PLAY INDICATOR will flash. Press the PLAY
BUTTON again to resume playback.
7 To stop playback, press the STOP BUTTON. The PLAY INDICATOR will go off. .
Skip Forward And Skip Reverse
1 Press the FORWARD SKIP BUTTON or the BACKWARD SKIP BUTTON to select a track.
2 Press the PLAY BUTTON to start playing the selected track
Search Forward And Reverse During Play
PLAYBACK
1 PressandholdtheFORWARDSKIPBUTTON or the BACKWARD SKIP BUTTON to search forward or backward
though the selected track.
2 Release the button at the desired point, playback will resume automatically.
Programmed Playback
1 Press the PROGRAM BUTTON. " 01" will shown on the display and the PROGRAM INDICATOR will flash.
2 Press the FORWARD SKIP BUTTON or the BACKWARD SKIP BUTTON to select a track.
3 Press the PROGRAM BUTTON again to store the selected track number.
4 Repeat steps 2 and 3 above to program other tracks.
5 Press the PLAY BUTTON to start Programmed playback. The PROGRAM INDICATOR will be on.
6 To erase the programmed sequence, press the STOP BUTTON twice or until the PROGRAM
INDICATOR is off. Programmed tracks will also erase when the
CD DOOR
is opened.
NOTE: Maximum of 20 tracks can be programmed to play in any order.
Auxiliary Input
1 You can connect external components to your unit by using the Auxiliary Input.
2 Plug Auxiliary cable into the LINE IN JACK on the back of your unit.
3 Switch the LINE IN SWITCH to the ON position.
4 Plug the other end of the Auxililary cable into the output jack on your desired external component.
5 Check the volume level of your external component.
6 See operators manual for correct operation of the external component.
NOTE: When not using the Auxiliary Input, make sure the LINE IN SWITCH is in the OFF position.
Troubleshooting
There is no Power
1 The AC plugged is not well connected.
2 Check to see that the ON/OFF volume knob is in the on position.
There is no Sound
1 Check the volume level by turning the volume knob.
2 Make sure the LINE IN SWITCH is in the OFF position if the LINE IN JACK is not being used.
Turntable will not work
1 Make sure the function switch is set to phono.
2 Try moving the tone arm to the right until youhear a click.
3 Make sure the protective needle cover isremoved.
CD does not play
1 Check to make sure CD is inserted correctly(label side facing up).
2 Check that the surface of the CD is clean
3 Make sure function switch is set to CD.

CONTROL LOCATORS

CONTROL LOCATORS

Customer support
You can contact the Ricatech customer service when you have a question or a problem with your Ricatech
product. You can contact us by telephone and email.
Email
For customer support by email, please sent a email to
[email protected] Please make sure that you mention the model number and serial number of the product,
mention your name & address and describe your question or problem clearly.
Telephone
For customer support by telephone, please dial +32 3 3265694. One of our service staff will be ready to serve
you. For full procedure please visit the website of Ricatech at: www.ricatech.com
Ricatech B.V.
Cornusbaan 1
2908 KB Capelle a/d IJssel
The Netherlands

Nederlands
BELANGRIJKE VOORZORGSMAATREGELEN VOOR
AUDIOPRODUCTEN
LEES AANDACHTIG DE VOLGENDE BELANGRIJKE VOORZORGSMAATREGELEN DIE VAN TOEPASSING
ZIJN OP UW APPARATUUR.
1. Instructies lezen - Alle veiligheids - en bedieningsinstructies moeten worden gelezen voordat het
apparaat wordt gebruikt.
2. Instructies bewaren - De veiligheids- en bedieningsinstructies moeten worden
bewaard voor raadpleging in de toekomst.
3. Aandacht besteden aan waarschuwingen - Alle waarschuwingen op het apparaat
en in de bedieningsinstructies moeten in acht worden genomen.
4. Instructies opvolgen - Alle bedienings- en gebruiksinstructies moeten worden
opgevolgd.
5. Water en vocht - Het apparaat mag niet worden gebruikt in de buurt van water,
bijvoorbeeld nabij een badkuip, wasbak, gootsteen, wastobbe, in een vochtige kelder
of nabij een zwembad en dergelijke.
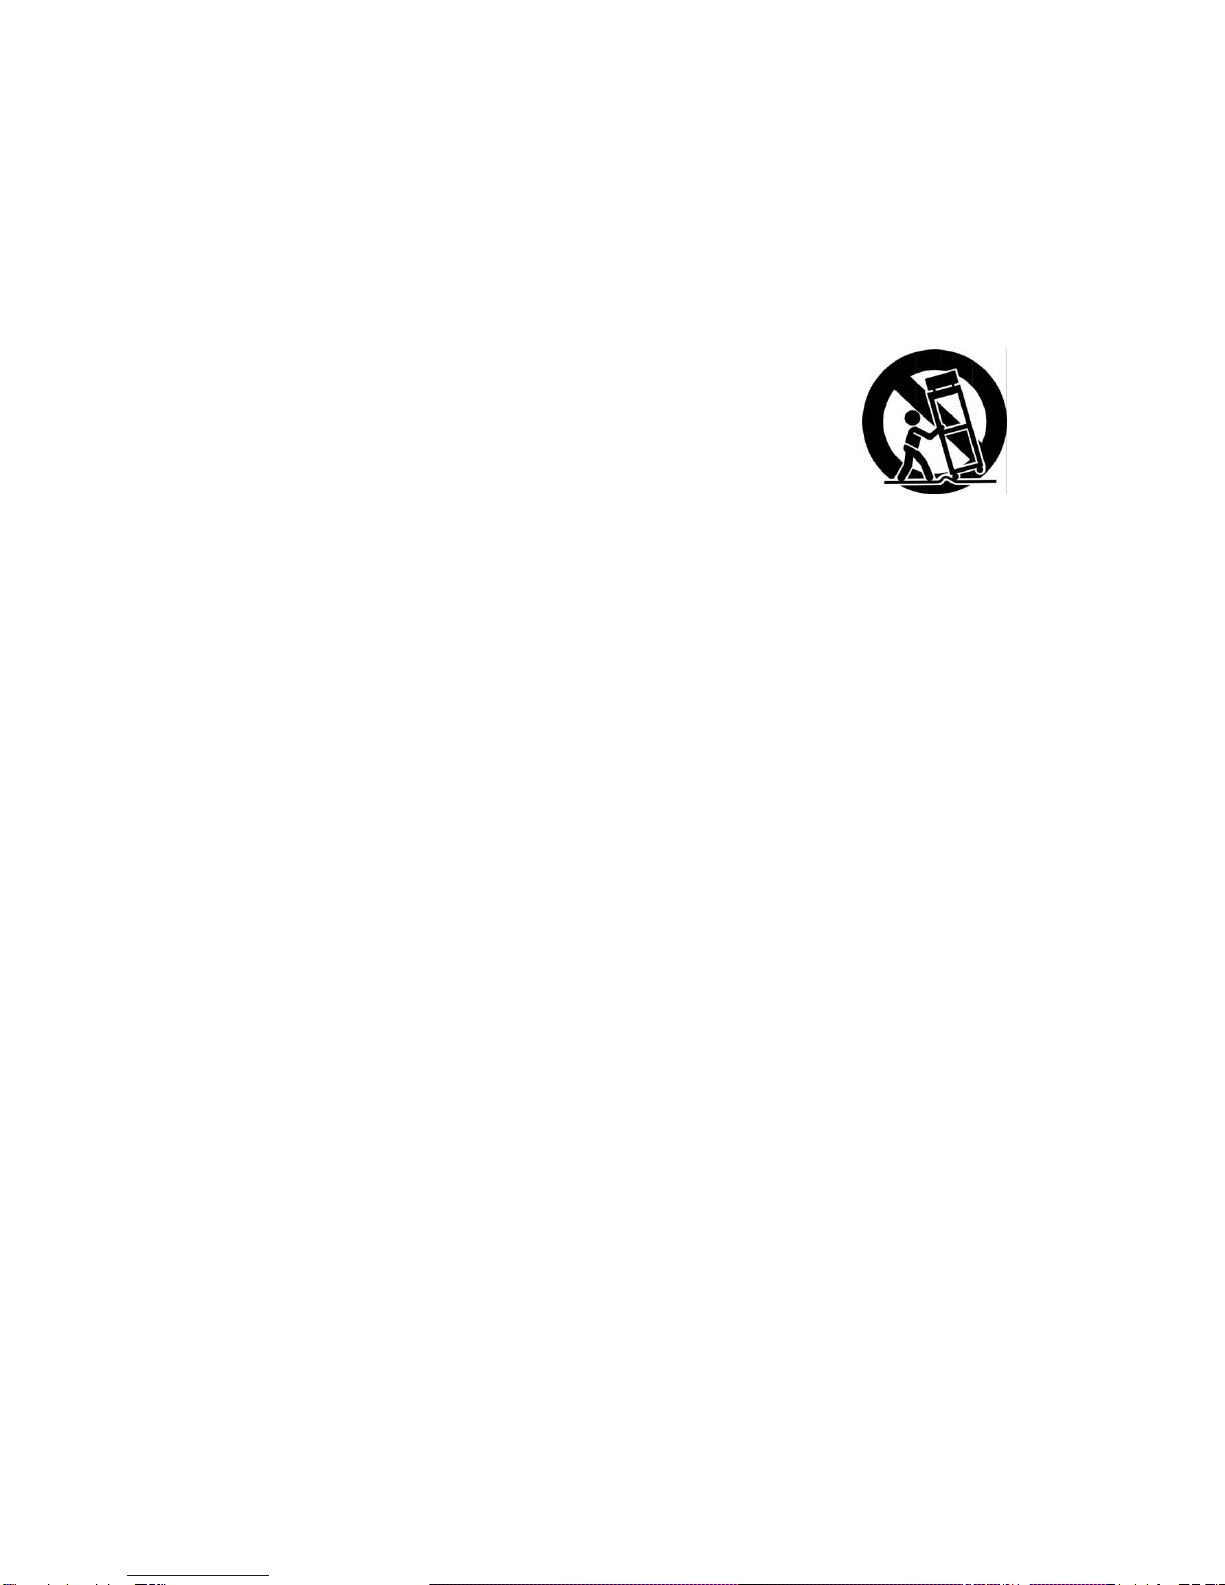
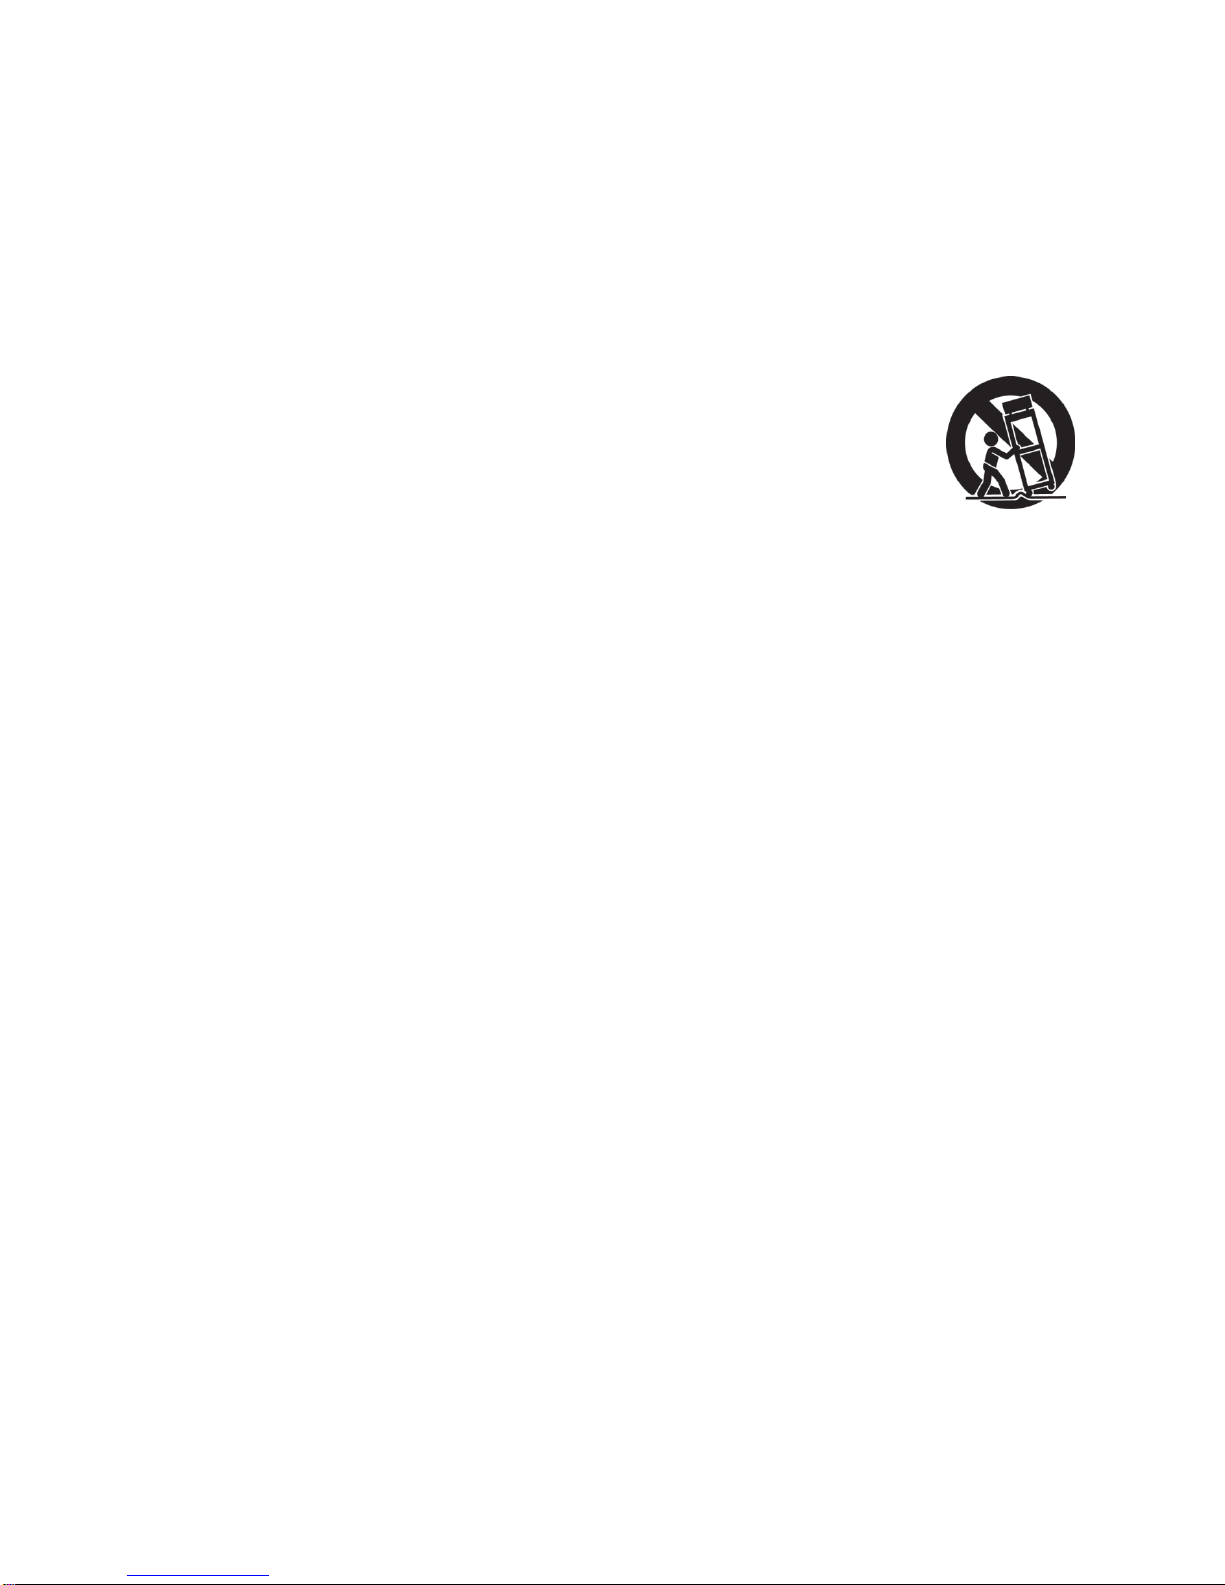
6A. Karretjes en staanders - Het apparaat mag alleen worden gebruikt met een karretje of staander
aanbevolen door de fabrikant.
6A.Een apparaat op een karretje moet voorzichtig worden verplaatst. Bruusk stoppen, overmatige
kracht en oneffen oppervlakken kunnen het karretje met apparaat doen omkantelen.
7. Wand- of plafondbevestiging - Het apparaat mag aan een wand of plafond alleen worden
bevestigd volgens de aanbevelingen van de fabrikant.
8. Ventilatie - De plaats en de stand van het apparaat mogen correcte ventilatie niet belemmeren.
Het apparaat mag bijvoorbeeld niet op een bed, sofa, vloerkleed of dergelijk oppervlak worden
geplaatst aangezien de ventilatieopeningen kunnen worden geblokkeerd; en evenmin in een
ingebouwde installatie zoals een boekenrek of kast aangezien de luchtstroom door de
ventilatieopeningen kan worden belemmerd.
9. Warmte - Het apparaat moet verwijderd zijn van warmtebronnen zoals radiators, warmteregisters,
kachels of andere toestellen (inclusief versterkers) die warmte produceren.
10. Voedingsbronnen - Het apparaat mag alleen worden aangesloten op een voeding van het type
beschreven in de bedieningsinstructies of aangegeven op het apparaat.
11. Aarding of polarisatie - Er moeten voorzorgsmaatregelen worden genomen zodat de middelen
voor aarding of polarisatie van een apparaat niet worden belemmerd.
12. Voeding - Netsnoerbescherming –Netsnoeren moeten zodanig worden geleid dat de kans om
erop te trappen of ze te knellen met voorwerpen die erop of ertegen staan minimaal is, met
bijzondere aandacht voor netsnoeren aan stekkers en op de plaats waar ze het apparaat verlaten.
13. Reiniging - Het apparaat mag alleen worden gereinigd volgens de aanbevelingen van de
fabrikant.
14. Dit product is ontworpen voor gebruik met de bevestigde antenne en mag niet worden
aangesloten op andere externe antennes.
15. Perioden van niet gebruik - Het netsnoer van het apparaat moet uit het stopcontact worden
getrokken wanneer het apparaat lange tijd niet wordt gebruikt.
16. Voorwerpen en vloeistoffen in het apparaat - U dient voorzichtig te zijn dan er geen
voorwerpen vallen of vloeistoffen worden gemorst in de behuizing via openingen
17. Schade die onderhoud vereist - Het apparaat moet door gekwalificeerd onderhoudspersoneel
worden onderhouden wanneer:
A. Het netsnoer van de stekker beschadigd is; of
B. Voorwerpen zijn gevallen of vloeistoffen zijn gemorst in het apparaat; of
C. Het apparaat werd blootgesteld aan regen; of
D. Het apparaat niet normaal lijkt te werken of de prestaties opvallend zijn gewijzigd; of
E. Het apparaat is gevallen, of de behuizing beschadigd is.
18.Onderhoud - De gebruiker mag niet proberen onderhoud van het apparaat uit te voeren behalve
het onderhoud beschreven in de bedieningsinstructies. Alle andere onderhoudswerkzaamheden
moeten worden uitgevoerd door gekwalificeerd onderhoudspersoneel.

OPGELET:
Het gebruik van de bediening of aanpassingen of prestaties van procedures andere dan deze hier opgegeven
kunnen leiden tot gevaarlijke blootstelling aan straling.
•Markeerplaat stond op onderste behuizing
Specificaties
Frequentiebereik : AM 530 - 1600 KHz
: FM 88 - 108 MHz
Voedingsbron : SCHAKELADAPTER 230 V ac/50 Hz(DC 12 V 1,2A )
Stroomverbruik : 18 W
Antennes : Externe antenne voor FM
: Ingebouwde ferrietstaaf voor AM
Luidspreker : 4‖ Dynamisch type x 2
* ONTWERP EN SPECIFICATIES ONDERHEVIGAAN WIJZIGINGEN ZONDER VOORAFGAANDE
KENNISGEVING.
* Controleer of er MP3-muziekbestanden zijn opgeslagen op het MP3/USB-apparaat/de Flash Drive/de SD-
kaart.
Aan de slag
Uitpakken
1 Verwijder de verpakkingsmaterialen van het apparaat. Opmerking: Bewaar al het verpakkingsmateriaal.
2 Verwijder de plastic zak die de radio bedekt.
3 Verwijder de plastic veiligheidsbescherming van de lichtnetstekker.
4 Verwijder de kabelbinder van het lichtnetsnoer en maak de antennedraad aan de achterzijde van de radio los.
5 Open het deksel en verwijder het piepschuimen verpakkingsmateriaal van de platenspeler.
6 Verwijder de zwarte kabelbinder onder de pick-uparm.
7 Verwijder de witte naaldbescherming door deze voorzichtig naar de voorzijde van het apparaat te trekken.
8 Maak de FM-antenne los en laat deze in een rechte lijn naar beneden hangen voor optimale FM-ontvangst.
Als u moeilijk kunt afstemmen op een FM-zender, verplaats de externe FM-antenne voor een betere ontvangst.
Verbind de FM-antenne niet met een buitenantenne.
OPGELET
Alleen voor Compact Disc-
apparaten:
ONZICHTBARE LASERSTRALING WANNEER OPEN EN WANNEER
VERGRENDELING MISLUKT OF WORDT VERIJDELD. VERMIJD
DIRECTE BLOOTSTELLING AAN LASERSTRAAL.
Het symbool van de bliksemflits
met pijlkop, in een gelijkzijdige
driehoek, is bedoeld om de
gebruiker attent te maken op de
aanwezigheid van niet-geï-
soleerde ―gevaarlijke spanning‖ in
de behuizing van het product die
zo hoog kan zijn dat ze gevaar
voor een elektrische schok
betekent voor personen.
OPGELET: OM HET GEVAAR VOOR EEN
ELEKTRISCHE SCHOK TE
VERMINDEREN, BEHUIZING (OF
ACHTERKANT) NIET VERWIJDEREN. GEEN
DOOR DE GEBRUIKER TE
ONDERHOUDEN ONDERDELEN AAN DE
BINNENKANT. LAAT ONDERHOUD OVER
AAN GEKWALIFICEERD
ONDERHOUDS- PERSONEEL.
Het uitroepteken in een
gelijkzijdige driehoek is be-
doeld om de gebruiker attent
te maken op de
aanwezigheid van een
belangrijke instructie voor
bediening en onderhoud
(service) in de documentatie
bij het apparaat.

Voedingsbron
1. Steek het smalle uiteinde van de meegeleverde ADAPTER in de 12V DC AANSLUITING aan de achterzijde
van het apparaat.
2. Steek de 2-pinsstekker van deAC-ADAPTER in een geschikt 230 V stopcontact.
De hoofdtelefoonaansluiting gebruiken
1 Sluit een hoofdtelefoon aan op de HOOFDTELEFOONAANSLUITING.
2 Stel het volume in op het gewenste luisterniveau.
OPMERKING: Wanneer u een hoofdtelefoon gebruikt zal het geluid van de luidsprekers worden onderbroken.
Hoofdtelefoonaansluiting
Het geluid van alle luidsprekers wordt onderbroken.
OPMERKING: Hoofdtelefoon niet meegeleverd met het apparaat.
Bediening van de draaitafel
Schakel het apparaat in door de AAN/UIT-VOLUMEDRAAIKNOP op het voorpaneel naar de AAN-positie te
draaien.
1 Zet de FUNCTIESCHAKELAAR op PH. om de PHONO-stand te selecteren.
2 Stel de SNELHEIDSSCHAKELAAR in op de gewenste snelheid (33 1/3,45 of 78 tpm). Plaats de plaat op de
platenspeler.
3 Gebruik de OPTILHENDEL om de pick-uparm van de armsteun te tillen. Trek de TOONARM lichtjes naar
rechts tot u een "klikgeluid" hoort om de draaitafel te activeren.
4 Breng de toonarm boven de plaat en laat hem met de toonarmhendel neer op het punt waar u het afspelen
van de plaat wilt starten. Stel de AAN/UIT-VOLUMEDRAAIKNOP af op het gewenste luisterniveau.
5 Aan het einde van de plaat stopt de TOONARM automatisch. U moet hem handmatig terugplaatsen in de
TOONARMSTEUN.
Accessoire:ADAPTER VOOR 45 TPM
Deze adapter maakt het mogelijk 45-toerenplaten af te spelen.
1 Plaats de 45 TPM adapter boven de as.
2 Plaats voorzichtig uw 45 TPM plaat op de platenspeler.
3 Volg de stappen onder bediening platenspeler om uw plaat af te spelen.
Cassettebediening
1 Zet de FUNCTIESCHAKELAAR op TA. om de CASSETTE-stand te selecteren.
2 Steek een vooraf opgenomen cassette in
de
CASSETTE
DEUR. De cassette zal in het cassettemechanisme
glijden en beginnen af te spelen.
3 Regel het volumeniveau door aan de VOLUMEKNOP te draaien.
4 Om vooruit te spoelen, drukt u CASSETTE UITWERPEN/F.F. halfweg in. Als u opnieuw drukt, stopt het
vooruitspoelen en keert de cassette terug naar de afspeelmodus.
5 Om de cassette te stoppen en uit te werpen, drukt u CASSETTE UITWERPEN/F.F. volledig in.
6 Wanneer een zijde van de cassette volledig is afgespeeld, stopt de cassette automatisch.
OPMERKING: Neem de cassette uit het apparaat wanneer het niet in gebruik is of gestopt is.
Bediening van de radio
1 Zet de FUNCTIESCHAKELAAR op RA. om de RADIO-stand te selecteren.
2 Stel de AM/FM-GOLFBANDSCHAKELAAR in op de gewenste radioband (AM of FM).
3 Selecteer de gewenste radiozender door aan de AFSTEMKNOP te draaien.
4 Stel de AAN/UIT-VOLUMEDRAAIKNOP af op het gewenste volumeniveau.
Antenne
Antenne: voor FM-ontvangst is het apparaat uitgerust met een FM-DRAADANTENNE, verplaats de draad tot de
ontvangst zuiver en zonder storingen is. Voor AM-ontvangst is het apparaat uitgerust met een ingebouwde
ferrietstaaf-richtingsantenne. Draai het toestel om de positie met optimale ontvangst te vinden. Sluit de
EXTERNE FM-ANTENNE niet aan op een buitenantenne

CD-bediening
Een CD afspelen
1 Zet de FUNCTIESCHAKELAAR op CD. om de CD-stand te selecteren.
2 Druk op de OPEN/SLUITEN-KNOP om de CD-DEUR te openen. Plaats een disc in de lade met het etiket van
de disc naar boven gericht.
3 Druk opnieuw op de OPEN/SLUITEN-KNOP om de CD-DEUR te sluiten. Gedurende enkele seconden toont
de display ―—‖ , vervolgens worden het totaal aantal nummers op de disc weergegeven. ―00‖ wordt getoond
wanneer er geen disc in het apparaat is geplaatst.
4 Druk op de AFSPELEN-KNOP om de weergave te starten. De AFSPELEN-AANDUIDING gaat branden.
5 Stel de VOLUMEDRAAIKNOP af op het gewenste volumeniveau.
6 Druk op de AFSPELEN/PAUZE-KNOP om de weergave te pauzeren. De AFSPELEN-AANDUIDING gaat
knipperen. Druk opnieuw op de AFSPELEN-KNOP om de weergave te hervatten.
7 Druk op de STOP-KNOP om de weergave te stoppen. De AFSPELEN-AANDUIDING gaat uit.
Vooruit en achteruit overslaan
1 Druk op de VOORUIT SKIP-KNOP of deACHTERUIT SKIP-KNOP om een nummer te selecteren.
2 Druk op deAFSPELEN-KNOP om het afspelen van het geselecteerde nummer te starten
Vooruit en achteruit zoeken tijdens het afspelen
WEERGAVE
1 HouddeVOORUITSKIP-KNOPof de ACHTERUIT SKIP-KNOP ingedrukt om vooruit of achteruit te zoeken
doorheen het geselecteerde nummer.
2 Laat de knop los op het gewenste punt en de weergave hervat automatisch.
Geprogrammeerde weergave
1 Druk op de PROGRAMMAKNOP. " 01" zal op de display worden getoond en de PROGRAMMA-AANDUIDING
zal knipperen.
2 Druk op de VOORUIT SKIP-KNOP of de ACHTERUIT SKIP-KNOP om een nummer te selecteren.
3 Druk opnieuw op de PROGRAMMAKNOP om het geselecteerde muzieknummer op te slaan.
4 Herhaal bovenstaande stappen 2 en 3 om andere nummers te programmeren.
5 Druk op de AFSPELEN-KNOP om Geprogrammeerde weergave te starten. De PROGRAMMA-AANDUIDING
blijft aan.
6 Druk, om de geprogrammeerde reeks te wissen, twee keer op de STOP-KNOP of totdat de PROGRAMMA-
AANDUIDING uit is. Geprogrammeerde nummers worden tevens gewist wanneer de
CD-DEUR
open is.
OPMERKING: Maximaal 20 nummers kunnen worden geprogrammeerd voor het afspelen in elke willekeurige
volgorde.
Hulpingang
1 U kunt externe componenten aansluiten op uw apparaat via de hulpingang.
2 Sluit een hulpkabel aan op de LINE IN-AANSLUITING op de achterzijde van uw apparaat.
3 Zet de LINE IN-SCHAKELAAR in de stand AAN.
4 Sluit het andere uiteinde van de hulpkabel aan op de uitgangsaansluiting van de gewenste externe
component.
5 Controleer het volumeniveau van de externe component.
6 Raadpleeg de gebruikershandleiding voor correcte bediening van de externe component.
OPMERKING: Wanneer u de hulpingang niet gebruikt, zorg er dan voor dat de LINE IN-SCHAKELAAR in de
UIT-positie staat.
Probleemoplossing
Er is geen stroomtoevoer
1 De lichtnetadapter is niet goed aangesloten.
2 Controleer of de AAN/UIT-volumeknop zich in de AAN-positie bevindt.
Er is geen geluid
1 Controleer het volumeniveau door aan de volumeknop te draaien.
2 Controleer of de LINE IN-SCHAKELAAR in de stand UIT staat als de LINE IN-AANSLUITING niet wordt
gebruikt.

Draaitafel werkt niet
1 Zorg dat de functieschakelaar op phono staat ingesteld.
2 Probeer de pick-uparm naar rechts te bewegen tot u een klik hoort.
3 Zorg dat de naaldbescherming is verwijderd.
CD wordt niet afgespeeld
1 Controleer of de CD juist is geplaatst (etiket naar boven gericht).
2 Controleer of het oppervlak van de CD schoon is
3 Zorg dat de functieschakelaar op CD staat ingesteld.
PLAATS VAN ONDERDELEN
LUIDSPREKE
RS
LUIDSPREKE
RS
LUIDSPREKERS
PROGRAMMAKNOP
AFSPELEN/PAUZE-KNOP
AFSPELEN-AANDUIDING
AFSTEMSCHAAL
STOP-KNOP
OPEN/SLUITEN-
KNOP
AM/FM-
GOLFBANDSCHAKEL
AAR
CD-DEUR
AFSTEMKNOP
LED-DISPLAY
AAN/UIT-VOLUMEDRAAIKNOP
HOOFDTELEFOONAANSLUITING
PROGRAMMA-AANDUIDING
VOORUITSKIP-KNOP
ACHTERUIT SKIP-KNOP
FUNCTIESCHAKELAAR

PLAATS VAN ONDERDELEN
DRAAITAFEL
SPIL
ADAPTER VOOR 45 TPM PLAAT
TOONARM
TOONARMHENDEL
TOONARMSTEUN
VEILIGHEIDSHAAK
TOERENTALREGELAAR (33 1/3,
45 ,78 TPM)
AC-ADAPTER
LINE IN-SCHAKELAAR
LINE IN-AANSLUITING
EXTERNE ANTENNE
CASSETTEDEUR
CASSETTE UITWERPEN / SNEL
VOORUITSPOELEN

KLANTENONDERSTEUNING
U kunt contact opnemen met Ricatech klantenservice als u een vraag of een probleem heeft met uw Ricatech
product. U kunt contact met ons opnemen per telefoon en e-mail.
E-mail
Voor klantenondersteuning per e-mail, gelieve een e-mail te sturen naar [email protected]. Zorg ervoor dat u
het modelnummer en het serienummer van het product vermeldt, onder vermelding van uw naam & adres en een
duidelijke omschrijving van uw vraag of probleem.
Telefoon
Voor telefonische klantenondersteuning belt u naar
+32 3 3265694. Een van onze servicemedewerkers zal u dan te woord staan. Voor de volledige
procedure kunt u terecht op de website van Ricatech: www.ricatech.com
Ricatech
Cornusbaan 1
2908 KB Capelle a/d IJssel
The Netherlands

FRANÇAIS
INSTRUCTIONS DE SECURITE IMPORTANTES POUR PRODUITS AUDIO
VEUILLEZ LIRE ATTENTIVEMENT LES INSTRUCTIONS SUIVANTES APPLICABLES
A VOTRE EQUIPEMENT
1. Lisez les instructions –Lisez toutes les instructions de sécurité et d’utilisation avant de
vous servir de l’appareil.
2. Conservez les instructions –Conservez les instructions de sécurité et d’utilisation pour
vous y référer ultérieurement.
3. Tenez compte des avertissements –Suivez tous les avertissements et instructions d’utilisation
de l’appareil.
4. Suivez les instructions –Suivez toutes les instructions de fonctionnement et utilisation.
5. Eau et humidité –Cet appareil ne doit pas être utilisé à proximité de
pointsd’eau, comme par exemple près de baignoires, lavabos, éviers
ou lavoirs, sur surfaces mouillées ou près d’une piscine.
6. Chariots et supports –Utilisez cet appareil uniquement avec des
chariots ou supports recommandés par le fabricant.
6A.Déplacez avec précaution l’ensemble chariot et appareil. Les arrêts rapides,
l’excès de force ou les surfaces irrégulières peuvent renverser le chariot.
7. Support mural ou de plafond –Placez cet appareil uniquement sur les supports muraux ou de
plafond recommandés par le fabricant.
8. Ventilation –Cet appareil doit être placé de façon à ne pas compromettre une bonne ventilation.
Par exemple, il ne doit pas être placé sur un lit, un divan, tapis ou surface semblable, qui puisse
bloquer les ouvertures de ventilation. Ne le placez pas non plus dans des placards, sur des
étagères ou armoires, qui puissent empêcher l’air de circuler par les ouvertures de ventilation.
9. Chaleur –Cet appareil doit être situé loin de sources de chaleur, telles que radiateurs,
chauffe-eaux, convecteurs ou autres appareils qui dégagent de la chaleur (y compris
les amplificateurs).
10.Courant –Cet appareil doit être branché uniquement au courant décrit dans le mode
d’emploi ou à celui décrit sur l’appareil lui-même.
11.Prise de terre ou polarisation –On doit prendre des précautions pour s’assurer que la prise de
terre ou la polarisation de l’appareil ne soient pas perturbées.
12.Protection du câble électrique –Les câbles électriques doivent être correctement placés pour
ne pas être piétinés ni aplatis avec des objets placés dessus ou contre ceux-ci. On doit prêter une
attention tout spéciale à la partie du câble proche de la prise et au connecteur de l’appareil.
13.Nettoyage –Vous devez nettoyer cet appareil uniquement comme le recommande le fabricant.
14.Ce produit a été conçu pour être utilisé avec une antenne intégrée et ne doit être connecté à
aucune autre antenne extérieure.
15.Périodes sans utilisation –Lorsque vous ne devez pas utiliser cet appareil pendant de longues
périodes, débranchez-le de la prise de courant.
16.Entrée d’objets et de liquides –Evitez que des objets ou liquides ne tombent à travers
les ouvertures du boîtier.
17.Dommages qui nécessitent réparation –Cet appareil doivent être apportés au service
technique si :
A.Le câble électrique ou la fiche sont endommagés.
B.Des objets ou liquides sont tombés à l’intérieur de l’appareil.
C.L’appareil a été exposé à la pluie.
D.L’appareil ne fonctionne pas normalement ou montre un changement dans son fonctionnement.
E.L’appareil est tombé ou le boîtier est endommagé.
18. Réparations —L’usager ne doit pas tenter de réparer l’appareil au-delà de ce qui est décrit dans
le présent manuel. Tout le reste doit être réalisé par un personnel d’entretien compétent.

AVERTISSEMENT :
Pour réduire les risques d’incendie ou d’électrocution, ne pas exposer cet appareil à la pluie ou à
l'humidité.
ATTENTION :
L’utilisation de commandes, de réglages ou de procédures autres que celles spécifiées risque d'entraîner une
exposition à des radiations dangereuses.
ATTENTION
Uniquement pour les lecteurs de
disques compacts :
RAYONNEMENT LASER INVISIBLE LORSQUE LE LECTEUR EST
OUVERT ET QUE L’INTERVERROUILLAGE A ÉCHOUÉ OU EST EN
PANNE. ÉVITER TOUTE EXPOSITION DIRECTE AU RAYON LASER.
• La plaque signalétique a été placée sur la partie inférieure du boîtier
Caractéristiques techniques
Plage de fréquences : AM 530 à 1 600 KHz
: FM 88 à 108 MHz
Source d'alimentation : COMMUTATION DE L’ADAPTATEUR CA 230 V / 50 Hz(1,2A, 12V CC)
Consommation électrique : 18 W
Antennes : Antenne externe pour la réception FM
: Barre de ferrite intégrée pour la réceptionAM
Haut-parleur : 4‖ Type dynamique x 2
* LA CONCEPTION ET LES SPÉCIFICATIONS SONT SUSCEPTIBLES D'ÊTRE MODIFIÉES SANS PRÉAVIS.
* Vérifiez qu’il y ait des chansons MP3 stockées sur le périphérique MP3 / USB / mémoire flash / Carte SD.
Pour commencer
Déballage
1 Retirez les emballages de l'appareil. Remarque : Conservez tous les matériaux d’emballage.
2 Retirez le sac en plastique qui couvre la radio.
3 Retirez le couvercle de sécurité en plastique de la prise C/A.
4 Dénouez le cordon C/A et détachez le câble de l'antenne à l'arrière de la radio.
5 Ouvrez le couvercle et ôtez les particules de calage en polystyrène de la platine.
6 Retirez le lien de calage noir du bras de lecture par en-dessous.
Le symbole de l’éclair avec
la pointe de flèche à l’intérieur
d’un triangle équilatéral a pour but
d’alerter l’utilisateur de la
présence de «voltage dangereux»
non isolé à l’intérieur du coffret du
produit qui est suffisamment grave
pour causer un risque de choc
électrique aux personnes.
AVERTISSEMENT:POUR RÉDUIRE
LES RISQUES DE CHOC ÉLECTRIQUE,
N’ENLEVEZ PAS LE COUVERCLE (OU
LE DOS). L’INTÉRIEUR NE CONTIENT
AUCUN COMPOSANT À RÉPARER PAR
L’UTILISATEUR. CONFIEZ VOTRE
APPAREIL SEULEMENT AU
PERSONNELDE SERVICE QUALIFIÉ
Le point d’exclamation à
l’intérieur d’un triangle
équilatéral a pour but
d’alerter l’utilisateur de la
présence d’instructions
importantes sur l’opération
et l’entretien dans le
manuel de l’utilisateur livré
avec l’appareil.

7 Retirez le cache-aiguille protecteur blanc en le tirant doucement vers l'avant de l'appareil.
8 Retirez les liens de l'antenne FM et laissez-la pendre en ligne droite pour une réception FM optimale. Si vous
éprouvez des difficultés à régler une station FM, déplacez l'antenne FM externe pour une meilleure réception. Ne
connectez pas l'antenne FM à une antenne extérieure.
Source d’alimentation
1. Branchez la petite extrémité de l’ADAPTATEUR fourni dans la prise d’entrée JACK 12 V DC située à l'arrière
de l'appareil.
2. Insérez la fiche à deux broches de l’ADAPTATEUR secteur CA dans une prise murale appropriée à la prise
d’alimentation secteur 230V CA.
Utilisation de la prise casque
1 Connectez un casque audio à la prise casque.
2 Ajustez le volume au niveau d’écoute de votre choix.
REMARQUE : Lors de l’utilisation d’un casque,
le son des haut-parleurs de l’appareil est coupé.
Prise casque
Le son de tous les haut-parleurs est coupé.
REMARQUE: Aucun casque audio n’est fourni avec l’appareil.
Utilisation du plateau de lecture
Allumez l'appareil en faisant tourner le BOUTON ROTATIF ON/OFF-VOLUME (MARCHE/ARRÊT-VOLUME)
situé sur le panneau avant jusqu'à la position ON (MARCHE).
1 Faites tourner le BOUTON FUNCTION (FONCTION) pour sélectionner le mode PHONO (PH.).
2 Réglez le BOUTON SPEED CONTROL (CONTRÔLE DE VITESSE) sur la position désirée (33 1/3,45 ou 78
tr/min.) Posez le disque sur la platine.
3 Utilisez le LEVIER DE SIGNAL pour lever le bras de lecture de sa base. Tirez doucement le BRAS DE
LECTURE vers le côté droit jusqu'à ce qu'un « clic » soit perceptible pour activer la platine.
4 Déplacez le bras de lecture vers le disque et utilisez le levier pour l’abaisser sur le point où vous désirez faire
démarrer la lecture. Réglez le BOUTON ROTATIF ON/OFF-VOLUME jusqu'à atteindre le volume sonore désiré.
5 À la fin du disque, le BRAS DE LECTURE s'arrête automatiquement. Vous devez replacer le bras de lecture
sur son support manuellement.
Accessoires : ADAPTATEUR POUR DISQUES 45 tr / min
Cet adaptateur vous permet de lire des disques 45 tours.
1 Placez l'adaptateur pour disques 45 tr/min sur l'axe.
2 Posez doucement votre disque 45 tours sur la platine.
3 Pour lire votre disque, suivez les étapes décrites pour le fonctionnement de la platine.
Fonctionnement de la cassette
1 Positionnez le BOUTON FUNCTION (FONCTION) sur TA. pour sélectionner le mode CASSETTE.
2 Insérez une cassette pré-enregistrée dans
la
TRAPPE
CASSETTE. La cassette s’engage dans le mécanisme
de lecture de cassettes et la lecture commence.
3 Réglez le niveau du volume en tournant le bouton VOLUME.
4 Pour activer l’avance rapide, appuyez à moitié sur la touche CASSETTE EJECT/F.F. Lorsque vous appuyez
de nouveau, l’avance rapide cesse et la cassette revient en mode lecture.
5 Pour arrêter et éjecter la cassette, appuyez sur la touche CASSETTE EJECT/F.F entièrement.
6 Lorsque la lecture d’une des faces de la cassette se termine, la cassette s’arrête automatiquement.
REMARQUE : Retirer la cassette de l’appareil lorsqu’il n’est pas utilisé ou qu’il est arrêté.
Utilisation de la radio
1 Positionnez le BOUTON FUNCTION (FONCTION) sur RA. pour sélectionner le mode RADIO.
2 Réglez le BOUTONAM/FM BAND sur la bande radio souhaitée (AM ou FM).
3 Sélectionnez la station radio de votre choix en tournant le bouton de réglage TUNING.
4 Réglez le BOUTON ROTATIF ON/OFF-VOLUME jusqu'à atteindre le volume sonore désiré.
Antenne
Antenne : pour la réception FM, une antenne filaire FM est fournie avec l’appareil ; déplacez le câble jusqu'à
obtenir une bonne réception sans interférences. Pour la réception AM, une antenne ferrite intégrée directionnelle
est fournie avec l’appareil . Pivotez l’antenne pour trouver la position dans laquelle vous obtiendrez la meilleure
réception. Ne pas brancher l’antenne FM externe à une antenne extérieure

FONCTIONNEMENT EN MODE CD
Lecture d’un CD
1 Positionnez le BOUTON FUNCTION (FONCTION) sur CD pour sélectionner le mode CD.
2 Appuyez sur le BOUTON OPEN/CLOSE (OUVERTURE/FERMETURE) pour ouvrir le TIROIR DU LECTEUR
CD. Placez un disque sur la platine, face imprimée du disque vers le haut.
3 Appuyez de nouveau sur le BOUTON OPEN/CLOSE (OUVERTURE/FERMETURE) pour fermer le TIROIR
DU LECTEUR CD. L'affichage indique « ——» pendant quelques secondes puis le nombre total de pistes du
disque s'affiche. « 00 » apparaît lorsqu'il n'y a aucun disque dans l'appareil.
4 Appuyez sur le BOUTON PLAY (LECTURE) pour commencer la lecture. Le TÉMOIN PLAY s'allume.
5 Réglez le BOUTON ROTATIF DU VOLUME jusqu'à atteindre le volume sonore désiré.
6 Pour mettre la lecture en pause, appuyez sur le BOUTON PLAY/PAUSE. Le TÉMOIN PLAY clignote. Appuyez
de nouveau sur le BOUTON PLAY (LECTURE) pour reprendre la lecture.
7 Pour arrêter la lecture, appuyez sur le BOUTON STOP. Le TÉMOIN PLAY s'éteint.
Avance rapide et retour rapide
1 Appuyez sur le BOUTON D'AVANCE RAPIDE ou sur le BOUTON DE RETOUR RAPIDE pour sélectionner
une piste.
2 Appuyez sur le BOUTON PLAY pour commencer la lecture de la piste sélectionnée
Avance rapide et retour rapide en mode lecture
LECTURE
1 AppuyezetmaintenezenfoncéleBOUTOND'AVANCERAPIDE ou le BOUTON DE RETOUR RAPIDE pour
rechercher en avant ou en arrière dans la piste sélectionnée.
2 Relâchez le bouton lorsque vous atteignez le passage souhaité, la lecture reprend automatiquement.
Lecture programmée
1 Appuyez sur le BOUTON PROGRAM (PROGRAMME). « 01 » apparaît à l'écran et le TÉMOIN PROGRAM
clignote.
2 Appuyez sur le BOUTON D'AVANCE RAPIDE ou sur le BOUTON DE RETOUR RAPIDE pour sélectionner
une piste.
3 Appuyez de nouveau sur le BOUTON PROGRAM pour mémoriser le numéro de la piste.
4 Répétez les étapes 2 et 3 ci-dessus pour programmer les autres pistes.
5 Appuyez sur le BOUTON PLAY (LECTURE) pour commencer la lecture programmée. Le TÉMOIN
PROGRAM s’allume.
6 Pour supprimer la séquence programmée, appuyez deux fois sur le BOUTON STOP ou jusqu'à ce que le
TÉMOIN PROGRAM s'éteigne. Les pistes programmées sont également supprimées quand le
TIROIR DU
LECTEUR DE CD
est ouvert.
REMARQUE : Un maximum de 20 pistes peut être programmé pour être joué dans n'importe quel ordre.
Entrée auxiliaire
1 Vous pouvez connecter des dispositifs externes à votre appareil à l’aide de l’entrée auxiliaire.
2 Branchez le câble auxiliaire dans la prise d’entrée de ligne (prise JACK) à l’arrière de votre appareil.
3 Réglez le commutateur en position ON.
4 Connectez l’autre extrémité du câble auxiliaire à la prise de sortie du dispositif externe de votre choix.
5 Vérifiez le niveau du volume du dispositif externe.
6 Reportez-vous au mode d'emploi du dispositif externe pour savoir comment l'utiliser correctement.
REMARQUE : Lorsque vous n’utilisez pas l’entrée auxiliaire, assurez-vous que le commutateur de ligne de
commande est sur la position arrêt.
Dépannage
Il n'y a pas d'alimentation
1 L'adaptateur CA n'est pas correctement branché.
2 Vérifiez que le bouton de volume ON/OFF est bien en position ON.
Il n’y a pas de son
1 Vérifiez le niveau de volume sonore en faisant tourner le bouton de volume.
2 Assurez-vous que l’interrupteur LINE IN soit en position OFF lorsque la prise LINE IN n’est pas utilisée.

Le plateau de lecture ne fonctionne pas
1 Assurez-vous que le commutateur de fonction est bien réglé sur PHONO.
2 Essayez de déplacer le bras de lecture vers la droite jusqu'à ce que vous entendiez un déclic.
3 Assurez-vous que le cache-aiguille de protection est retiré.
Le CD n'est pas lu
1 Assurez-vous que le CD est inséré correctement (face imprimée vers le haut).
2 Vérifiez que la surface du CD est propre
3 Assurez-vous que le commutateur de fonction est bien réglé sur CD.
EMPLACEMENTS DES COMMANDES
HAUT-
PARLEURS
HAUT-PARLEURS
BOUTON DE
PROGRAMMATION
BOUTON PLAY/PAUSE
TÉMOIN PLAY
BANDE DE FRÉQUENCES
BOUTON D’ARRÊT
BOUTON OUVRIR/FERMER
COMMUTATEUR
BANDES AM/FM
TIROIR
DU
LECTEU
R DE CD
BOUTON TUNNING
AFFICHAGE DEL
BOUTON ON / OFF DE VOLUME ROTATIF
PRISE CASQUE
TÉMOIN PROGRAM
(PROGRAMME)
AVANCE
RAPIDEBOUTON
RETOUR
RAPIDEBOUTON
BOUTON
FUNCTION
(FONCTION)
Table of contents
Languages:
Other Ricatech Media Player manuals
Popular Media Player manuals by other brands

Jacuzzi Products
Jacuzzi Products AQUATIC AV BLUEWAVE 6500-915 owner's manual

Denon
Denon DVD-A1UDCI owner's manual

ADS Technologies
ADS Technologies Instant Music RDX-150 user manual

Premier
Premier MP-2343-1G instruction manual

Western Digital
Western Digital WDBMBA0000NBK user manual

Brite View
Brite View BV-5005HD mini user manual