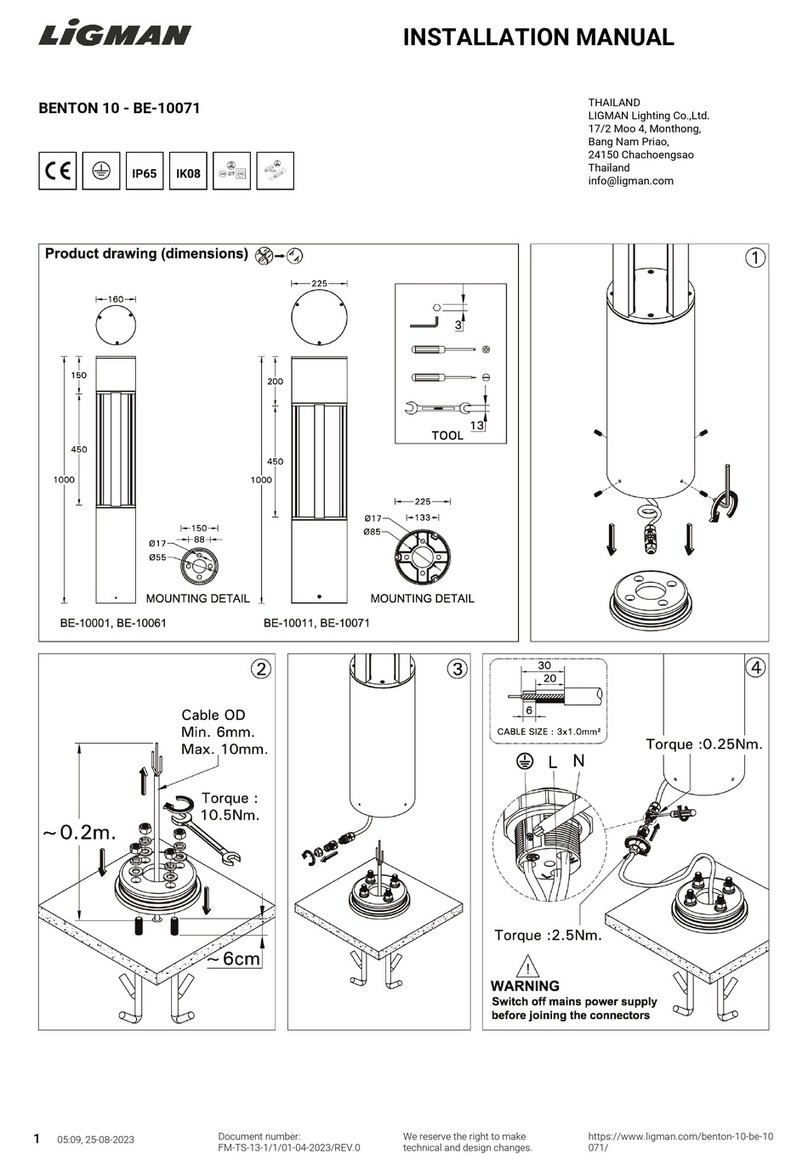
Ricoh PostScript 3 User manual

– 1 –
日本語
リコープロジェクター
IPSiOPJ交換用ランプタイプ3
取扱説明書
ご使用前に
このたびはリコープロジェクター交換
用ランプユニットをお買い上げいただ
き、ありがとうございます。ランプユニッ
トを正しく使っていただくため、お使い
になる前にこの「取扱説明書」をよくお
読みください。お読みになった後は、い
つでも見られるところに必ず保管してく
ださい。
ランプについて
IPSiOPJ交換用ランプタイプ3
は、リコープロジェクター専用のランプ
ユニットです。
他の製品に使用すると、火災、故障の
原因になりますので絶対に使用しないで
ください。
SoleilPJ1LampF-GB.indd1SoleilPJ1LampF-GB.indd1 2011/09/2712:03:542011/09/2712:03:54

– 2 –
安全上のご注意
警告
下記の注意事項を無視して、誤った
取扱いをすると、高温・火災などによ
り、死亡または重傷を負う可能性が
あります。
ランプを交換するときは、電源を切ってから1
時間以上経って、本機が冷めてから交換してくだ
さい。冷めないうちの交換は、内部および光源
ランプユニットは高温となっている部分がある
ため、やけどやけがの原因になります。また、ラ
ンプユニットを交換する前に、必ず電源プラグ
をコンセントから抜いてください。電源プラグを
抜かずに交換すると、感電や破裂の原因になり
ます。
取りだしたランプをお子様の手の届くところ
や、燃えやすいものの近くには置かないでくだ
さい。ランプが破損する場合があり危険です。
ランプを抜いた後のランプ収納部に金属類や燃
えやすい異物や手などを絶対に入れないでくだ
さい。火災や感電の原因となります。
交換用ランプは確実に取り付けてください。
取付不十分のときは、画面が暗くなったり、火災
の原因となることがあります。
SoleilPJ1LampF-GB.indd2SoleilPJ1LampF-GB.indd2 2011/09/2712:03:542011/09/2712:03:54

– 3 –
ご使用上の注意
● ランプのガラス面および鏡面部には、素手
でさわらないでください。
(万一、汚れた場合は、乾いた柔らかい布
で拭き取ってください。)
●ラン プ ユ ニットはガラス 製 品 のため 不 用意
に力を加えたり、強い衝撃を与えないでく
ださい。
●万一、ランプが割れた際には、ガラス片で
けがなどをしないように取扱いに注意し、
販売担当者またはサービス実施店に修理
を依頼してください。
●その他ランプについては、プロジェクター
の取扱説明書もあわせてご覧ください。
ランプ交換のしかた
光源用ランプは消耗品です。長時間使用し
ますと暗くなったり、ランプが切れて点灯しな
くなったりすることがあります。(ランプの寿
命は使用状態によって異なります。)
このようなときは、次の手順にしたがって
新しいランプに取り換えてください。
日本語
SoleilPJ1LampF-GB.indd3SoleilPJ1LampF-GB.indd3 2011/09/2712:03:542011/09/2712:03:54

– 4 –
1本体の電源を切り、排気ファンが停
止してから電源プラグを抜きます。
使用直後のランプは高温になっていま
す。電 源 プ ラグ を 抜 いて1時 間 以 上 たっ
てからランプを交換してください。
2底面が見えるように、平らな面に本
機を置きます。
3ノブを反時計回りに回転させ、ふた
を取りはずします。
CLB068
SoleilPJ1LampF-GB.indd4SoleilPJ1LampF-GB.indd4 2011/09/2712:03:542011/09/2712:03:54

– 5 –
日本語
4金属製の取っ手を起こします。
CLB069
5取っ手を持ち、ランプユニットを垂
直に引き上げます。
CLB070
SoleilPJ1LampF-GB.indd5SoleilPJ1LampF-GB.indd5 2011/09/2712:03:542011/09/2712:03:54

– 6 –
7ふたを装着します。
ランプカバーは正しく取り付けてくださ
い。正しく取り付けられていないと電源
が入らない、ランプが点灯しないなど誤
動作の原因となります。
6新しいランプユニットを本機に挿入
します。
本体内部の突起がランプユニットの穴に
しっかりと差し込まれているか 確認して
ください。
CLB071
SoleilPJ1LampF-GB.indd6SoleilPJ1LampF-GB.indd6 2011/09/2712:03:542011/09/2712:03:54

– 7 –
日本語
8ランプ時間をリセットします。
[電源]ボタン、[AVミュート]ボタン、[ ]
ボタンを同時に押しながら、コンセントに電
源プラグを差し込みます。
ランプ時間がリセットされます。
電源を入れ、「状態表示」の「ランプ時
間」が0Hになっているのを確認して
ください。
お知らせ
ランプ時間リセット後、電源を切るとき
は[電源]ボタンで電源を切ってから電源
コードを抜いてください。
1.[電源]ボタン
2.[AVミュート]
ボタン
3.[]ボタン
31 2
CLA020
SoleilPJ1LampF-GB.indd7SoleilPJ1LampF-GB.indd7 2011/09/2712:03:542011/09/2712:03:54

– 8 –
お願い
必ず新品のランプに交換してください。
新しいランプユニットには新ランプ
ラベルがはってあります。
1.新ランプラベル
CLB073
1
CLB073
1
使用済みのランプについて
本機のランプには環境に有害な微量
の無機水銀が使われています。使用済
みのランプは、破損させないように取
扱いに注意し、地方自治体の条例また
は規則にしたがって処理していただく
か、販売担当者またはサービス実施店
までご連絡ください。
SoleilPJ1LampF-GB.indd8SoleilPJ1LampF-GB.indd8 2011/09/2712:03:552011/09/2712:03:55

– 9 –
日本語
主な仕様
ランプ: 高圧水銀ランプ
最大外形寸法:約 5 9×7 3 × 9 7 m m
(幅×高さ×奥行)
質 量: 約145g
本機の仕様及び外観は、改良のため予告
なく変 更 すること が ありま す。ご了承く
ださい。
SoleilPJ1LampF-GB.indd9SoleilPJ1LampF-GB.indd9 2011/09/2712:03:552011/09/2712:03:55

– 10 –
SoleilPJ1LampF-GB.indd10SoleilPJ1LampF-GB.indd10 2011/09/2712:03:552011/09/2712:03:55

– 11 –
ENGLISH
Instruction Manual
Replacement Lamp Type 3
for Ricoh Projector
BEFORE USE
Thank you for purchasing this replacement lamp unit
for the Ricoh projector. Prior to using the purchased
lamp unit, please take the time to read through this
Instruction Manual to ensure that the lamp unit will
be used properly. After reading through these instruc-
tions, be sure to keep the Manual in a safe place for
future reference.
Concerning the lamp unit
Replacement Lamp Type 3 is designed to be exclu-
sively used for Ricoh projectors. Do not use this lamp
unit for other projectors, otherwise it may cause fire
or trouble of the machine.
SoleilPJ1LampF-GB.indd11SoleilPJ1LampF-GB.indd11 2011/09/2712:03:552011/09/2712:03:55

– 12 –
SAFETY PRECAUTIONS
Mishandling of this product without re-
gard to the cautionary items outlined
below may lead to high temperature,
fires, etc. which in turn can lead to
death or serious injury.
Before replacing the lamp, turn off the power and wait at least
one hour to allow the product to cool completely. If it is not
completely cool, you may burn or injure yourself due to the
inside of the product and lamp unit being hot. If you replace
the lamp without unplugging the power cord from the power
outlet, electric shock or explosion may occur.
Do not place the lamp you have removed within the reach of
children or near any object which may catch fire easily. The
lamp may break, which can be dangerous.
Keep foreign matter such as metal objects or articles which
catch fire easily away from the lamp housing after the lamp
has been removed. This is done to safeguard against the risk
of fires and electrical shocks. Under no circumstances should
you insert your hand inside the lamp housing because of the
danger of electrical shocks and burns.
Install the replacement lamp properly and securely. If it is
not installed properly, the screen may become dark or a
fire may occur.
LAMP(S) INSIDE THIS PRODUCT
CONTAIN MERCURY AND MUST
BE RECYCLED OR DISPOSED OF
ACCORDING TO LOCAL, STATE
OR FEDERAL LAWS.
WARNING
SoleilPJ1LampF-GB.indd12SoleilPJ1LampF-GB.indd12 2011/09/2712:03:552011/09/2712:03:55

– 13 –
ENGLISH
User Information on Electrical &
Electronic Equipment
Users in the countries where this symbol shown
in this section has been specified in national law
on collection and treatment of E-waste
Our Products contain high quality components and are
designed to facilitate recycling.
Our products or product packaging are marked with the
symbol below.
The symbol indicates that the product must not be treated
as municipal waste. It must be disposed of separately via
the appropriate return and collection systems available. By
following these instructions you ensure that this product
is treated correctly and help to reduce potential impacts
on the environment and human health, which could oth-
erwise result from inappropriate handling. Recycling of
products helps to conserve natural resources and protect
the environment.
For more detailed information on collection and recycling
systems for this product, please contact the shop where
you purchased it, your local dealer or sales/service
representatives.
SoleilPJ1LampF-GB.indd13SoleilPJ1LampF-GB.indd13 2011/09/2712:03:552011/09/2712:03:55

– 14 –
All Other Users
If you wish to discard this product, please contact your local
authorities, the shop where you bought this product, your local
dealer or sales/service representatives.
For Turkey only
PRECAUTIONS FOR USE
●
Do not touch the lamp’s glass side or mirror surface
area with bare hands.
(If it becomes dirty, wipe out with a soft dry cloth.)
●
The lamp unit is made of glass: do not apply force
to it or subject it to strong impacts out of negli-
gence.
●
In the event that the lamp breaks, be careful not to
be injured by the glass fragments. Ask your sales
representative to repair it.
●
For more information on the lamp, see the projector
instruction manual.
HOW TO REPLACE THE LAMP
The lamp will eventually begin to project dark or dull
pictures and finally will not light up. (Lamp’s life length
depends on the use condition.) In such a case, follow
the steps below to replace the lamp with new one.
SoleilPJ1LampF-GB.indd14SoleilPJ1LampF-GB.indd14 2011/09/2712:03:552011/09/2712:03:55

– 15 –
ENGLISH
1Turn off the power first and unplug
the power cord after the cooling fan
stops.
Since the lamp unit is still heated just after the
power is turned off, make sure to replace the lamp
unit at least one hour or more after the power cord
is unplugged.
2Turn over the projector and place it
on a flat surface so that you can see
the bottom of the projector.
3Turn the knob counterclockwise, and
then open the lamp cover.
CLB068
SoleilPJ1LampF-GB.indd15SoleilPJ1LampF-GB.indd15 2011/09/2712:03:562011/09/2712:03:56

– 16 –
4Raise the metal handle.
5Hold the handle, and then pull the
lamp unit out of the projector.
CLB069
CLB070
SoleilPJ1LampF-GB.indd16SoleilPJ1LampF-GB.indd16 2011/09/2712:03:562011/09/2712:03:56

– 17 –
ENGLISH
6Insert a new lamp unit.
Make sure that the small projections inside the
projector are inserted into the holes of the lamp unit
properly.
7Close the lamp cover.
Correctly install the outer lamp cover. Incorrect
installation may prevent the lamp or projector from
turning on.
CLB071
SoleilPJ1LampF-GB.indd17SoleilPJ1LampF-GB.indd17 2011/09/2712:03:562011/09/2712:03:56

– 18 –
The lamp time is automatically reset.
Turn the power on and check that “0H” appears on
[Lamp Time] in [Display Status].
Note
After resetting the lamp time, turn off the projector
using the [Power] button, then unplug the power cord
from the mains outlet.
1. [Power] button
2. [AV Mute] button
3. [ ] button
8Reset the lamp time.
While holding down the [Power] button, the [AV
Mute] button, and the [ ] button simultaneously,
plug the power cord into the power outlet.
31 2
CLB067
SoleilPJ1LampF-GB.indd18SoleilPJ1LampF-GB.indd18 2011/09/2712:03:562011/09/2712:03:56

– 19 –
ENGLISH
NOTES
Be sure to use a new lamp for replacement.There is a
“NEW LAMP” label stuck on every new lamp unit.
1. “NEW LAMP” label
CLB073
1
CLB073
1
Used Lamps
This projector’s lamp contains trace amounts of
environmentally harmful inorganic mercury. Be
careful not to break used lamps, and dispose
of them in accordance with local regulations
or contact your sales representative or service
representative.
SoleilPJ1LampF-GB.indd19SoleilPJ1LampF-GB.indd19 2011/09/2712:03:562011/09/2712:03:56

– 20 –
SPECIFICATIONS
Lamp: HID lamp
Maximum
dimensions:
Approx. 59 (W) x 73 (H) x 97 (D) mm
Mass: Approx. 145 g
The lamp’s specifications and exterior are subject to
change without notice due to improvements.
SoleilPJ1LampF-GB.indd20SoleilPJ1LampF-GB.indd20 2011/09/2712:03:562011/09/2712:03:56
Table of contents
Popular Outdoor Light manuals by other brands
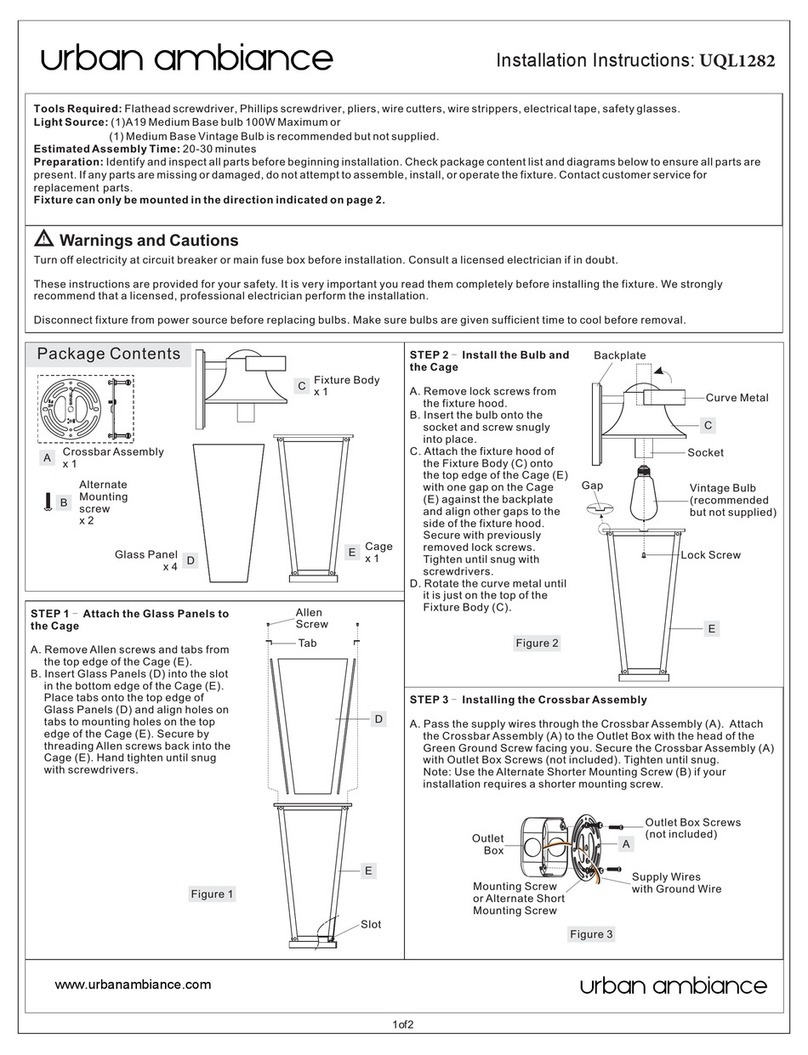
urban ambiance
urban ambiance UQL1282 quick start guide
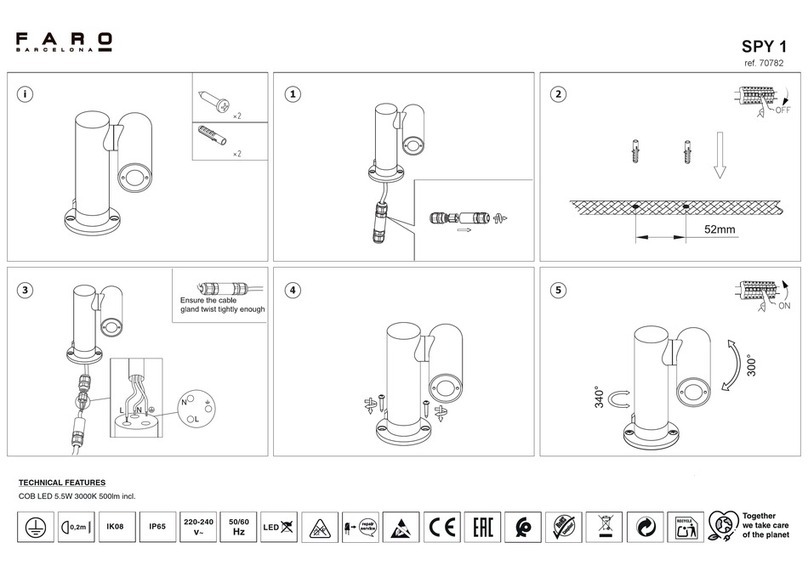
Faro Barcelona
Faro Barcelona SPY 1 manual
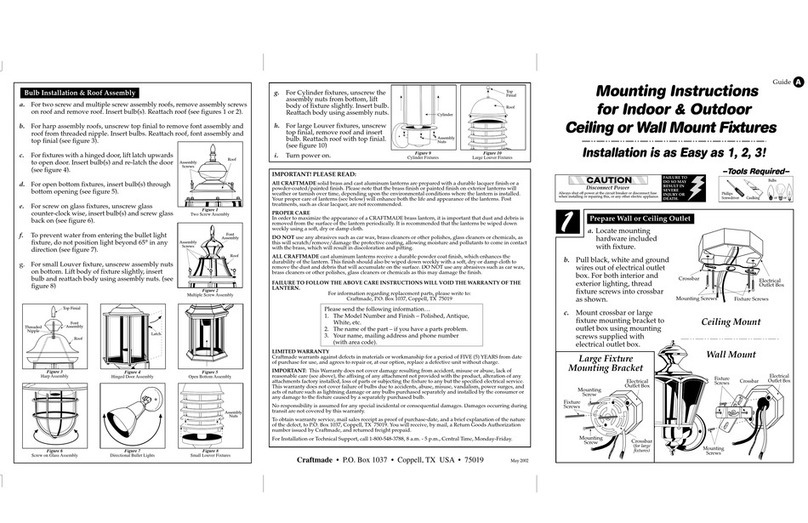
Craftmade
Craftmade Z6010-OBO Mounting instructions
Tracon Electric
Tracon Electric STLE2W user manual

urban ambiance
urban ambiance UQL1143 installation instructions

NightSearcher
NightSearcher NSFESTOON user manual

TOOLCRAFT
TOOLCRAFT 1425137 operating instructions

Home Decorators Collection
Home Decorators Collection KSZ1501LL-01/BR Use and care guide
LF
LF Portfolio WL120MWWP manual

Dewenwils
Dewenwils HLFL07A instruction manual

Soltech
Soltech STL-CLF150 Series installation instructions
Fabbian
Fabbian BELUGA ALU manual
