Ritter WD500 User manual
Ritter WD500
MANUAL
WATER DESTILLER

PLEASE READ BEFORE USE AND FILE FOR FUTURE USE
IMPORTANT NOTES
BEFORE USE
SPECIFICATION
ATTENTIONSET UP
Unpack the water distiller and check if all the components are present and undamaged. The box
should contain: Please note: The unit must be allowed to cool down below 60°C before starting another distilling
cycle. (This will prevent injuries from scalding water and prolong the life of the distiller)
• Keep the body of the unit dry-only ll with water using a jug (Please use the kettle to pick up
water instead of the machine body.)
• Please use the suitable electric outlet, and do not plug in with other electronics at the same
time in order to avoid overload.
• The unit will automatically turn off once the cycle is nished. You can remove the power cord
from the socket to stop mid—cycle.
• Leave the power cord unconnected when the unit is not in use.
• Do not immerse any part of the unit in water.
• Keep it away from children in order to avoid scalding injuries.
• Do not remove the top cover while the machine is running. It must be cooled down for at least
10 minutes after a distilling process is nished in case of scalding injuries.
• Do not use a wire brush to clean the stainless tank, it will damage the surface of the tank and
will clog the drain.
• Use unit in a dry, well ventilated area.
The distiller is now ready to create distilled water.
Note: The chamber cleaning powder should be purchased by customer. You can buy citric acid pow-
der that is food safety grade or white vinegar to clean the distiller.
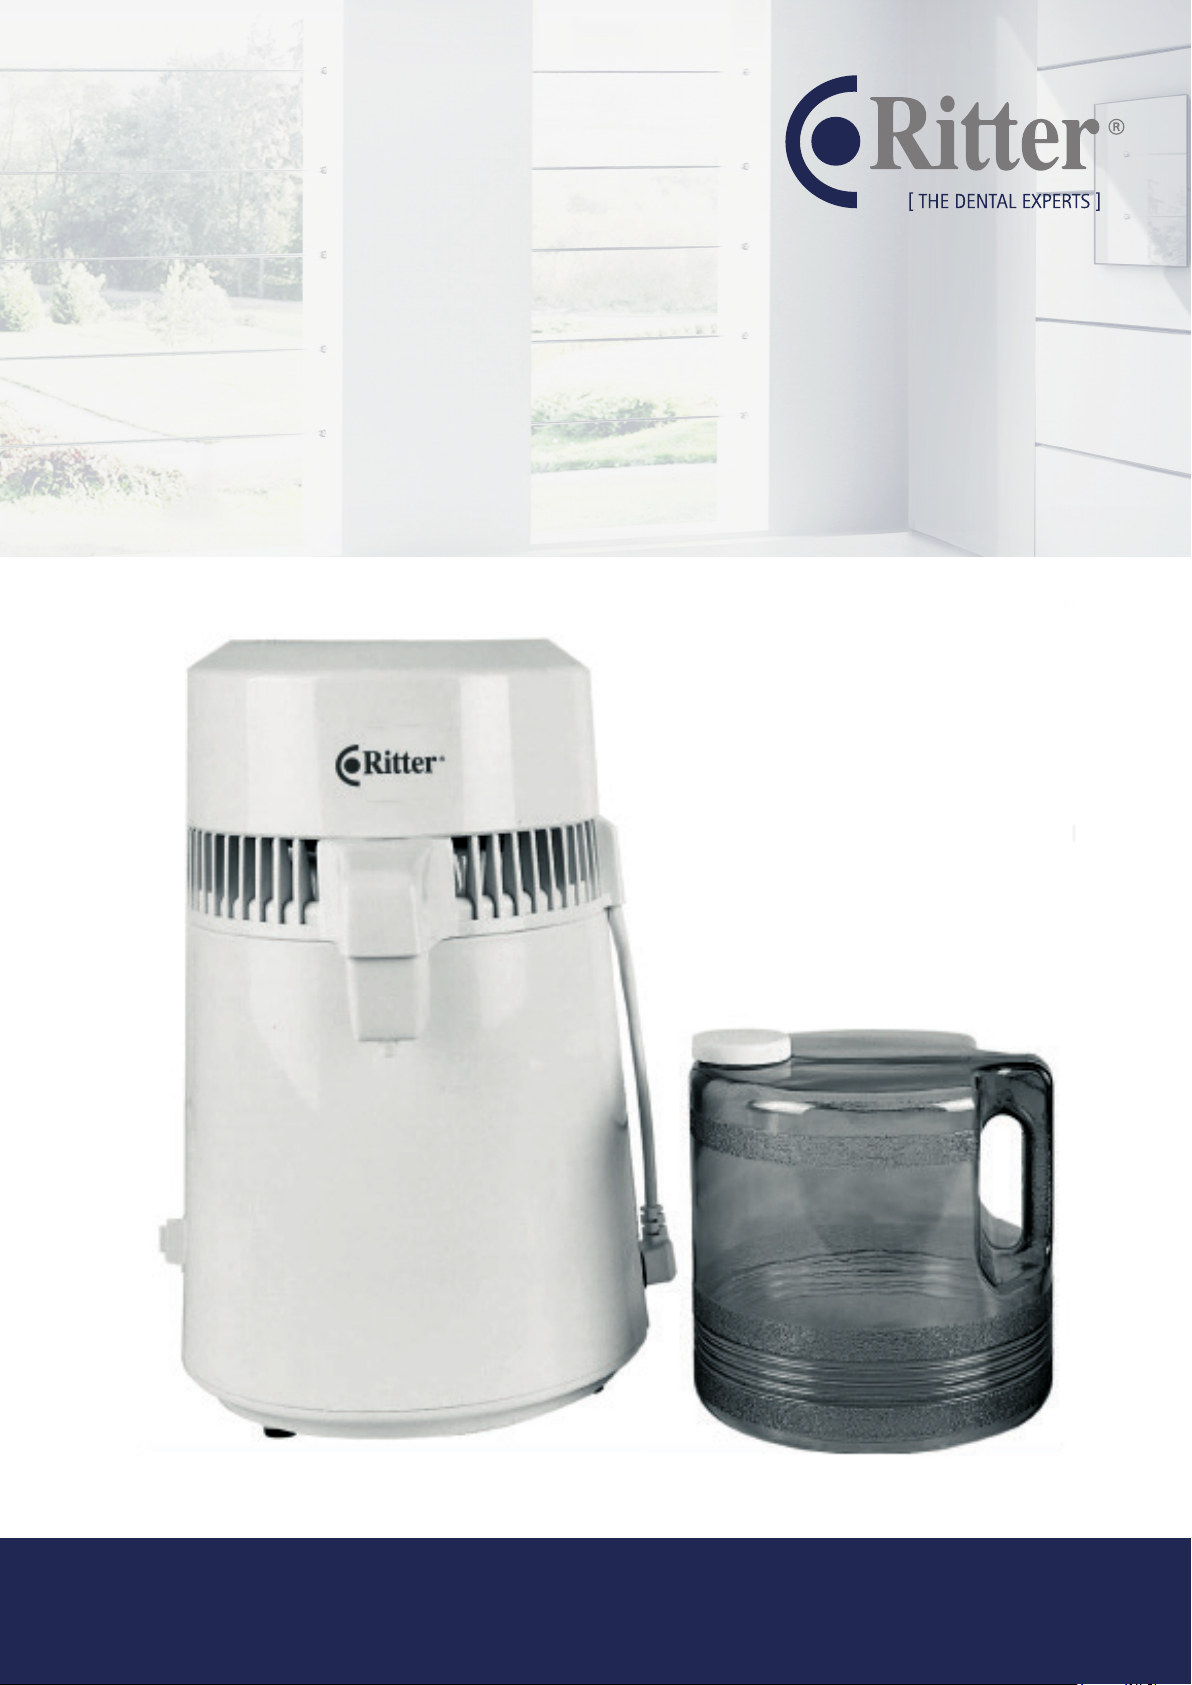
1. Distiller
2. Water Bottle
3. Discharge Cap
4. Bottle Cap
Rating Voltage: 220 V
Rating frequency: 50 Hz or 60 Hz
Power: 750 W
1. Remove the storage bottle from the inside of
the water distiller.
2. Fill up the tank inside the distiller with
water to the highest of the water line and
be very careful not to overll the tank.
(Please note that hot water is not recommended
here because it may lead to malfunction of the
high temperature protective function.)
7. After the storage bottle is fully lled with
distilled water, the starting button is still on
power. For your own safety, please disconnect
the power wire of the top cover and main power
wire to prevent injuries from scalding water.
8. Do not use the rst bottle of the distilled
water. It will take one distilling cycle for the
unit to “self-clean”. Wipe out the tank and
rinse/discard the water in the storage bottle.
5. Connect the main power wire to the
machine’ s body and plug in the electric
outlet. The fan starts to run and the tank
begins to heat. To start another distilling
cycle, press the “Start/Reset“ Button.
6. Water will begin to drip into the storage
bottle after approximately 30 minutes. It
will take approximately 4 hours to distill
4 liters of water. The unit will automatically
shut down when the cycle has nished.
3. Place the top cover on the machine’ s body,
please make sure the silicone seal is placed
correctly around the entire rim. Check to make
sure the unit is on a stable surface.
Then connect the power cord from the top
cover into the machine’ s body.
4. Set up the storage bottle as shown.
5. Filter
6. Main Power Wire
7. Instruction Manual
8. Chamber Cleaning Powder
Volume: 4 l
Degree of evaporation: 1 l/hour
Over-temperature safe: cut off at 160°C
COMMON FAULTS AND ANALYSES
1. No distilled Water comes out
a. Main power wire and power wire of the top
cover are disconnected.
b. No power from the electric outlet.
c. Starting button is not pressed (Indicator light
is not on.)
d. No water is lled in the stainless tank.
2. Not enough distilled water
a. Water is not up to the highest water level.
b. The sealing rubber ring of the top cover
doesn’t work or needs to be changed.
c. The top cover and machine body do not close
tightly and cause a steam leakage.
CLEANING
EXPLANATION OF THE SYMBOLS
I. Daily Cleaning: Rinse and wipe out tank every
day with clean water.
2. Clean the precipitate: Calcication and scale
will precipitate on the bottom of the tank and
should be removed every two weeks.
a. Pour in enough hot water to cover scale in
the tank.
b. Pour 1-4 teaspoons cleaning agent into tank
depending on the amount of precipitation.
c. Leave lid off unit and start up a cycle by
pushing “Start/Reset “ Button.
d. Let the cycle run for 30 minutes, then pour
out water and wash the inside of tank with
clean water.
e. If the precipitation is not completely
removed, please repeat the process or wipe
the inside part of the bucket with a cleaning
sponge to enhance the cleanliness.
f. The remaining scale is no harm for your
body, please feel free to use.
Serial number
Icon IconExplanations to type plates Explanations to type plates
Following the instruction for use
The symbol of the crossed waste con-
tainer on wheels indicates, that Ritter
products are electrical equipment
according to Directive 2021/19/EU.
Within the EU-Countries these pro-
ducts have to be separately disposed.
Ritter wants to encourage you, to
minimize possible effects of waste
to environment and health outside
the EU, too. Please follow the local
directives for disposal of waste and
make use of the separate collection of
electronic equipment.
CE-sign
Manufacturer/Date of manufactoring
3. Please replace lter every 2—3 months in order
to remain the purity of distilled water.
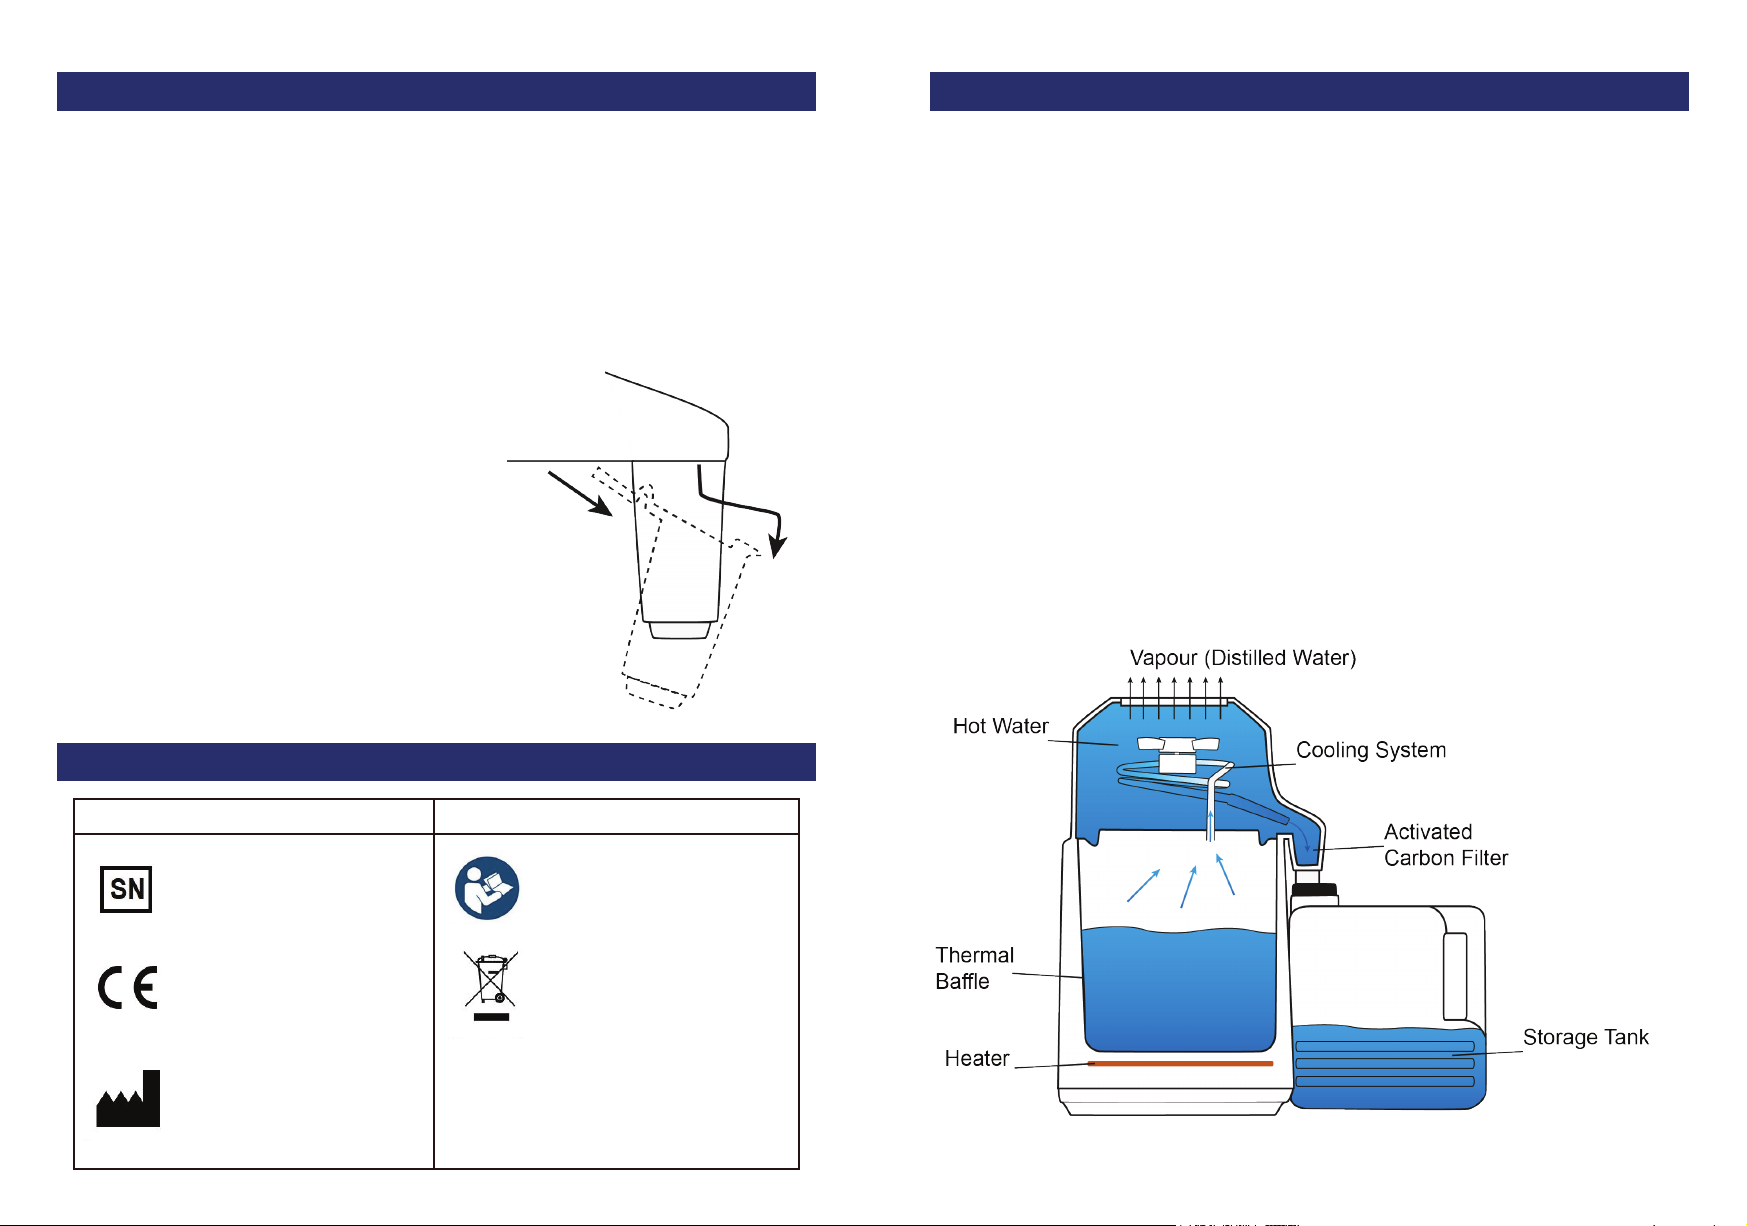
a. Overturn the cover to make the water outlet
face up, take off the lter following instruc-
tions as in diagram 4 (push—in, drag down).
b. Take out the new lter and put back the top
cover (please note: must push-in as original).
c. You can repeat the above steps for future
replacement.

V23.01.01
Ritter Concept GmbH
Freiburger Straße 45
88400 Biberach
GERMANY
Tel: +49 (0) 7351 52 925-10
Pictures may show options and special equipment. Design changes reserved. All rights reserved. © Ritter 2023


