Robin PKV101 User manual

MO DE L
IS S UE E MD-P U1642
9ZZ9020043
PKV101
INSTRUCTIONS FOR USE (USA only)

5W
10W
20W
#20
#30
#40
10W-30
10W-40
S ingle
gra de
Multi
gra de
Ambient
tempera tu re
-20 -10 0 10 20 30 40 C
-4 14 32 50 68 86 104 F
1 2
1
2
3
6
4
7
3
1
2
3
4
5
6
26
22
23
25
24
21
15
14
17
18
12
11
20
19
4
3
2
8
9
13
1
10
L
H
ON
O F F
1
2
5
5
16
3
6
1
7
4
5
1
2
2
1
3
6
7
1
2
4
3
8
1
2
9
8
7
6
10
5
0.7 ~ 0.8 mm
5
7
4
2
3
6
8
O N
O F F
L
H
L
H
L
H
1
2
1
2
1
1
2
3
6
4
2
4
3
5
1
1

US
G B
G B
G B
G B
G B
G B
G B
G B
G B
G B
G B
G B
G B
G B
G B
NOT IC E
F E DE R AL E MIS S ION C OMP ONE NT DE F E CT W AR R ANT Y and C ALIF OR NIA
E MIS S ION C ONT R OL WAR R ANT Y are applicable to only those engines
complied with E P A (E nvironmental P rotection Agency) and C AR B (C alifornia
Air R es ources B oard) emiss ion regulations.
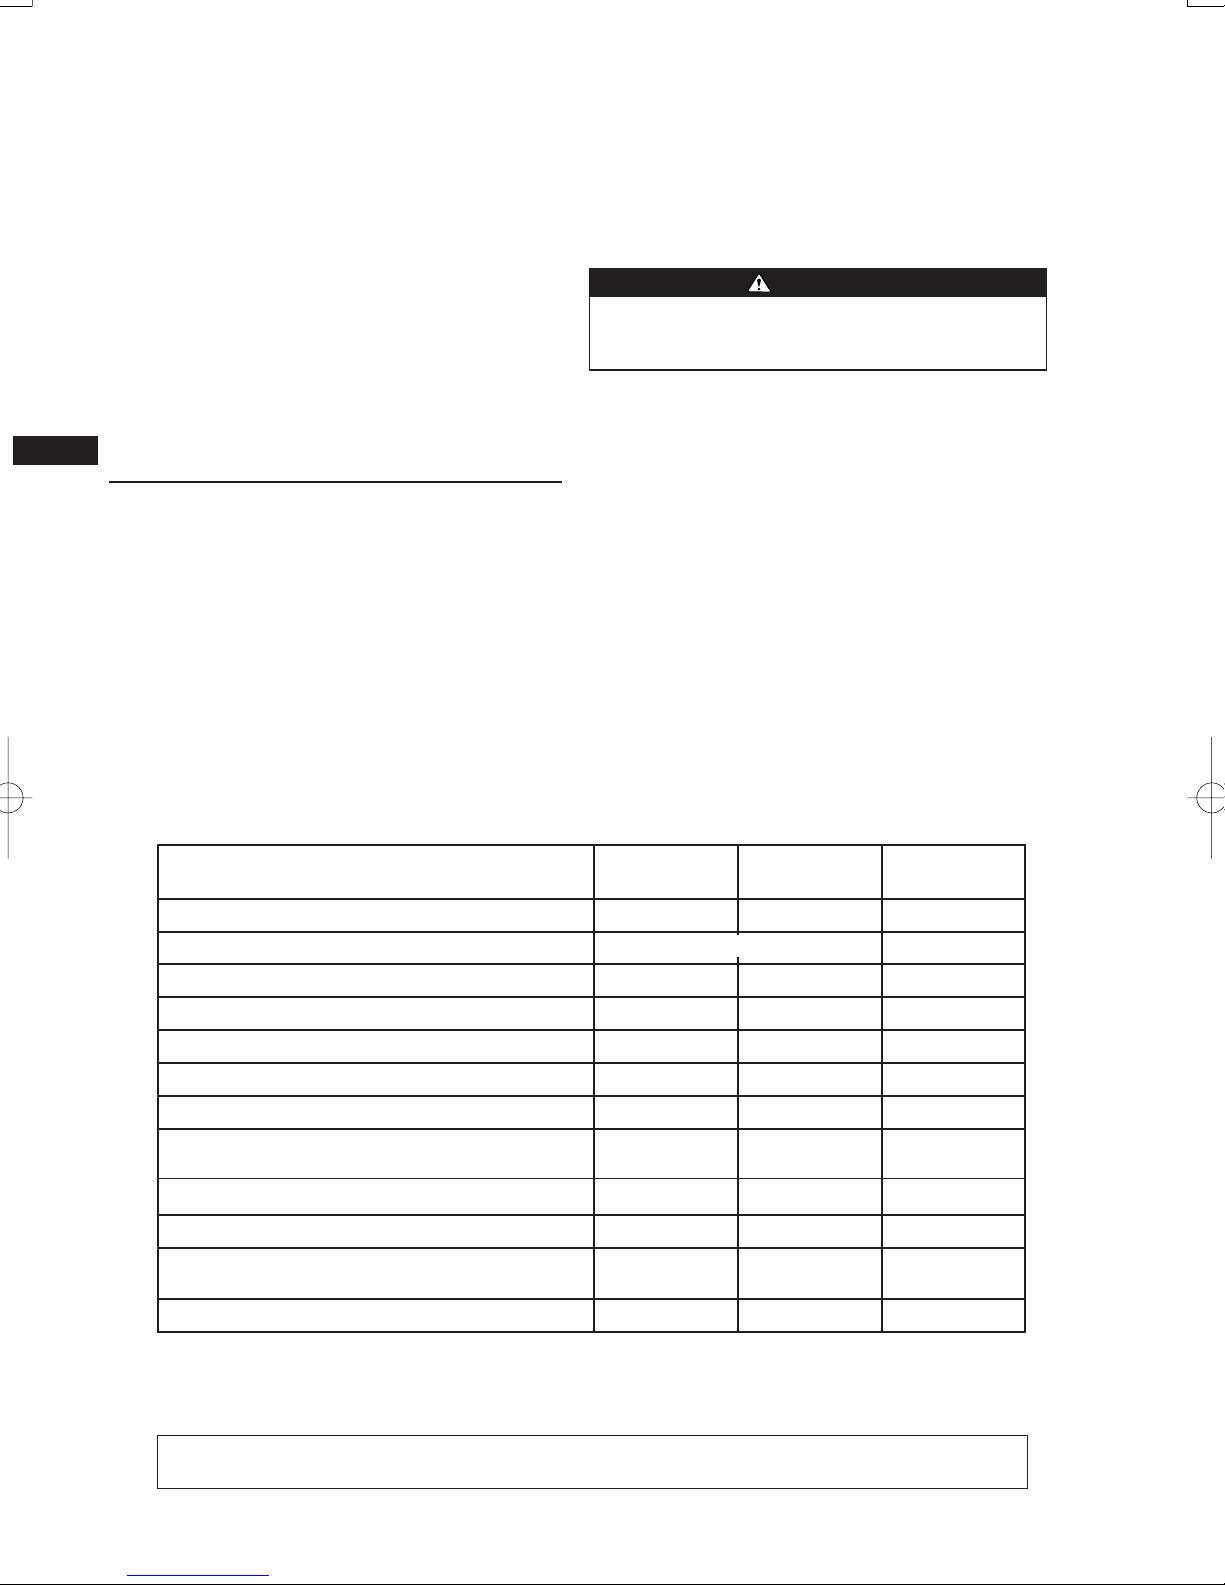
AIR INDE X
An Air Index Information hang tag was supplied to this engine in accordance
with the emission regulations of the C alifornia Air R esources B oard.
The bar graph on the hang tag shows the emiss ion performance of this engine.
The bar graph can be used to compare the emissions performance with other
available engines . T he lower the Air Index, the less pollution.
The following durability description is to provide you with information relating
to the emission durability period of the engine.
Des criptive Term Applicable to E miss ions Durability P eriod
Moderate - 50 hours (engine from 0 to 65 cc)
Intermediate - 125 hours (engine from 0 to 65 cc)
E xtended - 300 hours (engine from 0 to 65 cc)
Notic e :T he Air Index Information hang tag mus t remain on the engine or on
the equipment until it is s old to the ultimate purchaser. R emove the hang tag
The engine exhaust from this product contains
chemicals known to the S tate of C alifornia to
caus e cancer, birth defects or other reproductive
harm.
WAR NING :
before operating the engine.

US
G B
G B
G B
G B
G B
G B
G B
G B
G B
G B
G B
G B
G B
G B
G B
F E DE R A L E MIS S IONS C OMP ONE NT DE F E C T WA R R A NT Y
E MIS S IO NS C OMP ONE NT DE F E CT WA R R ANT Y C OV E R AG E – T his emission warranty is applicable in all S tates, except the
state of C a lifornia.
F uji Heavy Indus tries Ltd. and R obin America Inc., Wood Dale Illinois, (herein “R OB IN AME R IC A”) warrant(s ) to the initial retail purchaser and
each subsequent owner, that this Nonroad engine (herein “engine”) has been designed, built, and equipped to conform at the time of initial
sale to all applicable regulations of the U.S .
E nvironmental P rotection Agency (E P A), and that the engine is free of defects in materials and workmans hip which would caus e this engine to
fail to conform with E P A regulations during its warranty period.
F or the components lis ted under P AR T S C OV E R E D, the service dealer authorized by R OB IN AME R IC A will, at no cost to you, make the
neces s ary diagnosis , repair, or replacement neces s ary to ensure that the engine complies with applicable U.S . E P A regulations.
E MIS S IS O N C OMP ONE NT DE F E C T WAR R A NT Y PE R IOD
The warranty period for this engine begins on the date of s ale to the
initial purchas er and continues for a period of two years .
P A R TS C OVE R E D
Listed below a re the parts covered by the E miss ion C omponents
Defect Warranty. S ome of the parts listed below may require
scheduled maintenance and are warranted up to the firs t s cheduled
replacement point for that part.
(1) F uel Metering S ys tem
(i) C arburetor and internal parts
(ii) F uel filter, if applica ble.
(iii) T hrottle s topper, if applicable.
(iv) C hoke S ys tem, if applica ble
(2) Air Induction S ystem
(i) Air cleaner plate
(ii) Air cleaner case
(3) Ignition S ys tem
(i) S park plug.
(ii) F lywheel Ma gneto
(iii) Ignition C oil
(4) Miscellaneous Items Us ed in Above S ys tems
(i) F uel hos es , c la mps a nd s ea ling ga ske ts
OB T A INING W A R R A NT Y S E R VIC E
To obtain warranty service, take your engine to the nearest authorized
R obin America service dealer . Bring your s ales receipts indicating
date of purchas e for this engine. T he service dealer authorized by
R O B IN AME R IC A will perform the neces s ary repairs or adjus tments
within a reas onable amount of time and furnish you with a copy of the
repair order. All parts and access ories replaced under this warranty
become the property of R O B IN AME R IC A.
WHA T IS NOT C OVE R E D
*
C onditions res ulting from tampering, mis use, improper adjustment
(unless they were made by the s ervice dealer authorized by
R O B IN AME R IC A during a wa rranty repa ir), a ltera tion, a ccident,
failure to use the recommended fuel and oil, or not performing
required maintenance s ervices.
*The replacement parts us ed for required maintenance s ervices.
*C
onsequential damages such as los s of time, inconvenience, los s
of use of the engine or equipment, etc.
*
Diagnos is and inspection charges that do not result in warranty-
eligible s ervice being performed.
*
Any non-authorized replacement part, or malfunction of authorized
parts due to use of non-authorized parts .
OWNE R ’ S WA R R A NT Y R E S PONS IB IL IT IE S
As the engine owner, you are res ponsible for the performance of the
required maintena nce listed in your owner’s manua l. R O B IN
AME R IC A recommends that you retain a ll receipts covering
maintenance on your engine, but R OB IN AME R IC A cannot deny
warranty solely for the lack of receipts or for your failure to ens ure
the performance of all scheduled maintenance.
As the engine owner, you should however be aware that R OB IN
AME R IC A may deny warranty coverage if your engine or a part has
failed due to abuse, neglect, improper maintenance or unapproved
modifications.
Y ou are res pons ible for presenting your engine to the nearest service
dealer authorized by R OB IN AME R IC A when a problem exists.
If you have any ques tions regarding your warranty rights and
res ponsibilities, you s hould contact the R obin America cus tomer
service department at 1-630-350-8200 for the information.
THING S YOU S HOUL D K NOW AB OUT T HE E MIS S ION
C ONT R OL S Y S TE M WA R R ANT Y MA INT E NA NC E AND
R E P A IR S
Y ou are res ponsible for the proper maintenance of the engine.
Y ou s hould keep all receipts and maintenance records covering the
performance of regular maintenance in the event ques tions arise.
These receipts and maintenance records should be trans ferred to
each s ubsequent owner of the engine. R OB IN AME R IC A res erves
the right to deny warranty coverage if the engine has not been properly
maintained. Warranty claims will not be denied, however, s olely
because of the lack of required maintenance or failure to keep
maintenance records .
MAINT E NANC E , R E P LAC E ME NT OR R E P AIR OF E MIS S IO N
C ONT R OL DE V IC E S AND S Y S TE MS MAY B E P E R F OR ME D B Y
ANY R E P AIR E S T AB LIS HME NT OR INDIV IDUAL;
HOW E VE R , WAR R ANT Y R E P AIR S MUS T B E P E R FOR ME D B Y A
S E R VIC E DE ALE R AUT HO R IZE D B Y R OB IN AME R IC A. THE US E
OF P AR T S T HAT AR E NOT E QUIV AL E NT IN P E R F O R MANC E AND
DUR AB ILIT Y TO AUT HO R IZE D P AR T S MAY IMP AIR T HE
E F F E C TIVE NE S S OF T HE E MIS S ION C ONT R OL S Y S TE M AND MAY
HAVE A B E AR ING ON T HE O UT COME OF A W AR R ANT Y C LAIM.
If other than the parts authorized by R OB IN AME R IC A are us ed for
maintenance replacements or for the repair of components affecting
emiss ion control, you should ass ure yours elf that such parts are
warranted by their manufacturer to be equivalent to the parts
authorized by R O B IN AME R IC A in their performance and durability.
HO W T O MA K E A C L A IM
All repair qualifying under this limited warranty mus t be performed by a
service dealer authorized by R OB IN AME R IC A. In the event that any
emiss ion-related part is found to be defective during the warranty period,
you shall notify R obin America cus tomer s ervice department at 1-630-
350-8200 and you will be advis ed of the appropriate warranty service
d
ealer or service providers where the warranty repair can be performed.
(iii) Air cleaner element

US
G B
G B
G B
G B
G B
G B
G B
G B
G B
G B
G B
G B
G B
G B
G B
C A L IF OR NIA E MIS S ION C ONTR OLWA R R ANT Y S TAT E ME NT
Y OUR WAR R ANTY R IG HT S A ND OB L IG AT IONS
The C alifornia Air R es ources B oard and F uji Heavy Indus tries L td. (herein “F UJ I”) are pleas ed to explain the emis s ion control system warranty
on your 2004 and later S mall O ff-R oad engine (herein "engine"). In C alifornia, new engine mus t be designed, built and equipped to meet the
S tate's stringent anti-s mog s tandards. F UJ I mus t warrant the emiss ion control s ys tem on your engine for the periods of time described below,
provided there has been no abuse, neglect or improper maintenance of your engine. Y our emiss ion control sys tem may include parts s uch as
the carburetor or fuel-injection s ystem, and the ignition s ystem. Als o included may be hos es , belts, connectors and other emis s ion-related
as semblies . Where a warrantable condition exis ts, F UJ I will repair your engine at no cos t to you including diagnos is, parts and labor.
MA NUF AC TUR E R 'S W A R R A NT Y C OVE R A G E :
The 2004 and later engines are warranted for two (2) years . If any emis sion related part on your engine is defective, the part will be repaired
or re pla ced by F U J I.
OWNE R 'S W AR R A NT Y R E S P ONS IB IL IT IE S :
-As the engine owner, you are res ponsible for the performance of the required maintenance listed in your Owner's Manual. F UJ I
recommends that you retain all receipts covering maintenance on your engine, but F UJ I cannot deny warranty solely for the lack of
receipts or for your failure to ensure the performance of all scheduled maintenance.
-As the engine owner, you should ,however, be aware that F UJ I may deny you warranty coverage if your engine or a part has failed due
to abus e, neglect, improper maintenance or unapproved modifications .
-Y ou are responsible for pres enting your engine to a s ervice dealer or warranty station authorized by R OB IN AME R IC A Inc. 940 Lively
B lvd., W ood Da le, IL 60191 (here in R O B IN A ME R IC A) as s oon a s a problem exis ts . T he warra nty repa irs s hould be completed in a
reasonable amount of time, not to exceed 30 days.
If you have any ques tions regarding your warranty rights and res ponsibilities , you should contact the R obin America Inc. C ustomer S ervice
Department at 1-630-350-8200
L IMITE D WAR R A NT Y
on E mis s ion C ontrol S ys tems
-
C alifornia Only
-
F UJ I warrants to the owner of the 2004 and later engine that the engine 1)has been designed, built and equipped s o as to conform at the time
of manufacture with the applicable regulations of the California Air R esources B oard, and (2) is free from defects in materials and workmanship
that could caus e it to fail to conform with those regulations as may be applicablein the terms and conditions s tated below.
A. WAR R A NT Y C OMME NC E ME NT DAT E
The warranty period begins on the date the engine is delivered to a
first retail purchas er.
B . L E NG T H OF C O VE R AG E
F UJ I warrants to a first retail purchas er and each subs equent purchas er
that the engine is free from defects in materials and workmanship that
cause the failure of a warranted emiss ion-related part for a period of
two (2) years after the date of delivery to the firs t retail purchaser.
C . W HA T IS C O VE R E D:
1. R E P AIR O R R E P LAC E ME NT P AR T S
R epairs and replacement of any warranted part will be performed
at no charge to you by an authorized service dealer or a warranty
s ta tion. Y ou ma y contact the R obin Ame rica Inc. C us tome r S ervice
Department at 1-630-350-8200 to obtain the name of the nearest
appropriate location where your warranty repairs are performed.
2. WAR R ANT Y P E R IOD
This warranty continues for a period of two (2) years and applies
only to the repair, replacement or adjustment of the component
parts that are not s cheduled for replacement as required
maintena nce. F urther, component parts which a re s cheduled only
for regular ins pection to the effect of "repair or replace as
neces s ary" are warranted for the warranty period. Any warranted
part which is s cheduled for replacement as required maintenance
is warranted for the period of time up to the firs t s cheduled
replacement point for that part.
3. DIAG NO S IS
Y ou will not be charged for diagnos tic labor that leads to the
determination that a warranted part is defective, if the diagnos tic
work is performed at an authorized service dealer or warranty s tation.
4. DAMAG E S
If a warranted part failed caus ing damage to other engine
components, cons ult an warranty station.
D. W HA T IS NOT C OVE R E D
1. T his limited warranty does not cover any part which malfunctions,
fails or is damaged due to failure to follow the maintenance and
operating instructions s et forth in the 2004 and later Owner's
Manual including:
(1) improper maintenance of any warranted parts
(2) improper installation, adjustment or repair of the engine or of
any warranted part unles s performed by an authorized service
dealer
(3) failure to follow recommendations on fuel us e contained in the
2004 and later Owner's Manual
(4) repairs performed outside of the authorized warranty s ervice
dealers
(5) us e of parts which a re not authorized by F U J I.
2. Add-on or modified parts
This warranty does not cover any part that malfunctions , fails or is
damaged due to alterations by changing, adding to or removing
parts from the engine.
3. E xpens es incurred by process ing warranty claims
F UJ I, a ny a uthorize d s ervice dea ler and warranty s tation s hall not
be liable for any los s of use of the engine, for any alternative usage,
for any damage to goods, los s of time or inconvenience.
E . HOW T O F IL E A C L AIM
All repairs qualifying under this Limited W arranty must be performed
by a dealer who sold you the engine or warranty station authorized
by R OB IN AME R IC A. In the event that any emiss ion-related part is
found to be defective during the warranty period, you must notify the
R obin America Inc. C us tomer S ervice Department at 1-630-350-8200
and you will be advised of the appropriate warranty service facilities
where the warranty repair is to be performed.
F . W HE R E T O OB TAIN WAR R ANTY S E R VIC E
It is recommended that warranty s ervice be performed by the
authorized dealer who s old you the engine, although warranty
service will be performed by any authorized s ervice dealers or
warranty s tations anywhere in the United S tates.

US
G B
G B
G B
G B
G B
When warranty repair is needed, the engine mus t be brought to an
authorized service dealer or warranty station’s place of business during
normal busines s hours . In all cases , a reasonable time, not to exceed
30 days, must be allowed for the warranty repair to be completed after
the engine is received by the authorized service dealer or warranty station.
G . MA INT E NA NC E , R E P L AC E ME NT A ND
R E P A IR O F E MIS S ION-R E L A T E D P AR TS
Only warranted engine replacement parts approved by F UJ I s hould
be us ed in the performance of any warranty maintenance or repairs
on emis s ion-related parts. If other than authorized parts are us ed for
maintenance, replacement or repair of components affecting emission
control, you should ass ure yours elf that such parts are warranted by
their manufacturer to be equivalent to authorized parts in performance
and dura bility. F UJ I ,however, a ss umes no liability under this warra nty
with respect to parts other than authorized parts. T he us e of non-
authorized replacement parts does not invalidate the warranty on
other components unles s the non-authorized parts cause damage to
warranted parts .
H. P A R T S C OV E R E D UNDE R THE C AL IF OR NIA E MIS S IONS
WA R R A NT Y
(1) F uel Metering S ys tem
(i) C arburetor and internal parts
(ii) Air cleaner plate (including choke s ys tem)
(iii) Air cleaner cover
(iv) Air cleaner element
(2) Ignition S ys tem
(i) S park plug
(ii) F lywheel magne to
(iii) Ignition coil
(3) Miscellaneous Items Us ed in Above S ys tems
(i) Hos es and sealing gas kets, bolts, connectors, and ass emblies.
I. MA INT E NA NC E S TA TE ME NT S
It is your respons ibility to have all scheduled ins pection and maintenance services performed at the times recommended in the 2000 and later
Owner's Manual and to retain proof that inspection and maintenance s ervices are performed at the times when recommended. F UJ I will not
deny a warranty claim solely becaus e you have no record of maintenance; however, F UJ I may deny a warranty claim if your failure to perform
required maintenance resulted in the failure of warranted part. T he proof which you maintain should be given to each s ubsequent owner of the
engine. Y ou are res ponsible for performing the scheduled maintenance des cribed below based on the procedures specified in the 2004 and
later O wner's Manual. T he scheduled maintenance below is based on a normal engine operating schedule.
P R OC E DUR E INT E R V AL
1) C lean engine and check bolts and nuts. R etighten if necess ary. : E very 8 hours (daily)
2) C heck and refill engine oil (4 s troke) : E very 8 hours (refill daily up to upper limit)
3) C hange engine oil (4 s troke) : Initial 20 hours and every 100 hours afterward
4) C heck clogging of cooling air pas sage and cylinder fins. : E very 8 hours (daily)
Note: More frequent maintenance may be necess ary under dusty, dirty or severe conditions .
(v) F uel F ilte r
R emove and clean if necess ary.
12) R eplace packings and gas kets with new ones .
11) Overhaul engine.
10) R eplace fule lines .
9) Adjust valve clearance, if applicable (4 stroke)
8) C heck fuel filter. If clogged, replace with new one.
7) C heck muffler exhaus t outlet (or port). C lean if necess ary.
6) C heck s park plug. C lean and adjust if neces sary.
5) C lean a ir cleaner
: E very reas sembling
: E very 200 hours
: E very 8 hours (daily)
: E very 8 hours (daily)
: E very 50 hours (monthly)
: E very 50 hours (monthly)
: E very 200 hours
: E very 200 hours

GB
1
FOREWORD
Thank you very much for purchasing a ROBIN PUMP.
This manual covers operation and maintenance of ROBIN PUMP.
All information in this publication is based on the latest product information available at the
time of approval for printing. Please read this manual carefully before operating.
Please take a moment to familiarize yourself with the proper operation and maintenance
procedures in order to maximize the safe and efficient use of this product.
Keep this owner’s manual at hand, so that you can refer to it at any time.
Due to constant efforts to improve our products, certain procedures and specifications are
subjected to change without notice.
When ordering spare parts, always give us the MODEL, PRODUCTION NUMBER and SERIAL
NUMBER of your pump.
Please fill in the following blanks after checking the production number on your pump.
(Location of label is different depending on the pump specification.)
Page
1. SAFETY PRECAUTIONS................................................................................... 2
2. COMPONENTS.................................................................................................. 4
3. PRE-OPERATION FOR STARTING .................................................................. 5
4. OPERATING YOUR PUMP................................................................................ 5
5. MAINTENANCE ................................................................................................. 6
6. PREPARATIONS FOR STORAGE..................................................................... 8
7. EASY TROUBLESHOOTING............................................................................. 9
8. SPECIFICATIONS.............................................................................................. 10
PROD No.
SER No.
NOTE Please refer to the illustrations on the back page of the front
cover or back cover for Fig. 11
11
1 to 88
88
8indicated in the sentence.
CONTENTS
SER No.
(Label)
PROD No. / SER No.
(Label)
PKV101GB(2003) 2003.10.30, 6:50 PMPage 1 AdobePageMaker6.5J/PPC
GB
2
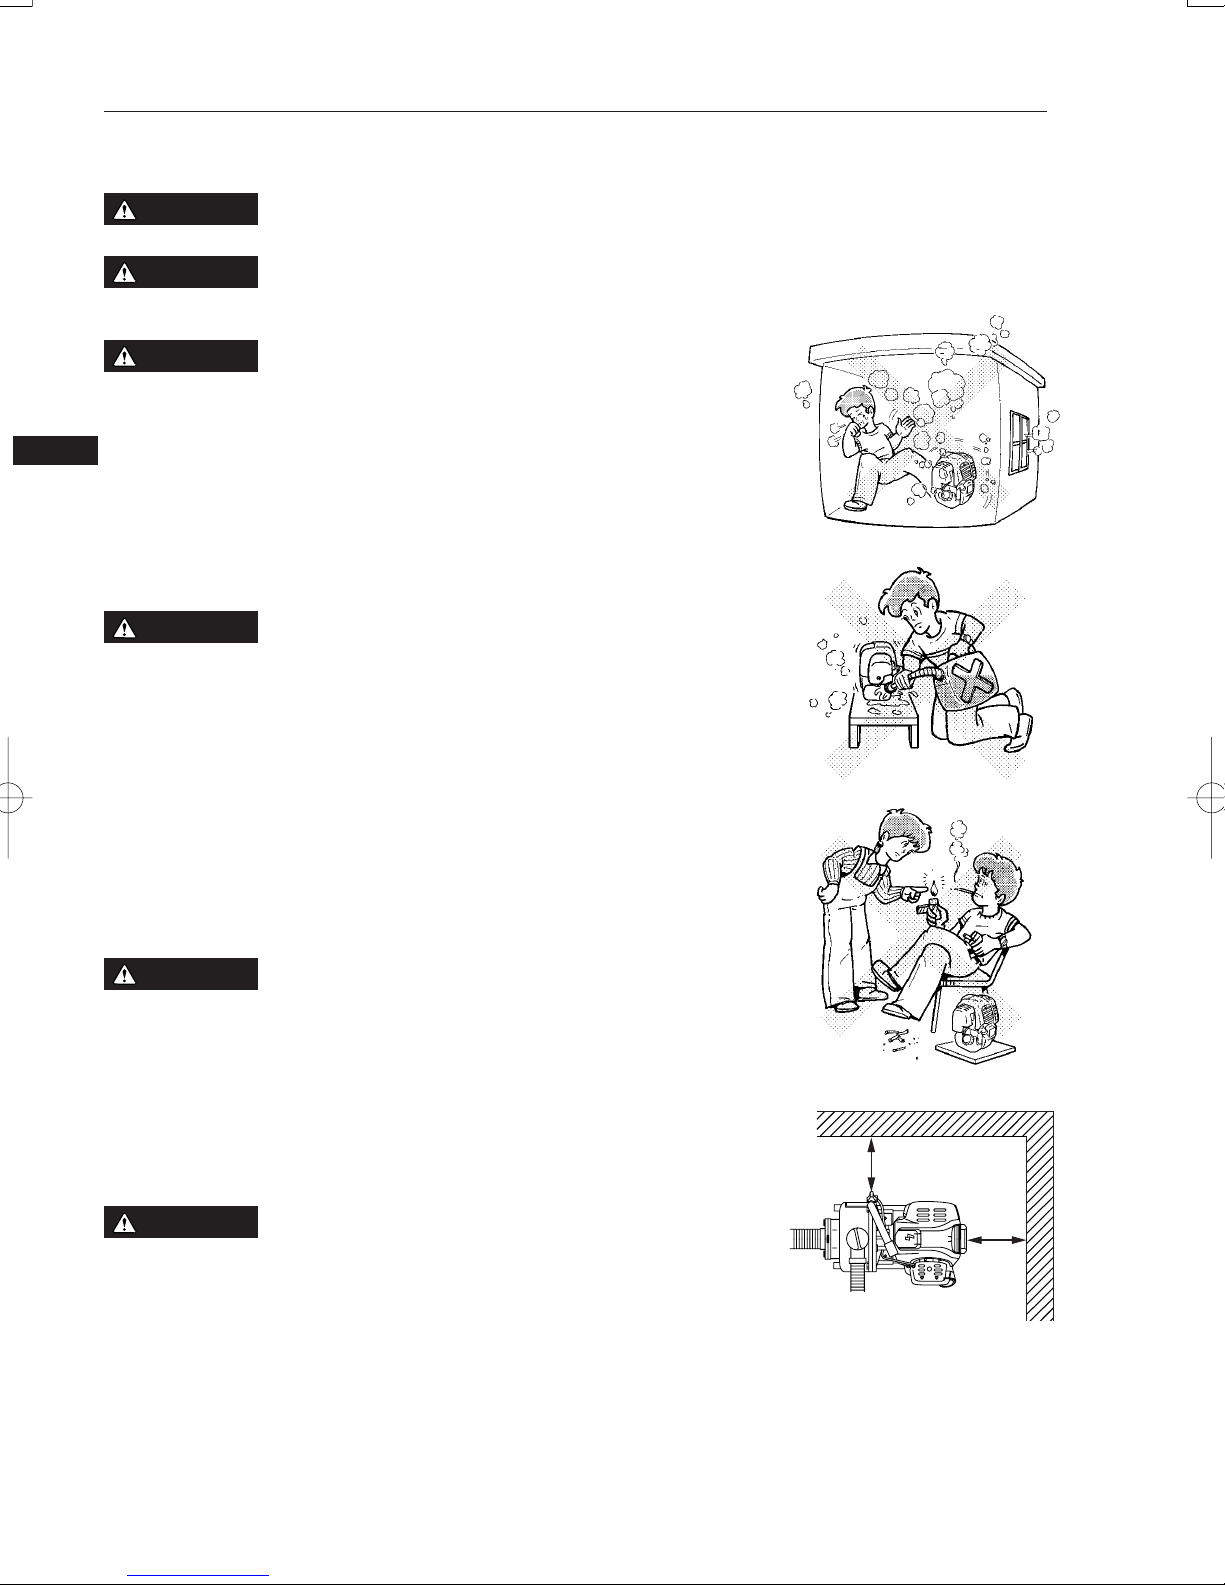
: EXHAUST PRECAUTIONS
■Never inhale exhaust gasses.
They contain carbon monoxide, a colorless, odorless and extremely dangerous gas
which can cause unconsciousness or death.
■Never operate the pump indoors or in a poorly ventilated area, such as tunnel, cave,
etc.
■Exercise extreme care when operating the pump near people or animals.
■Keep the exhaust pipe free of foreign objects.
: REFUELING PRECAUTIONS
■Gasoline is extremely flammable and its vapors can explode if ignited.
■Do not refuel indoors or in a poorly ventilated area.
■Be sure to stop the pump prior to refueling.
■Do not remove fuel tank cap nor fill fuel tank while engine is hot or running.
Allow engine to cool at least 2 minutes before refueling.
■Do not overfill the fuel tank.
■If fuel is spilt, wipe it away carefully and wait until the fuel has dried before starting the
engine.
■After refueling, make sure that the fuel cap is secured to prevent spillage.
: FIRE PREVENTION
■Do not operate the pump while smoking or near an open flame.
■Do not use around dry brush, twigs, cloth rags, or other flammable materials.
■Keep cooling air intake (recoil starter area) and muffler side of the engine at least
1 meter (3 feet) away from buildings, obstructions and other burnable objects.
■Keep the pump away from flammables and other hazardous materials (trash, rags,
lubricants, explosives).
: OTHER SAFETY PRECAUTIONS
■Be careful of hot parts.
The muffler and other engine parts become very hot while the pump is running or just
after it has stopped. Operate the pump in a safe area and keep children away from
the running pump.
■Do not use diaphram pump for the mixture of water and oil.
1. SAFETY PRECAUTIONS
WARNING
Please make sure you review each precaution carefully.
Pay special attention to statement preceded by the following words.
WARNING
WARNING
WARNING
WARNING
CAUTION
“WARNING” indicates a strong possibility of severe personal injury or loss of life if
instructions are not followed.
“CAUTION” indicates a possibility of personal injury or equipment damage if instructions
are not followed.
1m
1m
PKV101GB(2003) 2003.10.30, 6:50 PMPage 2 AdobePageMaker6.5J/PPC
GB
3
■Do not touch the spark plug and ignition cable when starting and operating the engine.
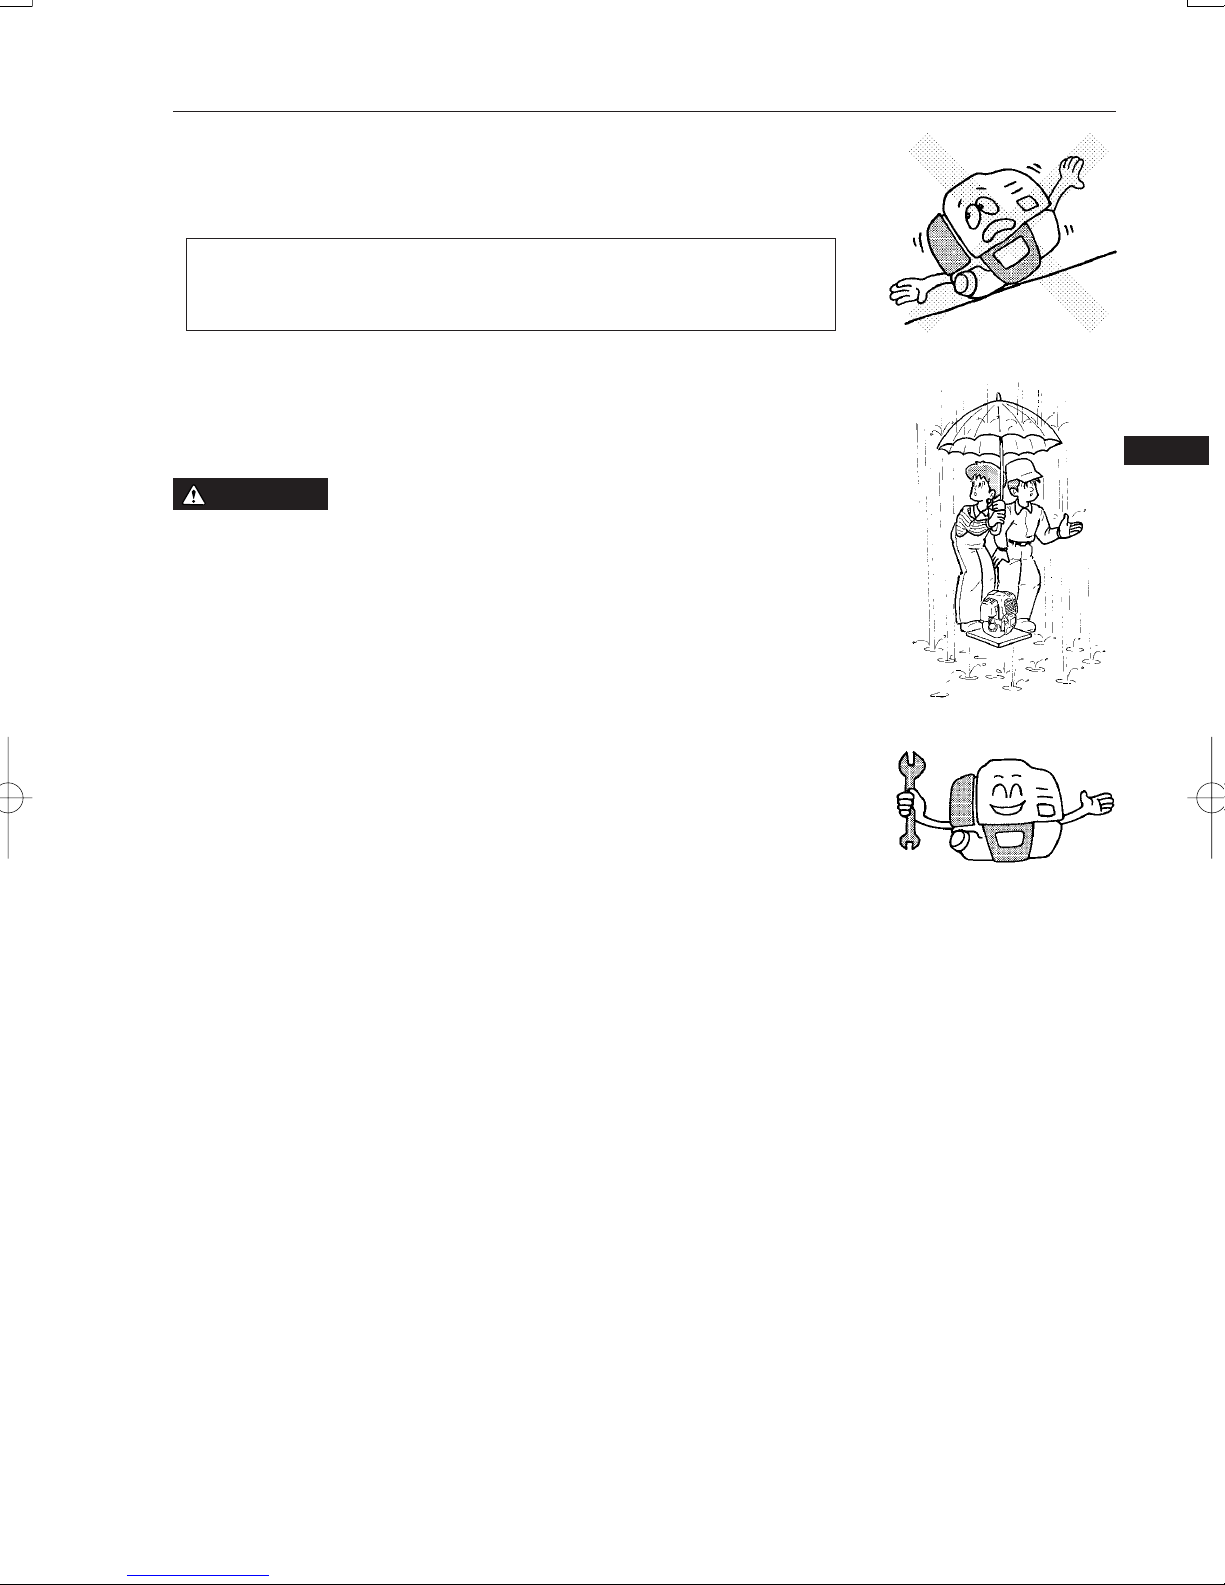
■Operate the pump on a stable, level surface.
If the engine is tilted, fuel spillage may result.
■Drain the fuel when transporting the pump.
■Keep the unit dry (do not operate it in rainy conditions).
: PRE-OPERATION CHECKS
■Carefully check fuel hoses and joints for looseness and fuel leakage. Leaked fuel
creates a potentially dangerous situation.
■Check bolts and nuts for looseness. A loose bolt or nut may cause serious engine
trouble.
■Check the engine oil and refill if necessary.
■Check the fuel level and refill if necessary. Take care not to overfill the tank.
■Keep cylinder fins and recoil starter free of dirt, grass and other debris.
■Wear snug fitting working clothes when operating the engine.
Loose aprons, towels, belt, etc., may be caught in the engine or drive train, causing a
dangerous situation.
NOTE
Operating the pump at a steep incline may cause seizure due to improper lubrication
even with a maximum oil level.
CAUTION
PKV101GB(2003) 2003.10.30, 6:50 PMPage 3 AdobePageMaker6.5J/PPC

GB
4
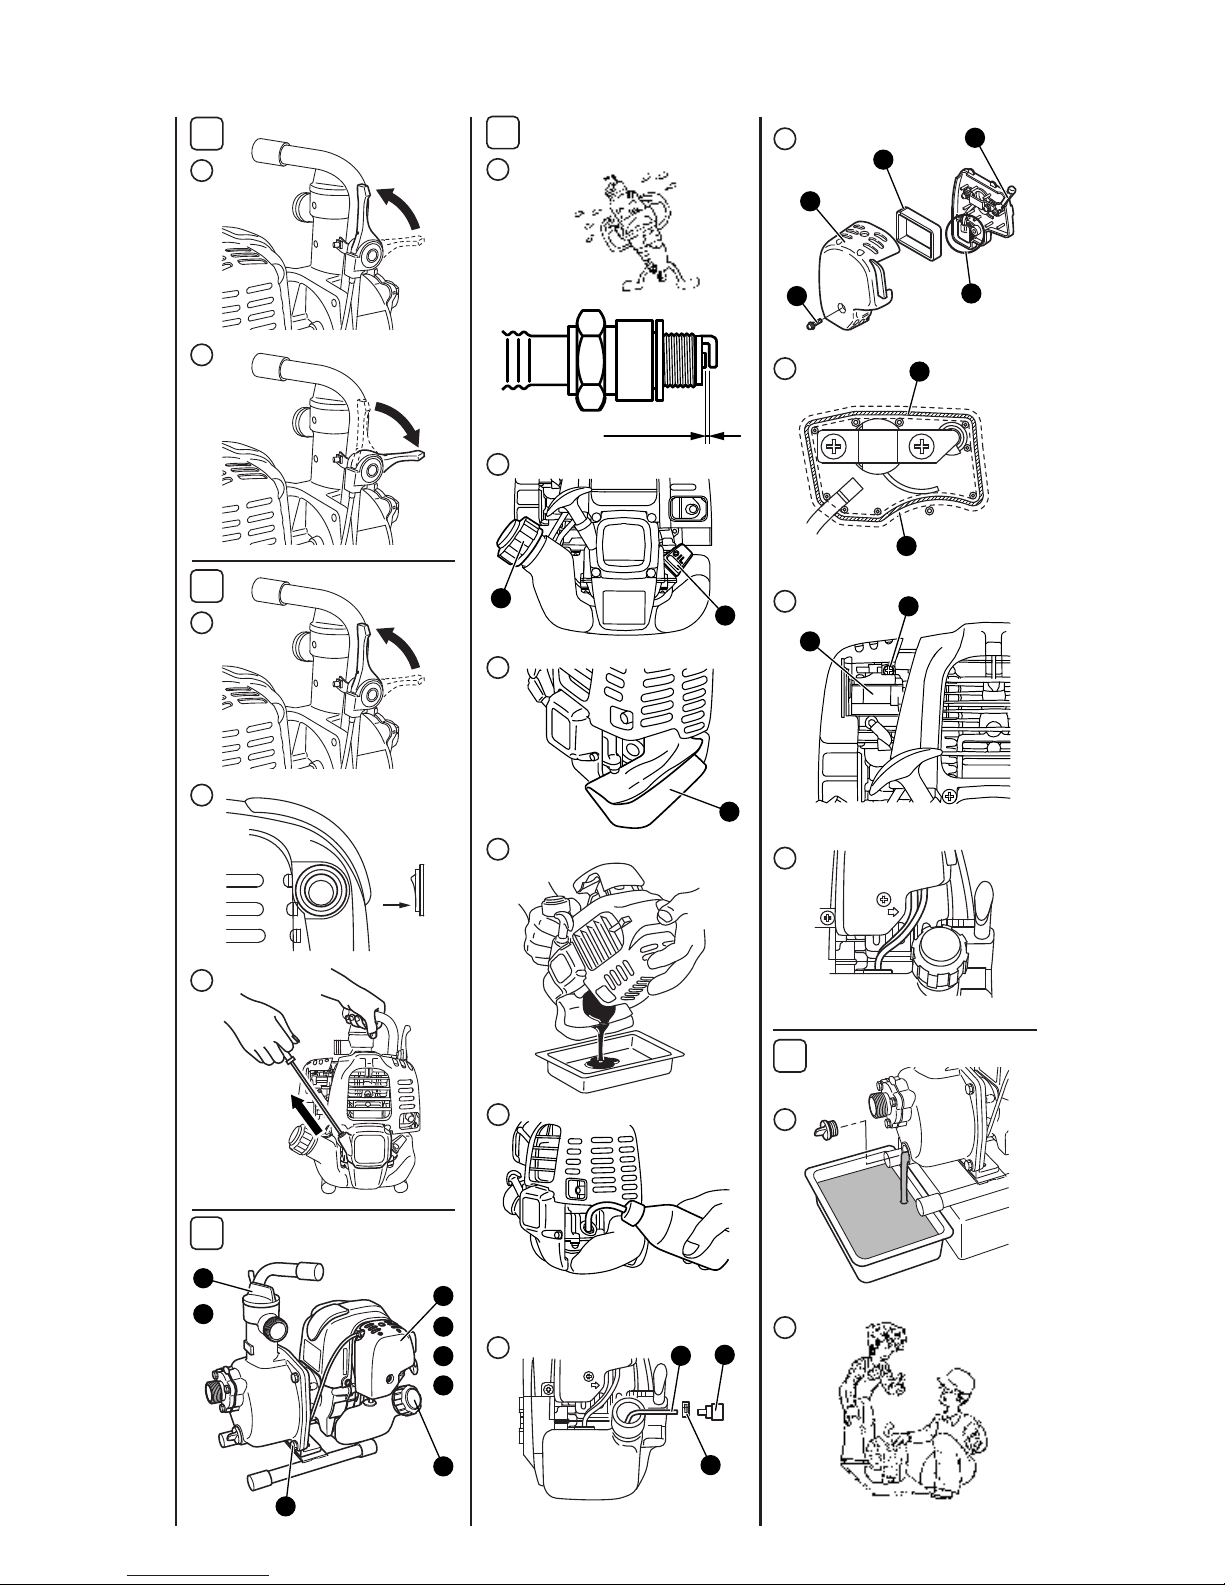
2. COMPONENTS
(See Fig. 11
11
1)
SYMBOLS
q Plug (drain)
w Suction
e Delivery
r Plug (priming)
tHandle
ySpark plug cover
uSpark plug
iAir cleaner
oCarburetor
!0 Primer button
!1 Tank cap
!2 Fuel tank
!3 Casing cover
!4 Speed control lever
!5 Stop Switch
!6 Set base
!7 Oil filler (with oil gauge)
!8 Recoil starter
!9 Starter handle
@0 Choke lever
@1 Muffler
@2 Strainer
@3 Hose coupling
@4 Hose band
@5 Tools
@6 Instruction for use
(This publication)
NOTE Please refer to the illustrations on the back page of the front
cover or back cover for Fig. 11
11
1 to 88
88
8indicated in the sentence.
.launams'renwoehtdaeR
.ecafrustohehtforaelcyatS
.suonosiopsisagtsuahxE .aeradetalitnevnunanietarepotonoD
.gnileufererofebenigneehtpotS
.detibihorpgnikomsdnaemalfnepo,eriF
)nuR(nOytiralopevitisoP;sulP
)potS(ffOyrettaB
lioenignE)tratscirtcelE(tratsenignE
lioddA
PKV101GB(2003) 2003.10.30, 6:50 PMPage 4 AdobePageMaker6.5J/PPC
GB
5
3. PRE-OPERATION FOR STARTING
(See Fig. 22
22
2)
■Stop the engine and open the cap.
■Incline the engine as fuel inlet upward, then refill fuel to
the upper level. Do not fill fuel too much.
■Use unleaded automotive gasoline only.
Fuel Tank Capacity (This engine is 4-stroke gasoline
engine). Refer to “8. SPECIFICATIONS”Page 10 for fuel
tank capacity
■When filling the fuel tank, always use the fuel filter.
■Wipe off any spilled fuel before starting the engine.
(See Fig.2
-
y)
1. CONNECT SUCTION HOSE
(See Fig. 22
22
2
-
qq
qq
q)
Use a reinforced-wall or wire braided hose to prevent suction
collapse.
Since the pump self-priming time is directly proportional to
hose length, a short hose is recommended.
Always use a strainer with the suction hose. Gravel
or debris sucked into the pump will cause serious
damage to the impeller and the pump casting.
CAUTION
2. CONNECT DELIVERY HOSE
(See Fig. 22
22
2
-
ww
ww
w)
When using a fabric hose, always use a hose band to prevent
the hose from disconnecting under high pressure.
4. CHECK FUEL (See Fig. 22
22
2
-
tt
tt
t)
3. CHECK ENGINE OIL (See Fig. 22
22
2
-
rr
rr
r)
Before checking or refilling engine oil, be sure the engine is
located on stable, level surface and stopped.
■Do not screw the oil gauge into the oil filler neck to check
oil level. If the oil level is low, refill to the upper level with
the following recommended oil.
■Use 4-stroke automotive detergent oil of API service
class SF or higher grade.
■Select the viscosity based on the air temperature at the
time of operation as shown in the table. (See Fig.2
-
e)
OIL CAPACITY : 0.8 liter
Explanation of Fig.22
22
2
-
rr
rr
r
qOil Gauge
wUpper Level (0.8 liter)
eLower Level
5. CHECK PRIMING WATER
(See Fig. 22
22
2
-
uu
uu
u)
It is recommended that the water chamber of pump casing
should be primed with full of water before operating.
Never attempt to operate the pump without priming
water or the pump will overheat. Extended dry
operation will destroy the mechanical seal.
If the unit has been operated dry, stop the engine
immediately and allow the pump to cool before
adding priming water.
WARNING
Do not refuel while smoking, near an open flame
or other such potential fire hazards. Otherwise
fire accident may occur.
WARNING
1. STARTING (See Fig. 33
33
3)
(1) Set the throttle lever to the idling position (L). (See Fig.3
-
q)
(2) Set the stop switch to the position “ON”. (See Fig.3
-
w)
(3) Close the choke lever. (See Fig.3
-
e)
■If the engine is cold or the ambient temperature is low,
close the choke lever fully.
■If the engine is warm or the ambient temperature is high,
open the choke lever half-way, or keep it fully open.
(4) Push the primer pump 7 to 10 times to feed the fuel to
the carburetor. (See Fig.3
-
r
-
q)
(5) Pull the starter handle slowly until resistance is felt. This
is the “compression” point. Return the handle to its
original position and pull swiftly.
Do not pull out the rope all the way.
After starting the engine, allow the starter handle to return
to its original position while still holding the handle.
(See Fig.3
-
t)
(6) After starting the engine, gradually open choke by turning
the choke lever and finally keep it fully opened. Do not
fully open the choke lever immediately when the engine
is cold or the ambient temperature is low, because the
engine may stop. (See Fig.3
-
y)
4. OPERATING YOUR PUMP
2. RUNNING (See Fig. 44
44
4)
(1) After the engine starts, set the speed control lever at the
low speed position (L) and warm it up without load for a
few minutes. (See Fig.4
-
q)
(2) Gradually move the speed control lever toward the high
speed position (H) and set it at the required engine speed.
(See Fig.4
-
w)
■Whenever high speed operation is not required, slow the
engine down (idle) by moving the speed control lever to
save fuel and extend engine life.
NOTE
If the engine is operated at upside down, white smoke may
be exhausted from the muffler.
PKV101GB(2003) 2003.10.30, 6:50 PMPage 5 AdobePageMaker6.5J/PPC
GB
6
3. INSPECTING THE SPARK PLUG
(See Fig.77
77
7
-
qq
qq
q)
(1) Clean off carbon deposits on the spark plug electrode
using a plug cleaner or wire brush.
(2) Check electrode gap. The gap should be 0.7 mm to 0.8
mm (0.03 inch.). Adjust the gap, if necessary, by carefully
bending the side electrode.
Recommended Spark Plug : NGK CMR6A
smetiecnanetniaM sruoh8yrevE )yliaD( sruoh05yrevE )ylkeeW( sruoh002yrevE )ylhtnoM(
STUNDNASTLOBKCEHCDNATESPMUPNAELC ●)yliaD(
LIOENIGNELLIFERDNAKCEHC
RENAELCRIANAELC ●
LIOENIGNEEGNAHC )sruoh02laitnI( ●
GULPKRAPSNAELC ●
RETLIFLEUFNAELC ●
NAELCDNAGNISACPMUPEHTEVOMER ●
KRAPSTSUJDADNANAELC SEDORTCELEDNAGULP ●
KCEHCECNARAELCEVLAVTSUJDADNA)1etoN*( ●
ROTERUBRACTSUJDADNANAELC ●
YREVILEDDNANOITCUSKCEHC SEVLAVKCEHC ●
)1etoN*(YRASSECENFIENIGNELUAHREVO ●
2. PERIODIC INSPECTION
Periodic maintenance is vital to the safe and efficient operation
of your pump.
Check the table below for periodic maintenance intervals. The
below chart is based on the normal pump operation schedule.
●(Refill daily up to upper level.)
3. STOPPING (See Fig. 55
55
5)
(1) Set the speed control lever at the low speed position and
allow the engine to run at low speed for 2 or 3 minutes
before stopping. (See Fig.5
-
q)
(2) Set the stop switch to the position “OFF”. (See Fig.5
-
w)
■Do not stop the engine suddenly when it is running at
high speed.
(3) Pull the starter handle slowly and return the handle to its
original position when resistance is felt. This operation is
necessary to prevent outside moist air from intruding
into the combustion chamber. (See Fig.5
-
e)
5. MAINTENANCE
(See Fig. 66
66
6)
1. DAILY INSPECTION
Before running the engine, check the following service items.
q Loose or broken bolts and nuts
w Clean air cleaner element
e Enough clean engine oil
r Leakage of gasoline and engine oil
t Enough gasoline
y Safe surroundings
u Check the priming water
i Excessive vibration, noise
*Note: 1.As to the procedures for these items, please refer to the SERVICE MANUAL or consult your nearest Robin
service dealer.
NOTE
Replace rubber hoses for passage every one year. If and when fuel leakage is found, replace hose at once.
Periodic Maintenance Schedule table
Replace rubber pipes for fuel passage every two
years. If fuel leakage is found, replace the pipe
immediately.
CAUTION
PKV101GB(2003) 2003.10.30, 6:50 PMPage 6 AdobePageMaker6.5J/PPC
GB
7
4.
ENGINE OIL CHANGE (See Fig.
77
77
7-ww
ww
w
〜
tt
tt
t
)
Initial oil change : After 20 hours of operation
Thereafter : Every 50 hours of operation
(1) When changing oil, stop the engine and loosen the drain
plug. Drain the used oil while the engine is warm. Warm
oil drains quickly and completely.
5. CLEANING FUEL FILTER
(See Fig.77
77
7
-
yy
yy
y)
WARNING Flame Prohibited
Remove the hose clamp and pull out the fuel filter from fuel
pipe. Wash the fuel filter with kerosene. After washing,
reassemble it. If the fuel filter is heavy dirty, replace it with
new one.
Explanation of Fig.77
77
7
-
yy
yy
y
qFuel filter
wFuel pipe
eHose clamp
(2) Re-install the drain plug before refilling oil.
OIL CAPACITY : 0.8 liter
(3) Refer to page 5 for the recommended oil.
■Always use the best grade and clean oil. Contaminated
oil, poor quality oil and shortage of oil cause damage to
engine or shorten the engine life.
(4) Remove the oil gauge. Be cautious to place the oil gauge
in a place where it will not gather dirt, dust or other foreign
matter. (See Fig.7
-
w)
(5) Place a cloth or paper towel to the area around the oil
filler hole. (See Fig.7
-
e, q)
(6) Remove the oil gauge, then tilt the engine and drain the
oil into a pan or other receptacle. (See Fig.7
-
r)
(7) Put the engine on a level surface, then fill with the oil up to
the point of overflowing the filler neck. Pour the oil in from
a squeeze bottle or other appropriate. (See Fig.7
-
r)
(8) After filling the engine with oil, reinsert the oil gauge.
Ensure that the oil gauge is tight, as if it loosens later oil
will leak out. (See Fig.7
-
t)
6. CLEANING AIR CLEANER
WARNING Flame Prohibited
A dirty air cleaner element will cause starting difficulty, power
loss, engine malfunctions, and shorten engine life extremely.
Always keep the air cleaner element clean.
■Remove the fixing bolt of air cleaner cover.
(See Fig.7
-
u
-
q)
■Pull out the lower edge of the cover to remove the air
cleaner cover. (See Fig.7
-
u
-
w)
■Place the choke lever to the fully closed position, taking
care to ensure that dust and dirt are not allowed to enter
the carburetor.
■Remove the element, then clean it with a solution of warm
water and a mild detergent, thoroughly drying it afterward.
Install it in alignment with the lines as shown in illustration.
■Wipe off any oil adhering to the area around the air
cleaner cover and breather with a cloth.
■After cleaning, reassemble the cleaner cover (insert the
tab at the top first, then insert the bottom tab) and tighten
the fixing bolt.
To prevent injury, pay attention to the hot oil.
Make sure the fuel cap is tightly secured to avoid
spillage.
CAUTION
PKV101GB(2003) 2003.10.30, 6:51 PMPage 7 AdobePageMaker6.5J/PPC
GB
8
1. WATER (See Fig.88
88
8
-
qq
qq
q)
Drain all water from the drain plug.
6. PREPARATIONS FOR STORAGE
In case the engine is not going to be used for more than 1
month, discharge fuel thoroughly from fuel tank and carburetor
in order to prevent from hard starting and/or poor engine
operation due to deteriorated fuel when you use the engine
next time.
■Pour out the fuel in the tank from its filler neck.
■Push the primer pump of the carburetor until the fuel in
it is thoroughly discharged.
4. ENGINE OIL (See Fig.88
88
8
-
ww
ww
w)
■Change the engine oil with fresh oil.
■Remove the spark plug, pour about 5 cc of engine oil
into the cylinder, slowly pull the starter handle of the
recoil starter 2 or 3 times, and reinstall the spark plug.
5. CLEAN AND STORE
■Slowly pull the recoil starter handle until resistance is
felt and leave it in that position.
■Clean the pump thoroughly with an oiled cloth, put the
cover on, and store the pump indoors in a well ventilated,
low humidity area.
When retightening drain plug, be sure to clean
the drain plug and the thread of casing. Otherwise,
the thread may be damaged.
CAUTION
2. DISCONNECT THE DELIVERY HOSE
Tilt the pump and drain all water from delivery hole. Severe
damage to pump may result if water freezes in the pumping
chamber.
WARNING Flame Prohibited
3. DISCHARGE FUEL
8. FUEL HOSE REPLACEMENT
(See Fig.77
77
7
-
!0!0
!0!0
!0)
9. CHECKING BOLTS, NUTS AND SCREWS
■Retighten loose bolts and nuts.
■Check for fuel and oil leaks.
■Replace damaged parts with new ones.
Replace the fuel hose every 2 years. If fuel leaks from fuel
hose, replace the fuel hose immediately.
Take extreme caution when replacing fuel hose ;
gasoline is extremely flammable.
WARNING
Normal idling rpm 3000±100rpm
7. ADJUSTING CARBURETOR
(See Fig.77
77
7
-
oo
oo
o)
Adjusting idling rpm.
When adjust screw is turned right, engine rpm increases, and
when it is turned left, rpm decreases. (Refer to illustration.)
NOTE
The carburetor greatly affects the performance of the
engine.
Since it has been adjusted carefully at our factory
before shipment, avoid adjusting unless absolutely
necessary. If adjustments are needed, contact your
nearest dealer.
PKV101GB(2003) 2003.10.30, 6:51 PMPage 8 AdobePageMaker6.5J/PPC

GB
9
7. EASY TROUBLESHOOTING
1. PUMP DOES NOT RUN .
■Engine dose not start.
(See 7.-4 “4. WHEN ENGINE DOES NOT START”)
■Sticking of impeller
(Disassemble and clean.)
2. PUMPING VOLUME IS SMALL.
■Sucking air at suction side.
(Check piping at suction side.)
■Drop off engine output
(Consult your nearest dealer.)
■Breakage of mechanical seal.
(Consult your nearest dealer.)
■High suction lift (Lower.)
■Suction hose is too long or thin.
(Use a thick hose in minimum length.)
■Leak of water from water passage.
(Stop leaking.)
■Clogging of foreign substance in impeller.
(Disassemble and clean.)
■Wear of impeller.
■Strainer is clogged. (Clean.)
■Engine speed is too low.
(Consult your nearest dealer.)
3. PUMP DOES NOT SELFPRIME.
■Suction of air at suction side.
(Check piping at suction side.)
■Insufficient priming water inside pump casing
(Prime fully.)
■Imperfect tightening of drain plug.
(Tighten the plugs completely.)
■Engine speed is too low.
(Consult your nearest dealer.)
■Sucking air from mechanical seal.
(Consult your nearest dealer.)
4. WHEN ENGINE DOES NOT START :
Perform the following checks before you take the pump to
your Robin dealer. If you still have trouble after completing
the checks, take the pump to your nearest Robin dealer.
Before testing, carefully wipe off spilled fuel.
Put the plug as far away from the spark plug hole
as possible.
Ground the side of the electrode to any engine
ground.
WARNING
(1) Is the engine switch set OK?
(See Fig.33
33
3
-
ww
ww
w)
(2) Is there a strong spark across the electrode ?
■Remove the spark plug and connect it to the plug cap.
Pull the starter handle while grounding spark plug against
engine body.
■Try with a new spark plug if the spark is weak or there is
no spark.
■The ignition system is faulty if there is no spark with a
new spark plug.
(3) Is there enough compression?
■Pull the starter handle slowly and check if resistance is
felt.
■If little force is required to pull the starter handle, check if
the spark plug is tightened firmly.
■If the spark plug is loose, tighten it.
(4) Is the spark plug wet with fuel?
■Choke (close choke lever) and pull the starter handle five
or six times. Remove the plug and check if its electrode is
wet. If the electrode is wet, fuel is well supplied to your
engine.
■When the electrode is dry, check where the fuel stops.
(Check the fuel intake of the carburetor and fuel filter
intake.)
■In case the engine does not start with well supplied fuel,
try using fresh fuel.
PKV101GB(2003) 2003.10.30, 6:51 PMPage 9 AdobePageMaker6.5J/PPC

GB
10
8. SPECIFICATIONS
PUMP
ENGINE
LEDOM101VKP
epyT pmuplagufirtneC,gnimirp-fleS
sretemaiDyrevileDxnoitcS).ni1x1(mm4.52x4.52
daeHlatoTm53
emuloVyrevileDmumixaMnim/L011
daeHnoitcuSm8
aireteMlaeSelxA )laeSlacinahceM( nobrac-cimareC
ledoM520HE
epyT enigneenilosaGVHO,ekorts-4,delooc-riAniboR
leuF enilosagdedaelnuevitomotuA
yticapaCknaTleuFL5.0
metsySgnitratSretratSlioceR
)HxWxL(snoisnemiD mm913x312x333
thgieWteNgk3.5
seirosseccAdradnatS ).cp1(reniartS,)tes1(tiklootenignE ).scp3(dnabesoH,).scp2(gnilpuocesoH
PKV101GB(2003) 2003.10.30, 6:51 PMPage 10 AdobePageMaker6.5J/PPC
PRINTED IN JAPAN
January 2004 CE 80
Table of contents
Other Robin Water Pump manuals

Popular Water Pump manuals by other brands

CMi
CMi 236552 operating instructions

Danfoss
Danfoss Series 42 Service manual

Meec tools
Meec tools 020715 operating instructions

Pentair
Pentair Myers SPS-4 owner's manual

Masterflex
Masterflex QUATTROFLOW 1200S OPERATING AND INSTALLATION Manual

Maag
Maag S Series Installation, operation & maintenance manual


