Instruction on use
Control panel features
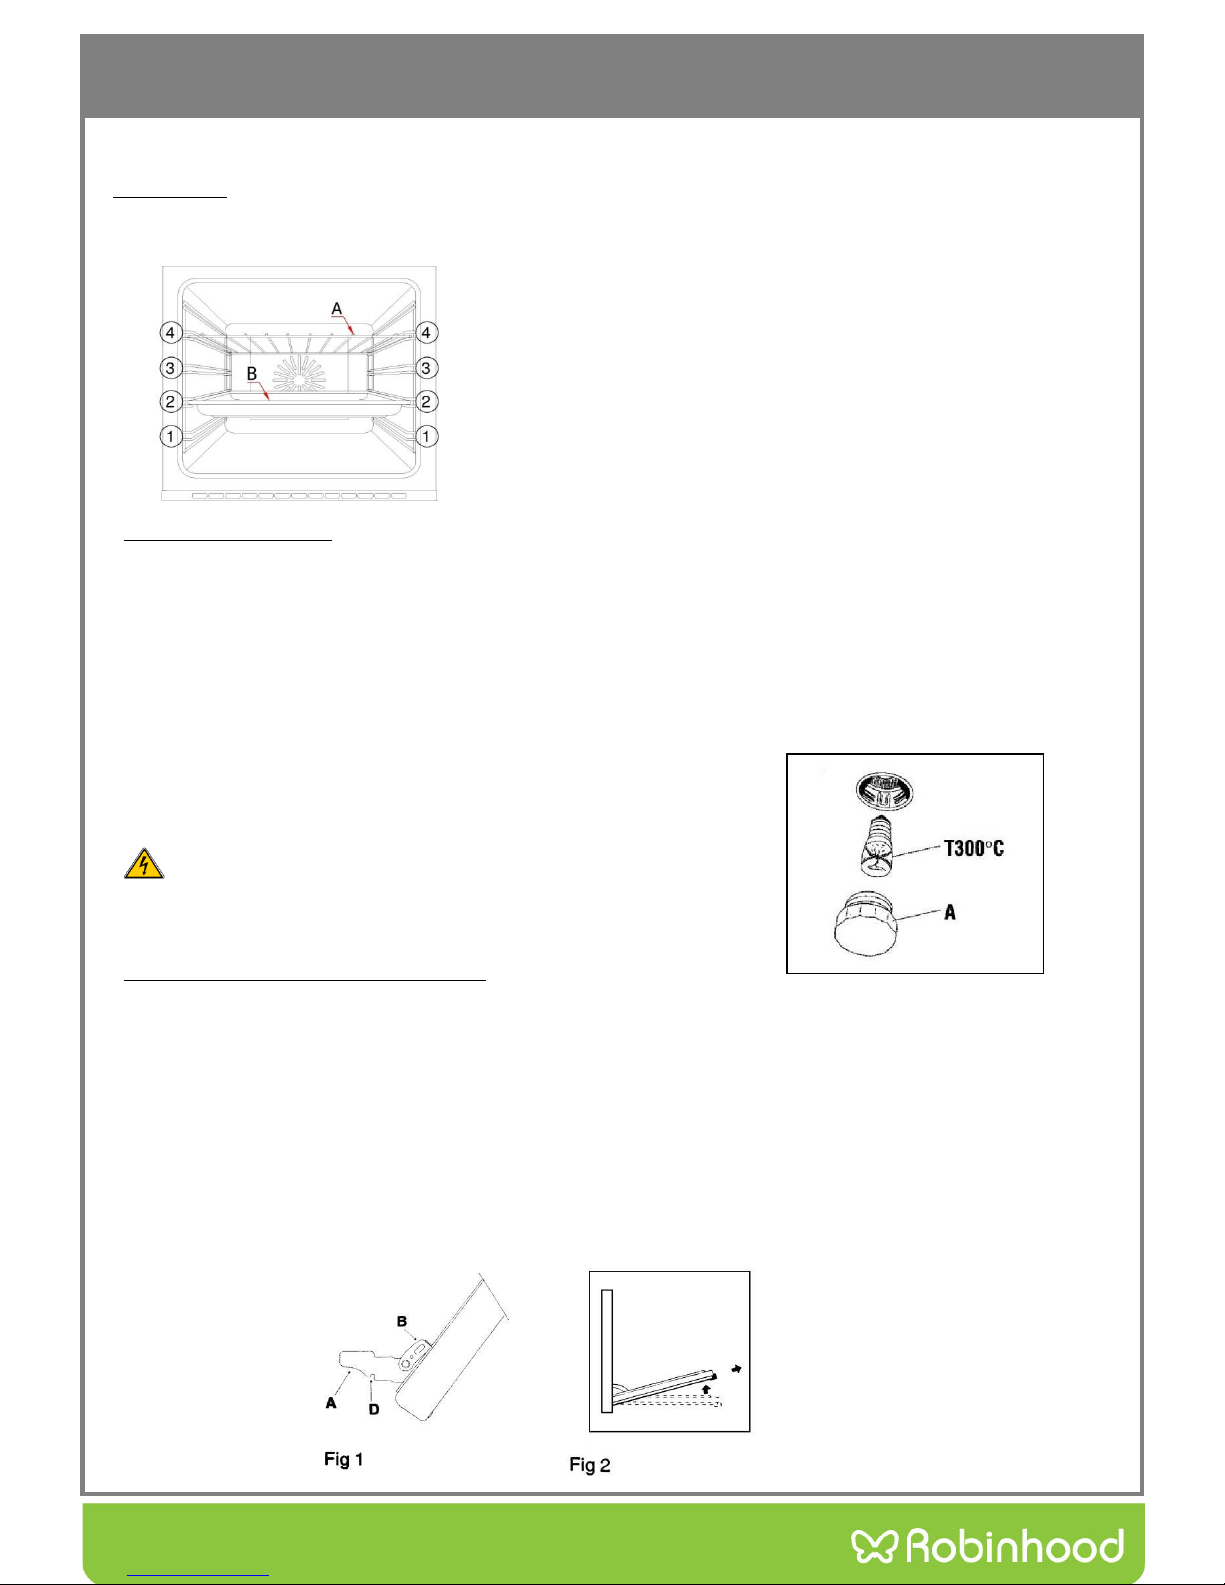
This oven combines in a single appliance the advantages of traditional convection ovens with those of modern forced air
ventilation ovens.
It is an extremely versatile appliance that allows you to easily and safely choose between 5 different cooking modes. The
selection of the various functions can be obtained by putting the programmer to the manual position or setting a
beginning/end of cooking program and successively by turning the selector (B) and thermostat (C) knobs on the control
panel.
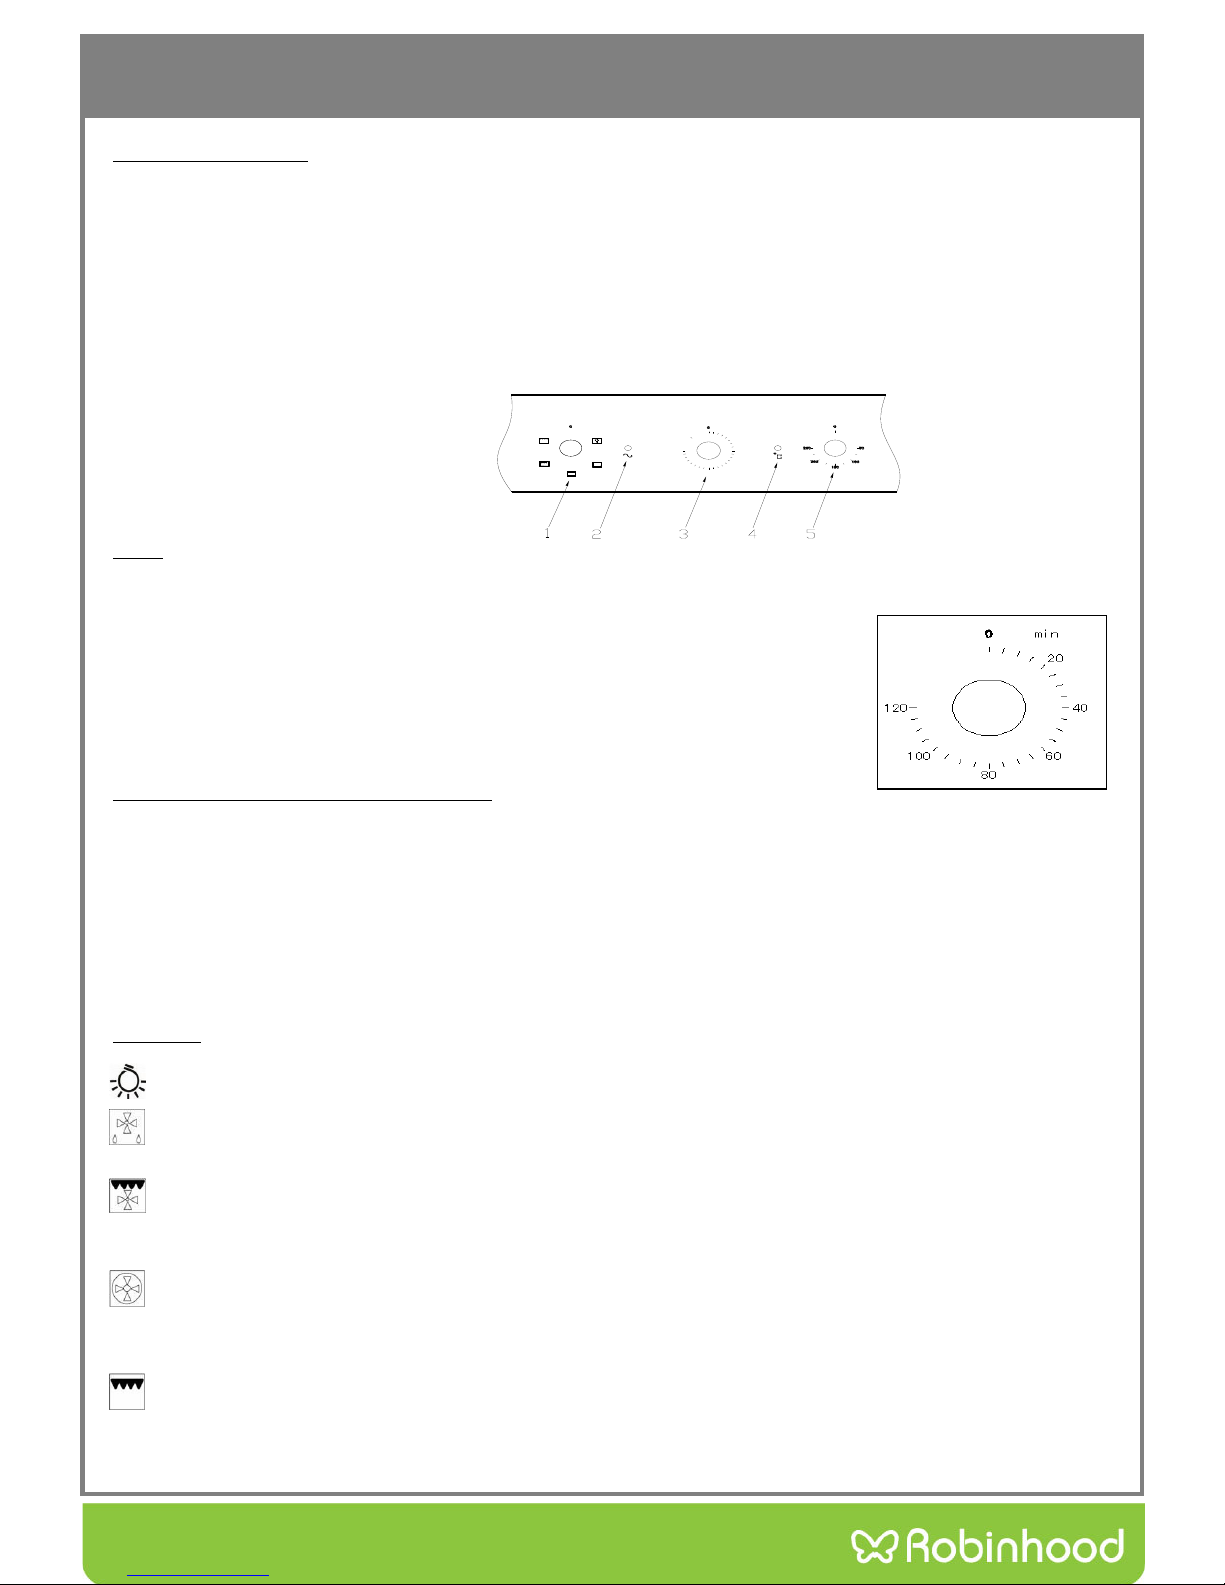
Oven programmer/timer display
1.Oven function selector knob
2.Indicator light
3.Oven programmer/timer display
4.Oven operating light
5.Thermostat control knob
Timer
1. If no need to use the oven programmer, setting the timer on “NO” and connected to your mains supply.
2. If need to use the timer, you turn the timer knob as you wish, then choose a time between
0~120 mins, the oven will power off when the timing is finished.
IMPORTANT: The oven power off when the alarm silenced. If you have
finished cooking, then you should turn the oven function selector
and thermostat control knob to 0.
Setting a cooking function and temperature
1.When your appliance is connected to the mains supply for the first time, the power indicator light will come on, after
selecting the cooking function and setting a temperature, the operating light will come on and the oven will start working,
finally setting the cooking time;(the cooking time is from 0min to 120mins, revolving the knob in clockwise direction to the
corresponding time on panel when setting the cooking time.
2.The oven function selector knob should be used to select the particular mode of cooking that you require. The appliance
will utilise different elements within the oven cavity, depending on the oven function that you select. When a function is
selected, the power indicator light will come on.
Functions
Light: Operates the interior light
Fan : The fan runs without heat to reduce defrosting time on frozen foods. The time required to defrost
the food depends on the room temperature.
Fan Assisted Grill:
The fan circulates heat from the oven grill around the food, simultaneous quick browning and sealing
the juices in. Economical rotisserie or spit effect.
Rear element and Fan Forced:
This method of cooking uses the circular element and the heat is distributed by the fan. This results
in a faster more economical cooking process. The fan oven allows food to be cooked simultaneously
on different shelves.
Conventional Grill:
This cooking method is for normal grilling using inner and outer parts of top element. It’s ideal for
medium to large portions of sausages, bacon, fish etc.