Rockford Systems KYL-229 User manual

5795 Logistics Parkway • Rockford, Illinois 61109 • Toll-Free 1-800-922-7533 • Phone 815-874-7891 Fax
815-874-6144 • Web Site www.rockfordsystems.com • E-Mail [email protected]
Manual No. KSL-282
INSTALLATION INSTRUCTIONS:
• DISC SANDER SHIELDS
• UPPER BELT SANDER SHIELDS
• LOWER BELT SANDER SHIELDS
Disc Sander Shields
Upper and Lower Belt Sander Shields

2Rockford Systems, LLC—www.rockfordsystems.com
Call: 1-800-922-7533
SECTION 1—DISC SANDER SHIELDS
Disc Sander Shield Installation Instructions
1. Remove all packing material from the shield and its
mounting assembly. Remove any protective cover-
ing from both sides of the shield, if any.
2. Attach the polycarbonate shield to the mounting
brackets using the four T-nuts and washers.
3. Using the mounting arms and shield assembly as a
template, mark mounting holes where the assembly
is to be mounted.
• Drillandtapholes
• Mounttheshieldassemblytothemachine
• UsetheT-handleknobstoadjusttheshieldup
ordown.
4. Permanently attach danger signs No. KSC-046 and
No. KSC-048 (if furnished). Make sure they are read-
ily visible to all personnel who work on or around
the machine.
Shield
T-Handle Knob
Washer
T-Nut
Mounting Arm
Mounting Arm
Mounting
Hole
Shield

3
Rockford Systems, LLC—www.rockfordsystems.com
Call: 1-800-922-7533
SECTION 2—UPPER BELT SANDER SHIELDS
Upper Belt Sander Shield Installation Instructions
1. Remove all packing material from the shield and its
mounting assembly. Remove any protective cover-
ing from both sides of the shield, if any.
2. Attach the polycarbonate shield to the mounting
bracket using the T-handle knob and hex nut.
3. Remove the end cap from bottom of shield arm.
4. Loosen the two buttton-head cap screws (through
access holes on shield arm) and slide mounting arm
from shield arm. Set aside.
Shield
Mounting Arm
Shield Arm
T-Handle Knob
Hex Nut
Shield Arm
End Cap
T-Nut
Mounting Arm
Shield Arm
Mounting Arm
(Continuedonnextpage.)

4Rockford Systems, LLC—www.rockfordsystems.com
Call: 1-800-922-7533
SECTION 2—UPPER BELT SANDER SHIELDS
Upper Belt Sander Shield Installation Instructions (continued)
10. Permanently attach danger signs No. KSC-046
and No. KSC-048 (if furnished). Make sure they
are readily visible to all personnel who work on or
around the machine.
6. Slide shield arm onto mounting arm and tighten
button-head cap screws.
7. Reattach end cap to bottom of shield arm.
8. Attach an end cap to each end of mounting arm us-
ing the furnished nylon push-in fasteners.
9. Use the T-handle knob to adjust the shield up or
down.
5. Using the mounting arm as a template, mark, drill,
and tap mounting holes and attach the mounting
arm to the machine using the furnished socket-
head cap screws.
Mounting Arm
Shield Arm
Mounting Arm

5
Rockford Systems, LLC—www.rockfordsystems.com
Call: 1-800-922-7533
SECTION 3—LOWER BELT SANDER SHIELDS
Lower Belt Sander Shield Installation Instructions
1. Remove all packing material from the shield and its
mounting assembly. Remove any protective cover-
ing from both sides of the shield, if any.
2. Attach the polycarbonate shield to the mounting
arm.
•Loosenandremovebutton-headcapscrews
•Alignholesonshieldtoendcap;insertand
tightenbutton-headcapscrews
3. Using the mounting arm as a template, mark holes
where the shield assembly is to be mounted.
•Drillandtapholes
•Mounttheshieldassemblytothemachine
4. Attach end cap to open end of mounting arm using
the furnished nylon push-in fasteners.
5. Permanently attach danger signs No. KSC-046 and
No. KSC-048 (if furnished). Make sure they are read-
ily visible to all personnel who work on or around
the machine.
Mounting Arm
Button-Head
Cap Screw
Shield
End Cap
Mounting Arm

SECTION 5—REPLACEMENT PARTS AND OTHER CONSIDERATIONS
Replacement Parts, Using the Shield, Maintenance, Warranty, Disclaimer, and Limitation of Liability
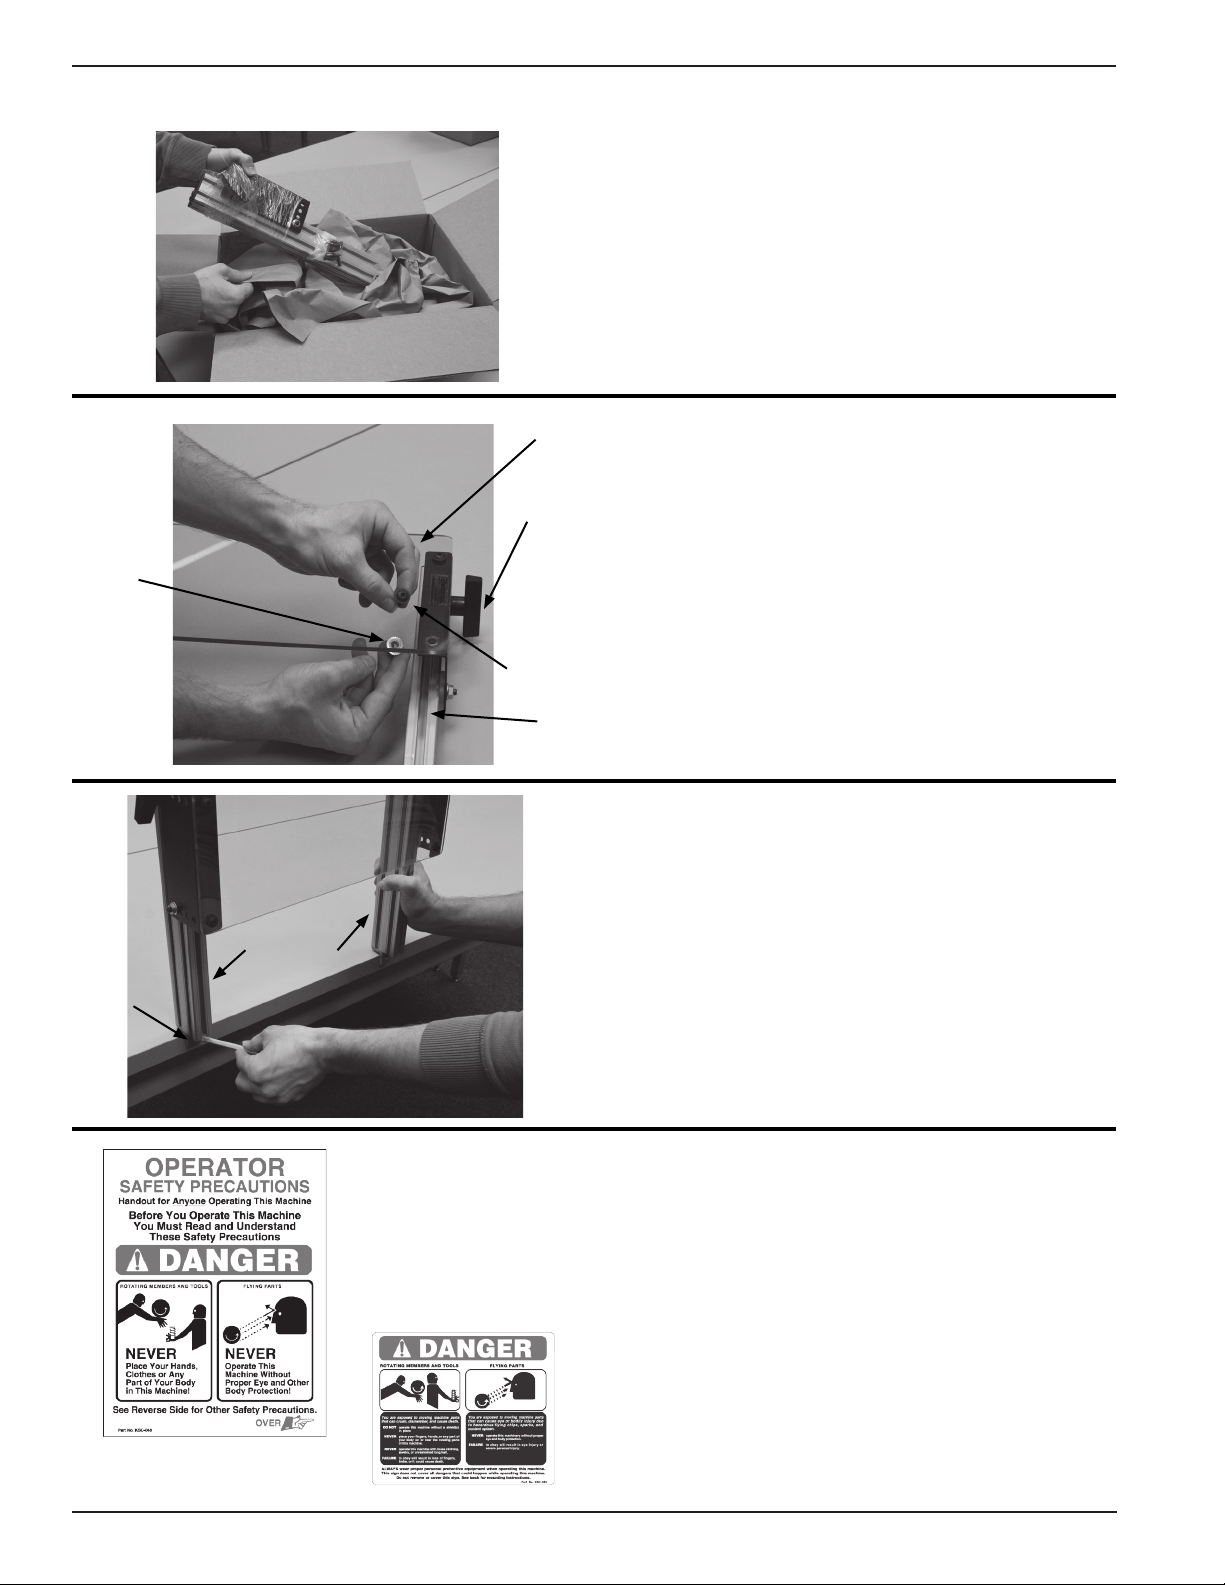
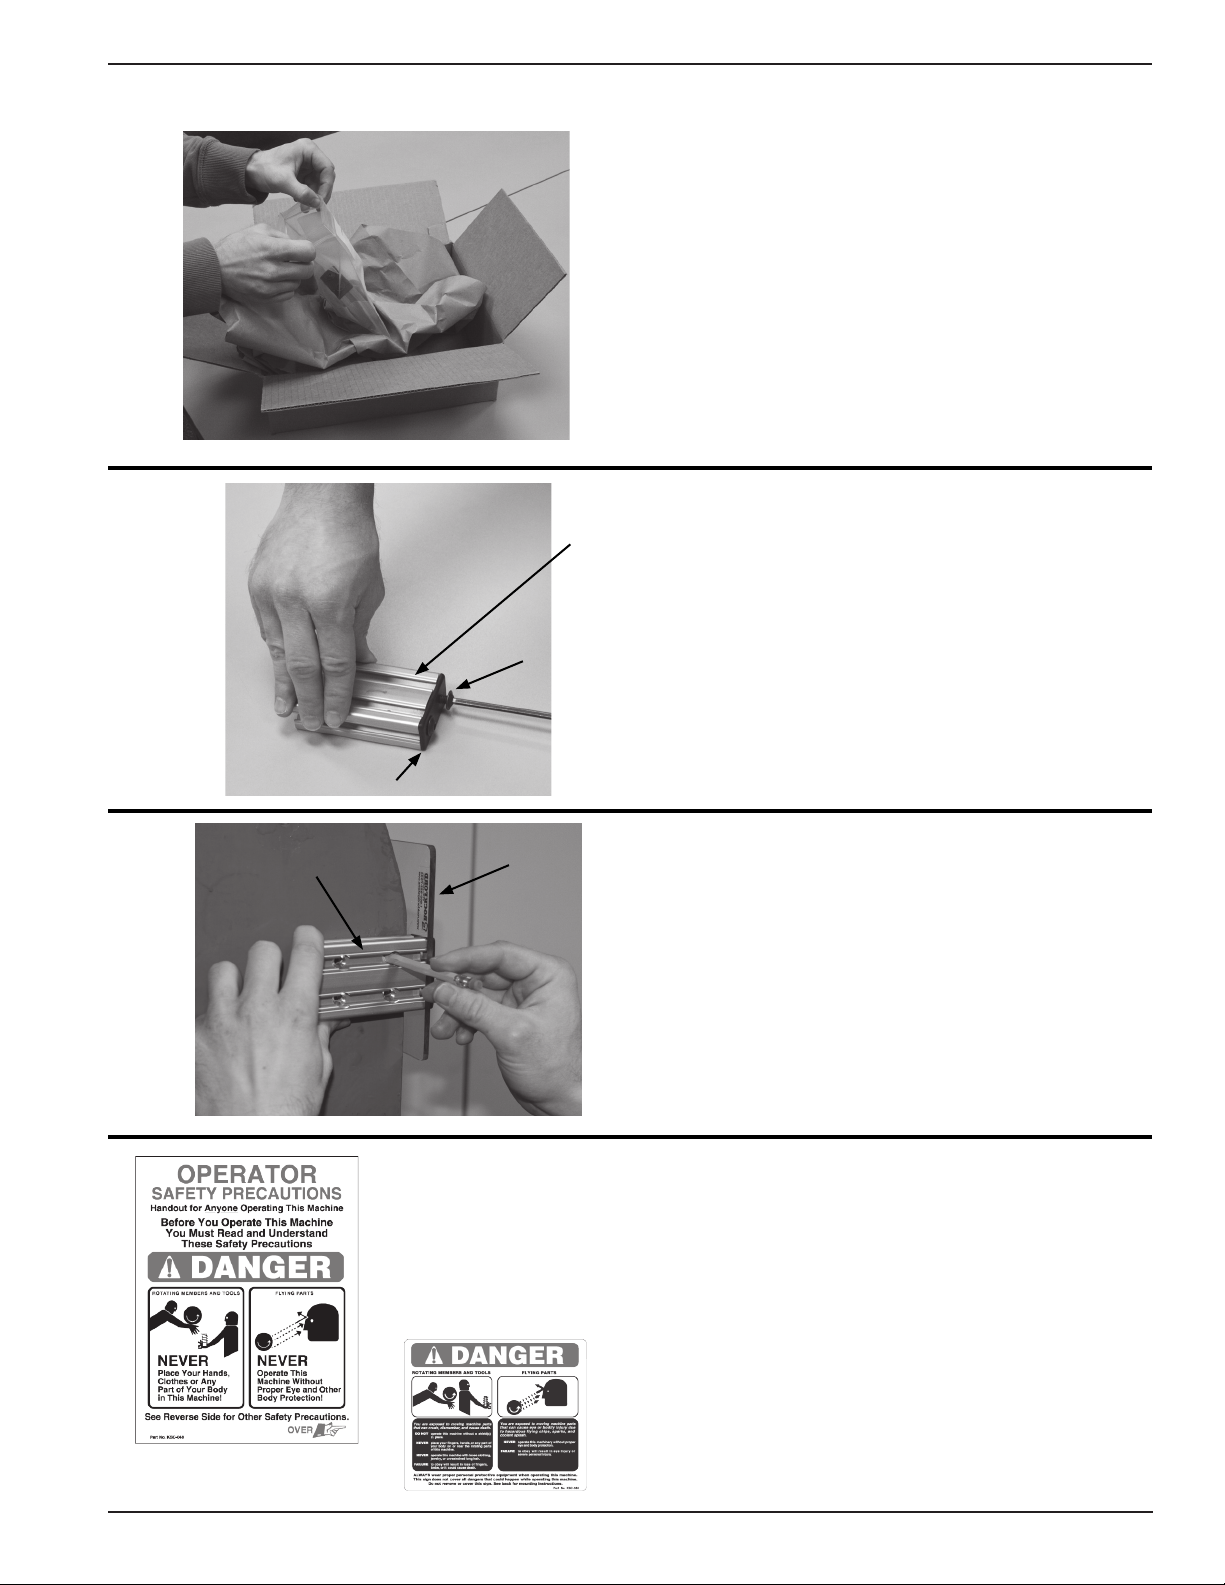
Using the Shield
Theshieldisintendedtodeectobjectssuchaschips(swarf)andsplashingcoolant.Forprotection,positiontheshield
betweenthepointofoperationandtheoperator.Makesureitwillnotbehitbynormalmovementsofthemachine
anditsparts(machinetable,chuck,rotatinghandles,etc.).Duringloadingorsetupofworkpieces,theshieldcanbe
movedoutoftheway.
Maintenance
Theseshieldsaremadeofpolycarbonatewhichwasselectedforitsstrengthanddurabilityunderimpact.Althoughit
willscratchifmistreated,itcanbekeptclearwithappropriatecare.
Remove coolant, chips, or debris periodically.
Using a clean sponge or soft clean cloth, wash with mild
soap or detergent and lukewarm water.
Rinse well with clean water.
Hairline scratches or minor abrasions can be removed or
minimized using a mild car polish such as paste wax. A
wax coating also makes cleaning easier.
Whenmanyshieldsareusedinaplant,spareshieldscanbekeptonhandandexchangedperiodically.Theshields
canberemovedfromthemachines,carefullywashed,andexchangedatalaterdate.
Do Notruborwipewithdirtyshoptowelsor
scrapewithablade.
Do Not use gasoline, benzine, acetone, or
carbontetrachlorideontheshield.
Do Notusecleanersorpowdersthatcontain
abrasivesor“dryrub”abrasivedusttoremove
coolant,lubricant,andchips.
WARRANTY, DISCLAIMER AND LIMITATION OF LIABILITY
WARRANTY
Rockford Systems, LLC warrants that this product will be free from defects in material and workmanship for a period
of 12 months from the date of shipment thereof. ROCKFORD SYSTEMS LLC’S OBLIGATION UNDER THIS WAR-
RANTY IS EXPRESSLY AND EXCLUSIVELY LIMITED to repairing or replacing such products which are returned to
it within the warranty period with shipping charges prepaid and which will be disclosed as defective upon examina-
tion by Rockford Systems, LLC. This warranty will not apply to any product which will have been subject to misuse,
negligence, accident, restriction and use not in accordance with Rockford Systems, LLC’s instructions or which will
have been altered or repaired by persons other than the authorized agent or employees of Rockford Systems, LLC.
Rockford Systems, LLC’s warranties as to any component part is expressly limited to that of the manufacturer of the
component part.
LIMITATION OF LIABILITY
Under no circumstances, including any claim of neg-
ligence, strict liability, or otherwise, shall Rockford
Systems,LLCbeliableforanyincidentalorconsequen-
tialdamages,oranylossordamageresultingfromade-
fectintheproductofRockfordSystems,LLC.
DISCLAIMER
The foregoingWarrantyis made in lieu of all other
warranties,expressedorimplied,andofallotherliabilities
and obligations on the part of RockfordSystems, LLC,
includinganyliabilityfornegligence,strictliability,oroth-
erwise,andanyimpliedwarrantyofmerchantabilityort-
nessforaparticularpurposeisexpresslydisclaimed.
KSL-282/RSI/0619
Part No. Description
KYL-229 9" Disc Sander Shield Only (6" x 13")
KYL-231 12" Disc Sander Shield Only (7" x 16")
KYL-233 16" Disc Sander Shield Only (9" x 20")
KYL-235 20" Disc Sander Shield Only (11" x 24")
KYL-237 24" Disc Sander Shield Only (13" x 28")
FKT-083 T-Handle Knob
Disc Sander Shield Replacement Parts
Part No. Description
KYL-227 Upper Belt Shield Only (L-Shaped)
KYL-225 Lower Belt Shield Only (6" x 8")
FKT-083 T-Handle Knob (For Upper Belt Shield)
Belt Sander Shield Replacement Parts
This manual suits for next models
6
Table of contents
Popular Sander manuals by other brands

Proxxon
Proxxon KT 70 CNC-ready manual

Makita
Makita BO4510 instruction manual

Skil
Skil 1210 Original instructions

Power Craft
Power Craft 54843 instruction manual

Rupes
Rupes SL42AES Translation of original operating instructions

Dynabrade
Dynabrade Mini-Dynorbital Silver Supreme 69500 Safety, operation and maintenance manual