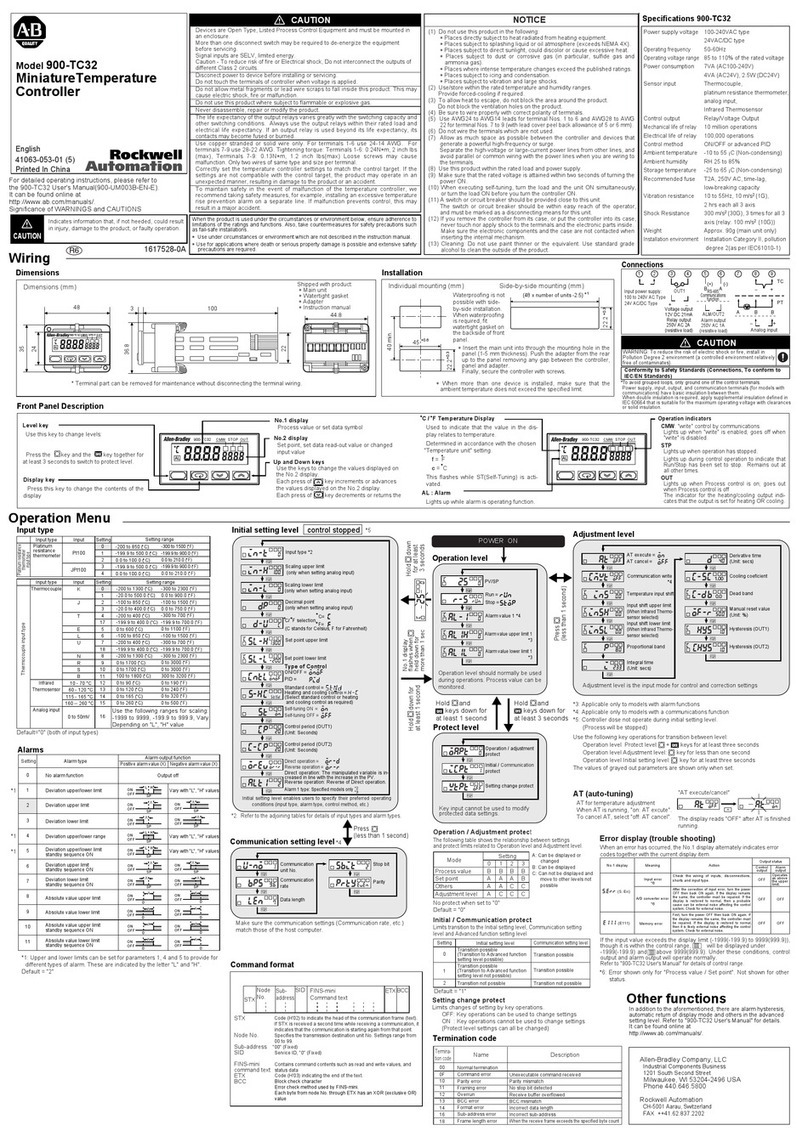
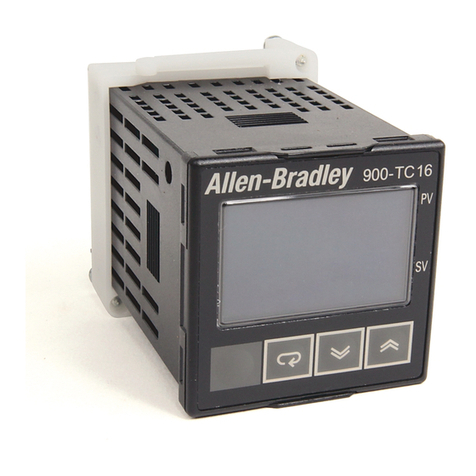
Rockwell Automation Allen-Bradley 900-TC User manual

900-TC Temperature Control Device Building Block
Connected Components Accelerator Toolkit
Quick Start

Important User Information
Read this document and the documents listed in the additional resources section about installation, configuration, and
operation of this equipment before you install, configure, operate, or maintain this product. Users are required to
familiarize themselves with installation and wiring instructions in addition to requirements of all applicable codes, laws,
and standards.
Activities including installation, adjustments, putting into service, use, assembly, disassembly, and maintenance are required
to be carried out by suitably trained personnel in accordance with applicable code of practice.
If this equipment is used in a manner not specified by the manufacturer, the protection provided by the equipment may be
impaired.
In no event will Rockwell Automation, Inc. be responsible or liable for indirect or consequential damages resulting from the
use or application of this equipment.
The examples and diagrams in this manual are included solely for illustrative purposes. Because of the many variables and
requirements associated with any particular installation, Rockwell Automation, Inc. cannot assume responsibility or
liability for actual use based on the examples and diagrams.
No patent liability is assumed by Rockwell Automation, Inc. with respect to use of information, circuits, equipment, or
software described in this manual.
Reproduction of the contents of this manual, in whole or in part, without written permission of Rockwell Automation,
Inc., is prohibited.
Throughout this manual, when necessary, we use notes to make you aware of safety considerations.
Labels may also be on or inside the equipment to provide specific precautions.
Allen-Bradley, Rockwell Software, Rockwell Automation, Micro800, Micro820, Micro830, Micro850, PanelView, Connected Components Workbench, PowerFlex, 900Builder, and Stratix 2000 are trademarks of Rockwell
Automation, Inc.
Trademarks not belonging to Rockwell Automation are property of their respective companies.
WARNING: Identifies information about practices or circumstances that can cause an explosion in a hazardous environment,
which may lead to personal injury or death, property damage, or economic loss.
ATTENTION: Identifies information about practices or circumstances that can lead to personal injury or death, property
damage, or economic loss. Attentions help you identify a hazard, avoid a hazard, and recognize the consequence.
IMPORTANT
Identifies information that is critical for successful application and understanding of the product.
SHOCK HAZARD: Labels may be on or inside the equipment, for example, a drive or motor, to alert people that dangerous
voltage may be present.
BURN HAZARD: Labels may be on or inside the equipment, for example, a drive or motor, to alert people that surfaces may
reach dangerous temperatures.
ARC FLASH HAZARD: Labels may be on or inside the equipment, for example, a motor control center, to alert people to
potential Arc Flash. Arc Flash will cause severe injury or death. Wear proper Personal Protective Equipment (PPE). Follow ALL
Regulatory requirements for safe work practices and for Personal Protective Equipment (PPE).

3Rockwell Automation Publication CC-QS027D-EN-P - August 2015 3
Where to Start
Follow this path to complete your Connected Components Accelerator Toolkit (CCAT) project.
Chapter 1 - 900-TC Temperature Controller Setup
Read the Getting Started CCAT with
System Design Assistant Quick Start,
publication CC-QS035.
Chapter 2 - Validate Your System

4Rockwell Automation Publication CC-QS027D-EN-P - August 2015
Where to Start
Notes:

Rockwell Automation Publication CC-QS027D-EN-P - August 2015 5
Table of Contents
Preface
About This Publication. . . . . . . . . . . . . . . . . . . . . . . . . . . . . . . . . . . . . . . . . . . . . 7
Terminology . . . . . . . . . . . . . . . . . . . . . . . . . . . . . . . . . . . . . . . . . . . . . . . . . . . . . . 8
Available Connected Components Accelerator Toolkits . . . . . . . . . . . . . . 9
Additional Resources . . . . . . . . . . . . . . . . . . . . . . . . . . . . . . . . . . . . . . . . . . . . . . . 9
Chapter 1
900-TC Temperature
Controller Setup
Before You Begin . . . . . . . . . . . . . . . . . . . . . . . . . . . . . . . . . . . . . . . . . . . . . . . . 11
What You Need . . . . . . . . . . . . . . . . . . . . . . . . . . . . . . . . . . . . . . . . . . . . . . . . . 11
Follow These Steps. . . . . . . . . . . . . . . . . . . . . . . . . . . . . . . . . . . . . . . . . . . . . . . 12
Review 900-TC16 Front Display Operation. . . . . . . . . . . . . . . . . . . . . . . . 13
Choose a Communication Port . . . . . . . . . . . . . . . . . . . . . . . . . . . . . . . . . . . 14
Set Communication Parameters . . . . . . . . . . . . . . . . . . . . . . . . . . . . . . . 14
Set Communication Writing . . . . . . . . . . . . . . . . . . . . . . . . . . . . . . . . . . 14
Change Communication Parameters for Modbus Protocol . . . . . . . . . . 15
Set the Parameters Used in This Building Block Application. . . . . . . . . 16
Set the 900-TC Temperature Controller for Manual Control. . . . . . . . 17
Change the Initial Setting/Communication
Protection Parameter . . . . . . . . . . . . . . . . . . . . . . . . . . . . . . . . . . . . . . . . . 17
Change the Auto/Manual Select Addition Parameter . . . . . . . . . . . 17
Set Parameters with 900Builder Lite Software and 900-CPOEM1
Cable (optional) . . . . . . . . . . . . . . . . . . . . . . . . . . . . . . . . . . . . . . . . . . . . . . . . . 18
Install the 900Builder Lite Software and the USB Driver . . . . . . . . 18
Set the 900-TC16 Controller Parameters By Using the Software
and Cable. . . . . . . . . . . . . . . . . . . . . . . . . . . . . . . . . . . . . . . . . . . . . . . . . . . . 19
Set the Parameters Used in This Building Block Application . . . . . 24
Upload and Save Your Settings . . . . . . . . . . . . . . . . . . . . . . . . . . . . . . . . . . . . 24
Download Your File to Another 900-TC Temperature Controller
(optional) . . . . . . . . . . . . . . . . . . . . . . . . . . . . . . . . . . . . . . . . . . . . . . . . . . . . . . . 26
Review Other Possible Parameters . . . . . . . . . . . . . . . . . . . . . . . . . . . . . . . . . 28

6Rockwell Automation Publication CC-QS027D-EN-P - August 2015
Table of Contents
Chapter 2
Validate Your System
Before You Begin. . . . . . . . . . . . . . . . . . . . . . . . . . . . . . . . . . . . . . . . . . . . . . . . . 31
What You Need. . . . . . . . . . . . . . . . . . . . . . . . . . . . . . . . . . . . . . . . . . . . . . . . . . 31
Follow These Steps . . . . . . . . . . . . . . . . . . . . . . . . . . . . . . . . . . . . . . . . . . . . . . . 32
Review the System Overview . . . . . . . . . . . . . . . . . . . . . . . . . . . . . . . . . . . . . . 33
Configure the Controller Communication Ports. . . . . . . . . . . . . . . . . . . . 34
Configure PanelView 800 Terminal Communication Settings . . . . . . . 38
Connect Your Devices . . . . . . . . . . . . . . . . . . . . . . . . . . . . . . . . . . . . . . . . . . . . 40
Download Your Program to the Controller. . . . . . . . . . . . . . . . . . . . . . . . . 40
Configure the IP Address for Your PanelView 800 Terminal. . . . . . . . . 42
Transfer Your HMI Application to the PanelView 800 Terminal. . . . . 43
Validate Your System . . . . . . . . . . . . . . . . . . . . . . . . . . . . . . . . . . . . . . . . . . . . . 45
Understand the Machine Functions Screen . . . . . . . . . . . . . . . . . . . . . 45
Understand the Status and Command Screen . . . . . . . . . . . . . . . . . . . 46
Verify Manual Operation of the 900-TC Temperature Controller
. 48
Appendix A
900-TC Temperature Controller
User-defined Function Blocks
RA_TC_MBUS_STS User-defined Function Block . . . . . . . . . . . . . . . . 51
RA_TC_MBUS_CMD UDFB . . . . . . . . . . . . . . . . . . . . . . . . . . . . . . . . . . . 54
Appendix B
Global Variables
. . . . . . . . . . . . . . . . . . . . . . . . . . . . . . . . . . . . . . . . . . . . . . . . . . . . . . . . . . . . . . . . . 57

Rockwell Automation Publication CC-QS027D-EN-P - August 2015 7
Preface
About This Publication
This quick start provides instructions for implementing a 900-TC temperature controller application on Modbus by using
the Connected Components Workbench™ software and a Micro800® programmable logic controller (PLC).
To help with the design and installation of your system, application files and other information are provided on the
Connected Components Accelerator Toolkit (CCAT). The CCAT provides bills of materials (BOM), CAD drawings for
panel layout and wiring, control programs, human machine interface (HMI) screens, and more. With these tools and the
built-in best-practices design, you are free to focus on the design of your machine control and not on design overhead tasks.
The CCAT is available on the Connected Components Accelerator Toolkit DVD, publication CC-QR002, or through
the Rockwell Automation® Software Download and Registration System (SDRS) site at
http://www.rockwellautomation.com/rockwellautomation/products-technologies/connected-components/tools/
accelerator-toolkit.page.
The beginning of each chapter contains the following information. Read these sections carefully before you begin work in
each chapter:
•Before You Begin - The chapters in this quick start do not have to be completed in the order in which they appear.
However, this section defines the minimum amount of preparation that is required before completing the current
chapter.
•What You Need - This section lists the tools that are required to complete the steps in the current chapter,
including, but not limited to, hardware and software.
•Follow These Steps - This section illustrates the steps in the current chapter and identifies the steps that are required
to complete the examples.

8Rockwell Automation Publication CC-QS027D-EN-P - August 2015
Preface
Terminology
Term (abbreviation) Definition
Application Sequence Programs User-modified programs that work together with the standard state machine logic to control what the machine does while
in the abort, clear, reset, run, and stop states.
Auto/manual operation
When the PanelView™ 800 terminal is in Auto mode, the controller logic controls the machine and monitors machine status.
When the PanelView 800 terminal switches to Manual mode, the terminal takes over control. Command buttons and
numeric entry fields are available only when the machine is in Manual mode.
Bill of Materials (BOM) A list of components that are needed for your system.
Building block (BB) Tools to accelerate and simplify the development of a Micro800 controller-based application. A typical building block
includes a starting Bill of Material (BOM), Computer-Aided Design (CAD) drawings, Micro800 controller programs,
PanelView 800 terminal applications, and a quick start document.
Computer-Aided Design (CAD) A computer-based system that is developed to facilitate design of mechanical parts.
Connected Components Accelerator Toolkit (CCAT) Software with application files and other information to speed the design and startup of component-based machines.
CCAT project A project that consists of these items:
• A ProposalWorks™-based bill of materials
• A set of CAD drawings (dimensions and schematics)
• A Connected Components Workbench project
• HMI screens
• A set of Quick Start documents
• A project document with information about the project components and links to reference materials
Connected Components Workbench™ software Software environment to configure or program Micro800 controllers, PanelView 800 terminals, PowerFlex® drives, and
other component-level products.
Connected Components Workbench project A project that consists of one or more of these items:
• Micro800 controller configuration
• Up to 256 Micro800 programs, each with program local variables
• Micro800 global variables
• PanelView 800 terminal application
• PowerFlex drive parameter lists
Global variables Project variables that any program can access, which includes all I/O and system variables.
State Machine control code Machine logic to coordinate overall machine operation that is based on states. The state machine broadcasts commands
and receives feedback information from each of the building blocks via user-modified application sequence programs.
Tags A PanelView 800 term for variables.
User-defined Function Blocks (UDFBs) Function block instructions that can be used like standard function block instructions within any Connected Components
Workbench programming language. Anyone who uses Connected Components Workbench software can write these
functions blocks. Many UDFBs are posted on the Rockwell Automation sample code website:
http://samplecode.rockwellautomation.com/idc/groups/public/documents/webassets/sc_home_page.hcst.
User-defined Object (UDO) A collection of PanelView 800 terminal screen objects that can be pasted into a new screen.

Rockwell Automation Publication CC-QS027D-EN-P - August 2015 9
Preface
Available Connected Components Accelerator Toolkits
For the most up-to-date listing of available Connected Components Accelerator Toolkits and related quick starts, refer to
these resources:
• Rockwell Automation Connected Components Accelerator Toolkit website at
http://www.rockwellautomation.com/rockwellautomation/products-technologies/connected-components/tools/
accelerator-toolkit.page
• Connected Components Accelerator Toolkit Building Block Project Descriptions Quick Reference,
publication CC-QR003
Additional Resources
These resources contain information about related products from Rockwell Automation.
You can view or download publications at http://www.rockwellautomation.com/literature. To order paper copies of
technical documentation, contact your local Allen-Bradley distributor or Rockwell Automation sales representative.
Resource Description
Micro800 Digital and Analog Plug-in Modules and Accessories
User Manual, publication 2080-UM004
Provides information to install, wire, and troubleshoot Micro800 plug-in modules and accessories.
Micro820™ 20-point Programmable Controllers User Manual,
publication 2080-UM005
Provides a reference guide for Micro820 controller systems. It also contains procedures to install, wire, and
troubleshoot your controller.
Micro830® and Micro850® Programmable Controllers User
Manual, publication 2080-UM002
Provides a reference guide for Micro830 and 850 controller systems. It also contains procedures to install, wire,
and troubleshoot your controller.
PanelView 800 HMI Terminals Installation Instructions,
publication 2711R-IN001
Provides information to install, wire, ground, and troubleshoot PanelView 800 HMI terminals.
PanelView 800 HMI Terminals User Manual, publication
2711R-UM001
Provides information to configure, operate, and troubleshoot the PanelView 800 HMI terminals.
Digital Temperature Controllers, Series B: Bulletin 900-TC8
and -TC16, publication 900-UM007D
Provides basic information to install, start up, and troubleshoot the 900-TC temperature control module.

10 Rockwell Automation Publication CC-QS027D-EN-P - August 2015
Preface
Notes:

Rockwell Automation Publication CC-QS027D-EN-P - August 2015 11
Chapter 1
900-TC Temperature Controller Setup
This chapter guides you through configuring your 900-TC temperature controller to properly communicate by using
Modbus RTU protocol and to function with a Micro800 controller programmed to use the sample building-block code
supplied in this Connected Components Accelerator Toolkit (CCAT). Micro850 controllers are referenced throughout
this Quick Start. Wherever a Micro850 controller is referenced, a Micro820 or Micro830 controller can be used. The
procedure is very similar for the 900-TC8 controller.
In addition, this chapter specifies the minimum number of parameters that need to be changed from the factory default
settings to establish communication with Micro800 controllers. For your machine application, there can be additional
temperature controller parameters that need to be adjusted. Consult the temperature controller documentation listed in
the Additional Resources on page 9 for information on all of the other temperature parameters. This building block helps
you develop an application to control a light, heater, relay, contactor (single or three-phase output), or fan by using an
analog output from the 900-TC temperature controller.
Before You Begin
• Review the Getting Started CCAT with System Design Assistant Quick Start, publication CC-QS035.
• Apply power to your 900-TC temperature controller.
What You Need
• Personal computer with 900Builder™ Lite software, version 3.0, loaded (optional)
• 900-CPOEM1 USB-serial conversion cable (optional)
• Allen-Bradley 900-TC16 temperature controller or equivalent
IMPORTANT
You can program the 900-TC temperature controller by using the controller front display or the 900Builder Lite
software. If you choose the latter, then you need a USB-serial conversion cable.

12 Rockwell Automation Publication CC-QS027D-EN-P - August 2015
Chapter 1 900-TC Temperature Controller Setup
Follow These Steps
Follow these steps to configure the parameters in the 900-TC temperature controller.
Start
Review 900-TC16 Front Display Operation
on page 13
Choose a Communication Port on page 14
Change Communication Parameters for Modbus
Protocol on page 15
Set the Parameters Used in This Building Block
Application on page 16
Set the 900-TC Temperature Controller for Manual
Control on page 17
Set Parameters with 900Builder Lite Software and
900-CPOEM1 Cable (optional) on page 18
Upload and Save Your Settings on page 24
Download Your File to Another 900-TC Temperature
Controller (optional) on page 26
Review Other Possible Parameters on page 28

Rockwell Automation Publication CC-QS027D-EN-P - August 2015 13
900-TC Temperature Controller Setup Chapter1
Review 900-TC16 Front Display Operation
Item Operation Indicators
ASUB1 Illuminates red when the auxiliary 1 output is ON.
SUB2 Illuminates red when the auxiliary 2 output is ON.
HA Illuminates red when a heater failure is detected due to open or short-circuit. The heater burnout alarm remains ON because the heater burnout latch is
set. To reset, cycle the power supply or set the heater burnout alarm value to 0.0 A.
OUT1 Illuminates amber when control output 1 is ON.
OUT2 Illuminates amber when control output 2 is ON.
STOP Illuminates amber when control of the 900-TC16 controller has stopped. During control, this indicator lights when an event or the run/stop function has
stopped. Otherwise, it is OFF.
CMW Illuminates amber when communication writing is enabled and is OFF when communication writing is disabled.
MANU Illuminates amber when the controller mode is Manual.
Illuminates amber when the settings change protection is ON ( and keys are disabled).
BTemperature
Unit
Temperature units are displayed when the display unit parameter is configured for temperature. When this parameter is set to °C, ‘c’ is displayed. When
this parameter is set to °F, ‘f’ is displayed.
CNo. 1 Display Displays the process value or parameter type (programmable as red, green, or amber).
DNo. 2 Display Displays the set point, manipulated variable, or configured value (setup) of the parameter.
EUp Key Each press of this key increases values displayed in the No. 2 display. Holding down this key continuously increases values.
FDown Key Each press of this key decreases values displayed on the No. 2 display. Holding down this key continuously decreases values.
GMode Key Press this key to select parameters within each functional group.
HFunctionGroup
Selection Key
Press this key to select the set-up function group. The set-up function group is selected in this order:
• Operation function group
• Adjustment function group
• Initial Setting function group
• Communications Setting function group
G + H Mode +
FunctionGroup
Keys
This key combination sets the 900-TC16 controller to the Protect function group.
AB
C
D
EFGH

14 Rockwell Automation Publication CC-QS027D-EN-P - August 2015
Chapter 1 900-TC Temperature Controller Setup
Choose a Communication Port
The 900-TC temperature controller has two communication ports that operate independently:
• Unit No. 1 – a fixed 4-pin port
•Unit No. 00…99 – an RS-485 port on 900-TC16 controllers and an RS-232C port on 900-TC8 controllers
The communication parameters of the 900-TC16 controller must be set before any communication via Modbus protocol
can be established. You can set the parameters with the front panel of the temperature controller or by using the optional
900Builder Lite software, version 3.0, and the 900-CPOEM1 cable.
Set Communication Parameters
You must configure the temperature controller for Modbus communication so you can communicate between the
PanelView 800 terminal, Micro800 controller, and 900-TC temperature controller.
This section provides instructions on how to manually set the communication parameters through the front panel of the
temperature controller or by using the optional 900Builder Lite software, version 3.0, and the 900-CPOEM1 cable.
Set Communication Writing
Follow these steps to set the communication writing parameter to ON (OFF is default).
1. Press the key for less than one second to access the Adjustment function group display (B).
2. Press the key once to access the Autotuning (AT) parameter (C).
3. Press the key once to access the Communications Writing enable/disable parameter (D).
4. Press the or key to set the communication writing parameter to ON (E).
5. Press and hold the key for longer than one second to enable the change and to return to the Operation function
group display (A).
When communication writing is enabled (ON), the indicator on the front panel illuminates.
TIP
An RS-485 communication card must be installed in the controller to use RS-485 communication.
TIP
The easiest way to set parameters in an application that includes multiple 900-TC temperature controllers is to use 900Builder
Lite software, version 3.0, and the 900-CPOEM1 cable.
ABCDE

Rockwell Automation Publication CC-QS027D-EN-P - August 2015 15
900-TC Temperature Controller Setup Chapter1
Change Communication Parameters for Modbus Protocol
The 900-TC temperature controller’s communication parameters are set at the communication setting level.
Follow these steps to set these parameters manually.
1. Press and hold the key for at least three seconds to move from the Operation function group display to the Initial
Setting function group display.
2. Press the key for less than one second to move from the Initial Setting function group display to the
Communications Setting function group display.
3. Press the key to select the appropriate parameters.
4. Use the and keys to change the parameter set values.
For Modbus protocol as used in this application, change to the following settings.
5. Press the key for longer than one second to enable your changed communication parameters.
Parameters
Characters
Displayed
Range (bold text is default setting)
Communication protocol CWF/Mod
Communication unit number 0…99 (1)
Communication (baud) rate 1.2/2.4/4.8/9.6/19.2/38.4/57.6 kps
Communication data length 7/8 bit
Communication stop bit 1/2
Communication parity None/Even/Odd
Send data wait time 0…99 ms (20)
Parameters Setting
Communication protocol
Communication unit number 1(1)
(1) This parameter sets a unique unit number for each temperature controller, letting the host identify the
temperature controller during communication. One (1) is the default unit number. When two or more
temperature controllers are used, do not use the same unit number.
Communication (baud) rate 19.2 kps
Communication parity

16 Rockwell Automation Publication CC-QS027D-EN-P - August 2015
Chapter 1 900-TC Temperature Controller Setup
Set the Parameters Used in This Building Block Application
Follow these steps to manually change parameters for this application.
1. Press and hold the key for at least three seconds to move from the Operation function group display to the Initial
Setting function group display.
2. Change the by using the and keys to set the input type to 7 or to match your input type.
3. Press the key to move to the setting.
4. Press to change from °C to °F.
5. Press the key to move to the setting.
6. Press the key to change from to .
7. Press the key to move to the setting.
8. Press the key to change from to operation.
9. Press the key to move to the setting.
10. Press the key to change the setting to or to the value you require for your application.
11. Press the key to move to the setting.
12. Press the key to change the setting to or to the value you require for your application.
13. Press and hold the key for one second to return to the Operation function group display.
14. Press the key to move to the setting.
15. Press the key to change the level to or the value you require for your application.
16. Press the key to move to the setting.
17. Press the key to change the level to or the value you require for your application.
Parameter Description Default Settings Settings for This Application
Set point 080
Input type 57 (J-type thermocouple)
Temperature unit °C (Celsius) °F (Fahrenheit)
PID–On/off (On/off) (PID)
Direct–reverse operation (reverse) (direct)
Alarm 1 type 28 (absolute value, upper limit)
Alarm 2 type 28 (absolute value, upper limit)
Alarm value 1 075
Alarm value 2 085
IMPORTANT
Perform step 8 only if you are using a fan.
TIP
Direct ( ) is typically used for fans and reverse ( ) is typically used for heaters.

Rockwell Automation Publication CC-QS027D-EN-P - August 2015 17
900-TC Temperature Controller Setup Chapter1
Set the 900-TC Temperature Controller for Manual Control
You can set the 900-TC temperature controller for manual control by using the front panel of the controller or by using the
optional 900Builder Lite software.
The next section details how to change the communication parameters, which must be done before manual control can be
set.
Change the Initial Setting/Communication Protection Parameter
To access the Advanced Setting function group, you must first change the Initial Setting/Communication Protection
parameter by following these steps.
1. Press and hold the and keys simultaneously for at least three seconds to move from the Operation function
group display (A) to the Protect function group, where Operation/Adjustment Protection is displayed (B).
2. Press the key once to access the Initial Setting/Communication Protection display (C).
3. Press the key to change the value from 1 (default) to 0.
4. Press the and keys simultaneously for at least one second (D) to return to the Operation function group
display (A).
Change the Auto/Manual Select Addition Parameter
Follow these steps to configure the controller for manual control.
1. Press and hold the key for at least three seconds to move from the Operation function group display (A) to the
Initial Setting function group display (B).
2. Press the key until you access the Move to Advanced Setting function group display (C).
3. Press the key to display the password -169 (D).
4. Press the key once to access the Advanced Setting function group display (E).
5. Press the key until the Auto/Manual Select Addition display is visible (F).
6. Press the key once to change the parameter from OFF (default) to ON.
ABCD

18 Rockwell Automation Publication CC-QS027D-EN-P - August 2015
Chapter 1 900-TC Temperature Controller Setup
7. Press the key for at least one second to move from the Advanced Setting function group display (G) to the Initial
Setting function display (H).
8. Press the key for at least one second to move from the Initial Setting function group display (H) to the Operation
function group display (A).
Set Parameters with 900Builder Lite Software and 900-CPOEM1 Cable (optional)
Use the 900Builder Lite software, version 3.0, to configure the temperature controller parameters.
Install the 900Builder Lite Software and the USB Driver
Follow these steps to install the 900Builder Lite software on your personal computer.
1. Double-click the Set-up icon or double-click the ‘run setup.exe’ file.
Full instructions for set-up options are available during the set-up process.
2. As part of the installation, choose a location for where to place the 900Builder Lite software icon.
To install the USB driver on your personal computer, follow the directions in the Bulletin 900 Direct USB to Temperature/
Process Controller Configuration Cable Installation Instructions, publication 900-IN026.
ABCD
EFGH
IMPORTANT
The 900Builder Lite software, version 3.0, supports the 900-TC8 Series B, 900-TC16 Series B, and 900-TC32 Series B temperature
controllers.
TIP
Administrator privilege is required to perform 900Builder Lite software installation.
TIP
After the installation, you can also choose Start > Programs > Rockwell Automation > 900Builder Lite to view the
900Builder Lite software icon.

Rockwell Automation Publication CC-QS027D-EN-P - August 2015 19
900-TC Temperature Controller Setup Chapter1
Set the 900-TC16 Controller Parameters By Using the Software and Cable
Follow these steps to set communication parameters for the 900-TC16 controller when using the 900-CPOEM1 cable.
1. Connect the 900-CP0EM1 cable to your personal computer’s USB port and the 900-TC16 controller’s
communication port for support software.
2. Access and launch the 900Builder Lite software, version 3.0, as detailed in Install the 900Builder Lite Software and
the USB Driver on page 18.
3. In the 900Builder Lite main dialog box, click ComSet to open the Communication Settings dialog box.
USB Connector
(Type A Plug)
Serial
Connector
900-TC Temperature Controller
(bottom view)
900-CP0EM1 cable
900-TC
Communication Port

20 Rockwell Automation Publication CC-QS027D-EN-P - August 2015
Chapter 1 900-TC Temperature Controller Setup
4. From the Serial Port pull-down menu, choose your personal computer’s serial
port (A).
The serial port of your computer can differ from the example at right.
5. From each pull-down menu, choose the Baud Rate, Data Length, StopBit
Length, Parity and UnitNo to match the numbers shown at right (B).
6. Click OK (C) to accept the changes and close the Communication Setting
dialog box.
7. In the Main dialog box, click Connect.
The ComSet button becomes unavailable and the Connect is covered by a
red X.
The model number of your temperature controller appears at the bottom of the screen.
Communication Setting Dialog Box
A
C
B
Table of contents
Other Rockwell Automation Temperature Controllers manuals
Popular Temperature Controllers manuals by other brands

Lead
Lead LD-BK10 Series User instructions

Vostermans Ventilation
Vostermans Ventilation Mf Net ETD-CN Installation and operating instructions

HomeMatic
HomeMatic HMIP-STHD Mounting instruction and operating manual

Eurotherm
Eurotherm 3116 PID user guide

Airmar
Airmar T80 owner's guide

MULTISPAN
MULTISPAN UTC-214 manual