STEP 1: PREPARE PRODUCT
1. Remove all packaging
2. Remove blue bulkhead plugs
3. Remove items from packet on or under lid
4. Rinse tank with potable water
STEP 2: INSTALL FAUCET
1. Tighten large bulkhead nuts by turning
counter-clockwise
2. Evenly apply pipe dope to larger faucet
threads
3. Carefully turn faucet clockwise into bulkhead
(Caution: do not cross thread)
4. Ensure bottom faucet is positioned horizontally
(see illustration)
5. Securely tighten faucet using wrench
STEP 3: PREPARE SITE
1. Ensure installation location is level, free from
sharp objects, and can hold 636 lbs for one tank
and 1272 lbs for two tanks
2. We recommend placing a Rockwell leach barrier
under the tank
3. Allow for 2 inches of clearance on all sides
4. Store out of direct sunlight to maximize tank life
STEP 4: FILL TANK
1. Use key to fully close faucet
2. Remove and clean lid
3. Fill with water using sanitary grade drinking hose
and hose holder (see illustration)*
4. While filling, closely monitor the tank for leaks,
overflow, and spills
5. Tighten bulkhead nut and faucet if you notice
leaking
6. Reinstall lid
7. Apply rotation schedule (see illustration)
8. Store key in key holder (see illustration)
9. Rotate water according to rotation schedule
*When stacking, fill bottom tank to 4” below top of
tank (measure from top of tank, not the pegs)
Note: Gallon markers are approximate measurements only
STEP 5: DRAINING
1. Connect hose to faucet
2. Use hose to drain
3. Open faucet using key
4. Drain water
5. Tilt tank to remove excess water
CONTACT ROCKWELL WATER WITH ANY WARRANTY CLAIMS DO NOT RETURN TO STORE.
THREE YEAR LIMITED WARRANTY: WE PROVIDE A LIMITED THREE-YEAR WARRANTY ON
ALL DEFECTS IN MATERIAL AND WORKMANSHIP OF OUR OASIS SERIES TANKS FROM THE
DATE THE PRODUCT WAS ORDERED. THIS LIMITED WARRANTY EXTENDS TO THE
ORIGINAL PURCHASE ONLY AND IS NON-TRANSFERABLE. OUR RESPONSIBILITY FOR
DEFECTIVE PRODUCTS IS LIMITED TO REPAIR, REPLACEMENT OR REFUND AS SET FORTH
IN THIS WARRANTY STATEMENT. THIS LIMITED WARRANTY DOES NOT APPLY TO, AND
ROCKWELL INNOVATIONS IS NOT LIABLE FOR, THE FOLLOWING:
• TANK DAMAGE CAUSED BY THE SUN OR FREEZING.
• IMPROPER INSTALLATION, FILLING, OR DRAINING (SEE INSTRUCTIONS).
• FAILURE TO COMPLY WITH THE WARNINGS HEREIN.
• MODIFICATIONS TO THE TANK.
• DAMAGE CAUSED BY OTHERS OR OUTSIDE FORCES.
• IMPROPER TANK STACKING.
• FLOODING CAUSED BY ANYTHING ON THIS LIST.
• WATER QUALITY.
FOR FULL WARRANTY INFORMATION, VISIT:
ROCKWELLWATER.COM/PAGES/TERMS-AND-CONDITIONS
READ ALL INSTRUCTIONS
1. ONLY STACK TANKS ACCORDING TO INSTRUCTIONS
2. DO NOT CLIMB ON TANKS
3. DO NOT PLACE OTHER ITEMS ON TANKS
4. ONLY FILL WITH POTABLE DRINKING WATER
WARNING
INSTALLATION
WARRANTY
Note: Your faucets may already be installed,
If so, proceed to step 3
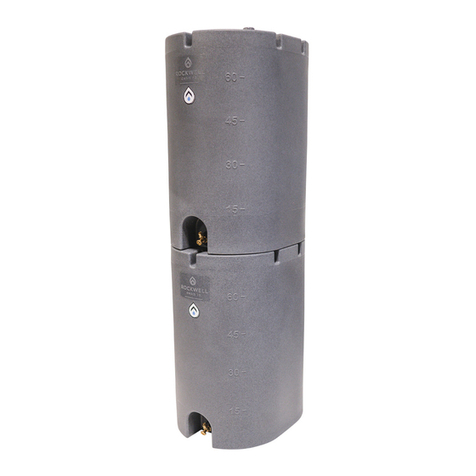
The Oasis 170 can be stacked
two tanks high. Do not fill a tank
on top of an empty tank. Drain top
tank first. Do not fill bottom tank
past fill line indicated on sticker.
Do not stack higher than two
tanks or stack any other tank
on top.
TANK STACKING
Fill Line


