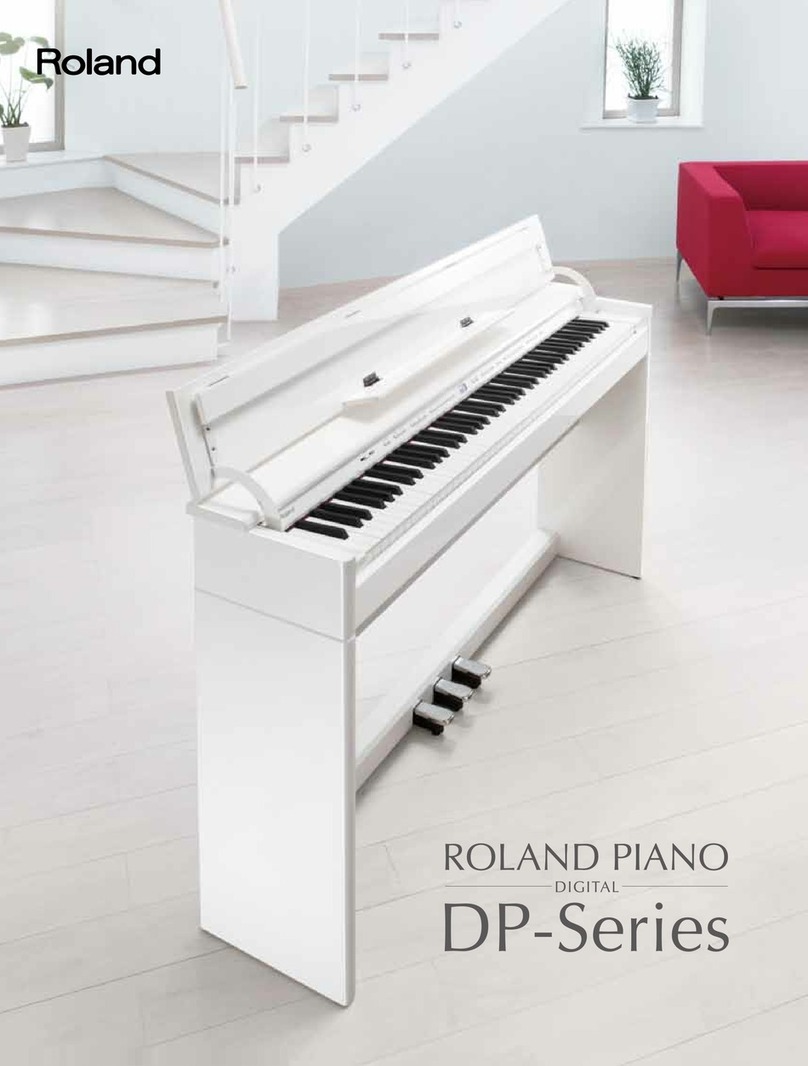
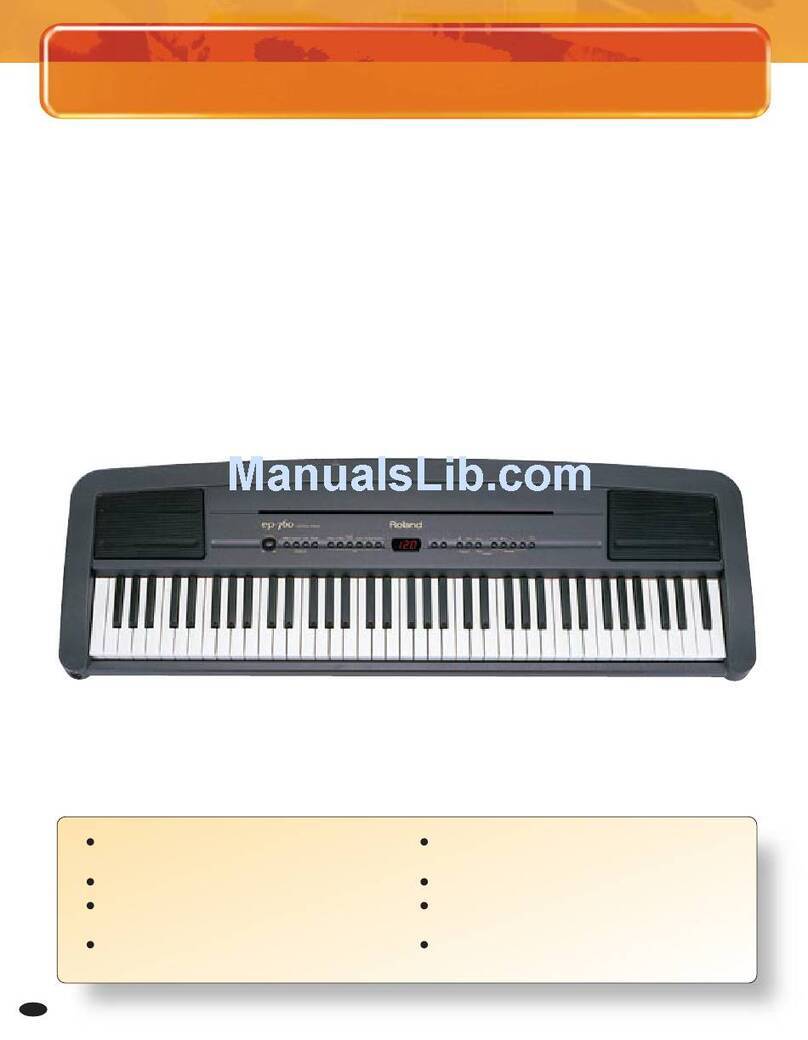
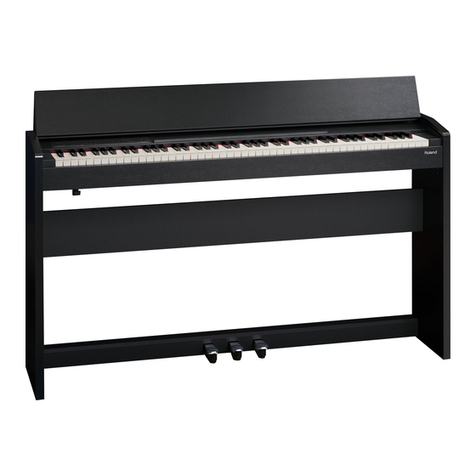
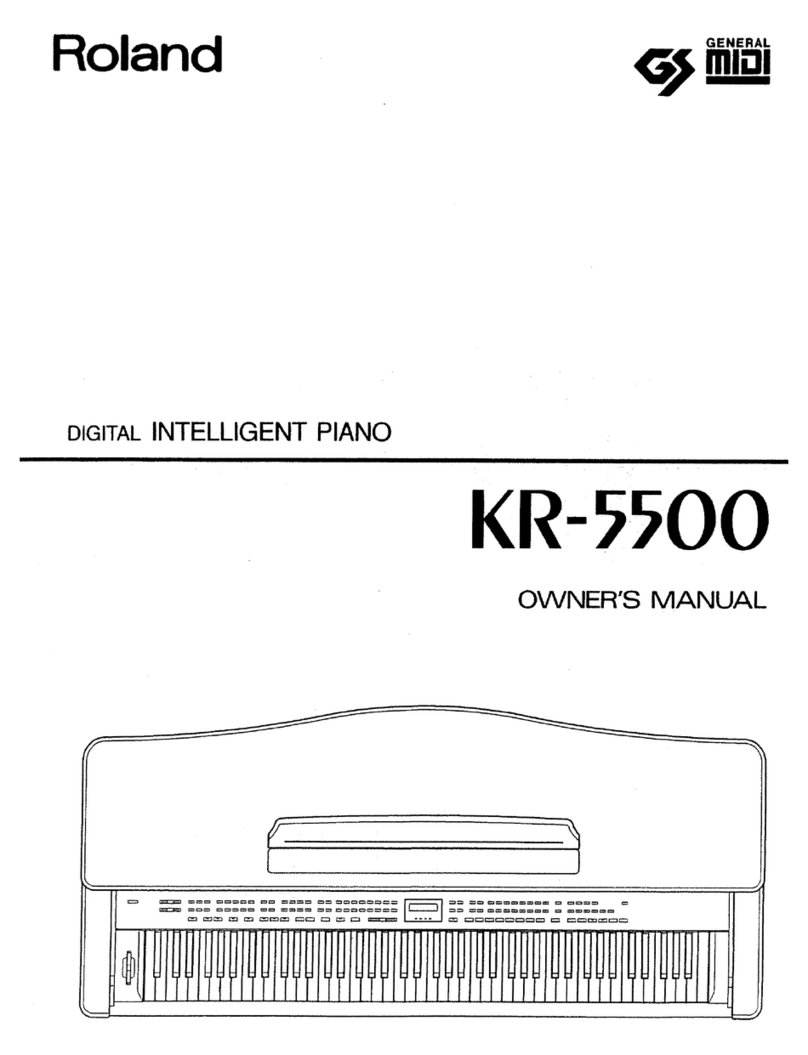
Roland FP-1 User manual

Roland’
Digital
piano
FP-1
OWNER'S
MANUAL
Thank
you,
and
congratulations
on
your
choice
of
the
Roland
FP-1
Digital
Piano.
The
FP-1
is
a
light-weight
digital
piano
that
features
an
88-note,
hammer-action
keyboard.
To
take
full
advantage
of
the
FP-1’s
great
sounds
and
performance
features,
please
take
the
time
to
read
this
entire
manual.
FEATURES
¢
Six
Outstanding
Sounds
The
FP-1
offers
six
high
quality
sounds
(including
a
robust
Grand
Piano)
that
fit
in
perfectly
with
a
wide
range
of
musical
genres.
¢
Onboard
Effects
The
FP-1
offers
two
kinds
of
effects,
Chorus
and
Reverb.
¢
Dual
Function
The
Dual
function
allows
you
to
layer
(combine)
any
two
of
the
FP-1’s
five
main
sounds.
¢
Hammer-Action
Keyboard
The
FP-1
is
equipped
with
a
hammer-action
mechanism
that
recreates
the
natural
feel
of
an
acoustic
piano—with
smooth,
delicate
travel
for
playing
pianissimo,
and
firm
response
for
fortissimo.
¢
Four
Types
of
Keyboard
Response
Four
keyboard
response
settings
let
you
adjust
the
keyboard
action
to
suit
your
particular
taste
or
needs.
¢
Compact
and
Light-Weight
Since
the
FP-1
is
compact
and
light-weight,
you
can
easily
carry
it
to
live
performances
or
other
occasions.
°
MIDI
Connectors
Since
the
FP-1
is
equipped
with
MIDI
connectors,
you
can
exchange
digital
MIDI
information
with
other
electronic
musical
instruments
or
computers.
*
Provides
Speaker
Output
Jacks
By
connecting
the
Speaker
Output
jacks
to
the
speakers
in
the
optional
FPS-1
keyboard
stand,
you
can
enjoy
the
rich
sound
of
the
FP-1
at
whatever
volume
you
need
with
family
or
friends.

The
lightning
flash
with
arrowhead
symbol,
within
an
equilateral
triangle,
is
intended
to
alert
the
user
to
the
presence
of
uninsulated
“dangerous
voltage”
within
the
product's
enclosure
that
may
be
of
sufficient
magnitude
to
constitute
a
risk
of
electric
shock
to
persons.
CAUTION
RISK
OF
ELECTRIC
SHOCK
ATTENTION
nisaue
be
choc
eLecTRIQUE
NE
PAS
GUVRIA
A
CAUTION:
TO
REDUCE
THE
RISK
OF
ELECTRIC
SHOCK,
BO
NOT
REMOVE
COVER
(OR
BACK).
NO
USER-SERVICEABLE
PARTS
INSIDE.
REFER
SERVICING
TO
QUALIFIED
SERVICE
PERSONNEL.
The
exclamation
point
within
an
equilateral
triangle
is
intended
to
alert
the
user
fo
the
presence
of
important
operating
and
maintenance
(servicing)
instructions
in
the
literature
accompanying
the
product.
INSTRUCTIONS
PERTAINING
TO
A
RISK
OF
FIRE,
ELECTRIC
SHOCK,
OR
INJURY
TO
PERSONS.
IMPORTANT
SAFETY
INSTRUCTIONS
SAVE
THESE
INSTRUCTIONS
WARNING
-
When
using
electric
products,
basic
precautions
should
always
be
followed,
including
the
following:
1.
Read
ail
the
instructions
before
using
the
product.
8.
The
power-supply
cord
of
the
product
should
be
unplugged
2.
Do
not
use
this
product
near
water
—
for
example,
near
a
from
the
outlet
when
left
unused
for
a
long
period
of
time.
bathtub,
washbowl,
kitchen
sink,
in
a
wet
basement.
or
near
9.
Care
should
be
taken
so
that
objects
do
not
fall
and
liquids
a
swimming
pool,
or
the
like.
are
not
spilled
into
the
enclosure
through
openings.
3.
This
product
should
be
used
only
with
a
cart
or
stand
that
is
10.The
product
should
be
serviced
by
qualified
service
recommended
by
the
manufacturer.
personnel
when:
4.
This
product,
either
alone
or
in
combination
with
an
amplifier
A.
The
power-supply
cord
or
the
plug
has
been
damaged;
or
and
headphones
or
speakers,
may
be
capable
of
producing
B.
Objects
have
fallen,
or
liquid
has
been
spilled
onto
the
sound
levels
that
could
cause
permanent
hearing
loss.
Do
not
operate
for
a
long
period
of
time
at
a
high
volume
level
or
at
a
level
that
is
uncomfortable.
If
you
experience
any
hearing
loss
or
ringing
in
the
ears,
you
should
consult
an
audiologist.
product;
or
C.
The
product
has
been
exposed
to
rain;
or
D.
The
product
does
not
appear
to
operate
normally
or
exhibits
a
marked
change
in
performance;
or
E.
The
product
has
been
dropped,
or
the
enclosure
5.
The
product
should
be
located
so
that
its
location
or
position
does
not
interfere
with
its
proper
ventilation.
damaged.
11.Do
not
attempt
to
service
the
product
beyond
that
described
6.
The
product
should
be
located
away
from
heat
sources
such
in
the
user-maintenance
instructions.
All
other
servicing
as
radiators,
heat
registers,
or
other
products
that
produce
should
be
referred
to
qualified
service
personnel.
heat.
7.
The
product
should
be
connected
to
a
power
supply
only
of
the
type
described
in
the
operating
instructions
or
as
marked
on
the
product.
For
the
USA
This
product
may
be
equipped
with
a
polarized
line
plug
(one
blade
wider
than
the
other)
.
This
is
a
safety
feature.
If
you
are
unable
to
insert
the
plug
into
the
outlet,
contact
an
electrician
to
replace
your
obsolete
outlet.
Do
not
defeat
the
safety
purpose
of
the
plug.
For
Canada
For
Polarized
Line
Plug
CAUTION:
To
PREVENT
ELECTRIC
SHOCK,
MATCH
WIDE
BLADE
OF
PLUG
TO
WIDE
SLOT,
FULLY
INSERT.
ATENTION:
pour
Eviter
LES
CHOCS
ELECTRIQUES,
INTRODUIRE
LA
LAME
LA
PLUS
LARGE
DE
LA
FICHE
DANS
LA
BORNE
CORRESPONDANTE
DE
LA
PRISE
ET
POUSSER
JUSQU'
AU
FOND.
For
the
U.K.
IMPORTANT:
THE
WIRES
IN
THIS
MAINS
LEAD
ARE
COLOURED
IN
ACCORDANCE
WITH
THE
FOLLOWING
CODE.
BLUE:
NEUTRAL
BROWN:
LIVE
As
the
colours
of
the
wires
in
the
mains
fead
of
this
apparatus
may
not
correspond
with
the
coloured
markings
identifying
the
terminals
in
your
plug,
proceed
as
follows:
The
wire
which
is
coloured
BLUE
must
be
connected
to
the
termina!
which
is
marked
with
the
letter
N
or
coloured
BLACK.
The
wire
which
is
coloured
BROWN
must
be
connected
to
the
terminal
which
is
marked
with
the
letter
L
or
coloured
RED.
Copyright
©
1994
ROLAND
CORPORATION
All
rights
reserved.
No
part
of
this
publication
may
be
reproduced
in
any
form
without
the
written
permission
of
ROLAND
CORPORATION.

@eeeoeeseoeoseonge
ees
es
Contents
eeaoseeovoeeveoeee
eee
0
(1)
Setting
Up
and
Switching
On
the
FP-1
...........
4
(2)
Playing
the
Demonstration
Song$............::::csesee
5
(3)
Playing
the
FP-1..........
Lea
Rexeaa
et
at
act
laces
nacre
a
(4)
Other
Useful
Functions.........cccccccccceeeeeseseeees
Pree
o
(5)
Using
the
MIDI
Functions..............:006
ee
eedcneae
lO
(6)
Reference
Section
............ccssseseeesscccceeesssseececeseeeeens
12
MIDI
implementation
Chart
Specifications
Troubleshooting
Service
Information
eececencecoce
Important
Notes
eeeecccccon
In
addition
to
the
items
listed
under
Safety
Precautions
on
a
previous
page,
please
read
and
adhere
to
the
following:
Power
Supply
¢
Before
connecting
this
unit
to
other
devices,
turn
off
the
power
to
all
units;
this
will
help
prevent
damage
or
mal-
function.
*
Do
not
use
this
unit
on
the
same
power
circuit
with
any
device
that
will
generate
line
noise—an
electric
motor
or
variable
lighting
system,
for
example.
Placement
*
Using
the
unit
near
power
amplifiers
(or
other
equipment
containing
large
power
transformers)
may
induce
hum.
¢
This
device
may
interfere
with
radio
and
television
reception.
Do
not
use
this
device
in
the
vicinity
of
such
receivers.
*
Make
sure
you
always
have
the
instrument
placed
so
it
is
level
and
sure
to
remain
stable.
Otherwise,
if
played
while
tilted,
you
risk
causing
damage
to
the
keyboard
as
a
result
of
the
unnatural
degree
of
force
that
might
be
applied
to
certain
parts
of
it.
Maintenance
¢
For
everyday
cleaning
wipe
the
unit
with
a
soft,
dry
cloth
or
one
that
has
been
slightly
dampened
with
water.
To
remove
stubborn
dirt,
use
a
mild,
non-abrasive
detergent.
Afterwards,
be
sure
to
wipe
the
unit
thoroughly
with
a
soft,
dry
cloth.
*
Never
use
benzine,
thinner,
alcohol
or
solvents
of
any
kind,
to
avoid
the
possibility
of
discoloration
and/or
defor-
mation.
Additional
Precautions
¢
Protect
the
unit
from
strong
impact.
¢
A
small
amount
of
heat
will
radiate
from
the
unit
during
normal
operation.
¢
Before
using
the
unit
in
a
foreign
country,
consult
with
qualified
service
personnel.

Power
Switch
Before
connecting
the
FP-1
with
other
devices,
make
sure
that
it
is
switched
off.
Damper
Pedal
Jack
Connect
the
supplied
DP-6
pedal
to
this
jack.
Depressing
the
pedal
while
you
play
will
then
create
a
resonance
(sustaining)
effect
similar
to
the
effect
of
a
damper
pedal
on
a
real
piano.
This
eftect
is
especially
useful
for
sounds
such
as
strings,
as
the
sound
will
be
sustained
for
as
long
as
the
pedal
is
depressed.
Soft
Pedal
Jack
(Soft,
Sostenuto,
Expression)
To
obtain
the
Soft
or
Sostenuto
effect,
connect
the
DP-6
to
this
jack.
To
obtain
an
Expression
(vol-
ume)
effect,
connect
an
Expression
pedal
(such
as
the
optional
EV-5)
to
the
jack.
For
a
detailed
explanation
of these
functions,
please
see
page
8.
MIDI
Connectors
Use
these
sockets
to
connect
the
FP-1
to
other
MIDI
devices
(using
special
MIDI
cables).
With
MIDI,
a
wide
range
of
performance
possibilities
becomes
available.
For
detailed
information,
please
refer
to
“Local
On/Off”
on
page
9,
and
“Using
the
MIDI
Functions”
on
page
10.
(2)
(3)
4)
O°
2
@ @
Of
DAMPER
SOFT
~~
PEDAL
“—
&
—mior—
7
Pedal
Switch
(DP-6)
Pedal
Switch
(DP-6)
Line
Input
Jacks
By
connecting
external
audio
devices
to
the
FP-
1's
[LINE
IN]
jacks
(with
audio
cables),
you
can
hear
that
external
device
through
the
FP-1’s
PHONES
jack,
[SPEAKER
OUT],
and/or
[LINE
OUT]
jacks.
*
The
sound
from
this
external
device
will
be
mixed
with
the
sounds
produced
by
the
FP-1
itself.
Line
Output
Jacks
By
connecting
these
jacks
(using
audio
cables)
to
external
audio
devices
(such
as
an
amp/mixer
or
a
tape
recorder),
you
can
hear
the
FP-1
at
a
much
higher
volume
(for
live
performances),
or
record
what
you
play
directly
onto
tape.
Connect
these
jacks
to
the
speakers
in
the
optional
FPS-1
keyboard
stand.
Please
refer
to
the
FPS-1
Owner's
Manual
for
details.
*
Connect
only
speakers
which
have
an
impedance
of
4
Q
or
greater
and
which
have
an
input
rating
of
10
W
or
higher.
Never
connect
any
other
kind
of
speakers,
or
other
devices.
*
If
you
ever
need
to
move
the
instrument,
be
very
careful
(keep
it
in
a
level
position)
so
it
does
not
topple
and
cause
injury.
7
Speaker
Output
Jacks
When
you
have
finished
setting
up,
switch
on
the
FP-1.
*
This
unit
is
equipped
with
a
protection
circuit.
A
brief
interval
(a
few
seconds)
after
power
up
is
required
before
the
unit
will
operate
normally.
5
6
fF
WW
OL
QO
O-~n
UMONO)
A
L(MONO)
~
STEREO”
SPEAKER
IMPEDANCE
OFF
LINE
OUT
™
SPEAKER
OUT
—
POWER
Expression
Pedal
(EV-5)

How
to
play
the
demonstration
songs...
1.
Hold
down
the
[FUNCTION]
button
while
you
then
press
the
[REVERB]
button.
The
first
demo
song
will
start
to
play.
REVERB
wee
2.
Select
the
song
you
wish
to
hear
using
one
of
the
five
Tone
buttons:
[PIANO
1],
[PIANO
2], [E.
PIANO],
[STRINGS]
and
[SYN
STRINGS].
One
song
is
assigned
to
each
button.
SYN.
PIANO
1
PIANO2
E.PIANO
STRINGS
STRINGS
PO
an
|
i
ee
CO
3.
Adjust
the
volume
with
the
[VOLUME]
slider.
4.
To
stop
playback
of
the
selected
demo
song,
press
the
[FUNCTION]
button
again.
*
Some
demo
songs
consist
of
two
parts.
When
the
FP-1
starts
to
play
such
a
demo
song,
the
[CHORUS]
or
[REVERB]
indi-
cator
will
flash
along
with
the
performance
of
each
part.
*
When
one
song
finishes,
the
next
one
will
start
playing
automatically.
Demonstration
Songs
Tone
Button
Composer
Song
Title
[PIANO
1]
Mitsuru
Sakaue
Double
Vision
Copyright
©
1994,
Roland
[PIANO
2]
John
Maul
Springtime
Sundays
Copyright
©
1994,
Roland
UK
[E.PIANO]
John
Maul
Mood/Ending
Copyright
©
1994,
Roland
UK
[STRINGS]
Chopin
Valse
in
D-flat
Major
op
64-1
“Petit
Chien”
ISYN
STRINGS]
Debussy
Arabesque
No.
1
E-dur

Volume
Slider
This
slider
adjusts
the
volume
of
the
head-
phones
or
any
connected
external
speakers.
Moving
the
slider
to
the
right
raises
the
volume.
Tone
Buttons
You
can
select
any
of
the
six
onboard
sounds
using
the
corresponding
Tone
button(s):
PIANO
1
oer
A
brilliant,
robust
grand
piano.
PIANO
2
ues
Grand
piano
ideal
for
playing
clas-
sical
pieces.
E.PIANO
uu...
eee
Tender
and
sweet
Rhodes
piano
sound.
STRINGS
.....
eee
Beautiful
ensemble
string
sounds.
SYN
STRINGS
........
Synthesizer
strings
with
a
slow
attack.
HONKY
TONK
......
Bright
and
jolly
piano
with
slightly
out-of-tune
sound.
(To
select
this
sound,
press
[PIANO
1]
and
{PIANO
2]
simultaneously.)
By
pressing
two
Tone
buttons
simultaneously,
you
can
mix
(layer)
two
sounds
(Dual
Function).
Pressing
{PIANO
1]
and
[PIANO
2],
however,
will
select
the
HONKY
TONK
piano
sound.
VOLUME
MIN
@
«© 2©
«©
@
«
«©
«
@
MAX
Pressing
a
Tone
button
selects
the
corresponding
sound
on
the
FP-1
and
also
transmits
the
appropriate
“Program
Change
number”
through
the
[MIDI
OUT]
socket
on
the
rear
of
the
FP-1:
PIANO
1
1
PIANO
2
2
E.PIANO
5
STRINGS
7
SYN
STRINGS
8
PIANO
1
&
PIANO
2 4
PIANO
1
&
E.PIANO
9
PIANO
1
&
STRINGS
10
PIANO
1
&
SYN
STRINGS
11
PIANO
2
&
E.PIANO
12
PIANO
2
&
STRINGS
13
PIANO
2
&
SYN
STRINGS
14
E.PIANO
&
STRINGS
15
E.PIANO
&
SYN
STRINGS
16
STRINGS
&
SYN
STRINGS
17
*
Program
Change
numbers
(or
messages)
can
also
be
transmitted
using
another
method
(see
page
10
for
details).
SYN
PIANO
1
PIANO2
E.PIANO
STRINGS
STRINGS
Ss
Ee
et
eed

When
the
FP-1
receives
the
following
Program
Change
numbers
through
its
[MIDI
IN],
the
corre-
sponding
Tone
will
be
selected:
16
17
*
If
the
FP-1
receives
a
Program
Change
number
higher
PIANO
1
PIANO
2
PIANO
1
HONKY
TONK
E.PIANO
E.PIANO
STRINGS
SYN
STRINGS
PIANO
1
&
E.PIANO
PIANO
1
&
STRINGS
PIANO
1
&
SYN
STRINGS
PIANO
2
&
E.PIANO
PIANO
2
&
STRINGS
PIANO
2
&
SYN
STRINGS
E.PIANO
&
STRINGS
E.PIANO
&
SYN
STRINGS
STRINGS
&
SYN
STRINGS
than
No.
17,
the
Tone
will
not
change.
CHORUS
REVERB
Gidlieggiol!
Pc
Ce)
Chorus
Button
This
button
adds
the
Chorus
effect
to
sounds
that
you
play.
Chorus
is
an
effect
that
makes
one
instrument
sound
like
several
playing
together.
*
Press
[CHORUS]
to
turn
on
the
Chorus
effect
(the
button
indicator
will
light).
Press
the
button
again
to
turn
Chorus
off.
¢
The
depth
of
the
Chorus
effect
can
be
set
to
one
of
five
levels.
The
current
depth
is
indicated
(by
the
lighted
Tone
button)
when
the
[CHORUS]
button
is
pressed.
*
To
change
the
Chorus
depth,
hold
down
the
[CHO-
RUS]
button,
and
press
one
of
the
Tone
buttons.
*
On/Off
of
the
Chorus
effect
can
be
set
for
each
Tone.
SYN.
PIANOT
PIANO2
E.PIANO
STRINGS
STRINGS
CHORUS
REVERB
Mme
Cee)
a
Shallower
<--->
Deeper
While
holding
down
Reverb
Button
This
button
adds
Reverb
(reverberation)
to
the
sounds
you
play.
Reverb
is
a
complex
echo-like
effect
that
makes
it
sound
like
you're
play-
ing
in
a
large
concert
hall.
e
Press
[REVERB]
to
turn
on
the
Reverb
effect
(the
button
indicator
will
light).
Press
the
button
again
to
turn
Reverb
off.
¢
The
depth
of
the
Reverb
effect
can
be
set
to
one
of
five
levels.
The
current
depth
(1-5)
is
indicated
(by
the
light-
ed
Tone
button)
when
the
[REVERB]
button
is
pressed.
*
To
change
the
Reverb
depth,
hold
down
the
[REVERB]
button,
and
press
one
of
the
Tone
buttons.
SYN
PIANO
1
PIAND2
E.PIANO
STRINGS
STRINGS
CHORUS
REVERB
Mmm
Oe
Ce
Shallower
<--->
Deeper
While
holding
down
Function
Button
This
button
is
used
to
activate
many
of
the
FP-1's
functions.
For
a
detailed
explanation
of
the
[FUNCTION]
button,
please
refer
to
pages
8-11.
Tune
Knob
The
FP-1
can
easily
be
tuned
to
match
the
pitch
of
another
musical
instrument.
This
is
useful
for
playing
in
ensembles
or
for
playing
along
with
recordings.
Rotating
the
[TUNE]
knob
counter-
clockwise
(to
#)
increases
the
pitch,
while
rotating
it
clockwise
(to
b)
lowers
the
pitch.
*
When
the
[TUNE]
knob
is
set
to
the
center
position,
the
middle
A
(la)
key
will
have
a
pitch
of
440.0
Hz.
*
By
turning
the
knob
all
the
way
in
one
direction
from
cen-
fer,
the
pitch
will
change
by
approximately
50
cents
(1/2
semitone).
Phones
Jack
,
Connect
headphones
to
the
Phones
jack
locat-
ed
on
the
far
left
side
of
the
keyboard.
Using
headphones
is
a
great
way
to
practice
without
disturb-
ing
those
around
you.
The
[VOLUME]
slider
can
be
used
to
control
the
headphone
volume.

When
you
press
[FUNCTION]
(the
indicator
[1]
will
light),
all
the
panel
buttons
will
work
to
set
various
aspects
of
the
instrument's
opera-
tion.
To
return
to
the
normal
playing
mode,
press
[FUNCTION]
again
(the
indicator
will
go
out).
In
other
words,
the
functions
described
on
pages
8
and
9
can
only
be
set
while
the
[FUNCTION]
indicator
is
lighted.
The
Transposition
function
allows
you
to
transpose
the
pitch
of
the
entire
keyboard
without
having
to
change
your
fingering.
For
exam-
ple,
you
can
play
music
in
any
key
you
like
using
the
fingering
of
the
C
major
scale!
(2)
Transposing
the
Keyboard
Press
[#]
or
[b]
as
many
times
as
necessary
to
reach
the
desired
transposition.
[#]
Each
time
you
press
this
button,
the
pitch
will
rise
by
a
semitone
(up
to
five
semitones).
[b]
Each
time
you
press
this
button,
the
pitch
will
fall
by
a
semitone
(up
to
six
semitones).
Pressing
[#]
and
[b]
simultaneously
will
return
the
FP-
1
to
C
major
key.
For
example,
if
you
wish
to
play
a
piece
written
in
E
major
using
the
fingering
of
C
major,
press
[#]
four
times
(because
there
are
four
semitones
between
C
and
E
on
the
keyboard).
[#]
button
once
twice
3times
4
times
Pitch
of
C
key
C#
D
D#
E
*
You
can
also
set
the
transposition
using
a
different
method.
(See
page
11.)
Setting
the
Pedal’s
Function
The
FP-1
allows
you
to
select
one
of
the
fol-
lowing
three
effects
that
you
want
to
apply
using
a
pedal
connected
to
the
[SOFT
PEDAL]
jack
on
the
rear
of
the
FP-1.
(See
page
4.)
Soft
*
Connect
the
supplied
DP-6
pedal
to
the
[SOFT
PEDAL]
jack.
The
[SOSTENUTO]
and
[EXPRES-
SION]
indicators
should
both
be
dark.
¢
Play
the
keyboard
while
the
pedal
is
depressed,
and
the
sound
you
hear
will
be
softer
than
usual.
*
The
Soft
function
is
automatically
selected
every
time
the
FP-1
is
turned
on.
Sostenuto
¢
Connect
the
supplied
DP-6
pedal
to
the
[SOFT
PEDAL]
jack.
¢
Press
[SOSTENUTO]
((E.
PLANOJ)
and
confirm
that
the
indicator
has
lighted.
¢
The
Sostenuto
function
is
now
in
effect—notes
being
sounded
the
moment
the
pedal
is
depressed
will
be
sustained.
Since
notes
played
later
will
not
have
the
effect
applied
to
them,
you
can
selectively
apply
the
effect
to
specific
notes.
Expression
¢
Connect
an
optional
Roland
EV-5
Expression
pedal
to
the
[SOFT
PEDAL]
jack.
*
Press
[EXPRESSION]
([STRINGS])
and
confirm
that
the
indicator
has
lighted.
¢
Now
you
can
change
the
volume
of
the
sounds
you
play
by
depressing
the
pedal.
*
Note
that
this
function
only
affects
sustained
sounds
such
as
STRINGS
or
SYN
STRINGS.
So,
for
example,
if
you
are
using
PLANO
1
and
STRINGS
layered
together,
the
pedal
will
only
alter
the
volume
of
the
STRINGS
sound.
*
To
return
to
the
SOFT
function,
simply
press
whichever
button
may
be
lighted,
and
confirm
that
both
the
[SOSTENUTO]
and
[EXPRESSION]
indicators
are
out.
SYN
PIANO
1
PIANO2
E.PIANO
STRINGS
STRINGS
Pe)
Ee
ae)
b
#
(2)
SOSTENUTO
EXPRESSION
LOCAL
|
PEDAL
(3)

Local
On/Off
Press
[LOCAL]
(ISYN
STRINGS)])
to
turn
the
Local
function
On
and
Off.
(When
the
indica-
tor
is
lit,
the
Local
setting
is
On.)
Local
On
This
is
the
normal
(default)
condition
in
which
the
FP-
1's
keyboard
is
connected
to
it’s
internal
sound
gener-
ator.
You
can
hear
the
sound.
Local
Off
When
set
this
way,
the
keyboard
and
the
internal
sound
generator
are
not
connected.
Therefore,
the
FP-
1
will
not
generate
any
sound
when
its
keyboard
is
played.
The
Local
Off
setting
can
be
used
when
you
wish
to
play
only
an
external
MIDI
sound
module
connected
to
the
FP-1,
or
when
you
want
to
hear
only
what
is
played
by
a
sequencer
connected
to
the
FP-1.
You
can
hear
no
sound.
FUNCTION
SS)
Ee
es
LIGHT
HEAVY
|
nee
KEY
TOUCH
Ss Wf
CHORUS
REVERB
DEMO
By
connecting
the
FP-1
to
a
sequencer
as
shown
below,
you
can
record
and
play
back
your
keyboard
performances.
Sequencer
If,
however,
the
THRU
function
on
the
sequencer
is
set
to
ON
(signals
received
through
MIDI
IN
are
sent
through
MIDI
OUT
without
any
modification),
you
need
to
set
the
FP-1
to
Local
Off.
If
set
to
Local
On,
the
notes
you
play
will
be
mirrored
by
those
being
returned
from
the
sequencer,
which
can
cause
notes
to
not
sound
like
they
should,
or
not
be
played.
Each
note
played
is
sounded
twice.
Sequencer
i
Thru
lunction
an
eyboard
Action
The
FP-1
allows
you
to
select
one
of
four
dif-
ferent
settings
which
determine
the
way
the
keyboard
will
“feel.”
Light
_~
Medium
<
Q
c
3
@
Full
Heavy
Strength
of
Touch
¢
Press
[LIGHT]
(the
indica-
tor
will
light)
and
loud
fee
sounds
are
produced
even
ae
when
you
play
softly.
*
Press
[HEAVY]
and
loud
sounds
are
produced
only
when
you
play
hard.
Co
CET
Lion
[=]
COT
Hea
Ce)
Co)
Full
¢
By
pressing
[LIGHT]
and
LIGHT
=
HEAVY
[HEAVY]
simultaneously,
ae
the
heaviest
key
action
(sy
(FULL)
is
selected.
That
is,
you
must
play
very
hard
indeed
to
produce
loud
sounds
*
To
return
to
the
standard
(MEDIUM)
setting,
press
any
buttons
that
are
lighted,
and
confirm
that
both
the
[LIGHT]
and
[HEAVY]
indicators
are
dark.
(This
is
the
setting
that
is
automatically
selected
every
time
the
FP-1
is
turned
on.)
9

Press
any
of
the
Tone
buttons
while
holding
kl
[FUNCTION]
down,
and
the
[FUNCTION]
indicator
will
begin
flashing.
This
means
that
the
Tone
buttons
and
the
keyboard
can
now
be
used
to
set
the
functions
related
to
MIDI.
To
return
to
the
normal
playing
mode,
simply
press
[FUNCTION]
again
(so
the
indicator
goes
out).
In
other
words,
the
MIDI
functions
described
on
pages
10
and
11
can
only
be
set
when
the
[FUNCTION]
indicator
is
flashing.
Setting
the
MIDI
Channels
MIDI
provides
sixteen
channels
(1-16).
By
set-
ting
the
MIDI
channel
of
the
FP-1
to
match
the
channel
number
of
an
external
MIDI
device,
you
can
play
and
change
sounds
on
that
external
device
by
operating
the
FP-1.
To
set
the
transmit
and
receive
chan-
nels
of
the
FP-1
to
the
same
number...
Press
[PIANO
1]
and
[PIANO
2]
simultaneously
(make
sure
that
both
button
indicators
light).
Then
press
the
keyboard
key
that
corresponds
to
the
desired
MIDI
channel.
PIANO
1
PIANO
2
oo
To
set
the
transmit
and
receive
chan-
nels
of
the
FP-1
to
different
numbers...
Setting
the
transmit
channel:
Press
[PLANO
1]
so
the
indicator
lights.
Then
press
the
keyboard
key
that
corresponds
to
the
desired
MIDI
channel.
|
dt
|
Setting
the
receive
channel:
Press
[PIANO
2]
so
the
indicator
lights.
Then
press
the
keyboard
key
that
corresponds
to
the
desired
MIDI
channel.
PIANO
1
PIANO
2
>
PIANO
1
PIANO
2
10
°
When
the
transmit
and
receive
channels
are
the
same,
and
the
FP-1
receives
Program
Change
mes-
sages
from
an
external
device,
the
sound
played
on
the
FP-1’s
own
keyboard
will
be
changed
to
the
sound
that
corresponds
to
the
received
Program
Change.
When
the
transmit
and
receive
channel
are
different,
and
the
FP-1
receives
Program
Change
messages
from
an
external
MIDI
device,
these
messages
will
cause
play
of
the
sound
on
the
FP-1
that
corre-
sponds
to
the
received
Program
Change.
The
FP-1's
keyboard,
however,
will
play
the
sound
that
has
been
selected
from
the
FP-1’s
panel
(it
is
not
affected
by
the
Program
Changes
that
arrive).
The
corre-
spondence
between
the
FP-1’s
sounds
and
Program
Change
numbers
is
shown
on
page
7.
Transmitting
Program
Change
and
Bank
Select
MSB/LSB
The
FP-1
can
transmit
Program
Change,
Bank
Select
MSB
and
Bank
Select
LSB
messages.
These
MIDI
messages
can
be
used
for
changing
sounds
on
a
MIDI
device
connected
to
the
FP-1.
By
combining
a
Program
Change
(1-128),
Bank
Select
MSB
(0-127),
and
Bank
Select
LSB
(0-127),
a
much
larger
number
of
sounds
can
be
selected
from.
*
The
Bank
Select
MSB,
Bank
Select
LSB
and
Program
Change
always
need
to
be
transmitted
as
a
complete
set,
in
the
proper
order.
(The
FP-1's
default
data
set
consists
of
Bank
Select
MSB/LSB:
0,
and
Program
Change:
1.)
*
It
ts
not
necessary
to
transmit
the
Bank
Select
MSB
and
LSB
to
MIDI
devices
that
do
not
respond
to
then.
*
If
you
happen
to
press
a
wrong
keyboard
key
when
trans-
mitting
a
Program
Change,
Bank
Select
MSB
and
LSB,
press
the
CANCEL
key
(C)
before
pressing
the
ENTER
key
(E).
SYN
PIANO
1
PIANO2
E.PIANO
STRINGS
STRINGS
‘Tiel
&)
el
5
Haat
Be
|
—Y—
(2)
(3)

Transmitting
Program
Changes
Press
[SYN
STRINGS]
so
the
indicator
lights.
To
transmit
a
Program
Change
in
number
format,
press
the
keyboard
keys
(0-9)
that
correspond
to
the
Program
number
(1-128)
you
wish
to
transmit,
then
press
the
ENTER
key
(E).
To
transmit
a
Program
Change
in
Group/Bank/Number
format,
press
the
keys
that
cor-
respond
to
the
Group
(A
or
B),
Bank
(1-8)
and
Number
(1-8),
then
press
the
ENTER
key
(E).
SYN
STRINGS
Transmitting
Bank
Select
MSB
Press
[E.
PIANO]
so
the
indicator
lights.
Press
the
keyboard
keys
(0-9)
that
correspond
to
the
Bank
Select
MSB
number
(0-127)
that
you
wish
to
transmit,
then
press
the
ENTER
key
(E).
=
ah
(1
FUNCTION
)
Ee
be
CHORUS
REVERB
Transmitting
Bank
Select
LSB
Press
[STRINGS]
so
the
indicator
lights.
Press
the
keyboard
keys
(0-9)
that
correspond
to
the
Bank
Select
LSB
number
(0-127)
that
you
wish
to
transmit,
then
press
the
ENTER
key
(E).
STRINGS
Transposing
the
Keyboard
Transposition
can
be
set
using
the
buttons
on
the
panel
(page
8),
or
when
the
FP-1
is
in
the
MIDI
func-
tion
mode
(while
the
[FUNCTION]
indicator
is
flash-
ing).
For
example,
to
play
a
piece
in
E
major
using
the
fin-
gering
of
C
major,
press
the
highest
E
on
the
key-
board
(while
the
[FUNCTION]
indicator
is
flashing).
Now
when
you
play
a
C
major
scale,
you'll
actually
hear
the
pitches
of
the
E
major
scale.
Press
the
keynote
of
the
key
you
wish
to
transpose
to
OMNI
On/Off
When
set
to
OMNI
On,
the
FP-1
will
always
respond
to
incoming
MIDI
messages,
regardless
of
which
MIDI
channel
they
are
received
on.
Thus,
OMNI
On
can
be
selected
when
you
want
to
play
the
FP-1
without
hav-
ing
to
worry
about
MIDI
channels.
To
select
OMNI
On,
press
the
highest
note
on
the
key-
board
while
the
[FUNCTION]
indicator
is
flashing.
*
Setting
a
specific
MIDI
channel
will
automatically
turn
the
OMNI
function
Off.
The
highest
key
11

DIGITAL
PIANO
Model
FP-1
Basic
Default
Channel
Changed
MIDI
Implementation
Chart
1 1
1-16
Default
Mode
Messages
Altered
Mode
3
x
FOI
IOI
I
i
ti
tok
th
tck
Mode
3
OMNI
ON/OFF
Note
Number
:
True
Voice
Velocity
Note
OFF
After
Touch
15-113
RRR
ARERE
REE
0-127
15-113
Date
:
Aug.
22,
1994
Version
:
1.00
Pitch
Bend
Control
66
Change
67
100,
101
Prog
Change
:
True
#
System
Exclusive
SongPos
SongSel
Tune
System
Common
System
Clock
Real
Time
Commands
Aux
Local
ON/OFF
Message
All
Notes
OFF
Active
Sense
Reset
Mode
1
:
OMNI
ON,
POLY
Reset
All
Controllers}
x
OO00000x
00
0-127
ROI
IR
In
1)
xO-”™
x
Mode
2
:
OMNI
ON,
MONO
Mode
3:
OMNI
OFF,
POLY
Mode
4:
OMNI
OFF,
MONO
Bank
Select
Data
entry
Volume
Expression
Hold
14
Sostenuto
Soft
Reverbe
Chorus
RPN
LSB,
MSB
fe)
O
O
(123
—
127)
oO
xX
QO:
Yes
x
:No

Keyboard
Maximum
Polyphony
Tones
Specifications
88
Keys
(hammer-action
mechanism)
28
Voices
Piano
1,
Piano
2,
E.Piano,
Strings,
Syn
Strings
and
Duals
(cf.
Piano
1
+
Piano
2
=
Honky-Tonk)
Effects
Chorus
(5
types),
Reverb
(5
types)
Control
Volume
Slider,
Tune
Knob
Key
Touch
Control
Light,
Medium,
Heavy
or
Full
Key
Transpose
-6
to
5
(semitone
steps)
Rated
Power
Output
10Wx2
(BTL
4Q
load)
Connectors
Speaker
Output
Jacks
(L,
R),
Line
Out
Jacks
(mono
/
stereo)
Line
In
Jacks
(mono
/
stereo),
Headphone
Jack
(stereo)
Pedal
Jacks
(damper,
soft
/
sostenuto
/
expression)
MID!
Connectors
(IN,
OUT)
Power
Supply
AC117V,
AC230V,
or
AC240
V
Power
Consumption
45
W
(AC117
V),
28
W
(AC230
V),
28
W
(AC240
V)
Dimensions
Piano
(FP-1):
1336
(W)
x
350
(D)
x
135
(H)
mm
52-5/8
(W)
x
13-3/4
(D)
x
5-5/16
(H)
inches
Stand
(FPS-1):
1226
(W)
x
476
(D)
x
629
(H)
mm
49-13/16
(W)
x
18-3/4
(D)
x
24-3/4
(H)
inches
Total
:
1336
(W)
x
476
(D)
x
754
(H)
mm
52-5/8
(W)
x
18-3/4
(D)
x
29-11/16
(H)
inches
Weight
Piano
(FP-1):
22.2kg
/
48
lbs,
15
oz
Stand
(FPS-1):
12.1
kg
/
26
lbs,
11
0z
Total
:
34.3
kg
/
75
ibs,
10
oz
Accessories
Owner's
Manual,
Power
Cord,
Pedal
Switch
:
DP-6
Options
Stand
;
two
speakers
included
(16
cm
x
2):
FPS-1
Stereo
Headphone
:
RH-20
/
80
/
120
Pedal
Switch
:
DP-2/6,
BOSS
FS-5U
Expression
Pedal
:
EV-5
Connecting
Cable
:
PU-1M/2/3
MIDI/SYNC
Cable
:
MSC-07
/
15/25
/50/
100
*
In
the
interest
of
product
development,
the
specifications
and/or
appearance
of
this
unit
are
subject
to
change
without
prior
notice.
Troubleshooting
No
sound
is
heard.
*
Is
the
[VOLUME]
slider
set
to
[MIN]?
¢
Are
headphones
connected
to
the
PHONES
jack?
*
Is
the
piano
set
to
LOCAL
OFF?
If
so,
press
[FUNCTION]
(so
the
indicator
lights),
then
press
[LOCAL]
(be
sure
its
indicator
also
lights).
Soft
effect
is
not
properly
obtained
by
depressing
the
pedal.
*
Is
the
Pedal
function
set
to
Sostenuto
or
Expression?
If
so,
press
[FUNCTION]
(so
the
indicator
lights),
then
press
either
[SOSTENUTO]
or
[EXPRESSION]
(so
both
indicators
are
dark).
Some
sounds
are
not
heard
when
“Expression”
is
selected
as
the
Pedal
Function.
*
Is
the
supplied
DP-6
pedal
connected?
When
the
DP-6
is
connected
to
the
[SOFT
PEDAL]
jack,
the
STRINGS
and
SYN
STRINGS
may
not
sound
if
the
Expression
function
is
selected.
The
pitch
of
notes
played
is
too
high
(or
too
low).
*
Has
a
Transposition
setting
been
made?
If
so,
press
[FUNCTION]
(so
the
indicator
lights),
then
press
[#]
and
[b]
simul-
taneously.
The
piano
is
not
in
tune
with
other
instruments
or
sound
generators.
*
Turn
the
[TUNE]
knob
on
the
FP-1’s
rear
panel
to
adjust
the
tuning.
(See
page
7.)
The
sound
from
the
speakers
is
distorted
or
is
suddenly
reduced.
¢
Are
the
speakers
of
the
proper
type
and
impedance?
The
speakers
you
connect
should
be
4
2
minimum.
If
improper
speakers
are
used,
sound
distortion
or
a
volume
decrease
could
result
(in
order
to
protect
the
internal
circuitry).

Information
When
you
need
repair
service,
call
your
local
Roland
Service
Station
or
the
authorized
Roland
distributor
in
your
country
as-
shown
below.
U.S.A.
Roland
Corporation
US
7200
Dominion
Circle
Los
Angeles,
CA.
90040-
3696,
U.S.A.
TEL:
(213)
685
5141
CANADA
Roland
Canada
Music
Ltd.
(Head
Office)
.
5480
Parkwood
Way
Richmond
B.
C.,
VeV
2M4
CANADA
TEL:
(604)
270
6626
Roland
Canada
Music
Ltd.
(Montreal
Office)
9425
Transcanadienne
Service
Rd.
N.,
St
Laurent,
Quebec
H45
1V3,
CANADA
TEL:
(514)
335
2009
Roland
Canada
Music
Ltd.
(Toronto
Office)
346
Watline
Avenue,
Mississauga,
Ontario
L4Z
1X2,
CANADA
TEL:
(416)
890
6488
AUSTRALIA
Roland
Corporation
Australia
Pty.
Ltd.
38
Campbell
Avenue
Dee
Why
West.
NSW
2099
AUSTRALIA
TEL:
(02)
982
8266
NEW
ZEALAND
Roland
Corporation
(NZ)
Ltd.
97
Mt.
Eden
Road,
Mt.
Eden,
Auckland
3,
NEW
ZEALAND
TEL:
(09)
3098
715
UNITED
KINGDOM
Roland
(U.K.)
Ltd.
Rye
Close
Ancells
Business
Park
Fleet,
Hampshire
GU13
8UY,
UNITED
KINGDOM
TEL:
(0252)
816181
Roland
(U.K.)
Ltd.,
Swansea
Office
Auantic
Close,
Swansea
Enterprise
Park,
Swansea,
West
Glamorgan
SA79F],
UNITED
KINGDOM
TEL:
(0792)
700
139
IRELAND
The
Dublin
Service
Centre
Audio
Maintenance
Limited
11
Brunswick
Place
Dublin
2
Republic
of
Ireland
TEL:
(OV)
677322
ITALY
Roland
italy
S.
p.
A.
Viale
delle
Industrie
8
20020
ARESE
MILANO
ITALY
TEL:
(02)
93581311
SPAIN
Roland
Electronics
de
Espafia,
S.
A.
Calle
Bolivia
239
08020
Barcelona,
SPAIN
TEL:
(93)
308
10600
GERMANY
Roland
Elektronische
Musikinstrumente
Handelsgesellschaft
mbH.
Oststrasse
96,
22844
Norderstedt,
GERMANY
TEL:
(040)
52
60090
FRANCE
Guillard
Musiques
Roland
ZAC
de
Rosarge
Les
Echets
01700
MIRIBEL
FRANCE
TEL:
(72)
26
5060
Guillard
Musiques
Roland
(Paris
Office)
1923
rue
Léon
Geoffroy
94400
VITRY-SUR-SEINE
FRANCE
TEL:
(1)
4680
86
62
BELGIUM/HOLLAND/
LUXEMBOURG
Roland
Benelux
N.
V.
Houtstraat
1
B-2260
Oevel-
Westerlo
BELGIUM
TEL:
(014)
575811
DENMARK
Roland
Scandinavia
A/S
Langebrogade
6
Box
1937
DK-1023
Copenhagen
K.
DENMARK
TEL:
3195
3111
SWEDEN
Roland
Scandinavia
A/S
Danvik
Center
28
A,
2
tr.
$-131
30
Nacka
SWEDEN
TEL:
(08)
702
0020
NORWAY
Roland
Scandinavia
Avd.
Kontor
Norge
Lilleakerveien
2
Postboks
95
Lilleaker
N-0216
Oslo
2
NORWAY
TEL:
(02)
73
0074
FINLAND
Fazer
Musik
tnc.
Lansituulentie
POB
169,
SF-02101
Espoo
FINLAND
TEL:
(00)
43
5O1T
SWITZERLAND
Roland
(Switzerland)
AG
Musitronic
AG
Gerberstrasse
5,
CH-4410
Liestal,
SWITZERLAND
TEL:
(O61)
921
1615
AUSTRIA
£.
Dematte
&Co.
Neu-Rum
Siemens-Strasse
4
A-6040
Innsbruck
P.O.Box
83
AUSTRIA
TEL:
(0512)
26
44
260
GREECE
V.
Dimitriadis
&
Co.
Ltd.
20,
Alexandras
Avn.,
GR
10682
Athens,
GREFCE
TEL:
(01)
8232415
PORTUGAL
Casa
Caius
Instrumentos
Musicais
Lda.
Rua
de
Santa
Catarina
131
4000
Porto,
PORTUGAL
TEL:
(02)
38
4456
HUNGARY
Intermusica
Ltd.
Warehouse
Area
‘DEPO’
Torokbatint,
Budapest
HUNGARY
TEL:
(1)
1868905
ISRAEL
D.}.A.
International
Ltd.
Twin
Towers,
33
Jabntinsy
St.
Room
214,
Ramat
Gan
52514
ISRAEL
TEL:
(03)
751
8585
CYPRUS
Radex
Sound
Equipment
Ltd.
17
Diagorou
St.,
P.O.Box
2046,
Nicosia
CYPRUS
TEL:
(2)
453
426
(2)
466
423
U.A.E
Zak
Electronics
&
Musical
Instruments
Co.
P.O.
Box
8050
DUBAI,
U.A.E
TEL:
360715
KUWAIT
Easa
Husain
Al-Yousifi
P.O.
Box
126
Satat
13002
KUWAIT
TEL:
5719499
LEBANON
A.
Chahine
&
Fils
P.O.
Box
16-5857
Beirut,
LEBANON
TEL:
(01)
335799
TURKEY
Barkat
Sanayi
ve
Ticaret
Siraselviler
Cad.
86/6
Taksim
Istanbul,
TURKEY
TEL:
(0212)
2499324
EGYPT
Al
Fanny
Trading
Office
9,
Ebn
Hagar
Ai
Askalany
Street,
Ard
El
Golf,
Heliopolis,
Cairo,
11341
EGYPT
TEL:
(U2)
917
803
(04)
171
828
QATAR
Badie
Studio
&
Stores
P.O.Bax
62,
DORA
Qatar
TEL:
423554
BAHRAIN
Moon
Stores
Bad
Al
Bahrain
Read,
P.O.Box
20077
State
of
Bahrain
TEL:
214.005
BRAZIL
Roland
Brasil
Ltda.
R.
Coronel
Octaviano
da
Silveira
203
05522-010
Sav
Paulo
BRAZIL
TEL:
(11)
843
9377
MEXICO
Casa
Veerkamp,
s.a.
de
cay.
Mesones
No.
21
Col.
Centre
MEXICO
D.F.
06080
TEL:
(905)
709
3716
La
Casa
Wagner
de
Guadalajara
s.a.
de
c.v.
Av.
Corona
No.
202
S.].
€.P.44100
Guadalajara,
Jalisco
MEXICO)
TEL:
(36)
13
1414
VENEZUELA
Musicland
Digital
C.A.
Av.
Francisco
De
Miranda,
Centro
Parque
de
Cristal,
Nivel
C2
Local
20
Caracas
VENEZUELA
TEL:
(2)
285
9218
PANAMA
Productos
Superiores,
S.A.
Apartado
655
-
Panama
1
REP.
DE
PANAMA
TEL:
26
3322
ARGENTINA
Instrumentos
Musicales
S.A.
Florida
638
{1005}
Buenos
Aires
ARGENTINA
TEL:
(1)
394
4029
HONG
KONG
Tom
Lee
Music
Co.,
Ltd.
Service
Division
22-32
Pun
Shan
Street,
Tsuen
Wan,
New
Territories,
HONG
KONG
TEL:
415
0911
KOREA
Cosmos
Corporation
Service
Station
261
2nd
Floor
Nak-Won
Arcade
Jong-Ro
ku,
Seoul,
KOREA
TEL:
(02)
742
8844
SINGAPORE
Swee
Lee
Company
BLOCK
231,
Bain
Street
#03-23
Bras
Basah
Complex,
Singapore
0718
TEL:
3367886
PHILIPPINES
G.A.
Yupangco
&
Co.
Inc.
339
Gil}.
Puyat
Avenue
Makati,
Metro
Manila
1200,
PHILIPPINES
TEL:
(02)
817
0013
THAILAND
Theera
Music
Co.,
Ltd.
330
Verng
Nakorn
Kasem,
Soi
2,
Bangkok
10100,
THAILAND
TEL:
(02)
2248821
MALAYSIA
Bentley
Music
SDN
BHD
No.142,
Jalan
Bukit
Bintang
55100
Kuala
Lumpur,
MALAYSIA
TEL:
(03)
2443333
INDONESIA
PT
CITRARAMA
BELANTIKA
Kompleks
Perkantoran
Duta
Merlin
Blok
E
No.6—7
].
Gajah
Mada
No.3—5,
Jakarta
10130,
INDONESIA
TEL:
(021)
3850073
TAIWAN
Siruba
Enterprise
(Taiwan)
Co.,
LTD.
Room.
5,
9ff,
No,
112
Chung
Shan
N.Road
Sec.2
Taipei,
TAIWAN,
R.O.C.
TEL:
(02)
571
5860
SOUTH
AFRICA
That
Other
Music
Shop
(PTY)
Ltd.
11
Melle
Street
(Cnr
Melle
and
futa
Street)
Braamfontein
2001
Republic
of
South
Africa
TEL:
(O11)
403
4105
Paul
Bothner
(PTY)
Ltd.
17
Werdmuller
Centre
Claremont
7700
Republic
of
South
Africa
TEL:
(021)
64
4030
As
of
July.
15.
1994

For
Germany
Bescheinigung
des
Herstellers/Importeurs
Hiermit
wird
bescheinigt,
da®
der/die/das
Dem
Zentralamt
fiir
Zulassungen
im
Fernmeldewesen
wurde
das
Inverkehrbringen
dieses
Gerates
angezeigt
und
Digital
piano
FP-1
die
Berechtigung
zur
Uberpriifung
der
Serie
auf
die
“
;
:
sumt.
(Gerat,
Typ,
Bezeichnung)
Einhaitung
der
Bestimmungen
eingeraum'
in
Ubereinstimmung
mit
den
Bestimmungen
der
BMPT-
|
Roland
Corporation
AmtsbiVfg
243/1991
funk-entst6rt
ist.
Der
vorschriftsmaBige
. a
-Chome
Kita-k
ka
530
Japan
Betrieb
mancher
Gerate
(z.
B.
MeBsender)
kann
allerdings
4-16
Dojimahama
1-Chome
Kita-ku
Osaka
530
Japan_
gewissen
Einschrankungen
unterliegen.
Beachten
Sie
|
(Name
und
Anschrift
des
Herstellers/Importeurs)
deshalb
die
Hinweise
in
der
Bedienungsanleitung.
For
the
USA
FEDERAL
COMMUNICATIONS
COMMISSION
RADIO
FREQUENCY
INTERFERENCE
STATEMENT
This
equipment
has
been
tested
and
found
to
comply
with
the
limits
for
a
Class
B
digital
device,
pursuant
to
Part
15
of
the
FCC
Rules.
These
limits
are
designed
to
provide
reasonable
protection
against
harmful
interference
in
a
residential
installation.
This
equipment
generates,
uses,
and
can
radiate
radio
frequency
energy
and,
if
not
installed
and
used
in
accordance
with
the
instructions,
may
cause
harmful
interference
to
radio
communications.
However,
there
is
no
guarantee
that
interference
will
not
occur
in
a
particular
installation.
if
this
equipment
does
cause
harmful
interference
to
radio
or
television
reception,
which
can
be
determined
by
turning
the
equipment
off
and
on,
the
user
is
encouraged
fo
try
to
correct
the
interference
by
one
or
more
of
the
following
measures:
~
Reorient
or
relocate
the
receiving
antenna.
-
Increase
the
separation
between
the
equipment
and
receiver.
-
Connect
the
equipment
into
an
outlet
on
a
circuit
different
from
that
to
which
the
receiver
is
connected.
~
Consult
the
dealer
or
an
experienced
radio/TV
technician
for
help.
Unauthorized
changes
or
modification
to
this
system
can
void
the
users
authority
to
operate
this
equipment.
This
equipment
requires
shielded
interface
cables
in
order
to
meet
FCC
class
B
Limit.
For
Canada
CLASS
B
NOTICE
This
digital
apparatus
does
not
exceed
the
Class
B
limits
for
radio
noise
emissions
set out
in
the
Radio
Interference
Regulations
of
the
Canadian
Department
of
Communications.
CLASS
B
AVIS
Cet
appareil
numérique
ne
dépasse
pas
les
limites
de
la
classe
B
au
niveau
des
émissions
de
bruits
radioélectriques
fixés
dans
le
Réeglement
des
signaux
parasites
par
le
ministére
canadien
des
Communications.

Roland
Corporation
70455467
‘94-8-C3-11K


Roland?
70455467
wininy
Roland
Other manuals for FP-1
1
Table of contents
Other Roland Musical Instrument manuals

Roland
Roland HP-201 User manual

Roland
Roland EXR-5 User manual

Roland
Roland FP-7 User manual

Roland
Roland XP-60 Owner's manual

Roland
Roland HP 1300e User manual

Roland
Roland RD-2000 User manual

Roland
Roland RD-300SX User manual

Roland
Roland RD-88 Manual

Roland
Roland ep-3 User manual

Roland
Roland PX-7B Operating and maintenance manual

Roland
Roland RG-7 User manual

Roland
Roland Atelier AT90 User manual

Roland
Roland F-110 User manual

Roland
Roland HP101 User manual

Roland
Roland C-80 User manual

Roland
Roland VK-8 User manual

Roland
Roland TR-8S User manual

Roland
Roland HPi-6F User manual

Roland
Roland EP-7 User manual

Roland
Roland HP 237R User manual