1
SOUND PACK/WAVE EXPANSION Install Manual
This manual explains how to import or install SOUND PACK and WAVE EXPANSION on the RD-88.
Read this in conjunction with the RD-88 Owner’s Manual.
Preparing the Sound Files
* If you’re using the USB flash drive for the first time, format it
using the RD-88.
&“Formatting a USB Flash Drive” (Owner’s Manual)
1. Prepare the sound file that you will add on the RD-88,
and place the file on your computer.
MEMO
Sound files such as SOUND PACK or WAVE EXPANSION can be
obtained via the Roland Cloud.
For more about Roland Cloud, refer to the Roland website.
&https://www.roland.com/
* Please be aware that in some countries or regions, it might not
be possible to use Roland Cloud at this time.
2. Connect the USB flash drive to your computer.
3. Save the file in the appropriate directory of your USB
flash drive.
SOUND PACK (extension: .SDZ): ROLAND/SOUND folder
WAVE EXPANSION (extension: .EXZ): Root directory
4. Disconnect the USB flash drive from your computer.
Adding the Sounds
Depending on the sounds that you are adding, perform the steps
described in “Importing a SOUND PACK” or “Installing a WAVE
EXPANSION” (p. 2).
Importing a SOUND PACK
1. Connect the USB flash drive in which you saved the
sound file to the RD-88.
&“Preparing the Sound Files”(p. 1)
2. Press the [MENU] button.
3. Use the cursor [ ] [ ] buttons to select “UTILITY,” and
then press the [ENTER] button.
4. Use the cursor [ ] [ ] buttons to select “IMPORT TONE,”
and then press the [ENTER] button.
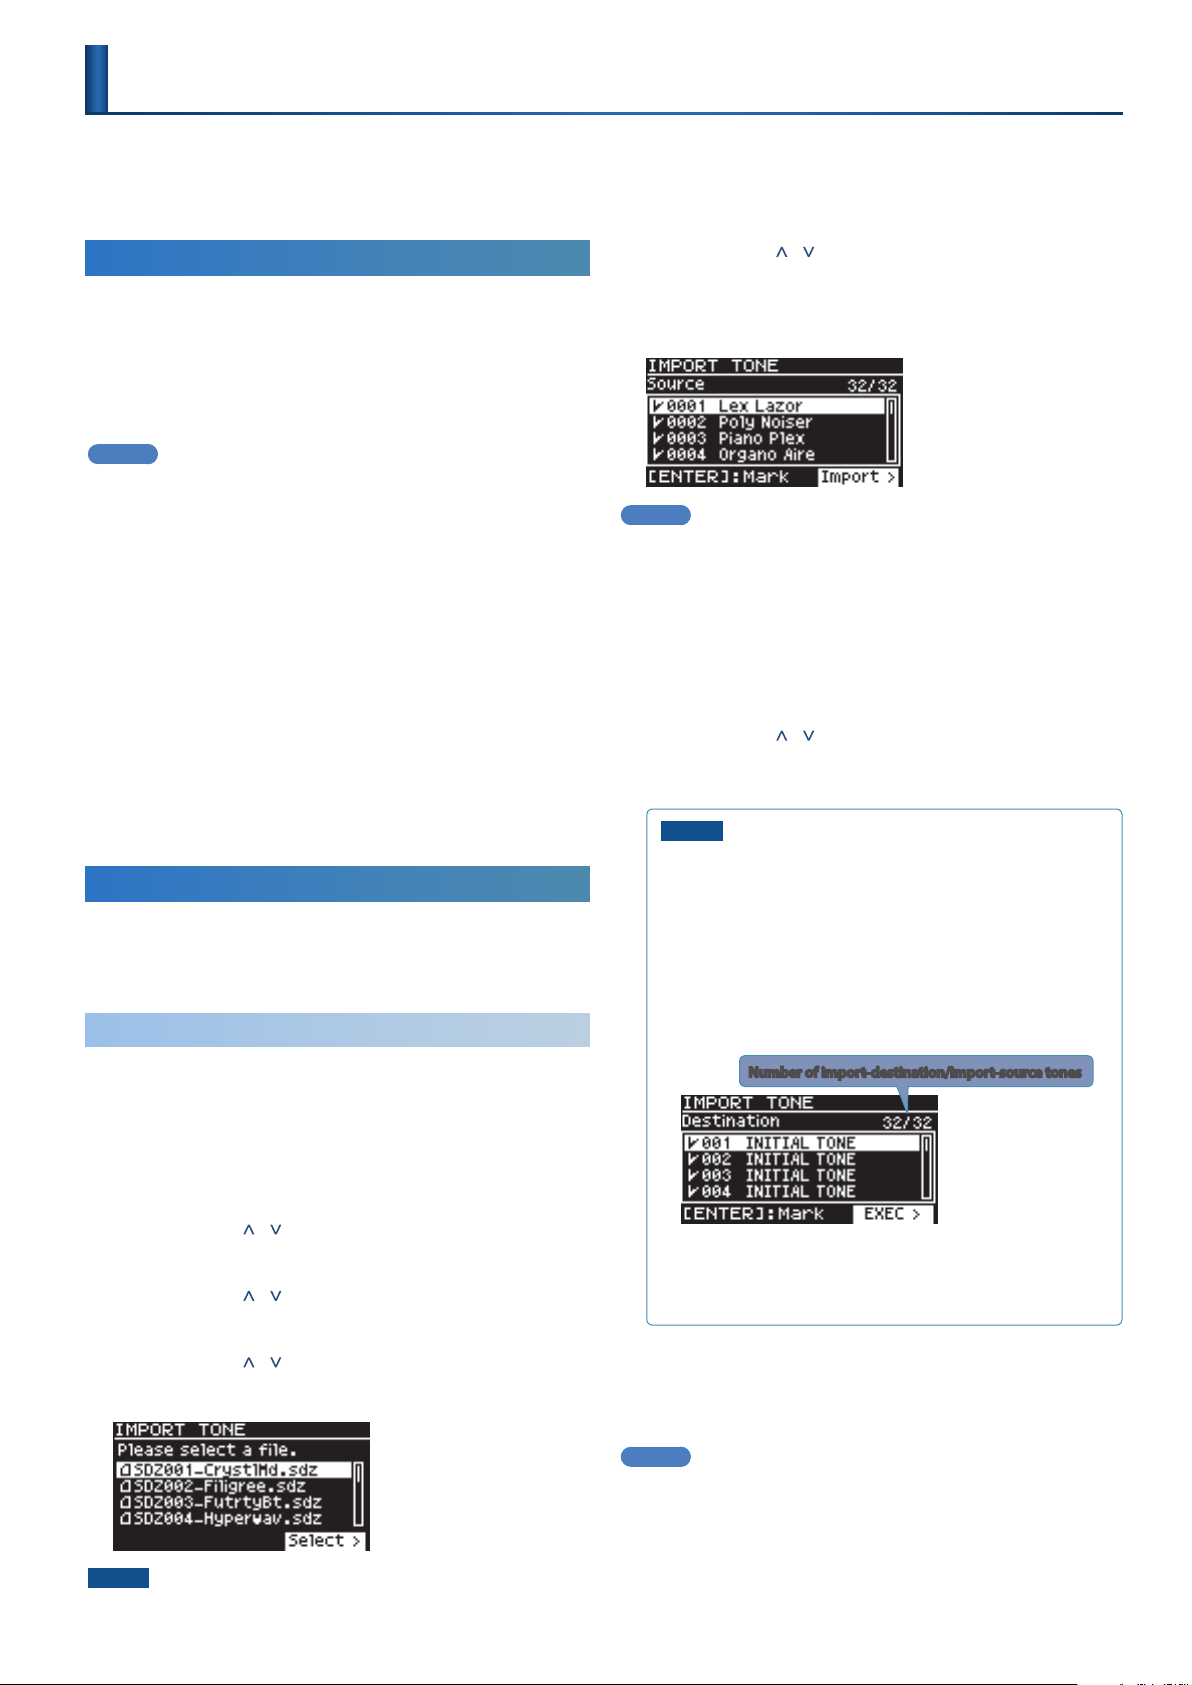
5. Use the cursor [ ] [ ] buttons to select the file that
contains the tones that you want to import, and then
press the cursor [>] button.
NOTE
Drum kit tones cannot be imported.
6. Use the cursor [ ] [ ] buttons to select the tone that you
want to import, and then use the [ENTER] button to add
a check mark.
Instead of using the [ENTER] button, you can also use the [INC]
[DEC] buttons to assign check marks.
MEMO
To select or de-select all tones, hold down the [SHIFT] button
and press the [INC] [DEC] buttons.
To select or de-select a specific range of tones, press the
[ENTER] button at the beginning of the range, then at the
end of the range, hold down the [SHIFT] button and press the
[ENTER] button.
7. Press the cursor [>] button.
8. Use the cursor [ ] [ ] buttons to select the import-
destination tone, and then press the [ENTER] button to
add a check mark.
NOTE
5 Be aware that the import-destination tone you select will
be overwritten.
5 An “ * ” is displayed for tones used in scene.
5 An indication of "NEW" is shown for newly imported tones.
5 If the import-destination has fewer tones than the import-
source, not all of the selected tones will be imported.
5 The number of tones is shown in the upper right of the
screen.
Number of import-destination/import-source tones
5 If there is a tone named “INITIAL TONE,” it is automatically
selected as the import-destination tone.
If you want to keep that tone, clear the check mark.
9. Press the cursor [>] button.
A confirmation screen appears.
If you decide to cancel, press the [EXIT] button.
MEMO
The first time you import, the user license registration screen
appears.
To execute, use the cursor [>] button to select “OK,” and then
press the [ENTER] button.
RD-88
© 2020 Roland Corporation


