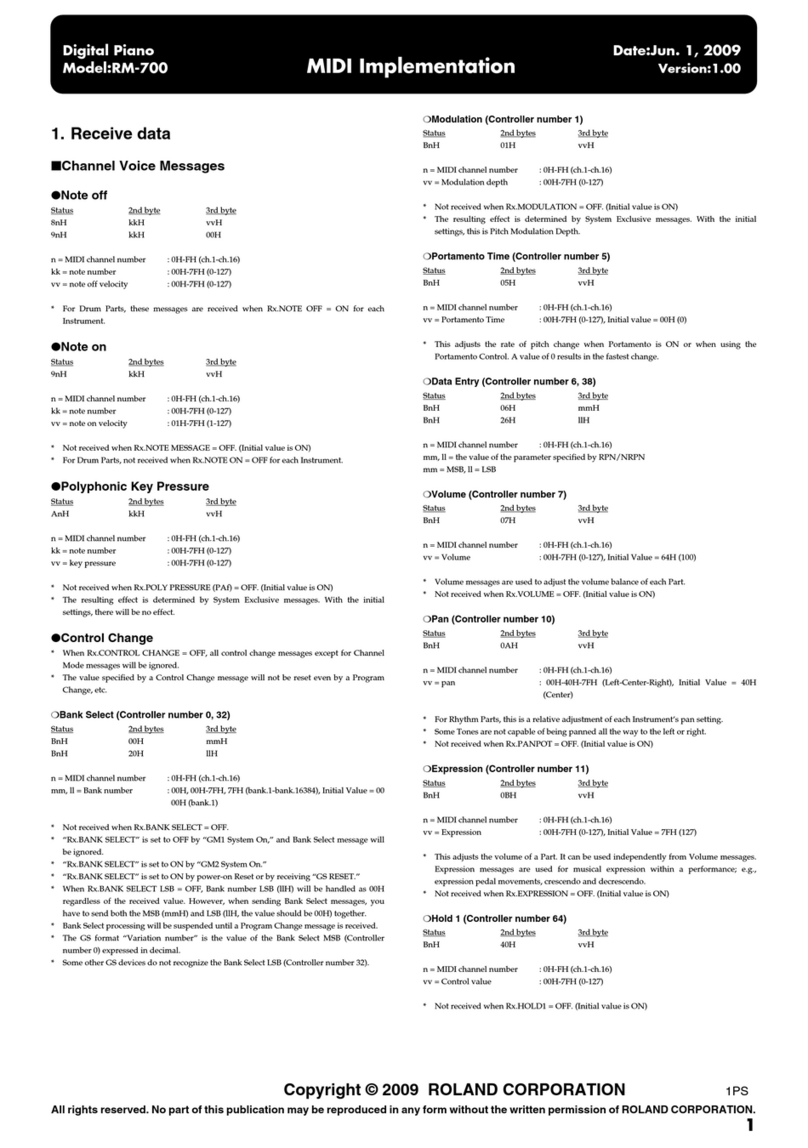
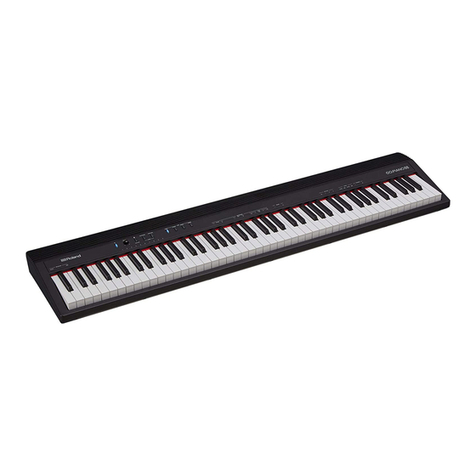
Roland EP-7 User manual

Roland
e
(O
»
Joer
PIANO
OWNER'S
MANUAL
M
Thank
you,
and
congratulations
on
your
choice
of
the
Roland
ep-7.
The
ep-7
Digital
Piano,
designed
to
make
it
easier
for
more
people
to
have
fun
with
music,
has
firm
roots
in
the
same
leading-edge
technology
and
manufacturing
know-how
that
has
made
Roland
a
leader
in
electronic
musical
instrument
development.
The
ep-7
provides
a
selection
of
5
realistic
sounds
(including
piano)
and
offers
a
keyboard
that
is
a
pleasure
to
play.
What's
more,
the
instrument
provides
a
complete
range
of
features,
including
a
convenient
recording
function.
To
make
sure
you
are
comfortable
in
using
all
the
features
the
ep-7
offers,
and
to
ensure
satisfaction
for
years
to
come,
please
read
this
Owner's
Manual
in
its
entirety
before
starting
out.
©
1990
ROLAND
CORP.
Unauthorized
copy
or
transfer
of
this
document
by
any
means,
whether
in
whole
or
in
part,
is
strictly
prohibited.


Important
Notes
[Power
Supply]
e
Be
sure
to
use
oniy
the
AC
adaptor
supplied
with
the
unit
Use
of
any
other
power
adaptor
could
result
in
damage,
maifunction,
or
electric
shock.
*
When
making
any
connections
wlth
other
devices,
always
turn
off
the
power
to
ali
equipment
first
this
will
help
prevent
damage
or
maltunction.
*
Do
not
use
this
unit
on
the
same
power
circuit
with
any
device
that
will
generate
line
noise,
such
as
a
motor
or
variabie
lighting
system.
*
The
power
suppiy
required
for
this
unit
İs
shown
on
its
nameplate.
Ensure
that
the
line
voltage
of
your
installation
meets
this
require-
ment,
*
Avoid
damaging
the
power
cord;
do
not
step
on
it,
place
heavy
objects
on
It
etc.
*
When
disconnecting
the
AC
adaptor
from
the
outlet,
grasp
the
plug
itself;
never
pull
on
the
cord.
*
ifthe
unitis
to
remain
unused
for
a
long
period
of
time,
unplug
the
power
cord.
[Placement]
*
Do
not
subject
the
unit
to
temperature
extremes
(eg.
direct
sun-
light
in
an
enclosed
vehicle).
Avoid
using
or
storing
the
unit
in
dusty
or
humid
areas
or
areas
that
are
subject
to
high
levels
of
vibration.
*
Using
the
unit
near
power
amplifiers
(or
other
equipment
con-
taining
large
transformers)
may
induce
hum.
e
This
unit
may
interiere
with
radio
and
television
reception.
Do
not
use
this
unit
in
the
vicinity
of
such
receivers.
*
Do
not
expose
this
unit
to
temperature
extremes
(eg.
direct
sun-
light
in
an
enclosed
vehicie
can
deform
or
discolor
the
unit)
or
Install.
it
near
devices
that
radiate
heat.
Specifications
[Maintenance]
*
For
everyday
cleaning
wipe
the
unit
with
a
soft,
dry
cloth
(or
one
that
has
been
siightly
dampened
with
water).
To
remove
stubbom
diri,
use
a
mild
neutral
detergent.
Afterwards,
be
sure
to
wipe
the
unit
thoroughly
with
a
soft,
dry
cloth.
*
Never
use
benzene,
thinners,
alcohol
or
soivents
of
any
kind
to
avoid
the
risk
of
discoloration
and/or
deformation.
[Memory
Backup]
*
The
unit
contains
a
battery
which
maintains
the
contents
of
memory
while
the
main
power
is
off.
The
expected
life
of
this
bat-
tery
is
5
years
or
more.
However,
to
avoid
the
unexpected
loss
of
memory
data,
it
is
strongly
recommended
that
you
change
the
battery
every
5
years.
Please
be
aware
that
the
actual
life
of
the
battery
will
depend
on
the
physical
environment
(especially
tem-
perature)
in
which
the
unit
is
used.
When
it
is
time
to
change
the
battery,
consult
with
qualified
service
personnel.
*
Please
be
aware
that
the
contents
of
memory
may
at
times
be
lost;
when
the
unit
is
sent
for
repairs
or
when
by
some
chance
a
mal-
function
has
occurred,
[Additional
Precautions]
*
Protect
the
unit
from
strong
impact
*
Do
not
allow
objects
or
liquids
of
any
kind
to
penetrate
the
unit.
In
the
event
of
such
an
occurrence,
discontinue
use
immediately.
Contact
qualified
service
personnel
as
soon
as
possible,
*
Before
using
the
unit
in
a
foreign
country,
consult
with
qualified
service
personnel.
*
Should
a
malfunction
occur
(or
if
you
suspect
there
is
a
problem)
discontinue
use
immediately.
Contact
qualified
service
personnel
as
soon
as
possible.
KEYBOARD
MAX.
POLYPHONY
VOICES
EFFECTS
RECORDER
76
weighted
keys
with
touch-sensitivity.
24
notes
Five
(Piano,
Electric
Piano,
Vibraphone,
Organ,
Strings)
Chorus,
Reverb
|
Provides
for
recording
and
playback,
as
well
as
tempo
changes.
(Can
record
a
max-
imum
of
4
pieces,
or
approximately
1,600
Voiume
Control
Slider
(VOLUME):
1
|
Piece
Selection
Slider
(PIECE):
1
CONNECTORS/
AC
Adaptor
Jack
(DC
IN):
1
JACKS
MIDI
IN
Connector:
1
MIDI
OUT
Connector:
1
Damper
Pedal
Jack
(DAMPER):
1
Output
Jacks
(OUTPUT
L(MONO)/R)
Headphone
Jacks
(PHONES):
2
SPEAKERS
12
cm:
2
OUTPUT
5W:2
|
notes.)
i
Rİ
E
EE
EE
Mae
er
MASTER
TUNING
|
Range:
approx.
+/-50
cents
DIMENSIONS
1139(W)
x
339(D)
x
100(H)
mm
3'
B-27/32"(W)
x
1'
1-11/32"(D)
x
BUTTONS
Power
Switch
(POWER):
1
3-15/16"(H)
Tempo
Adjustment
Buttons
(Y
TEMPO
A):
2
A
A
:
Recording
Button
(REC):
1
WEIGHT
!11kg
243
Ibs
(Without
AC
adaptor)
Playback
Button
(PLAY):
1
POWER
1700
mA
(DC
12
V)
Voice
Buttons
(PIANO,
E.
PIANO,
VIBRA-
CONSUMPTION
SEE
iyi
d
SUPPLIED
Damper
Pedal,
AC
Adaptor,
Music
Stand,
|
Reverb
Button
(REVERB):
1
ACCESSORIES
Owner's
Manual,
MIDI
Guidebook.
1
——
BL,
al
KNOBS/SLIDERS
|
Tuning
Knob
(TUNE):
3
OPTIONS
nenn
Hoe
*
Specifications
and/or
external
appearance
of
this
product
are
subject
to
change
without
notice.

Making
the
Connections/Powering
Up
Before
making
any
connections,
make
sure
you
have
the
power
on
your
instrument
turned
off.
AU
R
Li
©
HEP
©
These
connectors
are
used
when
you
wish
to
connect
the
ep-7to
another
MIDI-equipped
device.
For
details
please
refer
to
the
separate
"MIDI
Guide-
book".
Once
all
connections.
have
been
properly
made,
press
the
Power
Switch
to
turn
the
unit
on.
(The
red
indicator
will
light)
*POWER
With
the
pedal
depressed,
notes
will
linger
on
after
being
played.
With
sounds
which
maintain
a
constant
volume
level,
such
as
Strings
and
Pipe
Organ,
notes
you
play
will
con-
tinue
sounding
as
long
as
the
pedal
is
depressed.
(Use
the
DP-2
pedal)
Listening
to
the
Demo
it
desired,
you
can
have
your
keyboard
produce
a
more
im-
pressive
sound
by
connec
ting
itwith
a
stereo
system
or
ampli-
fier/speaker
setup.
To
connect
the
units,
plug
audio
cables
into
the
keyboard's
Output
jacks
and
plug
the
other
ends
into
the
Input
Jacks
on
your
sound
system.
If
the
equipment
you
are
going
to
use
can
only
receive
a
monaural
signal,
use
the
keyboard's
L
(Mono)
Output
jack.
Cord
Hook
played.
(The
supplied
AC
Adaptor
)
Cp
Press
PIANO,
VIBRAPHONE
and
STRINGS
si-
multaneously.
PIANO
E.PIANO
VIBRAPHONE
ORGAN
TRİNGS
The
demonstration
song
will
start
playing.
@To
stop
playback
of
the
demo,
press
any
Voice
button.
PIANO
E.PIANO
VIBRAPHONE
ORGAN
STRINGS
E
ae
|
ef
E
Im
@Adjust
the
volume.
VOLUME
Decreases
Increases
The
Cord
Hook
conveniently
allows
you
to
secure
the
AC
adaptor
cord,
thus
preven
ting
it
from
accidently
coming
loose
while
the
unit
is
being

e
jo
2/1)
ua»
Qs
inoqe
jo
sBueuo
uzud
e
JEGO
nak
'uon2&np
saya
ul
Aewwidwos
gouy
au
Buneo
Ag
=
2H
Dorr
80
um
pioq-A2y
aig
jo
app
au)
ui
/ax
v
aui
io
Kousnbeu
au
'uousod
135383
SU
je
GOL
DUE
YUNA
e
</BUEeg
Jeay>
“Pas
8^0j
St
jt
“SSIMADO¡O-JAJUNOI
Psjelos
U8UM
‘sass
youd
al]
‘asimyda;o
PaJejos
SI
qoux
ali
vaym
"aiquuesue
ue
ur
Bui
-Ke|d
aym
¡njasn
quswnasul
sayo
auos
jo
¿eya
sayojely
y
os
¿-de
eui
jo
yad
eur
snipe
Ajasioaid
0j
nok
smojye
qoux
sius
qouy
sun]
'oBed
j1xeu
998
e
"(ajduiexe
104
y5:u
ye
ajej)
NOK
punose
asoyy
Bulgur
-SIP
INOYHM
Áejd
Ol
ys
noÁ
usu
SOU
10)
(BSP!
y)
sexeui
siu1
"SIsyeads
ayı
WOI
andino
16Bu0;
ou
SI
punos
'sxoel
aseLy
jo
(Og
10)
sayue
0)
pajoauuos
ale
sauoyd
-peau
3310
awy
BLUES
sui
je
seuoudpesu
JO
Sj8S
OM]
IPPOWWOI
Ved
;-de
ay]
S4»pr
euoudpper
vuus
pus
.
348
VUL/CH
Hİ
“yel
ay]
03
uon
-ENSNI|]
au)
U}
UMOYS
SE
JUSUINISU!
Yİ
o1
|
uoenv
"uoueo
Bupyoed
ay)
ui
papnjou!
S|
PUBIS
SNAU
y
"parcas
aue
SBUMƏS
NLPP
DUI
UeARAOU
"jc
pausry
Si
samog
3940
(paiak
usag
eaey
jon
Ow
BAUM
suogoojas
Kun
Buspnyauı)
NSO
ANOA
[ENPA
~IPU}
UE
uo
{yO
Jo
uo)
s6unjas
Gandy
SU}
591005
juu
BUL
+
“(uo
5)
19948
qaaa:
ayy
qe
BULMOYS
"tubi
Jorealpuı
Sy
‘WONG
SJU}
Ssesd
NOÁ
USAN)
BAN
Ápeonsnooe
aou)
Si
ŞEYİ
woo:
e
Jo
eouaiuie
ay)
Buna
‘Aed
noA
sejou
ay,
o1
(ou2e
jo
adA
xajdwoo
2)
vogeisqlaası
sppe
yaya
qJaAs)
ay]
pasosa:
ave
sumas
pnejap
aw
'eaomoy
"YO
pawn
s
samod
a9u0
(paio/o]
useq
aney
5320
om
aeu
suoyoaae
Aye
Éuipnpu)
siseq
300A
janpın
ue
uo
{yO
Jo
uo)
Bumas
sniou7
eu
saicis
JUGUINASU!
Bul
=
(uo
sí
10948
snuoua
ayı
şeyi
Bumoys
ybi
A
JOJEO)PU!
Sy
'uognq
siy}
ssasd
noÁ
ueuM)
‘SAIS
-uedxa
aou!
pue
Sou
punos
[JJ
NWU
Jno&
os
'ayquiesus
ui
BujAe¡d
jusumaisui
atues
aui
Jo
[L13498
BİL
PUNOS
jusuinisu|
euo
SAJEW
Daya
sniou
au
|
uong
snioyp
802100
DAN
Gu
UIPA
ÁRG
UBA
VBI
NOK
—
SUI
IUES
BYE
SUCHNG
ow
55040
ueo
NOK
'YSIM
NGÁ
j|
a
28uj8D0)
pasə/B)
"ejquresue
Bus
e
jo
punos
ayı
SONIHLS
|
uebio
adid
e
jo
punos
eAisseidui
‘auijans
eu,
NvOuHO
‘Punos
auoudeiqiA
Buiusayaı
v
|
SNOHdYualA
‘ould
9419818
ue
jo
punos
Burzzep
ayi
ONVId
3
“punos
oueid
pugib
onsiea1
y
ONVid
NOU.dIH2S3Q
3910A
NOlina
"eiisep
noÁ
punos
ay)
Jo
uon2ajas
SAPIADIH
suoyng
SIDA
HI
8G
ij^
JOJED/PU!
auf
‘UO
sj
amod
ay}
UBUM
“yO
pue
uo
Jemod
suny,
UMS
18MÖd
"seuio2aq
Jena]
AUNOA
DL)
48
-Je916
ey
YB
ay,
0]
parow
s;
y
say
in)
34
|
'Sauoydpesy
JO
sjexeeds
au;
ynos
paulejgo
euinjo^
ay
sisnipy
TPIS
SUNJOA
|
1


The
Recorder
The
Recorder
allows
you
to
capture
what
you
play,
and
then
listen
to
the
playback
whenever
you
like.
@Select
the
voice
you
intend
to
use.
PIANO
E.PIANO
VIBRAPHONE
ORGAN
STRINGS
EE
KE
Pe
E
y
©The
ep-7
can
accommodate
four
different
pieces.
Here
you
need
to
select
the
number
of
the
piece
that
you
are
going
to
record.
PIECE
©
Press
the
REC
button.
(The
red
indicator
will
light)
REC
p
G
@Start
playing.
(The
moment
you
begin
playing,
the
recording
will
also
start.)
(&
When
you
are
finished,
press
the
REC
button
again.
(The
indicator
will
go
out)
REC
*
Everything
you
do
while
recording
is
in
pro-
gress,
including
such
things
as
changing
voi-
ces
or
pressing
the
Chorus
and
Reverb
but-
tons,
will
be
faithfully
recorded.
e
The
recording
feature
provides
for
a
combined
total
(within
all
4
pieces)
of
approximately
1,600
notes.
+
When
you
are
running
out
of
space
for
addi-
tional
notes...
REC
=~
TAS
the
red
indicator
on
the
REC
button
will
start
blinking.
*
And
if
you
continue
to
record...
REC
the
REC
button
indicator
will
blink
more
rapid-
ly.
*
When
you
reach
the
point
where
no
more
notes
can
be
recorded...
REC
Ru
the
indicator
on
the
REC
button
goes
out,
and
the
recording
stops
automatically.


Playback
X
If
you
wish
to
alter
the
playback
tempo...
(Select
the
number
of
the
piece
you
wish
to
hear.
PIECE
(©
Press
the
PLAY
button.
Playback
will
begin.
(The
green
indicator
will
light)
PLAY
When
the
end
of
the
piece
is
reached,
the
playback
mode
stops
automatically.
(The
indicator
goes
out)
Should
you
want
to
stop
playback
at
any
time,
press
the
PLAY
button.
*
*
TEMPO
v
T
Decreases
Increases
m
y
When
the
power
is
tumed
off,
the
tempo
reverts
to
that
which
the
piece
was
originaily
recorded
at.
If
you
desire,
you
can
play
an
accompaniment
part
(using
any
voice)
while
a
recorded
piece
is
being
played
back.
This
conveniently
allows
you
to
create
an
ensemble
effect,
even
though
you
are
playing
by
yourself.
For
example,
you
could
play
a
melody
using
STRINGS
to
accompany
a
recorded
piano
piece.
Voices
used
in
a
recorded
performance
cannot
be
changed
afterward.
i
To
Erase
Previously
Recorded
Pieces...
(DSelect
the
piece
you
wish
to
erase.
PIECE
(Press
the
REC
and
PLAY
buttons
simultane-
ously:
the
piece
will
now
be
completely
erased.
REC
PLAY


Roland
e
O
»
fuera
PIANO
CEI
MIDI
GUIDEBOOK
Read
This
If
You
Intend
To
Use
MIDI
To
Join
Your
Keyboard
With
Other
Electronic
Instruments
or
Computers
The
term
MIDI
is
an
acronym
for
the
"Musical
Instrument
Digital
Interface."
MIDI
is
a
standard
that
was
created
to
allow
electronic
musical
instruments,
computers
and
other
devices
to
com-
municate
with
each
other.
The
great
majority
of
contemporary
electronic
instruments
provide
MIDI
compatibility.
:
A
device
equipped
with
MIDI
is
easily
identified
by
the
fact
that
it
has
one
or
more
MIDI
Connectars.
In
order
to
share
performance
information
with
other
units,
cables
need
to
be
connected
using
these
connectors.
The
ep-7
has
a
MIDI
IN
connector,
used
to
receive
MIDI
messages;
and
a
MIDI
OUT
connector,
from
which
it
sends
messages.
The
MIDI
feature
makes
possible
applications
such
as
below:
*
The
notes
you
play
on
the
ep-7
can
be
relayed
and
sounded
simultaneously
on
other
IVIIDI-
equipped
instruments
or
sound
module
(*1).
*
The
ep-7
can
be
sounded
under
the
control
of
another
MliDi-equipped
keyboard,
or
a
sequencer
(*2).
*
Everything
you
play
on
the
ep-7
can
be
recorded
into
a
sequencer
(*2).
1*1)
A
sound
module
is
a
device
which
generates
sound
as
a
result
of
whatever
information
it
receives
at
its
MIDI
IN
connector.
İn
appearance
it
is
often
box-like.
Among
Roland
products
the
MT-32
is
probably
the
most
well
known.
(*2)
A
sequencer
is
a
device
which
is
capable
of
recording
and
playing
back
MIDI
messages.
The
PR-100
Recorder
is
a
representative
example
of
a
Roland
sequencer.
There
is
also
the
MT-100,
which
combines
a
sequencer
and
sound
module
in
the
same
unit.

TUNE
TEA
E
PU
UC
IN
ES
QUT
IN
WP
A
MONG)
170004
©
Beer
This
connector
is
where
MIDI
messages
are
received.
If
you
wish
to
have
the
ep-7
be
played
as
a
result
of
messages
sent
by
a
MIDI
se-
quencer
or
other
external
unit,
connect
a
cable
so
it
runs
from
here
to
the
MIDI
OUT
connector
on
the
external
device.
From
this
connector
MID!
messages
are
trans-
mitted.
If
you
wish
to
use
the
ep-7
to
play
the
sounds
of
another
MIDI
compatible
unit,
such
as
a
sound
module;
or
want
to
send
the
infor-
mation
describing
what
you
play
to
a
sequencer
for
recording,
connect
a
cable
so
it
runs
from
here
to
the
MIDI
IN
connector
on
the
external
device.
In
order
to
make
the
connections
between
the
connectors
on
two
units,
you
will
need
to
have
at
least
one
MIDI
Cable.
(MSC-15/25/50,
sold
sepa-
rately.)
*
Connecting
a
sound
module,
such
as
the
MT-32
*
Connecting
a
sequencer
ep.
sequencer
MIDI
re
QUTIN
00
*
Connecting
the
MT-100

In
a
setup
where
the
ep-7
is
combined
With
a
se-
quencer,
the
sequencer
would
usually
be
set
at
"Soft
Thru
ON.”
In
this
case,
as
explained
below,
the
ep-7
should
be
set
at
"Local
OFF."
With
the
cable
connections
between
the
ep-7
and
the
sequencer
made
as
illustrated
below,
what
you
play
can
be
recorded
into
the
seguencer;
and
the
se-
quencer
can
be
played
back
to
hear
a
reproduction
of
of
what
you
played.
Sequencer
MOLI
y
A
I
Take
for
example
that
"Soft
Thru”
on
the
sequencer
is
"ON",
and
Local
is
left
at
“ON”
on
the
ep-7
—
each
note
played
will
then
sound
twice.
This
may
cause
the
music
to
sound
somewhat
strange,
and
can
result
in
some
notés being
omitted.
Sequencer
won,
acc
nn
[non]
mA
eA
1
Soft
Thru
On&
Key
pressed
once,
yet
note
sounds
twice.
The
reason
the
above
occurs
is
because
the
key-
board's
performance
information
reaches
the
sound
source
by
means
of
two
paths:
(D
The
ep-7's
internal
circuitry.
©
The
"Soft
Thru"
feature
on
the
sequencer,
which
when
ON,
wends
from MIDI
OUT
a
copy
of
every-
thing
received.
Since
this
situation
is
undesirable,
path
@
can
be
disabled.
To
do
this
the
unit
is
set
to
"Local
OFF”.
The
ordinary
condition
—
where
path
©
remains
operative
—
is
referred
to
as
"Local
ON".
LOCAL
ON
Ordinary
condition
—
the
keyboard
and
the
internal
sound
module
are
connect-
ed.
Sound
is
produced
Sound
Module
A
Local
On
O
LOCAL
OFF
Since
there
is
no
longer
a
connection
between
the
key-
board
and
the
internal
sound
module,
when
the
keyboard
is
played
no
sound
is
pro-
duced.
No
sound
is
produced
Sound
Module
Local
Ott
O
PIANO
E.PIANO
VIBRAPHONE
ORGAN
STRINGS
While
holding
these
down,
press
the
kay
for
either
"On"
or
"Oft"
ON:
Local
On
OFF:
Local
Off
Y
*
Each
time
power
is
turned
on
this
setting
will
always
be
at
"ON."
Omni
On/Off
When
set
to
"Omni
On",
MIDI
messages
received
on
any
of
the
channels
will
result
in
sound
being
pro-
duced.
With
the
ep-7
set
to
Omni
On,
when
data
is
received
from
a
sequencer
or
other
device
you
will
be
able
to
hear
ail
the
performance
data
for
all
the
channels
played
at
the
same
time.
This
makes
it
convenient
for
times
when
you
wish
to
check
how
a
complete
arrangement
sounds.
PIANO.
E.PIANO
VIBRAPHONE
ORGAN
STRINGS
ELLE
While
holding
these
down,
press
the
key
for
either
"On"
or
"Oft"
a
E
|
ES
CZ
=e
ZR
ILLE
[T
E
UN
Ll
On OK
ON:
Omni
On
OFF:
Omni
Off
i»
*
Each
time
power
is
turned
on,
the
instrument
will
be
at
"Off."
*
This
setting
switches
to
Omni
Off
whenever
selection
ot
a
particu-
iar
Receive
channel
is
made.

eting
the
Channel
MID!
communication
takes
place
on
separate
chan-
neis
(MIDI
Channeis),
numbered
from
1
through
16.
The
channel
used
by
the
transmitting
unit
must
be
matched
with
that
used
by
the
receiving
unit.
Only
then
will
sound
be
produced
as
expected.
*
in
a
setup
where
you
wish
to
play
the
ep-7
and
also
have
another
MiDi-equipped
instrument
or
sound
module
play
the
same
notes,
you
first
should
set
the
channel
used
for
reception
on
your
external
device
to
the
same
channel
that
you
have
the
ep-7
set
to
use
for
transmission.
*
if
using
another
MIDI
keyboard
as
a
master
instru-
ment,
and
you
wish
to
have
the
ep-7
played
by
it,
you
would
need
to
set
the
channel
used
for
reception
on
the
ep-7
to
tne
same
channel
that
the
master
keyboard
will
be
transmitting
on.
e
When
wishing
to
have
a
sequencer
play
the
ep-7,
you
need
to
set
the
channel
used
for
reception
on
the
ep-7
to
the
same
channel
that
the
recorded
MIDI
data
is
set
to
use.
Setting
the
Channel
Used
for
Transmission
PIANO
E.PIANO
VIBRAPHONE
ORGAN
STRINGS
SO
While
holding
these
down,
press
tha
key
correspond-
ing
to
the
desired
channel:
123455
7
89101)
eIa115I6
Setting
the
Channel
Used
for
Reception
PIANO
E.PIANO
VIBRAPHONE
ORGAN
STRINGS
la
While
holding
these
down,
press
the
key
correspond-
ing
to
the
desired
channel:
12345678
monens
2
*
Each
time
power
is
tumed
on,
the
unit
defauits
to
“1”
as
the
channel
used
for
hath
transmission
and
reception.
urning
Transmission
Reception
of
Program
Changes
On
and
Off
Program
Change
messages
basically
state
something
to
this
effect
"A
change
has
been
made
to
the
number
such-and-such
voice."
They
do
not
convey
any
further
specifics
about
the
voice,
such
as
"The
voice
to
which
a
change
has
been
made
is
named
Piano."
An
instrument
sends
out
a
Program
Change
when-
ever
a
change
in
the
voice
being
used
is
made.
The
Program
Change
is
sent
as
a
number
which
has
been
assigned
to
a
certain
voice.
Such
numbers
and
what
they
mean
in
terms
of
specific
voices
can
vary
from
instrument
to
instrument.
When
another
device
receives
a
Program
Change
message,
it
will
respond
based
on
the
number
and
what
it
means
on
that
instrument
—
it
changes
to
the
voice
that
it
uses
for
that
particular
number.
For
this
reason,
it
is
entirely
possible
that
on
the
mas-
ter
keyboard
you
could
change
to
"Piano"
and
yet
another
instrument
would
begin
sounding
using
"Vibraphone."
Correspondence
charts
can
be
referred
to
before-
hand
to
avoid
such
surprises.
The
setting
shown
here
allows
you
to
turn
off
Pro-
gram
Change
communication.
When
off,
the
ep-7
no
longer
will
transmit
Program
Change
messages
when
its
Voices
are
changed.
Also,
if
the
ep-7
should
receive
Program
Changes
sent
from
another
unit,
no
change
is
made
in
its
voices.
It
should
be
so
to
"Off"
if,
for
example,
you
want
a
connected
unit
to
always
use
a
particular
voice
while
you
play
using
a
variety
of
voices
on
the
ep-7.
PIANO
E.PIANO
VIBRAPHONE
ORGAN
STRINGS
ECOLE
While
holding
these
down,
press
the
key
for
either
"On"
or
"Off"
On:
Transmission
and
On
Off
reception
takes
place
Off:
No
transmission
or
reception
takes
place
*
Each
time
power
is
turned
on
the
instrument
will
always
be
at
“On.”
*
The
ep-7
considers
a
combination
of
two
Voices
selected
to-
gether
as
a
separate
Voice
with
a
unique
Program
Change
number.
Moreover,
it
assigns
individual
numbers
to
every
possi-
ble
combination
of
a
Voice
plus
Chorus,
Reverb
or
both.
(Please
see
the
"Proaram
Chanae
Number
Chart.”

Turning
On/Off
Transmis-
Turning
Transmission/
Prog.
ğ "
»
Cha.
No.
VOICE
EFFECT
"|
Gens
VOICE
EFFECT
01
|
Piano
(No
Effect)
31
|
Piano--Organ
(Reverb)
02
|
Piano
(Chorus)
32
¡
Piano--Organ
(Chorus--
Reverb)
03
|
Piano
(Reverb)
33
|
Piana
--
Strings
(No
Effect)
04
|
Piano
(Chorus+Reverb)
34
|
Piano--Strings
(Chorus)
05
|
E.Piano
(No
Effect)
35
|
Piano+
Strings
(Reverb)
06
|
E.
Piano
(Chorus)
36
|
Piano--
Strings
(Chorus--
Reverb)
07
|
E.
Piano
(Reverb)
37
|
E.
Piano+
Vibraphone
(No
Effect)
08
|
E.
Piano
(Chorus--
Reverb)
38
İE.Piano--Vibraphone
(Chorus)
09
|
Vibraphone
(No
Effect)
39
|
E.
Piano-F
Vibraphone
(Reverb)
10
|
Vibraphone
(Chorus)
40
|
E.
Piano+
Vibraphone,
(Chorus
--
Reverb)
11
|
Vibraphone
(Reverb)
4]
|
E.
Piano--
Organ
(No
Effect)
12
|
Vibraphone
(Chorus+Reverb)
42
¡E.Piano-+Organ
(Chorus)
13
|
Organ
(No
Effect)
43
|
E.
Piano--
Organ
(Reverb)
14
|
Organ
(Chorus)
44
|
E.
Piano--
Organ
(Chorus+
Reverb)
15
|
Organ
(Reverb)
45
|
E.
Piano-
Strings
(No
Effect)
16
|
Organ
(Chorus--Reverb)
46
|
E.
Piano--
Strings
(Chorus)
17
|
Strings
(No
Effect)
47
|
E.
Piano-
Strings
(Reverb)
18
|
Strings
(Chorus)
48
|
E.
Piano-
Strings
(Chorus-+Reverb)
19
|
Strings
(Reverb)
49
|
Vibraphone+Organ
(Na
Effect)
20
|
Strings
(Chorus--Reverb)
50
|
Vibraphone--Organ
(Chorus)
21
|
Piano+E.
Piuno
(No
Effect)
5i
|
Vibraphone--Organ
(Reverb)
22
|
Piuno+E.
Piano
(Chorus)
52
|
Vibraphone--Organ
(Chorus--
Reverb)
23
|
Piano+E.
Piano
(Reverb)
53
|
Vibraphone+Strings
(No
Elfect)
24
|
Piuno-+E.
Piano
(Chorus+
Reverb)
54
|
Vibraphone+Strings
(Chorus)
25
|
Piano-+
Vibraphone
(No
Effect)
55
|
Vibraphone+-Strings
(Reverb)
26
|
Piuno--
Vibraphone
(Chorus)
56
|
Vibraphone--Strings
(Chorus--Reverb)
27
|
Piano+
Vibraphone
(Reverb)
57
¡Organ+Strings
(No
Effect)
28
|
Piano--
Vibraphone
(Chorus+Reverb)
58
|
Organ-+
Strings
(Chorus)
29
|
Piano+Organ
(No
Effect)
59
|
Orgun+Strings
(Reverb)
30
|
Piano+-Orgun
(Chorus)
60
|
Organ+Strings
(Charus--Reverb)
sion
of
MIDI
During
Recorder
Playback
When
the
setting
shown
below
is
turned
"On,"
you
get
the
performance
information
for
your
recordings
to
be
transmitted
from
MIDI
OUT
while
playback
takes
place.
This
conveniently
allows
you
to
have
any
connected
sound
generating
units
also
play
a
piece
you
have
recorded.
PIANO
E.PIANO
VIBRAPHONE
ORGAN
STRINGS
While
holding
these
down,
press
the
key
for
either
"On"
or
“Of”
On:
Transmission
takes
place.
Off.
No
transmission
takes
place.
*Each
time
power
is
turned
on
this
setting
will
always
be
at
"OH."
Reception
of
Damper
Messages
On
and
Off
When
the
setting
shown
below
is
switched
to
“Off,”
Damper
messages
(Hold
1:
Contro!
Change
No.
64)
will
no
longer
be
transmitted
when
a
pedal
connected
to
the
ep-7
is
depressed.
Also,
should
any
external
device
send
Damper
messages,
they
will
have
no
effect:
sounds
playing
on
the
ep-7
will
not
be
sus-
tained.
PIANO
E.PANO
VIBRAPHONE
ORGAN
STRINGS
While
holding
these
down,
press
the
key
for
either
"On"
or
"Off."
Í
tuti
UL
Ll
1
OnOff
On:
Transmission
and
reception
takes
place
Off
No
transmission
or
reception
takes
place
*Fach
time
nower
is
turned
on
this
setting
will
aiwavs
be
at
"On."

vigiada
riano
Vale
.
iVidi.
ID
fuov
Model
ep.
7
MIDI
Implementation
Chart
Version
:
1.00
Function
+++
Basic
Default
1
1
Channel
Changed
1-16
1-16
Mode
3
Mode
3
x
Omni
Off,
Poly
RK
RK
k
de
e x
28
-
103
OK
KOK
kk
ok ok
k
Note
21-108
*2
Number
21-108
*2
Velocity
Note
ON
Ov=1-127
elm
ek
une
Note
OFF
Ov=1-127
After
Key's
Touch
Ch's
True
Voice
Control
Change
Reset
All
Controllers
Prog
*1
(0-59)
*1
(0—59)
Change
True
#
RRR
RRR
EK
0-59
x
x
x x
System
Clock
x
x
`
Real
Time
Commands
x
Local
ON/OFF
Aux
All
Notes
OFF
Messages
Active
Sense
Reset
System
Exclusive
Svst
Song
Pos
erem.
Song
Sel
Common
Tune
x
*1
Can
be
set
to
O
or
x
manually.
*2
21-107
(Strings
is
selected).
Mode
1:
OMNI
ON,
POLY
Mode
2:
OMNI
ON,
MONO
O:
Yes
Mode
3:
OMNI
OFF,
POLY
Mode
4:
OMNI
OFF,
MONO
X
:
No

For
Nordic
Countries
Apparatus
containing
Lithium
batteries
ADVARSEL!
VARNING
!
Lithiumbatteri,
Eksplosionsfare,
Lithiumbatieri.
Explosionsrisk.
Udskiftning
má
kun
foretages
af
en
sagkyndig,
Får
endast
bytas
av
behörig
servicetekniker,
og
som
beskrevet
i
servicemanual.
Se
instruktioner
i
servicemanuaien.
ADVARSEL!
VAROITUS!
Lithiumbatteri.
Fare
tor
eksplotion.
Lithiumparisto,
Räjähdysvaara.
Má
bare
skiltes
av
kvalilisert
tekniker
som
Pariston
saa
vaihtaa
ainoastaan
beskrevet
i
servicemanualen,
alan
ammotimies.
For
West
Germany
Bescheinigung
des
Herstellers/Importeurs
Hiermit
wird
bescheinigt,
daB
der/die/das
in
Übereinstimmung
mit
den
Bestimmungen
der
Amtsbl.
Vig
1046/1984
(Geral.
Typ.
Bezeichnung)
(Amtsblativerfügung)
funk-entstórt
ist.
Der
Deutschen
Bundespost
wurde
das
Inverkehrbringen
dieses
Gerâtes
angezeigt
und
die
Berechtigung
zur
Überprüfung
der
Serie
auf
Einhaltung
der
Bestimmungen
eingeräumt.
Roland
Corporation
Osaka/Japan
Name
des
Herstellers/importeurs
For
the
USA
RADIO
AND
TELEVISION
INTERFERENCE
WARNING
—
©
This
equipment
has
been
verified
to
comply
with
the
limits
tor
a
Class
B.
computing
device,
pursuant
to
Subpart
J,
ol
Part
15,
of
FCC
rules.
Operation
with
non-certiliad
or
non-verified
equipment
is
likely
to
result
in
interference
to
radio
and
TV
reception.
‘The
equipment
described
in
this
manual
generates
and
uses
radio
frequency
energy.
If
It
is
not
installed
and
used
properly,
thal
is,
In
strict
accordance
with
our
instructions,
It
may
cause
interference
with
radio
and
television
reception,
This
equipment
has
been
tested
and
found
to
comply
with
the
limits
lor
a
Class
B
computing
device
in
accordance
with
the
specifications
in
Subpart
J,
of
Part
15,
ol
FCC
Rules.
These
rules
are
designed
to
provide
reasonable
protection
against
such
a
interlerence
In
a
rasidential
installation.
However,
there
is
no
guarantee
that
the
interference
wil
not
occur
in
a
particular
instalation.
If
this
equipment
does
cause
interference
to
radio
or
television
reception,
which
can
be
determined
by
tuming
the
equipment
on
and
off,
the
user
is
encouraged
to
try
to
correct
the
interference
by
the
lolowing
measure:
*
Disconnect
other
devices
and
their
input/output
cables
one
at
a
time.
If
the
interference
stops,
H
is
caused
by
eliher
the
other
device
or
its
VO
cable.
These
devices
usually
require
Roland
designated
shielded
VO
cables.
For
Roland
devices,
you
can
obtain
the
proper
shielded
cable
from your
dealer.
For
non
Roland
devices,
contact
the
manufacturer
or
desler
lor
assistance.
H
your
equipment
does
cause
interterence
Io
radio
or
television
reception,
you
can
try
to
correc!
the
Interference
by
using
one
or
mors
o!
the
following
measures.
*
Tum
the
TV
or
radio
antenna
unli
the
interference
stops.
*
Move
the
equipment
to
one
side
or
the
other
of
the
TV
or
radio.
*
Move
the
equipment
farther
away
İrom
the
TV
or
radio.
*
Plug
the
equipment
into
an
outlel
thal
is
on
a
different
circuit
than
the
TV
or
radio.
(That
is,
make
certain
the
equipment
and
the
radio
or
lelevistor
set
are
on
circulis
con-
trolled
by
different
circuit
breakers
or
fuses.)
+
Consider
installing
a
rooftop
television
antenna
with
comxial
cable
ieac-in
between
the
antenna
and
TV.
İl
necessary,
you
should
consult
your
dealer
or
an
experienced
racio^elavision
technician
for
additional
suggestions.
You
may
find
helpful
the
following
booklet
prepared
by
the
Federal
Communications
Commission:
"How
to
Identity
end
Resolve
Radio
—
TV
Interference
Problems"
This
bookiet
is
available
from
the
U.S.
Government
Printing
Office,
Washington,
D.C.,
20402,
Stock
No.
004-000-00345-4,
For
Canada
CLASSB
NOTICE
This
digital
apparatus
does
not
exceed
the
Class
B
limits
for
radio
noise
emissions
set
out
in
the
Radio
Interference
Regulations
of
the
Canadian
Department
of
Communications.
CLASSE
8
AVIS
Cet
appareil
numérique
ne
dépasse
pas
les
limites
de
la
classe
B
au
niveau
des
émissions
de
bruits
radioélectriques
fixés
dans
ie
Réglement
des
signaux
parasites
par
le
ministere
canadien
des
Communications.

Information
@When
you
need
repair
service,
call
your
local
Roland
Service
Station
or
the
authorized
Roland
distributor
in
your
country
as
shown
below.
U.
S.
A.
Roland
Corp
US
7200
Dominion
Circle
Los
Angeles,
CA.
90040
-
3647
U.
S.
A.
2
(213)685
-
5141
CANADA
Roland
Canada
Music
Ltd.
(Head
Office)
13880
Mayfield
Place
Richmond
B.
C.,
V6V
2EA
CANADA
t5
(604)270
-
6626
Roland
Canada
Music
Ltd.
9425
Transcanadienne
Service
Rd.
N.,
St
Laurent,
Quebec
H45
1V3
CANADA
2
(514)335
-
2009
Roland
Canada
Music
Ltd.
346
Watline
Avenue,
Mississauga,
Ontario
L4Z
1X2
CANADA
T
(416)890
-
6488
AUSTRALIA
Roland
Corporation
(Australía)Pty.
Ltd.
.
(Head
Office)
—
3B
Campbell
Avenue
Dee
Why
West.
NSW
2099
AUSTRALIA
Tx
(02)982
-
8266
Roland
Corporation
(Australia)Pty.
Ltd.
(Melbourne
Office)
50
Garden
Street
South
Yarra,
Victoria
3141
AUSTRALIA
Z
(03)241
-
1254
NEW
ZEALAND
Roland
Corporation
(NZ)Ltd.
97
Mt.
Eden
Road,
Mt,
Eden,
Auckland
3
NEW
ZEALAND
Z
(09)398
-
715
UNITED
KINGDOM
Roland(UK)Lid.
Amaigamated
Drive
West
Cross
Centre,
Brentford,
Middlesex
TW8
9EZ,
UNITED
KINGDOM
T
(81)568
-
4578
WEST
GERMANY
Roland
Elektronische
Musikinstrumente
Handeisgesellschaft
mbH.
Oststrasse
96,
2000
Norderstedt
WEST
GERMANY
71
040/52
60
090
BELGIUM/HOLLAND/
LUXEMBOURG
Roland
Benelux
N. V.
Houtstraat
]
B
-
2431
Oevel
-
Westerlo
BELGIUM
2014-5845
35
DENMARK
Roland
Scandinavia
A/S
Langebrogade
6
Box
1937
DK
-
1023
Copenhagen
K.
DENMARK
3)
-953111
SWEDEN
Roland
Scandinavia
A/S
DanvikCenter
28 A,
2
tr.
S
-
131
30
Nacka,
SWEDEN
Z
08
-
702
00
20
NORWAY
Roland
Scandinavia
Avd.
Norge
Lilleakerveien
2
Postboks
95
Lilleaker
N-0216
Oslo
2
NORWAY
702-730074
FINLAND
Fazer
Musik
Inc.
Länsituulentie
POB
169
SF
-
02101
Espoo
FINLAND
720-435011
ITALY
Roland
Italy
S.
P.
A.
Viale
delle
Industrie
8
20020
ARESE
MILANO
ITALY
202
-
9358131)
SPAIN
HUNGARY
Roland
Electronics
Intermusica
Ltd.
de
España
S.
A.
Warehouse
Area
'DEPO'
Bolivia
239
Budapest.
P.O.
Box
3,
08020
Barcelona
2045
Torokbalint
SPAIN
Budapest
Z
93
-
308
-
1000
HUNGARY
711868905
SWITZERLAND
Musitronic
AG
BRAZIL
Gerberstrasse
5,
CH
-
4410
Oliver
do
Brazil
S.A.
Liestal
Instrumentos
Musicais
SWITZERLAND
Rua
Ludovico
Ariostos,
55
T
061/921
1615
Butanta
Cep.
05542,
Sao
Paulo
-
SP
Roland
CK
(Switzerland)
AG
-BRAZIL
Hauptstrasse
21
22
5511
869
2561
CH
-
4456
Tenniken
SWITZERLAND
2
061/98
60
55
Repair
Service
bv
Musitronic
AG
FRANCE
Musikengro
102,
Avenue
Jean
-
Jaures
69007
Lyon
Cedex
07
FRANCE
Z
(7)858
-
54 60
Musikengro
(Paris
Office)
Centre
Region
Parisienne
41
rue
Charles
-
Fourier,
94400
Vitry
s/Seine
FRANCE
T
(1)4680
86 62
AUSTRIA
E.
Dematte
&Co.
Neu
-
Rum
Siemens
-
Strasse
4
A
-
6021
Innsbruck
Box
591
AUSTRIA
5
43(05222)63
451
GREECE
V.
Dimitriadis
&
Co.
Ltd.
2
Fidiou
Str.,
GR
106
78
Athens
GREECE
2
3620130
PORTUGAL
Casa
Caius
Instrumentos
Musicais
Lda.
Rua
de
Santa
Catarina
131
Porto
PORTUGAL
1302-38
44
56
As
of
JUN.
1.
1990


i>>Roland*
10684
10684
[ee
Roland
Other manuals for EP-7
2
Table of contents
Other Roland Musical Instrument manuals

Roland
Roland HP 330 User manual

Roland
Roland DP90S User manual

Roland
Roland KR-1077 User manual

Roland
Roland TR-8S User manual

Roland
Roland RD-600 Operating and maintenance manual

Roland
Roland EP-30 Quick start guide

Roland
Roland GP-9 Manual

Roland
Roland DP-970 User manual

Roland
Roland HP601 User manual

Roland
Roland KR-107 User manual

Roland
Roland GW-7 User manual

Roland
Roland V-Piano Grand GP-7 User manual

Roland
Roland RP107 User manual

Roland
Roland FR-3s White Manual

Roland
Roland HP737 User manual

Roland
Roland KR-5 User manual

Roland
Roland FP-7F User manual

Roland
Roland VS-1680 V-XPANDED User manual

Roland
Roland Music Atelier AT90S User manual

Roland
Roland GO:PIANO User manual