manuals.online logo
Brands
  1. Home
  2. •
  3. Brands
  4. •
  5. Roland
  6. •
  7. Musical Instrument
  8. •
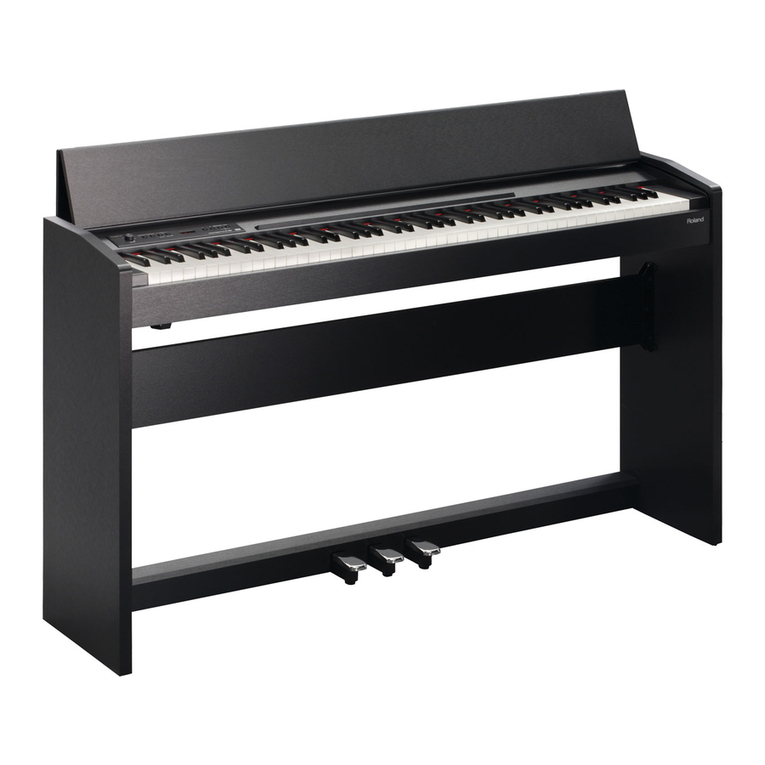
  9. Roland KR-4700 User manual

Roland KR-4700 User manual

*
Roland’
,
inilill
<5
DIGITAL
INTELLIGENT
PIANO
KR-4700/2000
OWNER’S
MANUAL
A
fs
A
FISK
OF
ELECTRIC
SHOCK
NOT,
[
RSX
GE
RET
TRE
Broo
ATTENTION
aisave
ve
choc
ELecTRIQue
NE
PAS
QUVRIR
CAUTION:
TO
REDUCE
THE
RISK
OF
ELECTRIC
SHOCK,
DO
NOT
REMOVE
COVER
(OR
BACK).
NO
USER-SERVICEABLE
PARTS
INSIDE.
REFER
SERVICING
TO
QUALIFIED
SERVICE
PERSONNEL.
The
lightning
fiash
with
arrowhead
symbol,
within
an
equi-
lateral
trangle,
is
intended
to
alert
the
user
to
the
presence
of
uninsuiated
“dangerous
voltage”
within
the
product's
enciosure
that
may
be
of
sufficient
magnitude
to
constitute
a
risk
of
electric
shock
to
persons.
The
exclamation
point
within
an
equilatera!
triangle
is
intended
to
alert
the
user
to
the
presence
of
important
oper-
ating
and
maintenance
(servicing)
instructions
in
the
litera-
ture
accompanying
the
product.
INSTRUCTIONS
PERTAINING
TO
A
RISK
OF
FIRE,
ELECTRIC
SHOCK,
OR
INJURY
TO
PERSONS.
IMPORTANT
SAFETY
INSTRUCTIONS
SAVE
THESE
INSTRUCTIONS
WARNING
-
When
using
electric
products,
basic
precautions
should
always
be
followed,
including
the
following:
Read
all
the
instructions
before
using
the
product.
.
Do
not
use
this
product
near
water
—
for
example,
near
a
bathtub,
washbowl,
kitchen
sink,
in
a
wet
basement,
or
near
a
swimming
pool,
or
the
like.
3.
This
product
should
be
used
only
with
a
cart
or
stand
that
is
recommended
by
the
manufacturer.
4.
This
product,
either
alone
or
in
combination
with
an
amplifier
and
headphones
or
speakers,
may
be
capable
of
producing
sound
levels
that
could
cause
permanent
hearing
foss.
Do
not
operate
for
a
tong
period
of
time
at
a
high
volume
level
or
at
a
fevel
that
is
uncomfortable.
If
you
experience
any
hearing
loss
or
ringing
in
the
ears,
you
should
consult
an
audiologist.
..
The
product
should
be
located
so
that
its
tocation
or
position
does
not
interfere
with
its
proper
ventilation.
The
product
should
be
located
away
from
heat
sources
such
as
radiators,
heat
registers,
or
other
products
that
produce
heat.
The
product
should
be
connected
to
a
power
supply
only
of
the
type
described
in
the
operating
instructions
or
as
marked
on
the
product.
po
N
2
um
8.
The
power-supply
cord
of
the
product
should
be
unplugged
from
the
outlet
when
left
unused
for
a
long
period
of
time.
9.
Care
should
be
taken
so
that
objects
do
not
fall
and
liquids
are
not
spilied
into
the
enclosure
through
openings.
10,The
product
should
be
serviced
by
qualified
service
person-
nel
when:
A.
The
power-supply
cord
or
the
plug
has
been
damaged;
or
B.
Objects
have
fallen,
or
liquid
has
been
spilled
onto
the
product;
or
C.
The
product
has
been
exposed
to
rain;
or
D.
The
product
does
not
appear
to
operate
normally
or
exhibits
a
marked
change
in
performance;
or
&.
The
product
has
been
dropped,
or
the
enclosure
dam-
aged.
11.Do
not
attempt
to
service
the
product
beyond
that
described
in
the
user-maintenance
instructions.
Ali
other
servicing
should
be
referred
to
qualified
service
personnel,
For
the
USA
This
product
may
be
equipped
with
a
polarized
line
plug
(one
blade
wider
than
the
other)
.
This
is
a
safety
feature.
If
you
are
unable
to
insert
the
plug
into
the
outlet,
contact
an
electrician
to
replace
your
obsolete
outlet.
Do
not
defeat
the
safety
pur-
pose
of
the
plug.
For
Polarized
Line
Piug
CAUTION:
ATENTION:
For
Canada
TO
PREVENT
ELECTRIC
SHOCK,
MATCH
WIDE
BLADE
OF
PLUG
TO
WIDE
SLOT,
FULLY
INSERT.
POUR
EVITER
LES
CHOCS
ELECTRIQUES,
INTRODUIRE
LA
LAME
LA
PLUS
LARGE
DE
LA
FICHE
DANS
LA
BORNE
CORRESPONDANTE
DE
LA
PRISE
ET
POUSSER
JUSQU’
AU
FOND.
BLUE
BROWN
>
NEUTRAL
:
LIVE
terminals
in
your
plug,
proceed
as
follows:
As
the
colours
of
the
wires
in
the
mains
lead
of
this
apparatus
may
not
correspond
with
the
coloured
markings
identifying
the
The
wire
which
is
coioured
BLUE
must
be
connected
to
the
terminal
which
is
marked
with
the
letter
N
or
coloured
BLACK.
The
wire
which
is
coloured
BROWN
must
be
connected
ta
the
terminal
which
is
marked
with
the
letter
L
or
coloured
RED.
For
the
U.K.
IMPORTANT:
THE
WIRES
IN
THIS
MAINS
LEAD
ARE
COLOURED
IN
ACCORDANCE
WITH
THE
FOLLOWING
CODE.
Introduction
Thank
you
for
purchasing
the
Roland
KR-4700/5000
Digital
Intelligent
Piano.
The
KR-4700/5000
is
a
sophisticated
keyboard
instrument
that
allows
you
to
create
full
ensemble
performances
with
simple
operation.
in
order
to
take
full
advantage
of
its
functionality
and
enjoy
years
of
trouble-free
use,
please
read
this
manual
caretully.
Main
features
@
A
wide
variety
of
built-in
sounds
(Tones)
A
wide
variety
of
musical
instrument
tones
(such
as
piano,
violin
and
trumpet)
are
built
in.
Normally,
you
will
be
able
to
select
from
16
tones.
By
switching
to
the
Tone
Expansion
mode,
however,
you
will
be
able
to
select
from
128
different
tones.
in
addition,
8
drum
sets
and
one
SFX
(sound
effects)
set
are
provided.
@
Sophisticated
ensemble
performances
The
KR-4700/5000
provides
an
Arranger
function
that
allows
you
to
create
ensembles
of
various
musical
genres
(such
as
rock,
bossanova
or
rhumba).
All
you
have
to
do
is
select
a
Music
Style
and
play
the
chords!
Normally,
you
will
be
able
to
select
from
16
music
styles.
By
switching
to
the
Music
Style
Expansion
mode,
however,
you
will
be
able
to
select
from
128
different
music
styles.
By
using
a
Music
Style
card
(sold
separately),
you
can
add
8
more
music
styles.
@
Easy
setup
for
performance
The
KR-4700/5000
provides
a
One
Touch
Program
button
and
a
Piano
button
By
pressing
the
One
Touch
Program
button,
you
can
immediately
begin
using
the
Style
performance
function,
regardless
of
the
panel
settings.
When
you
press
the
Piano
button,
the
entire
keyboard
will
function
as
a
piano,
again
regardless
of
the
panel
settings.
®
Built-in
Composer
with
taperecorder-style
operation
The
built-in
Composer
allows
you
to
record
your
ensemble
playing
as
with
easily
as
with
a
tape
recorder.
It
can
also
play
back
SMF
Music
Data
(sold
separately).
@
User
Program
function
for
storing
panel
settings
The
User
Program
function
lets
you
store
8
different
panel
setups.
To
recall
a
stored
setup,
simply
press
a
button.
@
High
quality
stereo
sound
The
KR-5000
features
a
40W
+
40W
stereo
amp
and
6
speakers
(2
in
the
piano;
4
in
the
stand),
pro-
viding
you
with
high
quality
sound.
The
KR-4700
has
a
25W
+
25W
stereo
amp
and
two
internal
speakers.
Copyright
©
1983
ROLAND
CORPORATION
All
rights
reserved.
No
part
of
this
publication
may
be
reproduced
in
any
form
without
the
written
permission
of
ROLAND
CORPORATION.
MeN
ene
cmialsmaae
alee]
mum
This
manual
consists
of
Six
chapters.
Chapter
1.
Try
out
the
KR-4700/5000
This
chapter
explains
basic
operations
of
the
KR-4700/5000,
such
as
how
to
select
sounds
and
use
the
performance
functions
and
the
Arranger.
If
you
are
using
the
KR-4700/5000
for
the
first
time,
please
be
sure
to
read
this
chapter.
Chapter
2.
Enhancing
your
playing
technique
This
chapter
explains
how
to
use
the
performance
functions
and
the
keyboard,
and
how
to
use
the
User
Program
function
to
store
panel
settings.
Read
this
chapter
when
you
wish
to
take
advantage
of
these
functions.
Chapter
3.
Record
and
playback
your
playing
This
chapter
explains
how
to
use
the
built-in
Composer
to
record
and
playback
your
playing.
The
musical
data
you
record
is
stored
temporarily
in
memory,
but
will
disappear
when
you
turn
the
power
off.
Be
sure
to
save
important
data
on
a
floppy
disk.
Chapter
4.
Editing
performance
data
This
chapter
explains
how
to
edit
musical
data,
and
also
how
to
use
various
other
performance
func-
tions.
Refer
to
this
chapter
as
necessary.
Chapter
5.
Various
function
settings
This
chapter
explains
various
settings
that
can
be
made
on
the
KR-4700/5000.
Refer
to
this
chapter
as
necessary.
Chapter
6.
Appendices
This
chapter
contains
various
supplementary
material,
such
as
explanations
of
the
message
displays,
and
lists
of
the
internal
Tones
and
Music
Styles.
Refer
to
this
chapter
as
necessary.
General
MIDI
System
The
General
MIDI
System
is
a
set
of
recommendations
which
seek
to
provide
a
way
for
going
beyond
the
limitations
of
proprietary
designs,
and
standardize
the
MIDI
capabilities
provided
by
sound
gener-
ating
devices.
If
you
use
a
sound
generating
unit
which
carries
the
General
MIDI
logo,
you
will
be
able
to
faithfully
reproduce
any
song
data
which
also
carries
the
General
MIDI
logo.
G
GS
format
The
GS
Format
is
Roland's
universal
set
of
specifications
which
were
formulated
in
the
interest
of
standardizing
the
way
in
which
sound
generating
devices
will
operate
when
MIDI
is
used
for
the
per-
formance
of
music.
If
you
use
a
sound
generating
unit
which
carries
the
GS
logo,
you
will
be
able
to
faithfully
reproduce
any
commercially
available
song
data
which
also
carries
the
GS
logo.
This
product
supports
both
General
MIDI
and GS.
Song
data
which
carries
either
of
these
logos
can
be
accurately
reproduced.
SMF
This
device
can
playback
Standard
MID!
Files
(720
Kbyte
format,
3.5
inch
floppy
disk)
such
as
SMF
Music
Data.
|@)(sme)
mere)
air=
ali
2
AIMPOrANE
MOLES
F255.
250s
Sa
leases
Se
aose
Capdade
sina
neg
ctvsse
cesses
tadetebs
to
Sonesenceen
andak
seas
daa
has
Mow
sadbaes
agua
ee
7
Front-and
tear
patiels.cci
iiss
leiysahe
std
cup
hnec
boc
ule
Aisa
de
ate
tate
be
nics
taddeaca
oss
sea
decateachutatants
9
Before
you
begin
Listen
to
the
demo
songs..
Chapter
1.
Try
out
the
KR-4700/5000
Auditioning
the
Sounds.
Selecting
a
Tone
(Tone
Seandard
mude}
Selecting
a
Tone
(Tone
Expansion
Mode)
........cccccsceseesesseesessenesecsssesescaresseseneasstseseeueesivsacanesessane
18
Using
the
performance
functions
Using
the
stand
pedals
Raising
or
lowering
the
pitch
(Pitch
Bend
effect)
occ
eccceeessessceeseseseseersseearenresscseeessensecseeeseneaee
19
Changing
the
brightness
of
the
sound
(KR-5000
only)
.
Try
playing
with
a
Style
Selecting
aiMusic:
Styles
vsczeccccovedsevaadescdes
ciccesstcivseG
se
cavtscadudbdtealdtSeses
ce
tyuientsticrtelveda
desavastecotees
tne
Selecting
the
basic*display::...i:fuccccA.gestgecs
nasocsicesaveceueaest
saebeddececchcesl
clvevuvadgoescudabe
opetvsddbasatecdbateesa
27
Chapter
2,
Enhancing
your
playing
techinque
Performance
functions
2
Quick
preparation
for
Style
performance
(One
Touch
Program
button)..
ay)
Quick
preparation
for
Piano
performance
(Piano
DUTTON)
.........
eee
ccsescsesescesseatsevaseescacsereesceeanee
29
Change
the
Tempo
of
a
Style
performance
(Tempo
buttons)
Simplified
fingering
for
chords
(the
Chord
Intelligence
button)..
Hold
notes
played
in
the
Lower
area
(the
Lower
Hold
button)
Add
harmony
to
the
melody
(the
Melody
Intelligence
button)
Use
the
Leading
Bass
function
(the
Leading
Bass
button)...
Start/Stop
Style
performance
Using
the
metronome
Ways
to
use
the
keyboard
(Keyboard
Mode}
..
Split
the
keyboard
(Split)
Play
two
tones
together
(Layer).......cccccsccssccsssssscssecscssesssesceesessescsssessssausuvsssavsvacsssssessessusrasenerevaree
Sounding
the
bass
without
using
Style
performance
(Manual
Bass)
Play
drums
from
the
keyboard
(Manual
Drums)
Register
panel
settings
(User
Program)
........ccsssessecssscesecseseseenesessesssesessesseescaescsseseccenenceeecaeeaveatareees
Chapter
3.
Record
and
playback
your
playing
RECORd
VOUT
DIAVIAB
ccs
sessdesattevcasnctuiensiereceeldenoMa
iD
conse
hsv
eltl
foster
i
due
dalestectstieaeva
44
Playing
back
a
recorded
performance...
Save
performance
data
to
disk
(Save)
....
Playback
performance
data
from
disk
oo...
eesseesssssseseseesesesesnesssncnsasssssessesessasenssseceesenescavevavevasesaee
50
Minus-one
performance.
Record
additional
songs.
Chapter
4.
Editing
performance
data
Before
you:
read
this
Chapter
ccc.
ox.cccscacccosseiesosseeas
secevenececsressesstoscunattsn
uate
sues
ndesoresssisensdansciaseeecsannysd
55
Load
performance
data
from
disk
(Load)
.
Three
ways
to
record
..
Correct
inaccurate
note
timing
(Quantize}
.
Erase
performance
data
(Erase)
insert
blank
measures
(Insert)
Copy
performance
data
(Copy}
Delete
specified
measures
of
performance
data
(Delete}..
Modify
the
initial
settings
of
the
performance
data
.......cece
cesses
eserereeeseeeseesecesseeensnessiensaseseeaeaenes
Erasing
all
data
from
a
disk
(Format)
.........:secsssssssscsscsssscsscsseseseessessstscsesessenssessessseausasesserecseasensgeee
68
Erasing
specified
performance
data
from
disk
(Delete
File)
Convert
performance
data
to
Standard
MIDI
File
(Save
As
SMF)
Chapter
5.
Various
function
settings
Adjust
the
volume
balance
Reverb
effect
settings
Chorus
fect
Seti
BS
cuccsesessedssscesavasveisievied
ocassewdenssddcaclescsgusedegssgali
au
creda
cqrtnsa
geaas
cass
setihsees
mecteseels
73
Transpose
the:
pitch
:(TransPOse)
ssc
seis
saves
tatethschasclesssaessesdavecsedaoutesseet
ches
{hop
dosage
cede
arate
aL
TNE
Shift
the
pitch
by
octaves
(Octave
Shi
Change
the
function
of
the
pedals.
Pitch
Bend
Wheel
settings
Adjust
the
keyboard
response
(Keyboard
Sensitivity)
........ccscssssesssesssesesceeteeetecetecseeeeestenseenenensenes
79
Change
the
Split
Point
Chord
Hold
on/off
..
Save
User
Programs
on
disk.
Adjust
the
volume
of
the
metronOMme
........ccssssseseecetsecceeceessereseessscsssessesseaesecsesaueceseesecensaneteneeesa
85
Adjust
the
display
contrast
Adjust
the
tuning
Restoring
the
factory
settings
Chapter
6.
Appendices
Troubleshooting...
Display
messages.
TOME
ES
toc
ases
ce
ecu
ib
eteca
cies
aph
ce
neo
duets
Saka
cle
Ye
cube
tbaaca
dobb
tanec
ot
habsrveisiegedseieasdshcdeitiaaaes
cent
eae
lied
Music
Style
list
Drum
set
fist
Chord
list
MIDI
Implementation:
Chatt
.c.0..c.c..ccsisecccscesseesasassecnccnornensuqenseatesccsussenstaseastsntaecncesnecabesnsasancenacni
oars
SPECIE
CALIONS
ress
cae
pce
ces
ost
ancbudc
saan
cstecelnen
ces
Mesdeivas
eva
tndrac
susdavacendtaeSevenbsddeesqaintiegtegetiReastelsaa
Assembling
the
stand
(KR-4700)
..
Assembling
the
stand
{KR-5000}
INGO:
ccisiateuide
setae
secageese
ilaelerelacolaimareices
Power
Supply
Placement
@
Before
connecting
this
unit
to
other
devices,
turn
off
the
power
to
all
units;
this will
help
prevent
damage
or
malfunction.
@
Do
not
use
this
unit
on
the
same
power
circuit
with
any
device
that
will
generate
line
noise;
an
electric
motor
or
variable
lighting
system
for
example.
@
This
device
may
interfere
with
radio
and
television
reception.
Do
not
use
this
device
in
the
vicinity
of
such
receivers.
@
Make
sure
you
always
have
the
instrument
placed
so
it
is
level
and
sure
to
remain
stable.
Otherwise,
if
played
while
tilted,
you
risk
causing
damage
to
the
keyboard
as
a
result
of
the
unnat-
ural
degree
of
force
that
might
be
applied
to
certain
parts
of
it.
Maintenance
@
For
everyday
cleaning
wipe
the
unit
with
a
soft,
dry
cloth
or
one
that
has
been
slightly
dampened
with
water.
To
remove
stubborn
dirt,
use
a
mild,
non-abrasive
detergent.
Afterwards,
be
sure
to
wipe
the
unit
thoroughly
with
a
soft,
dry
cloth.
@
Never
use
benzene,
thinners,
alcohol
or
solvents
of
any
kind,
to
avoid
the
possibility
of
discol-
oration
and/or
deformation.
Additional
Precautions
@
Protect
the
unit
from
strong
impact.
@
Never
strike
or
apply
strong
pressure
to
the
display.
@A
smal!
amount
of
heat
will
radiate
from
the
unit
during
normal
operation.
@
Before
using
the
unit
in
a
foreign
country,
consult
with
qualified
service
personnel.
@
Please
be
aware
that
the
contents
of
memory
may
at
times
be
Jost;
when
the
unit
is
sent
for
repairs
or
when
by
some
chance
a
malfunction
has
occurred.
Important
data
should
be
stored
on
a
floppy
disk,
or
written
down
on
paper
(if
possible).
During
repairs,
due
care
is
taken
to
avoid
the
loss
of
data.
However,
in
certain
cases
(such
as
when
circuitry
related
to
memory
itself
is
out
of
order),
we
regret
that
it
may
not
be
possible
to
restore
the
data.
Before
Using
Disks
Handling
the
drive
@
Avoid
using
the
unit
in
areas
of
high
humidity
(eg.,
condensation).
High
levels
of
humidity
can
adversely
affect
the
operation
of
the
drive
and/or
damage
floppy
disks.
When
the
unit
has
been
transported,
allow
it
to
warm
to
room
temperature
before
operating.
@
To
insert
a
disk,
push
it
gently
but
firmly
into
the
drive
—
it
will
click
into
place.
To
remove
a
disk,
press
the
EJECT
button
firmly.
Do
not
use
excessive
force
to
remove
a
disk
which
is
lodged
in
the
drive.
EJECT
button
@
Never
attempt
to
remove
a
floppy
disk
from
the
drive
while
the
drive
is
operating
(the
indicator
is
brightly
lit);
damage
could
result
to
both
the
disk
and
the
drive.
@
Remove
any
disk
from
the
drive
before
powering
up
or
down,
Handling
Floppy
Disks
@
Floppy
disks
contain
a
magnetic
storage
medium
(much
like
magnetic
recording
tape).
Please
observe
the
following
when
handling
floppy
disks:
©
Never
touch
the
magnetic
medium
inside
the
disk.
2
Do
not
subject
floppy
disks
to
temperature
extremes
(eg.,
direct
sunlight
in
an
enclosed
vehicle).
Recommended
temperature
range:
10
to
50°C.
2
Do
not
expose
floppy
disks
to
strong
magnetic
fields,
such
as
those
generated
by
Joud-
speakers.
@
Floppy
disks
contain
a
‘write
protect’
tab
which
can
protect
the
disk
from
accidental
erasure.
It
is
recommended
that
the tab
be
kept
in
the
‘PROTECT’
position
and
moved
to
the
‘WRITE’
position
only
when
you
wish
to
write
new
data
onto
the
disk.
ai
ae
|
Protect
tab
Write
(write
enabie)
Protect
(write
disable)
@
All
important
data
should
be
copied
onto
backup
disk(s).
This
provides
a
complete
duplicate
of
the
data
should
the
original
disk(s}
be
lost
or
damaged.
@
The
identification
label
should
be
firmly
fixed
to
the
disk.
Should
the
label
come
loose
while
the
disk
is
in
the
drive,
it
may
be
difficult
to
remove
the
disk.
@
Put
the
disk
back
into
its
case
for
storage.
imsealmelarenr-ve|melelai=s
1.
Power
switch
This
switch
turns
the
power
on/off.
When
the
power
is
turned
on,
the
indicator
above
the
head-
phone
jack
will
light.
2.
Demo
button
Press
this
button
to
hear
the
demo
songs.
(#p.15)
3.
Metronome
button
This
button
determines
whether
the
metronome
wil!
sound
during
performance.
(6p.35)
4.
Chord
Intelligence
button
Press
this
button
when
you
wish
to
use
the
Chord
Intelligence
function
(chords
played
by
simplified
fingering).
(=
p.30)
5.
Lower
Hold
button
Press
this
button
when
you
wish
to
use
the
Lower
Hold
func-
tion
(notes
played
in
the
Lower
area
will
continue
to
sound
when
you
release
the
keys).
(ep.32)
6.
Part
Balance
buttons
These
buttons
adjust
the
volume
of
each
performance
Part.’
(erp.71)
7.
Music
Style
select
buttons
These
buttons
are
used
to
select
a
Music
Style.
(n«p.22)
8.
Display
button
This
button
switches
among
the
three
basic
display
pages.
(0'9.27)
9.
User
Program
button
Press
this
button
when
you
wish
to
store
panel
settings
as
a
User
Program,
or
to
recall
a
previously
stored
User
Program.
(p.42)
10.
Brilliance
slider
<KR-5000
only>
This
slider
adjusts
the
brightness
(tone
quality)
of
the
sound.
(68
p.19)
11.
Volume
slider
This
slider
adjusts
the
overall
volume.
(¢7p.15}
12.
Leading
Bass
button
Press
this
button
when
you
wish
to
use
the
Leading
Bass
function
(the
lowest
note
of
the
chord
you
play
will
be
played
as
the
bass
note).
(#p.33)
13.
Sync
button
Press
this
button
when
you
wish
to
start
a
Style
performance
the
moment
you
play
a
note.
(&p.34)
14.
Arrangement
buttons
This
button
selects
Arrangements
within
a
Music
Style.
(e#p.24)
15.
Fill
in
buttons
Press
this
button
to
trigger
a
fill-in
before
switching
to
a
dif-
ferent
arrangement.
(#p.24,
35)
16.
Intro/Ending
button
Press
this
button
to
start
a
Style
performance
with
an
Intro,
or
to
end
a
performance
with
an
Ending.
(#p.25,
35)
20
21
22
23
24 25
17.
Display
Various
information
is
displayed
in
this
area.
18.
Beat
indicator
This
indicator
flashes
to
indicate
the
beat
of
the
selected
Music
Style
(or
performance
data).
19.
Tone
select
buttons
These
buttons
select
the
tone
played
by
each
performance
Part;
Upper,
Lower,
and
Manual
Bass.
(®p.17,
p.37,
p.39)
20.
Effect
buttons
Use
these
buttons
to
switch
the
Chorus
and
Reverb
effects
on/off.
Chorus
adds
spaciousness,
and
Reverb
adds
reverber-
ation.
(Reverb:
#*p.72,
Chorus:
&*p.73)
21.
Start/Stop
button
Press
this
button
to
start/stop
a
Music
Style.
(&p.34)
22,
Tempo
buttons
These
buttons
adjust
the
performance
tempo.
(*p.30)
23.
Melody
Intelligence
button
Press
this
button
when
you
wish
to
use
the
Melody
Intelligence
function
(harmony
will
be
added
to
the
melody).
(9,33)
24.
Piano
button
Press
this
button
when
you
wish
to
use
the
entire
keyboard
as
a
piano.
(8.29)
25.
One
Touch
Program
button
Press
this
button
to
set
the
KR-4700/5000
to
a
setting
suitable
for
the
selected
Music
Style.
(&p.29)
26.
Keyboard
Mode
Use
these
buttons
to
specify
how
you
wish
to
use
the
key-
board.
(6p.36)
26
27 28 29
27.
Manual
Bass
On/Off
button
This
button
determines
whether
or
not
the
Manual
Bass
Part
will
sound.
(#p.38)
28.
Lower
On/Off
button
This
button
determines
whether
or
not
the
Lower
Part
will
sound.
29.
Music
Style
Card
slot
A
Music
Style
card
(sold
separately)
can
be
inserted
here.
(@p.23)
12
13
14
15
16
171819
1.
Transpose
button
Press
this
button
when
you
wish
to
use
the
Transpose
func-
tion
(shifting
the
keyboard
range).
(#p.74)
2.
Octave
Shift
button
Press
this
button
to
shift
the
pitch
by
octaves.
(#*p.75)
3.
Utility
button
Press
this
button
to
access
various
utility
functions.
4,
Exit
button
Press
this
button
to
cancel
an
operation.
5.
Enter
button
Press
this
button
to
execute
an
operation.
6.
Load
button
Press
this
button
to
load
performance
data
from
a
disk
into
the
KR-4700/5000.
(ep.57)
7.
Save
button
Press
this
button
to
save
performance
data
from
the
KR-
4700/5000
on
to
a
disk.
(#*p.49)
8.
Clear
button
Press
this
button
to
clear
(erase)
performance
data
from
the
KR-4700/5000's
memory.
(#*p.54)
9.
Edit
button
Press
this
button
to
edit
performance
data.
10.
All
Song
Play
button
Press
this
button
to
successively
play
all
the
songs
on
a
disk.
(e#p.50)
11.
Track
buttons
These
buttons
select
the
track
on
which
to
record.
12.
Cursor
button
Press
this
button
to
select
an
item
shown
in
the
display.
13.
Value
buttons/Song
Select
buttons
Use
these
buttons
to
modify
the
value
of
a
setting,
or
to
select
a
song
from
a
disk
for
playback
and
load.
14.
Reset
button
Press
this
button
to
return
to
the
beginning
of
the
song
and
reset
the
initial
values
of
the
selected
performance
data.
15.
Stop
button
This
button
stops
playback/recording
of
performance-data.
16.
Play
button
This
button
starts
playback/recording
of
performance
data.
17.
Recording
button
Press
this
button
to
record
performance
data.
18.
Backward
button
(Bwd)
This
button
moves
backward
("rewind")
through
performance
data.
19.
Forward
button
(Fwd)
This
button
moves
forward
("fast
forward")
through
perfor-
mance
data.
1.
Pedal
connector
Connect
the
pedals
of
the
Keyboard
stand
to
this
jack.
2.
MIDI
connectors
External
MIDI
devices
can
be
connected
here
to
exchange
MIDI
data
with
the
KR-4700/5000
3.
Expression
pedal
connector
<KR-5000
only>
When
an
expression
pedal
(sold!
separately)
is
connected
here,
you
can
control
the
volume
with
your
foot.
4.
Audio
input
jacks
A
tape
recorder
or
CD
player
can
be
connected
here
and
played
back
through
the
KR-4700/5000's
speakers
together
with
your
own
playing.
This
is
especially
convenient
when
practicing
a
song.
5.
Audio
output
jacks
These
jacks
can
be
connected
to
a
keyboard
amp
or
an
audio
system
to
hear
the
KR-4700/5000
through
other
speakers.
The
input
jacks
of
a
tape
recorder
can
also
be
connected
here
to
record
your
playing.
*
if
you
wish
to
hear
your
playing
only
on
the
external
speaker
system
and
not
through
the
KR-4700/5000's
built-in
speakers,
insert
a
dummy
plug
into
the
head-
phone
jack.
6.
Speaker
connector
<KR-5000
only>
Connect
the
speakers
in
the
Keybuard
stand
to
this
connec-
tor.
7.
AC
inlet
Connect
the
included
power
cable
to
this
connector.
7
1
8.
Phone
jack
A
set
of
headphones
(RH-20/80/1
20,
sold
separately)
can
be
connected
here.
When
headphones
are
plugged
in,
the
built-
in
speakers
of
the
KR-4700/5000
will
not
sound.
This
is
use-
ful
when
you
wish
to
practice
without
inconveniencing
peo-
ple
around
you,
or
late
at
night.
*
To
adjust
the
headphone
volume,
use
the
Volume
slider.
Remember
that
excessive
volume
levels
can
result
in
permanent
hearing
loss.
Before
you
begin
Connect
the
power
cable
1,
Make
sure
that
the
Power
switch
(located
on
the
left
side
of
the
panel)
is
in
the
Off
position
(not
pressed).
2.
Connect
the
included
power
cable
to
the
AC
inlet
(located
on
the
bottom
of
the
unit),
and
then
connect
the
other
end
to
an
electrical
outlet.
ae
Ty
*
Use
only
the
included
power
cable.
*
If
you
will
not
be
using
the
instrument
for
an
extended
period
of
time,
disconnect
the
power
cable
from
the
electrical
outlet.
Set
up
the
music
stand
Raise
the
music
stand,
and
bend
down
the
two
metal
supports
as
shown
below.
Open
the
cover
For
the
KR-4700,
use
both
hands
to
grasp
the
ridge
at
the
lower
edge
of
the
cover;
raise
the
cover
vertically
and
slide
it
back.
For
the
KR-5000,
use
both
hands
to
grasp
the
cover
handles,
raise
the
cover
vertically
and
slide
it
back.
¢
r
*
Be
careful
not
to
pinch
your
fingers
when
opening
or
closing
the
cover.
When
closing
the
cover,
slide
it
slowly
forward.
When
it
stops,
lift
it
a
bit
upward
and
then
genily
lower
it.
Small
children
should
be
assisted
by
an
adult.
*
Do
not
close
the
cover
with
sheet
music
or
other
objects
resting
on
the
keyboard.
Attaching
the
Manual
Drum
template
The
Manual
Drum
template
indicates
which
drum
sound
will
be
played
by
each
key
when
playing
drums
from
the
keyboard.
You
may
attach
it
as
desired.
The
Manual
Drum
template
is
fastened
to
the
inside
of
the
packing
carton
with
tape.
Peel
off
the
pro-
tective
sheet
on
the
back
of
the
template,
and
affix
it
to
the
left
side
of
the
keyboard
as
shown
below.
(iis(=\aliolial-xel-\anleielate
ss
The
KR-4700/5000
has
five
demo
songs
in
its
memory.
These
demo
songs
cover
a
wide
variety
of
musical
genres,
and
demonstrate
the
sounds
and
Music
Styles
the
KR-4700/5000
can
produce.
“Sia/Stos
1.
Make
sure
that
the
power
cable
is
connected,
and
that
the
Volume
slider
is
at
the
minimum
position.
2.
Press
the
Power
switch
to
turn
the
power
on.
*
When
you
first
use
the
KR-4700/5000
or
after
it
has
been
unused
for
a
month
or
longer,
the
fol-
lowing
display
will
appear
for
a
time
and
then
the
basic
display
will
reappear.
All
settings
in
inter-
nal
memory
will
be
restored
to
the
factory
settings.
If
you
have
modified
any
of
the
internal
set-
tings,
these
settings
will
be
lost.
For
this
reason
it
is
a
good
idea
to
turn
the
power
on
regularly
to
prevent
the
settings
from
being
lost.
*
This
unit
is
equipped
with
a
protection
circuit.
A
brief
interval
(a
few
seconds)
after
power
up
is
required
before
the
unit
will
operate
normally.
3.
Adjust
the
Volume
slider
to
an
appropriate
volume.
4.
Press
the
Demo
button.
The
Start/Stop
button
and
the
Music
Style
buttons
(1
—5)
will
blink,
and
you
can
now
listen
to
the
demo
songs.
5.
Press
the
Start/Stop
button.
The
five
demo
songs
will
be
played
in
succession.
If
you
wish
to
hear
only
a
specific
demo
song,
press
one
of
the
Music
Style
buttons
(1—5).
*
Demo
songs
cannot
be
selected
during
playback.
6.
To
stop
playback,
press
the
Start/Stop
button
(or
the
Demo
button).
7.
After
you
have
finished
listening
to
the
demo
songs,
press
the
Demo
button
once
again
to
return
to
normal
playing
mode.
List
of
demo
songs
1.
Strictly
Salsa
(Style:
54.
Salsa)
by
John
Maul
Copyright
1993,
Roland
UK
2.
Flying
Home
(Style:
83.
Pop3)
by
Mark
Van
Der
Sluis
Copyright
1993,
Roland
New
Zealand
3.
2
Left
Feet
(Style:
A-4.
Country)
by
Marvin
Sanders
Copyright
1993,
Marvin
Sanders
4.
Latin
Frenzy
(Style
53.
Latin)
by
Luigi
Bruti
&
Roberto
Lanciotti
Copyright
1993,
Roland
Europe
5.
Pink
Sox
(Style:
24.
8Beat4)
by
John
Maul
Copyright
1993,
Roland
UK
Profiles
of
the
composers
John
Maul
John
Maul
is
a
musician,
composer
and
arranger
having
graduated
from
the
Royal
Academy
of
Music
in
London.
John's
work
encompasses
studio
recordings
and
live
performances,
including
work
with
top
cabaret
artists
in
the
U.K.
His
writing
credits
include
commercilal
music
for
radio
and
television,
as
well
as
scoring
jass
and
classical
works.
As
a
product
specialist
for
Roland
U.K.,
John’s
talents
are
well
utilized
in
the
preparation
of
support
material
for
educational
and
instructional
use.
Mark
Van
Der
Sluis
Mark
did
not
go
through
formal
musical
training,
but
is
a
naturally
gifted
musician
who
by
age
12
was
already
performing
and
composing
as
a
professional
keyboard
player.
He
has
appeared
in
many
recordings,
television
broadcasts
and
live
performances,
and
in
1989
signed
a
contract
with
Roland
New
Zealand
as
a
product
specialist.
In
1992
he
became
a
product
specialist
for
Roland
Japan,
con-
ducting
product
clinics
and
demonstrations
worldwide.
Marvin
Sanders
Marvin
Sanders
is
a
somewhat
wacky
Los
Angeles
composer
whose
work
can
be
heard
on
projects
for
Toyota,
Acura,
Max
Factor,
Alpine,
Thomas
Brothers,
Theater
for
Young
Audiences,
and
Michael
Jackson.
He
has
also
worked
extensively
with
Roland,
conducting
clinics
and
writing
music
for
numerous
product
videos
and
demos
including
ROM-plays
in
the
SC-155
and
JV-880.
Luigi
Bruti
Luigi
Bruti
is
the
senior
musical
advisor
in
Roland
Europe;
he
joined
the
company
in
1979.
He
won
the
world
championships
of
accordion
in
1976
and
worked
for
three
years
(1978—80)
for
an
Italian
record
company
in
the
creation
of
sound
tracks,
both
as
a
composer
and
performer.
He
is
a
keyboard
and
synthesizer
player,
and
has
his
own
recording
studio
where
he
creates
sound
tracks
for
radio
and
TV
spots
and
for
movies.
As
the
chief
of
Roland
Europe's
musical
staff,
he
designed
the
musical
sec-
tion
of
the
E-series
(from
E-20
to
E-70,
which
include
several
original
patents),
and
has
also
created
many
musical
styles,
demo
songs
and
style
cards
related
to
the
E-series.
Roberto
Lanciotti
Roberto
Lanciotti
is
a
musical
advisor
in
Roland
Europe;
he
joined
the
company
in
1985.
He
is
a
key-
board
and
synthesizer
player
involved
in
various
live
performances.
He
works
as
a
composer
and
per-
former
in
several
recording
studios
in
the
creation
of
sound
tracks
for
radio
and
TV
spots
and
for
movies.
As
a
member
of
Roland
Europe's
musical
staff
he
has
participated
in
the
creation
of
the
E-
series,
music
styles
and
style
cards.
Chapter
1.
Try
out
the
KR-4700/5000
XUroliilelaliatemiave
ase.
ate
cee
The
KR-4700/5000
includes
a
wide
variety
of
instrumental
sounds
such
as
piano,
guitar,
violin
and
trumpet.
These
sounds
are
called
Tones.
Normally,
you
can
select
from
16
Tones.
By
switching
to
the
Tone
Expansion
mode,
however,
you
can
select
trom
128
Tones.
When
the
power
is
turned
on,
the
"Piano
1"
Tone
will
be
selected
.
Play
the
keyboard
to
hear
the
sound.
*
Whenever
the
KR-4700/5000
is
turned
on,
it
will
always
be
ready
for
Piano
performance.
If
dur-
ing
operation
you
ever
become
confused,
turn
the
power
off
and
then
on
once
again.
Selecting
a
Tone
(Tone
Standard
mode)
Normally
you
can
select
from
16
Tones.
The
16
Tones
are
organized
by
Group
(A/B)
and
Number
(1--8),
and
are
selected
by
the
Tone
buttons.
The
Tones
selected
by
each
button
are
printed
on
the
front
panel.
1.
Press
the
Group
button
to
select
the
Group.
Each
time
the
button
is
pressed,
you
will
alternate
between
Groups
A
and
B.
*
If
you
wish
to
select
another
Tone
in
the
same
group,
there
is
no
need
to
press
the
Group
button.
2.
Press
a
number
button
1—8
to
select
the
Number.
The
specified
Tone
will
be
selected.
The
name
of
the
selected
Tone
will
be
shown
in
the
display.
Example:
When
A-7
"E.Organ*
is
selected
17
Selecting
a
Tone
(Tone
Expansion
mode)
in
Tone
Expansion
mode
you
can
select
from
128
different
Tones.
The
128
Tones
are
organized
by
Group
(A/B),
Bank
(1—8)
and
Number
(1—8).
For
a
list
of
the
Tones,
refer
to
the
“Tone
list"
(¢#p.94).
1.
Press
the
Expansion
button.
The
button
indicator
will
light,
indicating
that
the
Tone
Expansion
mode
is
selected.
2.
Press
the
Group
button
to
select
the
Group.
*
If
you
wish
to
select
another
Tone
in
the
same
group,
there
is
no
need
to
press
the
Group
button.
3.
Press
a
button
1—8
to
select
the
Bank.
4.
Again
press
a
button
1—8
to
select
the
Number.
The
specified
Tone
will
be
selected.
To
return
to
Tone
standard
mode,
press
the
Expansion
button
once
again.
The
button
indicator
will
go
off.
Using
the
stand
pedals
When
the
power
is
turned
on,
or
when
the
Piano
button
is
pressed
(##p.29),
the
function
of
each
pedal
is
set
as
follows:
Soft
pedal
Damper
pedal
Sostenuto
pedai
When
the
soft
pedal
is
pressed,
the
sound
will
become
softer
(muted).
When
the
sostenuto
pedal
is
pressed,
the
notes
that
were
sounding
at
that.
moment
will
be
sustained.
Notes
played
afterward
will
not
be
affected.
When
the
damper
pedal
is
pressed,
notes
will
be
sustained.
*
During
Style
performance,
the
function
of
the
left
and
center
pedals
will
be
different.
(««p.29)
Raising
or
lowering
the
pitch
(Pitch
Bend
effect)
The
pitch
bend
wheel
is
located
on
the
left
side
of
the
keyboard.
If
you
move
the
wheel
forward
or
backward
while
a
note
is
sounding,
the
pitch
will
change
smoothly
(over
a
maximum
of
two
half-
steps).
Moving
the
wheel
away
from
you
raises
the
pitch,
and
moving
the
wheel
toward
you
lowers
the
pitch.
*
When
the
power
is
turned
on,
this
effect
applies
to
the
Upper
Tone.
*
You
can
change
the
maximum
range
of
pitch
change.
(**p.78)
Changing
the
brightness
of
the
sound
(KR-5000
only)
Use
the
Brilliance
lever
to
adjust
the
brightness
of
the
sound.
Moving
the
lever
to
the
right
will
bright-
en
the
sound,
and
moving
it
to
the
left
will
darken
(soften)
the
sound.
14
20
Try
playing
with
a
Style
—
w
The
KR-4700/5000
provides
an
Arranger
function
which
allows
you
to
easily
create
ensembles
of
var-
ious
musical
genres
all
by
yourself.
The
Arranger
function
detects
the
type
of
chord
being
played,
and
automatically
produces
an
accompaniment
suitable
for
the
selected
Style.
References
in
this
manual
to
"Style
Performance"
refer
to
when
you
play
the
keyboard
while
using
this
Arranger
function.
About
Music
Styles
.
There
are
many
different
types
of
music
in
the
world,
and
each
has
certain
characteristics.
For
example,
a
bossanova
tune
has
certain
things
about
it
that
make
us
recognize
it
as
a
bossanova,
just
as
a
rhumba
has
certain
characteristics
that
mark
it
as
a
rhumba.
Some
of
these
elements
are
the
rhythm,
the
tempo,
the
type
of
instruments
used,
and
the
arrangement.
in
the
KR-4700/5000,
"Music
Style"
refers
to
this
type
of
data
that
has
been
analyzed
for
each
genre
of
music.
Each
Music
Style
contains
accompaniment
patterns
for
Original,
Variation,
intro,
Ending
and
Fill-in,
In
addition,
there
are
two
types
of
each
of
these
patterns;
Basic
and
Advanced.
These
accom-
paniment
patterns
are
not
simply played
hack.
Rather,
the
arrangement
changes
according
to
the
chords
you
play,
for
musically
sophisticated
development
as
the
sang
progresses.
For
now,
press
Music
Style
button
1
to
select
the
"A-1
Big
Band"
Music
Style
(a
large
jazz
orchestra).
The
display
will
indicate
the
selected
Music
Style
name
and
tempo.
Ai
Bigbands
Press
the
One
Touch
Program
button
to
make
the
button
indicator
light.
You
are
now
ready
to
begin
Style
performance.
Simultaneously
play
the
notes
of
the
following
chord.
When
you
play
the
chord,
accompaniment
will
start
automatically.
LAL
ay
The
accompaniment
will
continue
even
if
you
take
your
hands
off
the
keyboard.

This manual suits for next models

1

Other Roland Musical Instrument manuals

Roland FR-8X Operating instructions

Roland

Roland FR-8X Operating instructions

Roland G-70 User manual

Roland

Roland G-70 User manual

Roland VS-880EX User manual

Roland

Roland VS-880EX User manual

Roland Atelier AT-90SL User manual

Roland

Roland Atelier AT-90SL User manual

Roland GO:PIANO88 User manual

Roland

Roland GO:PIANO88 User manual

Roland -50 User manual

Roland

Roland -50 User manual

Roland DP990RF User manual

Roland

Roland DP990RF User manual

Roland 4500 User manual

Roland

Roland 4500 User manual

Roland HP-207 User manual

Roland

Roland HP-207 User manual

Roland RG-7 User manual

Roland

Roland RG-7 User manual

Roland RG-3F User manual

Roland

Roland RG-3F User manual

Roland HP 335 Operating and maintenance manual

Roland

Roland HP 335 Operating and maintenance manual

Roland XP-50 User manual

Roland

Roland XP-50 User manual

Roland FP-10 User manual

Roland

Roland FP-10 User manual

Roland STUDIO M User manual

Roland

Roland STUDIO M User manual

Roland RM-700 User manual

Roland

Roland RM-700 User manual

Roland HP-7/3 User manual

Roland

Roland HP-7/3 User manual

Roland RD-88 Manual

Roland

Roland RD-88 Manual

Roland KR-107 User manual

Roland

Roland KR-107 User manual

Roland V-Sudio VS-840 Owner's manual

Roland

Roland V-Sudio VS-840 Owner's manual

Roland EP-9e User manual

Roland

Roland EP-9e User manual

Roland HP 535 Operating and maintenance manual

Roland

Roland HP 535 Operating and maintenance manual

Roland GP-9 Manual

Roland

Roland GP-9 Manual

Roland V-studio VS-2480 Assembly instructions

Roland

Roland V-studio VS-2480 Assembly instructions

Popular Musical Instrument manuals by other brands

BYOGuitar.com LP Std Assembly instructions

BYOGuitar.com

BYOGuitar.com LP Std Assembly instructions

Yamaha P-45 owner's manual

Yamaha

Yamaha P-45 owner's manual

Redpipes classic operating manual

Redpipes

Redpipes classic operating manual

Yamaha QR10 owner's manual

Yamaha

Yamaha QR10 owner's manual

Miditech i2-Stage 88 manual

Miditech

Miditech i2-Stage 88 manual

Johnny Eleca Pickups instruction manual

Johnny Eleca

Johnny Eleca Pickups instruction manual

Classic Cantabile UP-1 user manual

Classic Cantabile

Classic Cantabile UP-1 user manual

Gewa CP14 owner's manual

Gewa

Gewa CP14 owner's manual

Casio Privia PX-870 user guide

Casio

Casio Privia PX-870 user guide

Orla CDP31 owner's manual

Orla

Orla CDP31 owner's manual

Yamaha Clavinova CVP-204 installation guide

Yamaha

Yamaha Clavinova CVP-204 installation guide

Kawai CN2 owner's manual

Kawai

Kawai CN2 owner's manual

Kurzweil EGIV owner's manual

Kurzweil

Kurzweil EGIV owner's manual

Gibson Maestro manual

Gibson

Gibson Maestro manual

TC-Helicon VoiceTone create product manual

TC-Helicon

TC-Helicon VoiceTone create product manual

Yamaha BB 604 Service manual

Yamaha

Yamaha BB 604 Service manual

Gibson Digital Guitar owner's manual

Gibson

Gibson Digital Guitar owner's manual

Yamaha YPP-45 owner's manual

Yamaha

Yamaha YPP-45 owner's manual

manuals.online logo
manuals.online logoBrands
  • About & Mission
  • Contact us
  • Privacy Policy
  • Terms and Conditions

Copyright 2025 Manuals.Online. All Rights Reserved.