5
Panel Descriptions
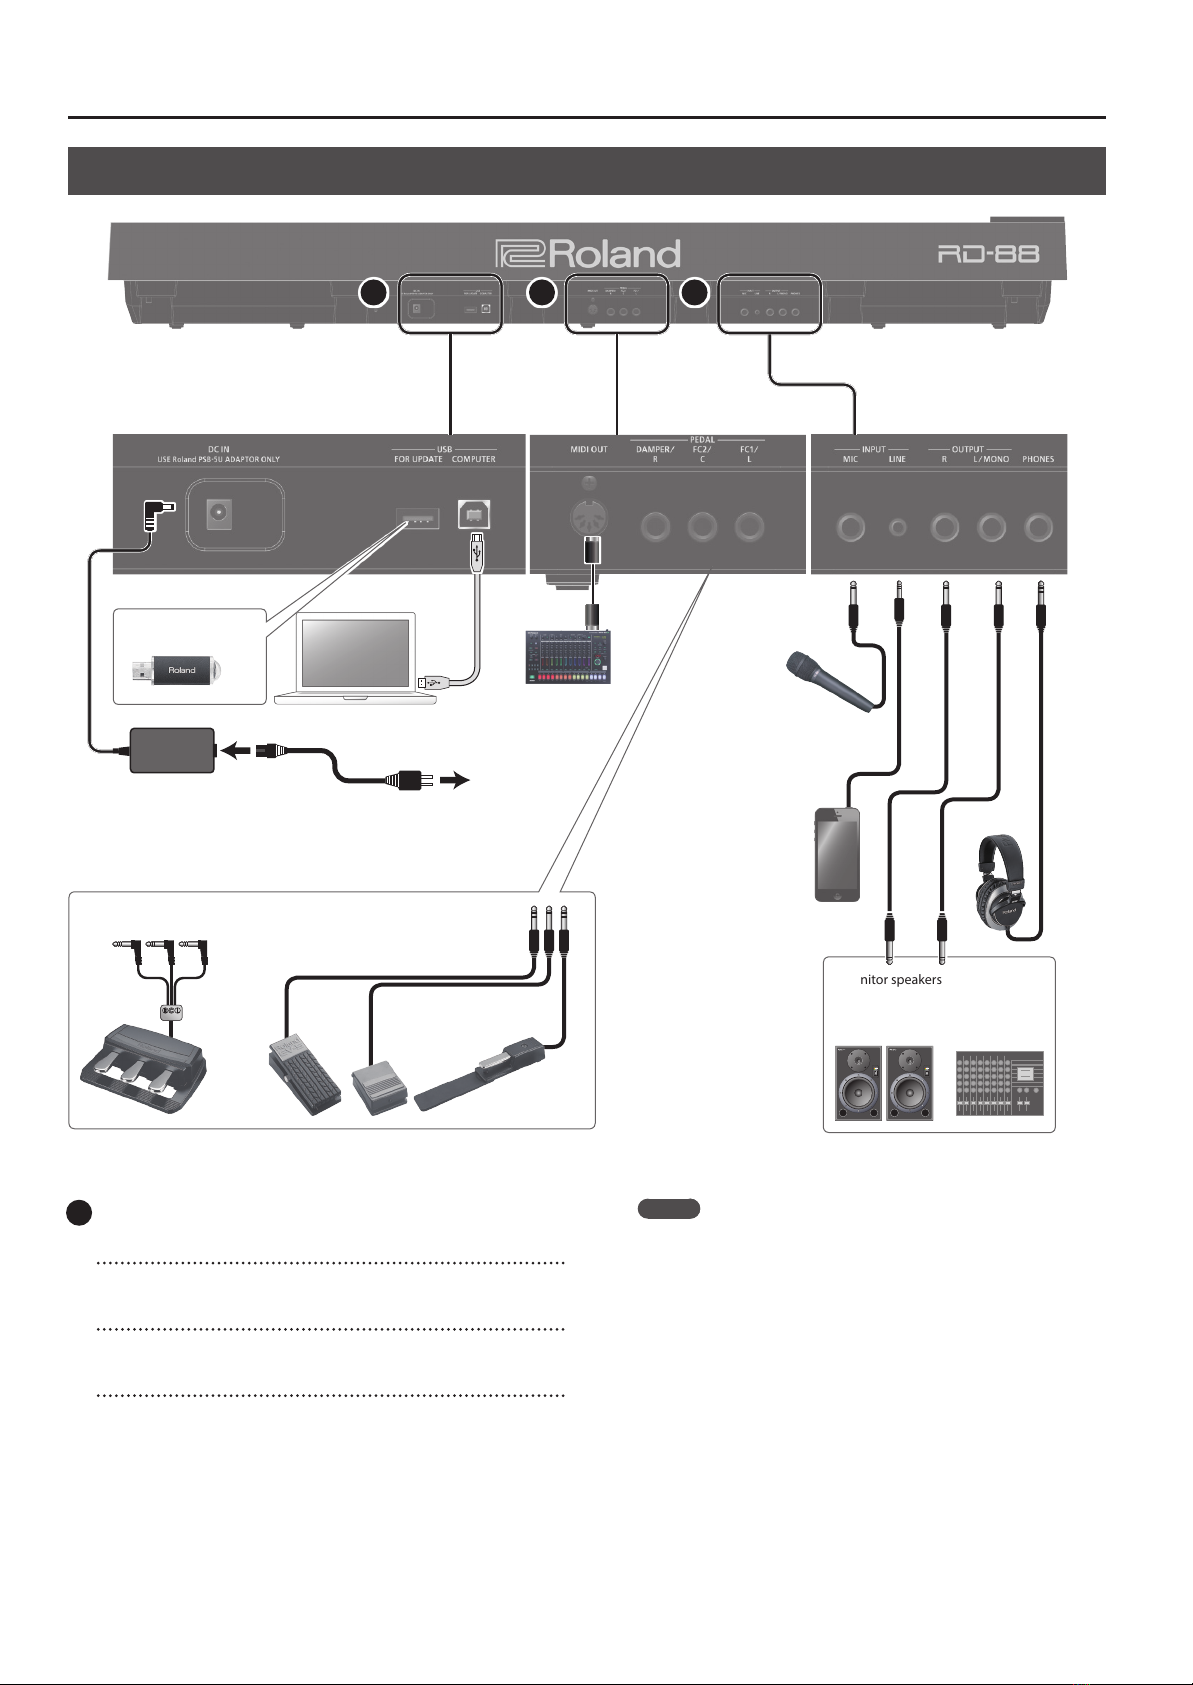
[MIC/LINE IN SETTING] button
Accesses the MIC/LINE input setting screen. You can apply EQ and
reverb to the MIC/LINE input (p. 7).
3
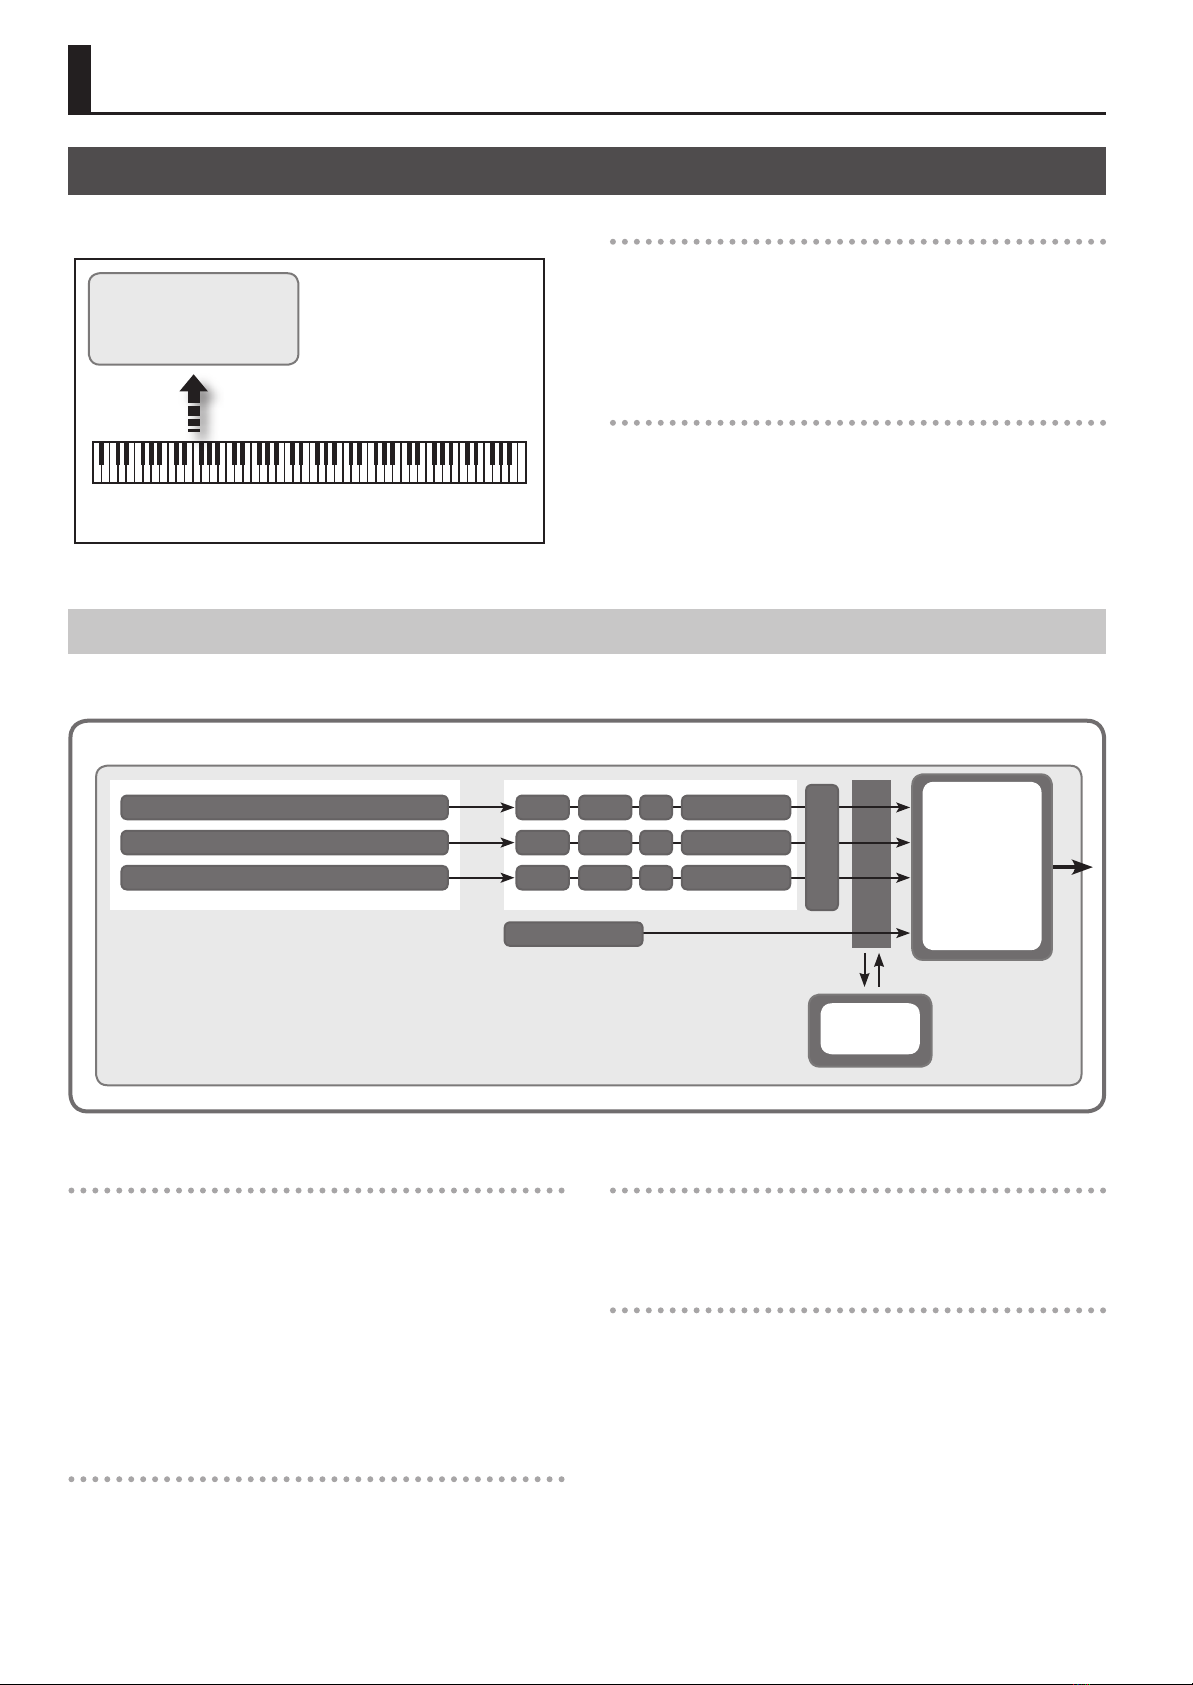
Display
Shows the Scene names and the values of various settings, etc.
4
[<] [>] [ ] [ ] buttons
Press these to switch pages and to move the cursor.
[INC] [DEC] buttons
Modify values. If you keep on holding down one button while
pressing the other, the value change accelerates.
[SHIFT] button
You can easily call up Edit screens for related parameters by
holding down this button while pressing buttons, turning knobs,
or operating other controllers (refer to “List of Shortcut Keys”). If
you edit a parameter value while holding down this button, the
value will change more greatly.
[EXIT] button
Press to return to a previous screen or to cancel a procedure that
is in progress.
[ENTER] button
Press this to conrm a value or execute an operation.
5
[ONE TOUCH PIANO] button
Recalls a piano sound (Scene).
You can also make settings so that a favorite sound is recalled
instead of a piano sound (p. 11).
NOTE
Note that when you press this button to recall a piano sound, the
settings you’re editing are lost.
FAVORITE [ON] button
Turns on/o the function (FAVORITE function) that recalls favorite
sounds you’ve registered (p. 18).
FAVORITE [BANK] button
Selects the bank of FAVORITE memories (p. 18) in which you can
register your favorite sounds.
[MENU] button
The MENU screen appears.
[WRITE] button
The WRITE screen appears.
[KEY TOUCH] button
Accesses a screen where you can make keyboard touch settings
(p. 13).
SONG/RHYTHM [SELECT] button
Accesses a screen where you can select songs or rhythms
(p. 19, p. 20).
SONG/RHYTHM [s] button
Starts/stops playback of the song or rhythm (p. 19, p. 20).
[SPEAKER ON] button
Turns the internal speakers on/o.
The internal speakers turn o when headphones are plugged
into the headphone jack, but pressing this button turns on the
speakers even if headphones are connected. You can also turn o
the speakers even if headphones are not connected.
[PANEL LOCK] button
Long-press this button to turn panel lock on/o (a function that
disables panel operations)(p. 17).
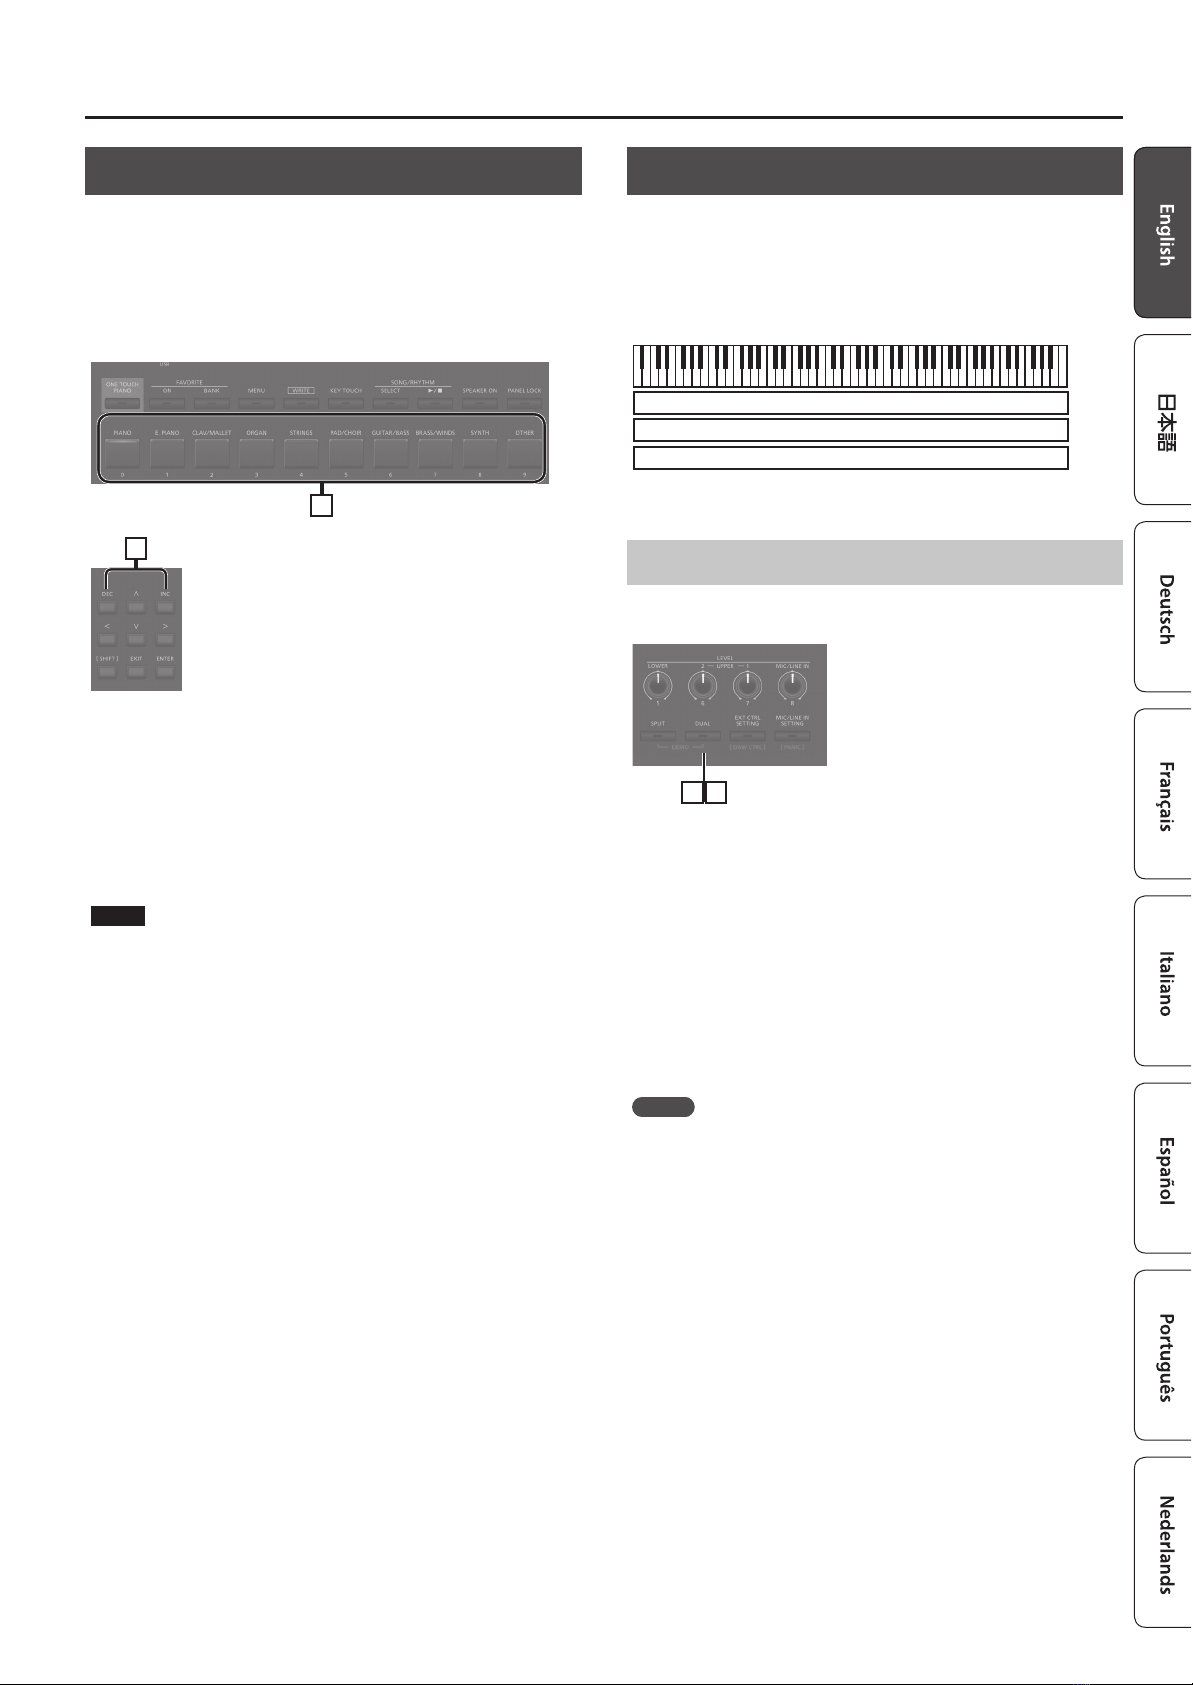
[PIANO]–[OTHER] buttons / [0]–[9] buttons
Select Tone (Scene) categories (p. 11).
If the [FAVORITE] button or the [BANK] button are lit, these
buttons operate as [0]–[9] buttons (p. 18).
List of Shortcut Keys
* “ [A]+[B] ”indicates the operation of“holding down the [A] button
and pressing the [B] button.”
Shortcut Explanation
[SHIFT] + [DEC]
[SHIFT] + [INC]
Changes the value in steps of 10. When the
Scene screen is shown, this changes the Scene
category.
[SHIFT] + Favorite [BANK], or
[SHIFT] + Favorite [ON] Accesses the Favorite list.
[SHIFT] + operate a knob 1–4 Jumps to the parameter edit screen for the
corresponding knob.
[SHIFT] + operate a knob 1–8 * If the [ASSIGN] button is on
Jumps to the knob assignment edit screen.
[SHIFT] + operate a WHEEL 1/2 Jumps to the wheel assignment screen.
[SHIFT] + operate a pedal Jumps to the pedal assignment screen.