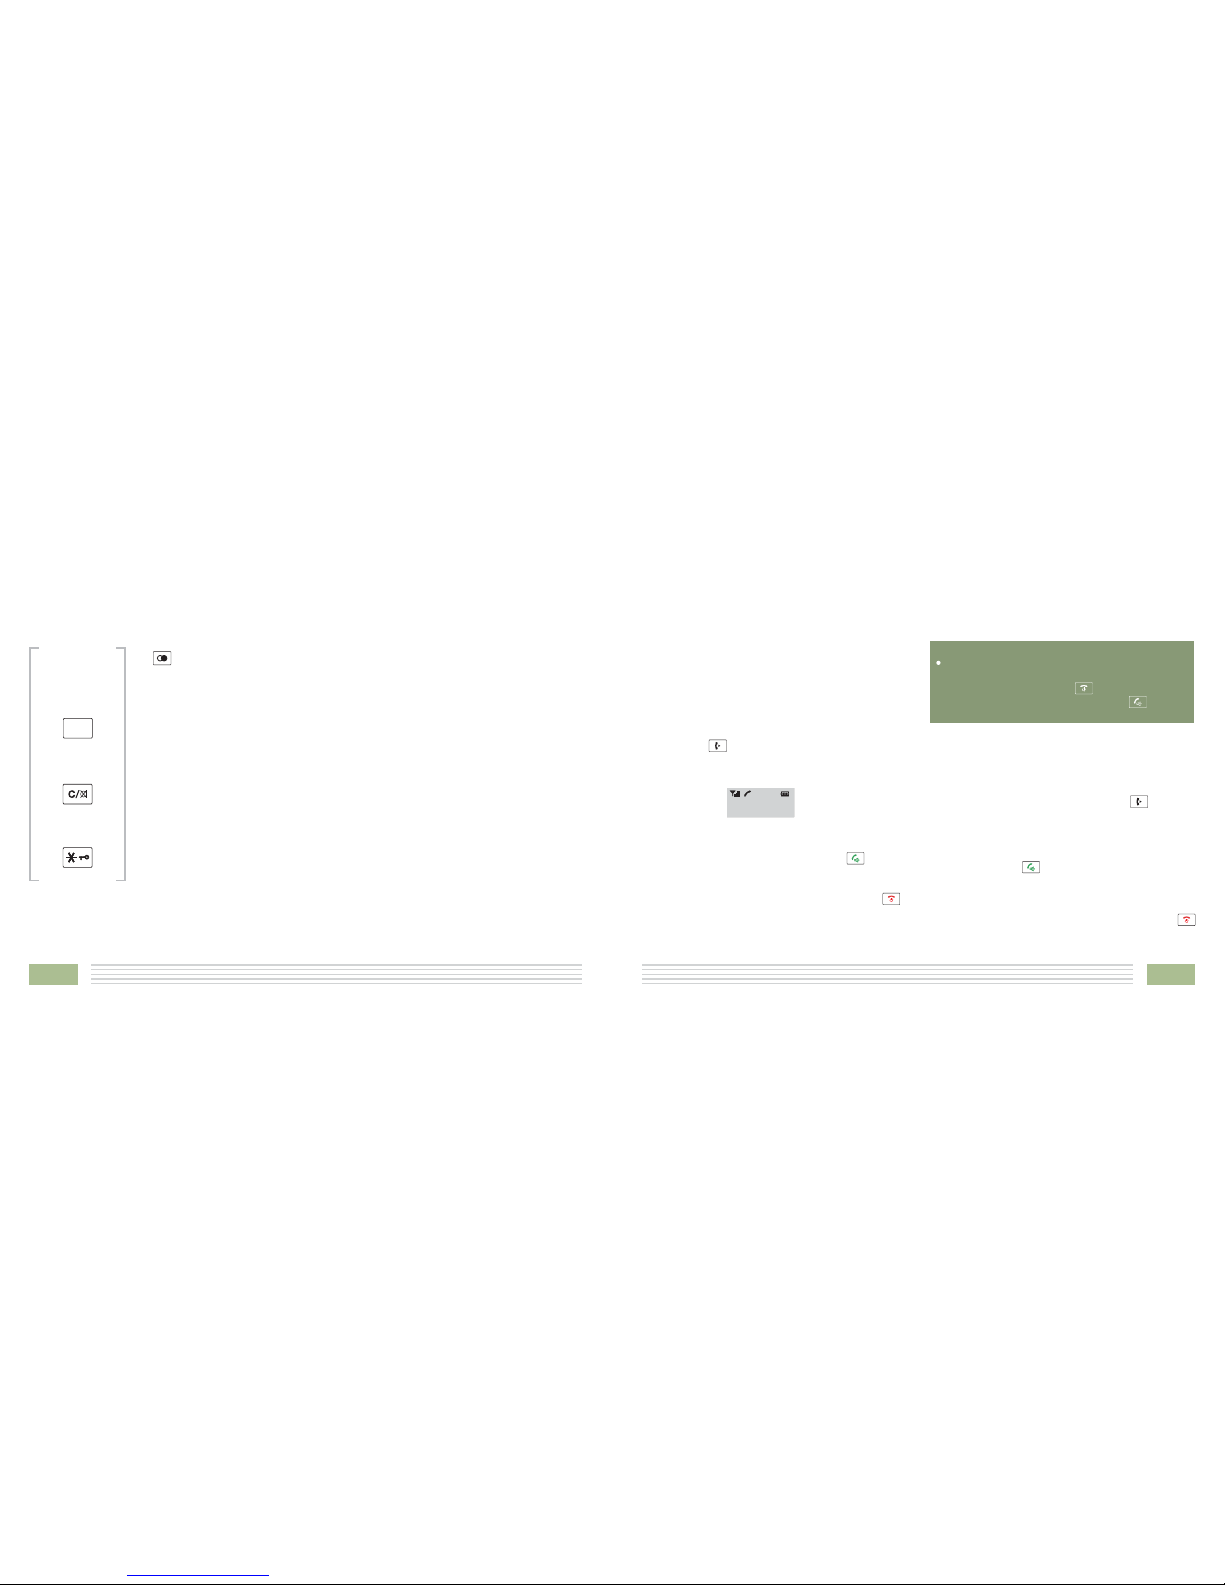
Romeo TE-3375 User manual

TE-3375
USER' S MANUAL
Digital Cordless Phone

Contents
Prior To Use Basic Functions
Congratulations
Safety Precautions
Unpacking
Phone Layout and Keys Function
Keys Description
LCD Window Icons Description
Connecting Lines
Installing Batteries
Charging Handset
Turning Handset On/Off
Making a call
Receiving a call
Muting the Microphone
Adjusting Audio Volume
Last Number Redial
CID Book
Key Lock
Paging
Dial Mode
Handsfree
Flash Signal
Ringer Setting
Selecting a Language
HS Name
Auto Answer
1
12
112
113
314
4
14
615
816
918
920
10
11
20
21
21
22
22
23
23

Contents
Advanced Functions
Feature List
Menu Navigation
Menu Map
Phone Book
BS Settings
HS Settings
Registration
Calling with more than one
Handset
CallerIDoncallwaiting
24
39
24
25
26
29
31
35
36
Troubleshooting
Technical Specifications
40
41
38

nCongratulations
on purchasing our high quality product.
Please read the manual carefully to find out all features and how your telephone works, so you can get
the best out of your new phone.
nSafety Precautions
To reduce the risk of electrical shock and injury, please follow these basic safety precautions before
using the phone.
1. Carefully read and observe the instructions in this manual.
2. Follow all warnings marked on the unit.
3. When cleaning, unplug the phone first, then use a damp cloth to wipe. Do not use liquid or aerosol
cleaners.
4. Do not place objects on the line cord that may cause damage.
5. Do not use this phone in wet surroundings or environments where there is a risk of explosion.
6. Avoid spilling of any liquid on the phone.
Prior To Use
1
DC 9VDC 9V
If you subscribe to a DSL service
Please attach a noise filter (contact your DSL provider) to the telephone line between the
base unit and the telephone line jack in the event of the following:
- Noise is heard during conversations.
- Caller ID features do not function properly.
To single-line
telephone jack
Noise filter

7. Unplug this phone from the wall outlet and refer servicing to qualified service personnel only.
8. Pay attention to the polarity of the batteries, insert the rechargeable batteries in accordance with
polarity symbols (this instruction is found in the installing batteries section.)
9. Use only . Never use other ordinary batteries or
conventional alkaline batteries. Otherwise this may not only cause personal injuries but also damage
to the unit.
10. Do not mix exhausted batteries with full batteries. Exhausted batteries shall not be disposed of with
the usual household waste or in a fire.
11. If you are sure you will not be going to use the handset over a month, please take out the batteries
from the battery compartment.
12. Use only .
13. Keep the phone out of the reach of children.
14. Use the phone only in the described manner.
15. Stop using the phone if it becomes damaged.
the batteries indicated in the User's Manual
the power supply indicated in the User's Manual
2
41
Technical Specifications
Frequency Range 1.88~1.90GHz
Channels 120 Duplex channels
Frequency Stability
Carrier Power
Modulation
<250mW
GFSK
<50Khz
Charging time 15 hours
Ambient temperature Normal: 15 ~ 35 , Extreme: 0 ~ 40
Humidity 0%~90%
Weight (grams) Base: 108.8; Handset: 77.8
Dimensions (mm) Base: Handset:110 x 105 x 67; 129.9 x 43 x 26
Power Supply Base input: 9V, 300mA; Handset input: Ni-MH 1.2V 2, 600mA
x

nUnpacking
Once you have unpacked your phone, make sure that all the parts shown below are available. If any
pieces are missing or broken, please promptly call your dealer.
340
Line cord*Adapter*
2AAANi-MH
batteries
User's manual
Handset
Base
MENU/R
C/
*The shape of the plugs can vary according to each country’s specification.
Troubleshooting
Symptom Check & Remedy
No operation Check that the power adapter is properly connected.
Check that the telephone line cord is properly connected.
Check that the handset batteries in full power.
Check that the handset batteries are installed properly.
No dial tone Check that the telephone line cord is properly connected.
Check that the power adapter is properly connected.
Nothing appears
on the display
Check that the handset batteries are installed properly.
Check that the handset batteries in full power.
Check that the handset is on.
Handset seems
to have very short
battery life
Caller s number
is not displayed
’
Check the charge contacts.
Consistently short battery life may indicate that replacement of the batteries is necessary.
Make sure the right batteries be used.
Make sure you have subscribed to a Caller ID service via your network provider.
The caller may have withheld their details.
Let the phone ring a couple of times as there may be a delay in receiving the Caller ID information.

nPhone Layout and Keys Function
4
39
Earpiece
Microphone
Menu/OK key
Dial/Speaker key
Redial key
Down key
End/Power key
INT key
Up key
Alph numeric
keys
a
Display
Star key Hash key
Cancel/Mute key
Charging contacts
Battery
compartment
cover
MENU/R
C/
Speaker
Feature List
1.8GHz DECT technology with GAP
Up to 5 handsets for optional for one base
Up to 4 bases for optional for one handset
Phonebook with up to 50 groups
10 VIP numbers setting from phonebook
Redial book with up to 10 entries
5 melodic and 5 monophonic ring tones
and volume selectable (5 levels+off)
Key tone ON/OFF selectable
Internal call
Call transfer
3-way conference call
Receiver/Speaker volume adjustable (5
levels)
Mute
PIN protection
Predialing
Redial, Flash, Pause
DTMF/PULSE dialing mode selectable
FLASH time selectable
Full handsfree speakerphone
Call duration display
Date & Time setting
Keypad lock
Multiple languages selectable
Auto answer ON/OFF selectable
Alarm clock include snooze option
Handset Name setting
LCD backlight
FSK and DTMF dual system Caller ID
Caller ID / Call Waiting
Caller ID list with up to 40 entries
Incoming calls can be called back/added
to phonebook/deleted
Caller ID
Note:
The caller ID feature is only available if you
subscribe to a Caller Display service from
your network provider.
Handset

nPhone Layout and Keys Function (continued)
538
Base
Rear and bottom View
Power Jack
Phone
Line Jack
Charge pins
Page button
DC 9VDC 9V
nCaller ID on call waiting
When you subscribe to Call Waiting service
from your local telephone company, the
telephone will display the name and number
of the second caller while you are having a
conversation.
Caller 1
4361234 Caller 1
4Caller 2
2915678
Caller two's information
is displayed
Caller ID info displayed
1.When you are on the line, the telephone will
automatically display the name and number of
the second caller.
2.Press the key to answer the second caller.
3.When you have finished, press the key to
continue with your conversation with the first
caller.
Note:
If you have transferred an external call to
another handset, you cannot use the call
waiting function via the second handset.
MENU/R
MENU/R

nKeys Description
Dial/Speaker key
Make/Answer a call.
Activates the speakerphone if pressed during a call.
End a call.
End/Power key
Up key
Down key
INT key
Long press to activate power on/off, as described in page 11.
Scroll up through lists and menu options.
Increase the earpiece/speakerphone volume during a call.
Enter the CID book, as described in page 18.
Scroll down through lists and menu options.
Decrease the earpiece/speakerphone volume during a call.
Enter the Phonebook, as described in page 27.
Set up an internal call to another handset.
Transfer an incoming call to another handset.
Set up a conference call with an external line and an internal handset.
6
37
Setting up a 3-way conference call
When you have both an external call and an
intercom call in progress, you can set up a three-
way conference call, like this:
1. During an external call, press the key and
then the number of the handset you want to
join the 3-way call.
2. The called party press key to answer.
3. The calling party can press the key to start
the 3-way call.
4. Either of the two internal handsets can press
the key to leave the conference call at any
time.
Note:
If one of the handsets drops the conference
call, the remaining handsets will continue the
conference.
Navigation key:

Redial key
Star key
Enter the redial book, as described in page 16.
Insert a pause when pre-dialing a number.
Press and hold to turn on/off keypad lock function.
Set up a conference call, as described in page 37.
Menu/OK key
Cancel/Mute key
Enter the menu functions in standby mode.
Confirm selections & actions.
Return to the previous menu.
Enter to mute during a call.
Delete an incorrect character/digit.
Performs "Flash" function.
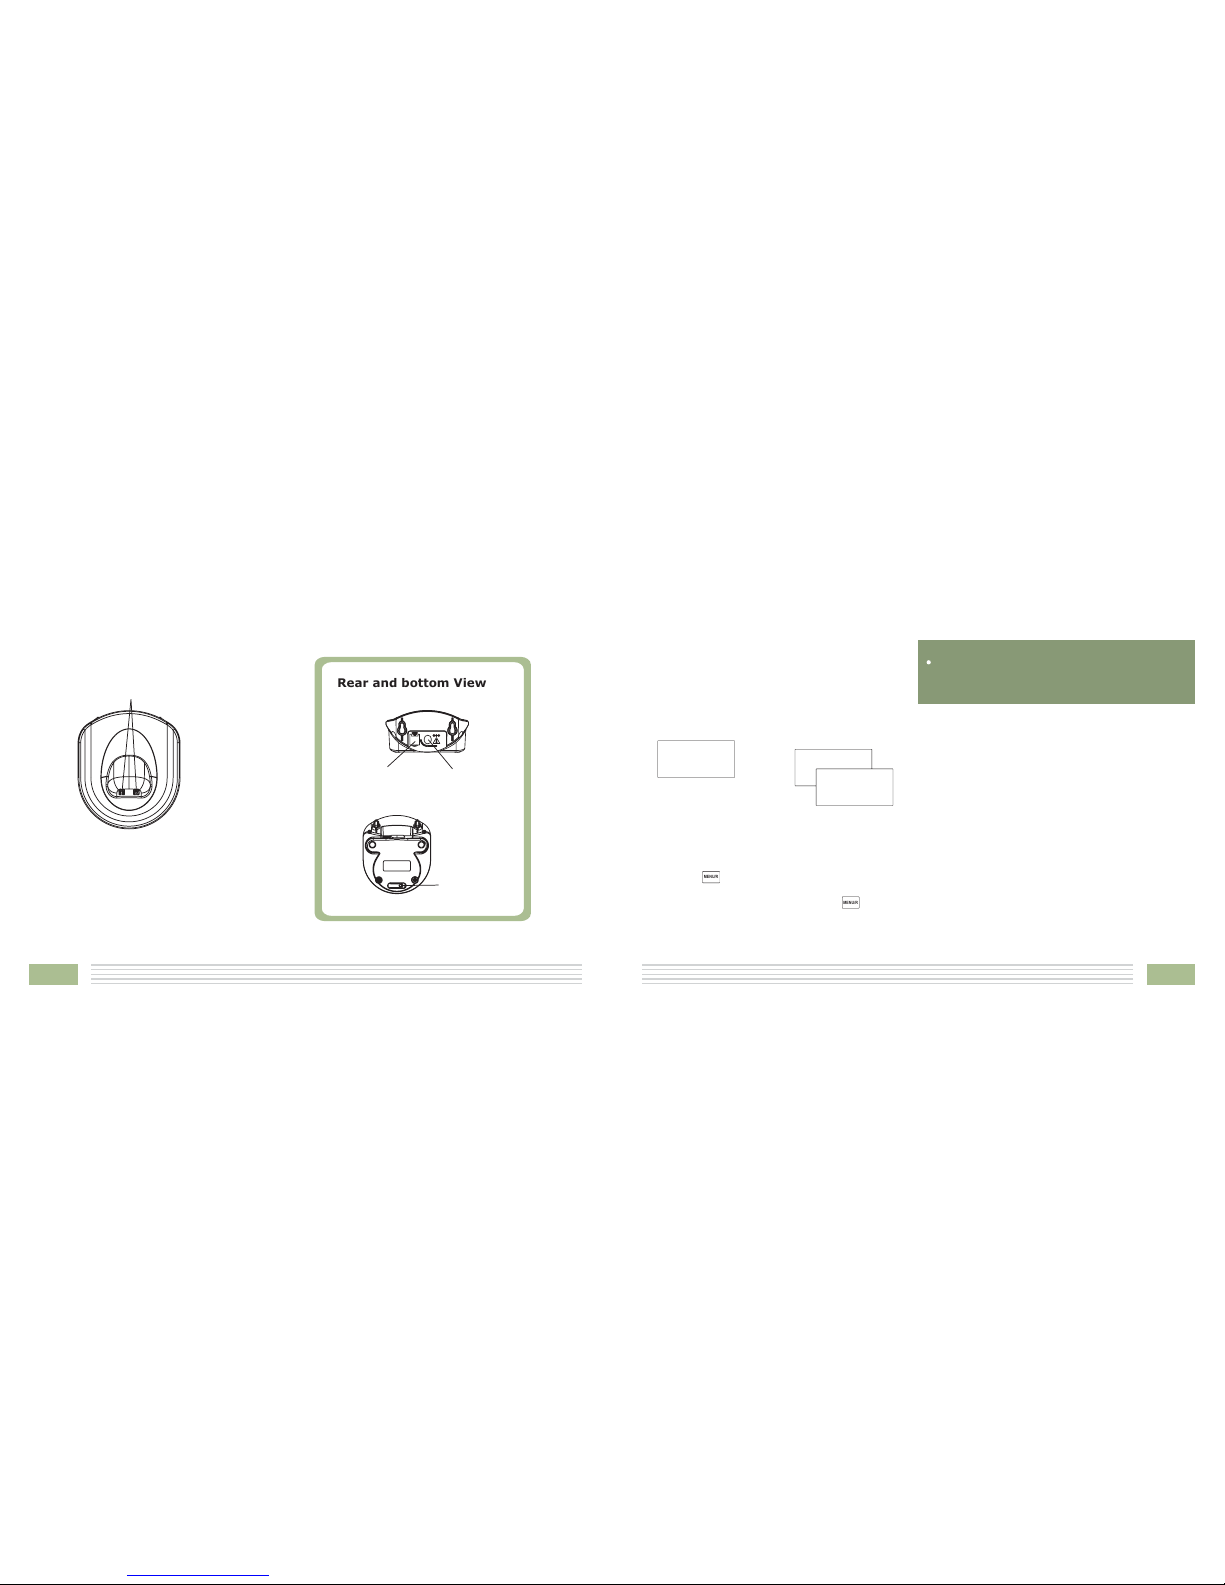
nKeys Description (continued)
736
MENU/R
nCalling with more than one Handset
If you have more than one handset registered to
the same base, you can make internal calls and
transfer an external call between the registered
handsets.
1. Press the key, the LCD displays as follows,
then enter the number of the handset you
want to call.
Making an internal call
2. If the handset entered is valid, the called
handset will ring and display .
The handset user can press the key to
answer the internal call.
3. At the end of your conversation, press the
key.
HSX CALLING
Call transfer between handsets
You can transfer an external call between the
handsets those are registered to the same base.
1. During an external call, press the key and
then the number of the handset you want to
transfer the call to.
2. If the called party can answer your call, he/she
can press the key to talk with you. At this
time you can inform him/her of the incoming
call.
3. When the called handset answers, press the
key or replace the handset to the base to
complete the transfer.
Note:
During the internal call, if an external comes
in, the LCD will show the caller's number.
You should press the key to end the
internal call first then press the key to
answer the call.
12345

nLCD Window Icons Description
New Call
Off Hook
Indicates you have missed one
or more calls.
Indicates the line is engaged.
Hands-free
Battery Icon
Indicates the handsfree function
is enabled.
Indicates battery charge level.
8
Signal Icon
Keypad Lock
Indicates the current signal
strength. If the handset is too far
from the base, this icon will blink
on the LCD.
This icon appears when the
keypad is locked.
35
nRegistration
The supplied handset is already registered with
the number 1.
3. Use the key to scroll through the Base
names list, press the key to choose a base
to your necessary. The handset will search for
the requested base and the relevant
information will flash on the LCD.
You can register up to 5 handsets
to your base unit in order to share the same line
with other people.
Before registering a handset to the base, you
should press and hold the key on the bottom
of the base for about 5 seconds then release it.
REGISTER
1. Press the key.
2. Press the key repeatedly to choose
, then press the key.
4. If the base is found, and the handset is
successfully registered, you will be prompted
to enter the PIN code (the default one is 0000).
On validation of the PIN code, the
Registration tone will sound and the Base
assigns a number to the handset. If the PIN
code entered is invalid, a warning tone will
sound, and the handset will return to the
previous registration state.
5. If the base is not found, the handset will
behave according to the Out of Range
condition.
MENU/R
MENU/R
MENU/R

nConnecting Lines
nInstalling Batteries
Slide the battery cover in the direction of the
arrow and pull it out.
Insert new batteries as indicated, matching
correct polarity (+,-).
The rechargeable Ni-MH batteries (AAA size) come with
your phone. Install the battery before using your
phone.
2.
1.
Note:
Reversing the orientation may damage
the handset.
9
Connect one end of the phone line cord to the phone
line jack of the base, and the other end to a
standard phone wall outlet.
Connect the modular end of the AC power adapter to
the power jack of the base, then plug the AC adapter
intoastandardACwalloutlet.
1.
2.
34
To AC wall outlet
Tophonewalloutlet
DC 9VDC 9V
HS Reset
This function allows you to reset the Handset
settings to the factory default.
1. Perform steps 1 and 2 of paragraph "Setting
Alarm".
2. Press the key to choose the
menu, press the key. You will be prompted
to enter the PIN code.
3. Enter the PIN code (the default one is 0000),
then press the key. If the PIN code is
validated all handset settings will return to the
factory default, otherwise a warning tone will
be heard and the settings will remain.
After resetting, the handset will reset and
return to Standby mode.
HS DEFAULT
Result:
MENU/R
MENU/R
Selecting a Base
This function allows you to select a base from
those already registered to the handset. You can
access the options by scrolling the menu.
1. Perform steps 1 and 2 of paragraph "Setting
Alarm".
2. Press the key to choose , press
the key.
3. You can use the key to select the base you
want, then press the key. If you select a
non-existent base, the handset will sound a
warning tone.
4. The display will show . Press the
key to confirm. A confirm tone will be
SELECT BS
SELECT BS X
MENU/R
MENU/R
MENU/R
heard.

nInstalling Batteries (continued)
nCharging Handset
3. To replace the battery
cover, slide the cover up
until it snaps in place.
The batteries need to be replaced if
they do not recover their full
storage capacities after recharging.
When replacing the batteries,
always use good quality Ni-MH re-
chargeable batteries. Never use
other batteries or conventional
alkaline batteries.
Notes:
! Important Note YOU SHOULD FULLY
CHARGE THE HANDSET 15
: Before initial operation,
for about hours.
To charge the handset, you should place it on the base.
Result: When you place the handset on the base, the handset
automatically turns on.
10
33
MENU/R
C/
4. You can use the key to choose the Date
format ( / ), press the key to
save.
DD-MM MM-DD
2. Setting date & time
2. Press the key to choose or
menu, press the key.
3. Enter the current date or time by numeric
keypad and press the key to save and exit.
SET DATE SET
TIME
1. Perform steps 1 and 2 of the paragraph "Date
Format".
1. Date Format
2. Press the key to choose ,
press the key.
3. Press the key to choose .
DATE & TIME
DATE FORM
1. Perform steps 1 and 2 of paragraph "Setting
Alarm".
Note:
At step 3 you need to enter the time in 24-
Hour format.
MENU/R
MENU/R
MENU/R
MENU/R
Setting Date & Time
MENU/R

11 32
If the handset is in power off mode, when
you place the handset on the base, it
automatically turns on. To turn the handset
on or off in Standby mode, follow these
steps:
1. ,
press and hold the key until you
switch the display on.
To turn on the handset when it's off
On power up, the
handset will enter subscription mode
and search for a registered base. A
message as shown below will be
displayed to the user, and the signal icon
will flash.
Note
OutOfRange
:
If the handset is successful in finding a
base, the handset will enter the Standby
mode, the display will show handset
number or the handset name (if you have
one saved as described on page 21),
signal icon, battery icon and current time.
If the handset is not successful in finding
a base, the handset will behave according
to the condition.
nTurning Handset On/Off
2. , keep the key
pressed until the display turns off.
To turn the handset off
Note
YOU SHOULD FULLY
CHARGE THE HANDSET BEFORE USING.
:
Nothing will appear on the LCD when battery
power is very low.
Unregister
Key Tone
Every time you press a key, your handset
acknowledges it with a key tone. You can
disable the key tones for a silent use. In certain
error conditions, a warning tone will sound
when an incorrect key is pressed.
1. Perform steps 1 and 2 of paragraph "Setting
Alarm".
2. Use key to choose menu,
press the key.
3. Press the key again to choose .
TONE SETUP
KEY TONE
Audio Setup
You can also use the menu to adjust the audio
volume.
2. Press the key to choose ,
press the key.
3. Use the key to choose or
,press key.
4. The display show the current setting. Use the
key to choose the volume level (VOLUME
1-VOLUME 5), press the key.
AUDIO SETUP
SPEAKER VOL
EARPIECE V
1. Perform steps 1 and 2 of previous paragraph.
Note:
For a normal use, we recommend to
leave the key tone enabled: they make
the use of the phone easier.
4. You can use the key to choose or
to enable or disable the function.
5. Press the key.
ON OFF
MENU/R
MENU/R
MENU/R
MENU/R
MENU/R
MENU/R

12
31
nMaking a Call
Making a call You can enter the desired phone number in
Standby mode, which allows you to make
corrections before dialing. Follow these steps:
1. Enter a telephone number (up to 32 digits).
Check it. You can also use the key to
insert a pause.
1.Pickupthehandsetandpressthe key.
3. To end the call, either press the
2. Dial a telephone number.
key
or replace the handset on the base.
Result: The icon appears on the LCD.
Basic Functions
Note:
You can store up to 10 telephone numbers in
memory for automatic dialing.
Note
Redial
:
To make a call to the last number you dialed,
use the feature. For details, see page
16.
Note:
If you make a mistake while entering a
number, press the key to clear the
last digit.
2. When the number appears correctly, press
the key.
nHS Settings
Setting Alarm
1. Press the key.
2. Press the key repeatedly to choose
menu, then press the key.
HS
SETTING
You are able to set the alarm on the handset
and adjust the alarm settings.
3. Press the key again to choose .
4. The display shows the current set. Use the
keytoselect / ,pressthe key.
5. If you select , the display indicates you
to enter the time in : format.
ALARM
ON OFF
ON
HH MM
6. Press the key, a beep sounds and the
display shows you can
press the key to enable or disable the
snooze function on the alarm and press the
key.
7. When the alarm sounds, press any key to
switch it off.
SNOOZE ON/OFF,
Notes
SNOOZE ON
:
At step 5 you need to enter the time in 24-
Hour format.
If you press any key at the right time the
alarm to ring, the alarm will be silent.
If you choose , the alarm will
ring at regular intervals of 10 minutes.
MENU/R
MENU/R
MENU/R
MENU/R
MENU/R
MENU/R

13 30
nReceiving a Call
When a new call is received, t
If the caller can be identified, the caller's
phone number is displayed.
1. To answer the call, press the key. If
you have activated the Auto Answer
function, when the handset is on the
base,simplyliftituptoanswer.
he call
information will appear.
2. You can speak. To end the call, either
press the key or replace the handset
on the base.
Result: After you hang up the call, the LCD
displays the call duration.
Notes:
You can select the ringer volume by using
the key when the phone rings with an
incoming call.
If the polyphonic ring tone is set, the ring
tone may continue for 4 seconds after the
caller's hang-up or after the parallel phone
had answered the calling.
Modify PIN
This function allows you to change the PIN
number of the currently active Base. The default
PIN is 0000.
3. The display shows " " to prompt you to
enter the old PIN. If the old PIN code is
validated, you will be prompted to enter a new
PIN code. If the old PIN is not validated, a
warning beep will sound and you will be
returned to the menu.
1. Perform steps 1 and 2 of paragraph "
".
2. Use the key to choose menu,
press the key.
4. Enter the new PIN, press the key. You will
be requested to confirm the PIN code. Enter
the new PIN again then press the key to
confirm and exit.
MODIFY PIN
MODIFY
PIN?
PIN
Terminate
HS
BS Reset
This function allows you to reset the Base
setting to the factory default.
1. Perform steps 1 and 2 of paragraph "
".
2. Press the key to choose , press
the key. You will be prompted to enter the
PIN code.
3. Enter the PIN code (the default PIN is 0000),
then press the key. If the PIN code is
validated all Base settings will be returned
to the factory default, otherwise the
settings will remain.
After resetting, the base will be reset
and the handset will return to Standby
mode.
BS DEFAULT
Result:
Terminate
HS
MENU/R
MENU/R
MENU/R
MENU/R
MENU/R

14
29
nMuting the Microphone
During a conversation, you can temporarily
switch your phone's microphone off, so that the
other party cannot hear you.
Example: You want to say something to another
person in the room but do not want
the other party to hear you.
To mute your microphone, press the key during
the conversation. The " " appears on
the LCD.
CALL MUTED
To unmute the microphone, press the key again.
You will restore the normal condition.
nAdjusting Audio Volume
During a conversation, you can use the
key to adjusts the level of the earpiece (or
the handsfree speakerphone one, if activated)
volume from to . The selected
volume will be displayed on the LCD.
VOL1 VOL5
You can also select the earpiece volume or the
speaker volume by the in
Menu under , as described in
page 32.
AUDIO SETUP
HS SETTING
nBS Settings
Terminate HS
This function allows you to delete a handset
registration from the base.
3. Press the key again to choose
. The display shows " " to prompt you
to enter the PIN Code (The default PIN Code is
"0000"). Then press the key.
4. Use the key to select a handset. Selecting
either the current handset or a non-existent
handset will sound a warning tone to the user.
5. Press the to confirm, and the selected
handset will behave according to the
unregistered condition.
TERMINATE
HS PIN?
key
1. Press the key.
2. Press the key repeatedly to choose
menu, then press the key.
BS
SETTING
Flash Time
You can select to change the Flash time by the
following steps:
1.
2. Use the key to choose menu.
Press the key.
3. The display shows the current setting. Use the
key to select / , press the
key.
FLASH TIME
SHORT LONG
Perform steps 1 and 2 of previous paragraph.
MENU/R
MENU/R
MENU/R
MENU/R
MENU/R
MENU/R
MENU/R

15 28
nRinger Setting
You can select your own external (from the
telephone Network) or internal (from other
handsets registered to the same base) ring
tone and adjust the volume.
1. Press the key.
2. Press the key to choose
menu, then press the key.
HS SETTING
3. Press the key to choose ,
and press the key.
4. Use the key to choose /
,pressthe key.
5. Press the key to choose or
,pressthe key.
RING SETUP
INT RING EXT
RING
MELODY
VOLUME
Result: You can select the ring tone from Melody 1
to 10 or adjust the volume from Volume 1
to 5. You can also turn the ringer Off. Each
time you press the key, the handset
sounds the selected melody or loudness.
6. Press the key to confirm.
MENU/R
MENU/R
MENU/R
MENU/R
MENU/R
MENU/R
Deleting the Phone book Entries
PB Status
1. Perform steps 1 and 2 of paragraph "Adding the
Phone book Entries".
2. Press the key to choose .
Press the key.
3. Press the key repeatedly until the name you
want to delete displays, then press the key.
The display shows " ". You can
press the key to delete it or press the
key to exit.
4. In step 2, if you choose menu and
press the key, the display will show
" ". You can press the key to
delete all the entries or press the key to
exit.
The PB Status shows the number of phone book
entries already stored. When the
shows on the LCD, press the key to enter it.
DELETE ENTRY
CONFIRM ?
DELETE ALL
CONFIRM ?
PB STATUS
Editing the Phone book Entries
1. Perform steps 1 and 2 of paragraph "Adding
the Phone book Entries".
2. Press the key to choose
menu. Press the key.
3. Press the key repeatedly until the entry you
want to edit displays, press the key to
confirm.
4. If necessary, press the key to clear the
digit(s) then enter the desired name and
number, press the key to save.
5. Use the key to select the ring you like to
associate with the number, press the key to
confirm.
CHANGE ENTRY
MENU/R
MENU/R
MENU/R
MENU/R
MENU/R
MENU/R
MENU/R
MENU/R
MENU/R
MENU/R
Dialing a Number from Phone book
Find out the number you want to dial. Refer to
"Viewing the Phone book Entries". Then press the
key to dial out the number.

16
27
nLast Number Redial
1.Pressthe keyinStandbymode.
The LCD displays the last number you
dialed.
2.Pressthe keytodialoutthenumber.
Your phone allows you to retrieve the last 10
numbers you have dialed and recall them
quickly.
Result:
Search for and dial a number in
Redial Book
1. Press the key in Standby mode.
2. If you want to scroll through the memory,
press the key repeatedly until you find
out the number you want to dial.
3. Press the key to dial out the number.
Use Redial Book options
Using the redial book options, you can add a
number to phone book or delete a number in
the redial book.
1. Press the key.
2. Scroll to the desired number by using the
key.
3. When the number appears on the display,
press the key to choose the desired
option:
Notes
EMPTY
:
If no numbers are found, " " is
displayed.
When the redial book is full, each time you
dial a new number, the oldest number stored
in the redial book is automatically erased,
and it is updated.
MENU/R
Adding the Phone book Entries
PHONE BOOK
ADD ENTRY
NAME ?
NUMBER ?
3. Press key again to choose .
4. The display shows " ". Enter the name
you want to use, then press the key to
confirm. The display shows " ".
Enter the desired number (up to 20 digits),
press the key.
5. Use the key to select the ring you like to
associate with the number, press the key
to confirm.
6. Repeat if necessary.
1. Press the key.
2. Press the key repeatedly to choose
,pressthe key.
Note:
If you make a mistake while entering a
number, use the key to correct it. Each
time you press the key, the last digit is
deleted. To clear all digits, press and hold
the key.
Using a Pause
Viewing the Phone book Entries
A pause is useful when you access an interactive
voice response system, such as an automated
banking system. A pause provides a delay of 3
seconds. If you want to insert a pause when you
dial a number in Standby mode or store a number
in memory, press the key. The letter will
appear at the pause entry.
1. In the Standby mode, press the key.
2. Press the key repeatedly until the desired
name is displayed.
3. Press the key to show the relevant number.
P
Down
MENU/R
MENU/R
MENU/R
MENU/R
MENU/R
MENU/R
MENU/R

17 26
ADD TO PB:
DELETE:
DELETE ALL:
allows you to add the number to the
phone book. Complete storing the entry by
starting from step 4 described in par."Adding the
Phone Book Entries" (obviously, you will find the
number already entered in the appropriate field).
allowsyoutodeletetheselectednumber.
allows you to delete the whole
redial book.
4. To exit, press the key.
Note
DELETE
DELETE ALL
CONFIRM ?
:
At step 3, when you select or
options, a message
" " will further ask you to
confirm the deletion. To confirm press
ey, to escape press the key.K
MENU/R
Kk
nPhone Book
The phonebook built in your cordless phone allows you to store frequently used numbers so that you can
easily make a call without having to remember or enter the phone number.
Character Map
To enter a specific alphanumeric character, press one or more times the relevant key for the required
character according to the following table: once for the first character, twice for the second and so on.
Key Characters in the displayed order
0
1
2
3
4
5
6
7
8
9
(spc) 0&\.
1@
_
AbC2
dEF3
gHI4
JKL5
MNO6
Pq RS7
TUV8
WX yZ9
_
Table of contents